GEN 1 Mishimoto Radiator upgrade experience?

Disclaimer: Links on this page pointing to Amazon, eBay and other sites may include affiliate code. If you click them and make a purchase, we may earn a small commission.

Trick.Raptor

The Cracker Raptor
Joined
Nov 7, 2014
Posts
3,966
Reaction score
7,737
Location
Santa Maria, CA
Ok, so even with the open trailer and "just" the Evo on it, I saw 220-225 coolant temps on baker grade and mountain pass going 65-70 this weekend with 90* ambient temps. So the radiator is definitely needed (which we already knew).

Oil temp doesn't seem to effect coolant temp, coolant goes up and stabilizes and oil goes up at its own pace that is slower than coolant. On the longer grades oil temp got up to 242. Not a huge deal, most OEM vehicles run 240-260* oil temps as normal op temp these days. Cruising flats oil surprisingly stays at 170-190ish. Due to that, I'm reluctant to put an oil cooler on until I see how it does with the radiator upgrade. Even with a thermostat for the oil cooler, the cooler still gets about 10-15% oil flow so that oil is circulating through it and the system isn't shocked with thick/cold oil when the thermostat opens. My concern is that with an oil cooler the oil will run cold, especially without a load and/or in colder weather.

The trans doesn't run that hot. It seems to stabilize at 210-215ish, only going up from there when coolant temp is higher than trans temp. So I feel like high coolant temps add heat to the trans. So again, I'm just going to put the radiator in and see how everything does. This may change based on what I see with offroading where the converter is unlocked more often, but we'll see.

For now I'll be doing just the radiator, getting more data, and I'll go from there.

I see the same transmission temps when towing as well. I think the highest I ever seen the trans temp was at 225° climbing the Sierra Pass heading west. I have the larger OEM cooler and that has been more than enough to keep the transmission temps in check.
 
OP
OP
Dane

Dane

FRF Addict
Joined
Sep 20, 2011
Posts
2,201
Reaction score
779
Location
Littleton, CO
The radiator shipped today, very ahead of schedule. Excited to get it installed. Even though temps are cooling off here now lol.
Please let us know how install goes. It appears very straight forward, but it would be nice to hear any gotchas or tips. Just got done with another big tow through Berthoud Pass in the Rockies. As usual I had to chill a few times to keep the engine temp happy, but it was manageable. Tranny stayed happy.
 

JAQ51

Member
Joined
Dec 26, 2019
Posts
31
Reaction score
23
Location
Laguna Beach, CA
Yes, please share tip and tricks and some PICS!! Please and thanks!

broken clips, broken push pins, clearence issues, hose connections, removing air from system, etc...
 

B E N

FRF Addict
Joined
May 1, 2019
Posts
1,236
Reaction score
1,159
Location
Frederick, CO
Replace your hoses and belts while your in there. You will have most of the front dress apart to install the radiator, perfect time to do it.
 

letsgetthisdone

Full Access Member
Joined
Mar 13, 2019
Posts
465
Reaction score
441
Location
Las Vegas, NV
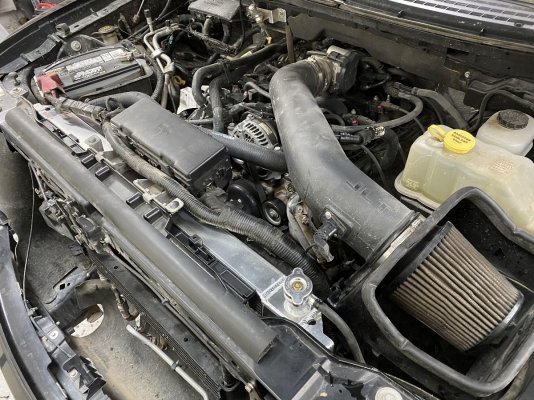
I was able to pull the radiator without removing the AC condenser from the truck. Remove the fans first, then you can lean the radiator back enough to pull the condenser bracket off the radiator. Biggest thing is remove the air box, not just the intake pipe/hose whatever you want to call it so you have room to move the radiator over to clear the AC lines as its coming out. And have zip ties (go to a real hardware store and by quality zip ties with metal lock tabs) to re-secure the wiring harness as about half the clips that hold various wiring leads and the main harness on the fan shroud broke.

I ended up pulling the condenser anyways because the condenser mount/bracket thing was broken, hoping to find one of those locally today. So i haven't put the new rad back in. I'll have a bunch of pics for a build thread I think. The truck also got full suspension build this week with lots of cool parts. :)

I bought all new hoses (upper and lower rad, and both heater hoses), but they honestly didn't need replaced. Other than being dirty, they have the same texture and squishy-ness as the new ford hoses. They probably would have easily lasted until the next coolant flush. I talked to my dad about it who worked on the North Las Vegas Police fleet (all ford); he retired in 2018 and basically since about the late 2000's, OEM these hoses typically last "forever" as long as they don't get cut or abraded. At least from his experience with the ford fleet at the city. My belt is showing no signs of crack, even where it bends over the tensioner pulley so I'm not worried about it, and I keep a spare in the truck.
 

JAQ51

Member
Joined
Dec 26, 2019
Posts
31
Reaction score
23
Location
Laguna Beach, CA
Awesome, thanks for the notes, look forward to a build thread. I will be doing this for sure. Did you end up using ford hoses or silicone hoses? The part you broke, can you advise how to avoid that? Were you able to do everything without bending any fins? Thanks again for the write up.
 

letsgetthisdone

Full Access Member
Joined
Mar 13, 2019
Posts
465
Reaction score
441
Location
Las Vegas, NV
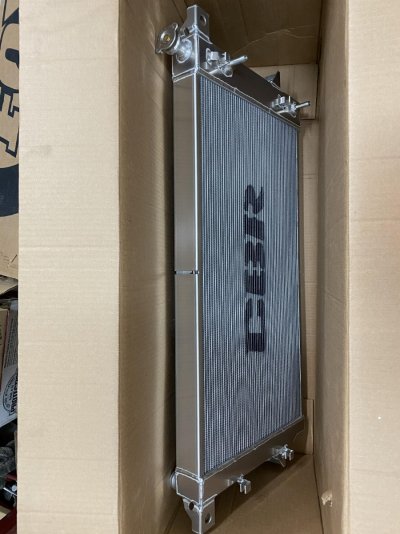
Got the radiator in. Its a really nice part. Had to trim the fan shroud on the top and bottom for it to sit properly on the radiator, and they didn't have a drain petcock in the box, so i had to grob one (its 1/4" NPT for future reference).

The thing is huge, and getting in the and the fans in isn't as easy as the stock one, but it fits well once its in. The added thickness moves the lowe hose close to the abs module/pump, so it helps getting the lower hose on if you unplug the abs module.

Other than that, it's a straight forward install IMO as far as aftermarket parts are concerned.

03a13b0f09698cd9b9c975fbd5af2dc5.jpg


2d312a18dc8928bd320081bc8a96ee98.jpg
 
Top