SVC Bump Stop Kit Install

Disclaimer: Links on this page pointing to Amazon, eBay and other sites may include affiliate code. If you click them and make a purchase, we may earn a small commission.

FINRPTR

Full Access Member
Joined
Feb 14, 2018
Posts
100
Reaction score
94
Location
So Cal
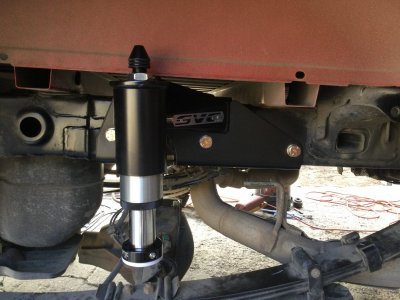
So this weekend I decided to finally install my new SVC Adjustable Bump System. I figured since I had 4 days off of work, I should be able to get it in, no problem.

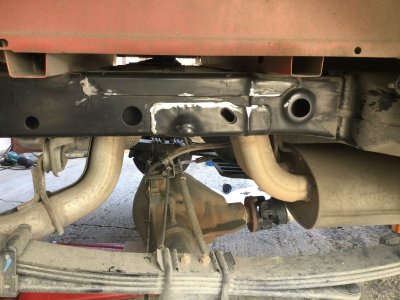
Well, everything started out ok, it is really a nice kit. I used a flapper wheel on a grinder to smooth out the welds on the frame, then painted the frame to keep it from rusting.

Installation went pretty well, I followed the instructions provided, there needed to be a few changes made. Then Gen 2 system uses 3 5/8 bolts, where the Gen 1 uses (1) 5/8 bolt, and (1) 3/4" bolt.

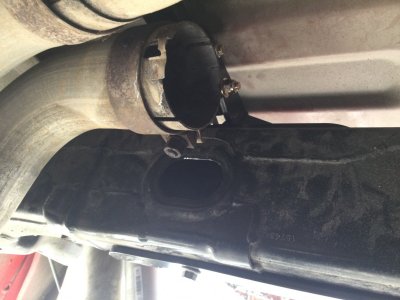
Also the exhaust hangers needed to be cut, as the Gen 2 bracket covered the bottom hole for the hanger. I would rather cut the hanger than try to cut through the ABS bracket. On the right side I needed to remove the exhaust pipe to get better access to the hole in the frame.

The right side exhaust pipe should be removed to get better access.


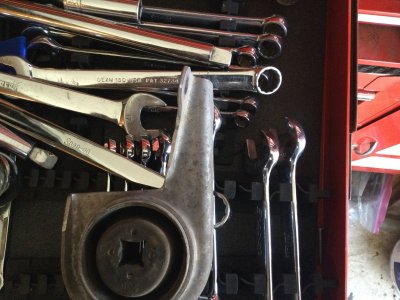
I used about twice as many tools as called out in the SVC instructions, and being the OCD kind of guy I am, it took me honestly 8 hours to do the complete install. Someone else might be able to do it in half the time.

This is a really nice kit. I would recommend it to anyone.


IMG_0265.JPG IMG_0265.JPG IMG_0253 (1).JPG IMG_0257 (1).JPG

IMG_0262.JPG
 
Last edited:

dixonk

HMFIC
Joined
Oct 14, 2017
Posts
960
Reaction score
1,588
Location
Oklahoma
Good on you for getting it done. I made an attempt a couple days ago. I couldn’t get one single but lined up through the frame to get a bolt started. Got frustrated and put it back in the box for now. I honestly debated on getting new hardware and just drilling right through the frame.


Sent from my iPhone using Tapatalk Pro
 
OP
OP
FINRPTR

FINRPTR

Full Access Member
Joined
Feb 14, 2018
Posts
100
Reaction score
94
Location
So Cal
Lots of tape and bend the supplied tool ALOT!

The other thing that might have been an issue is the SVC label rivetted on the bracket needs to face the rear. I had one hole on the right side that was slightly mis-aligned, but a 5/8 drill bit took care of that.
 

dixonk

HMFIC
Joined
Oct 14, 2017
Posts
960
Reaction score
1,588
Location
Oklahoma
Lots of tape and bend the supplied tool ALOT!

The other thing that might have been an issue is the SVC label rivetted on the bracket needs to face the rear. I had one hole on the right side that was slightly mis-aligned, but a 5/8 drill bit took care of that.

I just could never get it bent right. All the time wasted trying to make it work with the exhaust on, I should have pulled the exhaust. I hate their install video with the bed and exhaust off. Make it look so easy.


Sent from my iPhone using Tapatalk Pro
 

OEMPlus Raptor

OEM preferred....
Joined
Aug 17, 2020
Posts
1,074
Reaction score
1,145
Location
Oxnard CA
So this weekend I decided to finally install my new SVC Adjustable Bump System. I figured since I had 4 days off of work, I should be able to get it in, no problem.

Well, everything started out ok, it is really a nice kit. I used a flapper wheel on a grinder to smooth out the welds on the frame, then painted the frame to keep it from rusting.

Installation went pretty well, I followed the instructions provided, there needed to be a few changes made. Then Gen 2 system uses 3 5/8 bolts, where the Gen 1 uses (1) 5/8 bolt, and (1) 3/4" bolt.

Also the exhaust hangers needed to be cut, as the Gen 2 bracket covered the bottom hole for the hanger. I would rather cut the hanger than try to cut through the ABS bracket. On the right side I needed to remove the exhaust pipe to get better access to the hole in the frame.

The right side exhaust pipe should be removed to get better access.


I used about twice as many tools as called out in the SVC instructions, and being the OCD kind of guy I am, it took me honestly 8 hours to do the complete install. Someone else might be able to do it in half the time.

This is a really nice kit. I would recommend it to anyone.


View attachment 165659 View attachment 165659 View attachment 165660 View attachment 165661

View attachment 165665
I've been debating on getting this kit, but never knew it required grinding the frame, which is why I didn't consider the RPG kit. Is grinding the frame in the instruction or was that a personal choice?
 

dixonk

HMFIC
Joined
Oct 14, 2017
Posts
960
Reaction score
1,588
Location
Oklahoma
I've been debating on getting this kit, but never knew it required grinding the frame, which is why I didn't consider the RPG kit. Is grinding the frame in the instruction or was that a personal choice?

It would only be needed if your factory welds are boogered up in that spot. My frame welds were fine and the mount sat flush without any grinding.
 
OP
OP
FINRPTR

FINRPTR

Full Access Member
Joined
Feb 14, 2018
Posts
100
Reaction score
94
Location
So Cal
I only had a couple spots that really needed some attention. I ran along all the welds just because I was already there.
 
OP
OP
FINRPTR

FINRPTR

Full Access Member
Joined
Feb 14, 2018
Posts
100
Reaction score
94
Location
So Cal
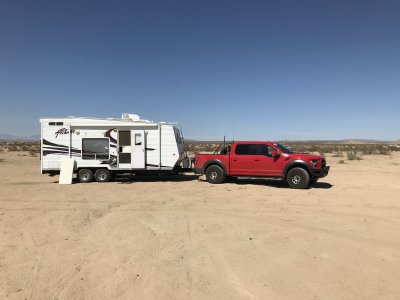
So over the weekend I hooked up my 9000lb+ toy hauler and went to the desert. The SVC kit was an awesome addition to the WD hitch. The suspension dropped to the point the bump stops touched, and it was a smooth ride, much better than without the kit.
SHRM9484.JPG
 

OEMPlus Raptor

OEM preferred....
Joined
Aug 17, 2020
Posts
1,074
Reaction score
1,145
Location
Oxnard CA
I ordered the SVC kit, the only thing I don't want to do is grind off the wheel speed sensor from the axle. Mind you I haven't received the kit yet but can I use someone else's strike plate such as the RPG's.
 
Top