smurfslayer
Be vewwy, vewwy quiet. We’re hunting sasquatch77
- Joined
- Dec 16, 2016
- Posts
- 17,689
- Reaction score
- 27,295
I took my inspiration from #1 ; @Mjolnir - lots of good info.
I spent at least a pint figuring out where things would go that would make them less likely to get destroyed quickly and not be a PITA to replace. The front wheel well lights are a best effort. Rears appear to be out of the way, and I was able to mount light pods to the door step mount points, keeping the lights up higher than the steps themselves.
Just to warn you, a lot of pints were slain in this effort over the course of several days after work hours when I could cram the work in and on weekends in between chores. As a result, this project took about 2 weeks of small chunks of time and a couple longer days. I had to keep the truck in a drivable state. Also, if I never see wire loom again, it will be too soon.
The rear lights seemed easiest, so I started there. This run is easy, no disassembly required, and you can stop before undertaking any serious work in the engine bay.
I mounted the pods on the x rails for the bed. The existing holes lined up with what looks like a position that should survive some hard use ... for a while. I hope.
<amateur tip> Once you have wires run to the engine bay, check to see that your circuits work !
I had 3 runs that the connectors came apart in the wire loom as I was getting the runs up to the engine bay or run in the engine bay. At least I had the presence of mind to test before I buttoned up each circuit. So I ran the rears first, then tested, then secured then tested again to be sure they lit up. Repeated the process for the front wheel lights, vent lights, and finally the running board lights.
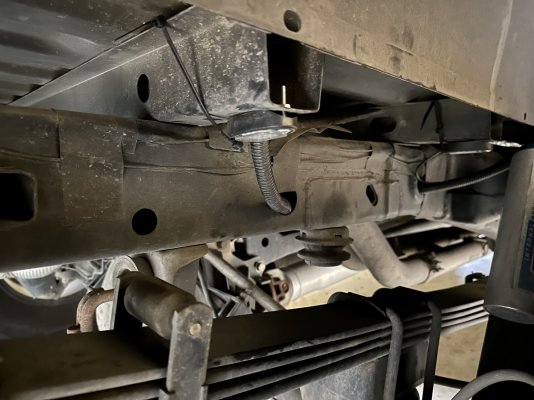
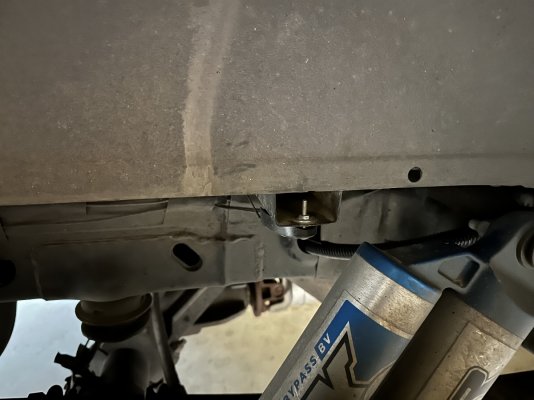
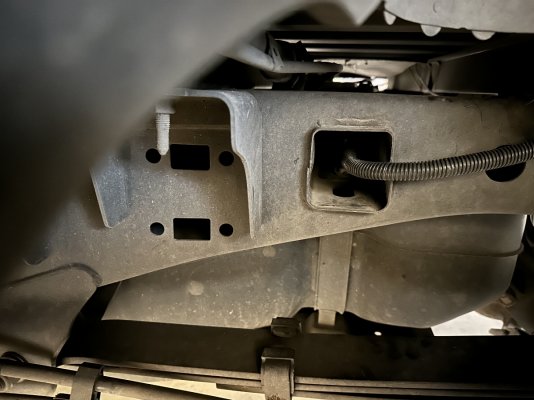
I ran the wires from the rear along the passenger side frame rail. I sent the wires for the 2 driver’s side pods through an existing brace in the frame.
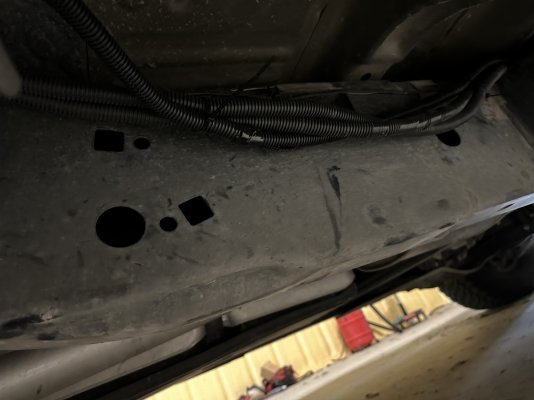
I grabbed all the wires, zip tied up and secured on the passenger side.
Next, I went to the front wheels. I have to say I was dreading this because I could easily envision anywhere on the fender liner where these things would get totally smashed on full suspension compression. Anyway, after a few pints and test fitting I settled on the spots pictured. No way to do this without drilling, and no way to see where you’re drilling the rear pod mounts without pulling the fender wheel well trim. Another H/T to @Mjolnir here.
Here’s what the trim looks like taken off.
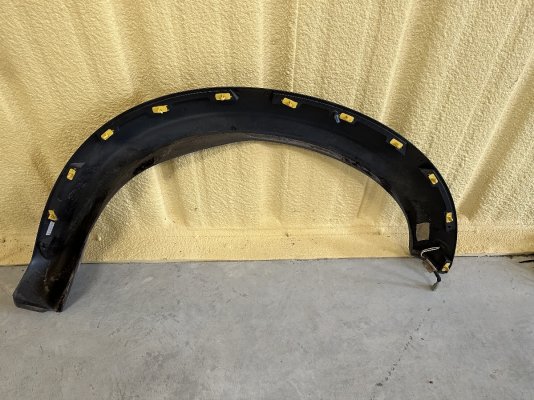
Looks easy, right?
SO, to remove these, you loosen all the screws, and mud flaps if you have any. Using only interior trim tools, along with a microfiber towel, get under the trim and pry -gently- until you pop out the front most piece. Don’t go nuts with force here or slide your tools between the trim and paint. Just take your time. Here’s where things get interesting. It looks like these push pin connectors are solidly mounted on the fender trim. They’re not. These yellow connectors slide on to the trim via a slot and this trim piece is not very hard, so it flexes easy and these push pin connecters will seem to pop off and it may look like you’re breaking the trim.
You’re not.
when you get a little past half way, on the rear of the trim - that is your military left in the picture above, there is a round “slot” for mounting on the truck and keeping it flush. You can loosen the front wire connector and continue popping the connectors loose while supporting with your hands. When you get to the last one the trim can be pulled away. When you reassemble, make damn sure the slot is correctly seated before sinking any of those push connectors in! There should be no gap between the trim and painted panels. This is a tricky fitting to get just right, so take your time here.
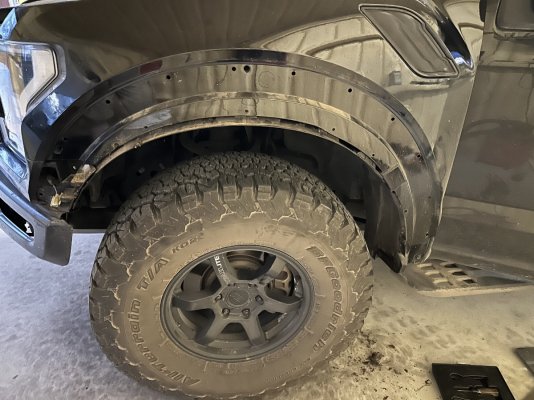
I picked 2 mount points on each wheel. Up front they are:
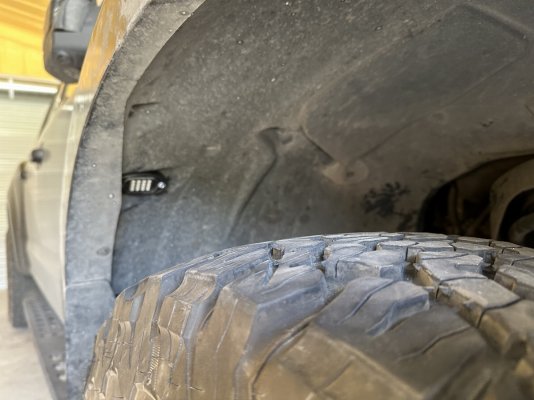
On the rear of the front wheel well, each side there’s a recess in the fender liner. This isn’t just good, it’s good enough!
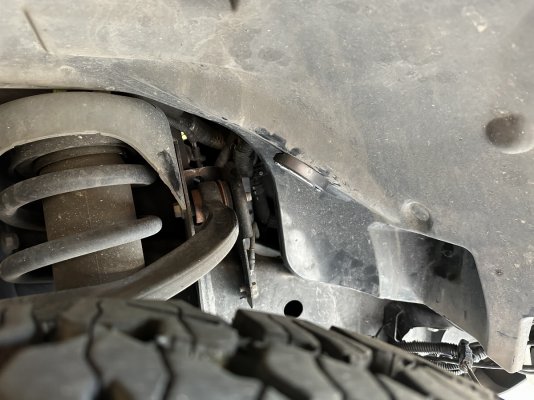
up front, this mount point is well inside the normal up stroke and shouldn’t get hit ... I hope.
Not sure this pic really helps but I just used the light pod as a guide and drilled to fit. I made sure there was nothing behind there or close by.
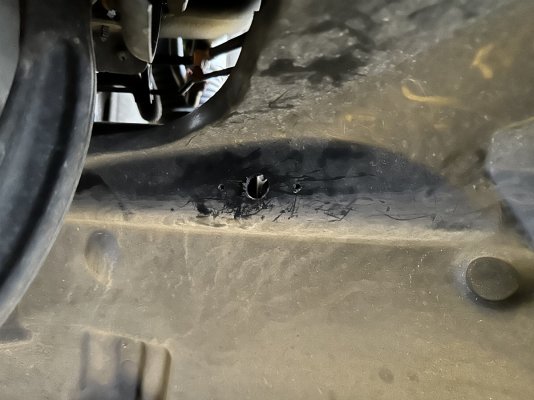
ok, I know I’m going to get some cr@p from you tire shine loving pùtos, for this...
I had a couple leftover pods, so I put them in fender vents. These were 2 of the easier cable runs.
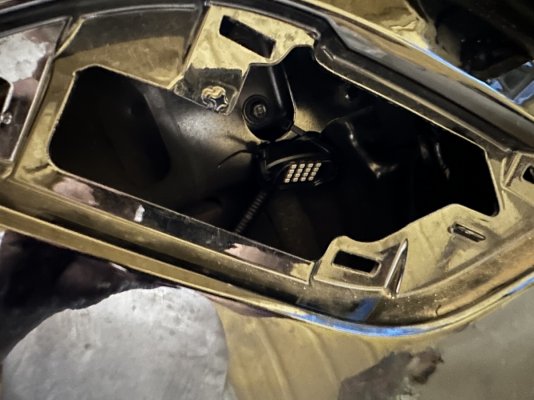
Those fender vent pieces are a PITA to get off, they’re just push pin connectors but they are quite difficult. Youtube is your friend. Do NOT use any tool or implement that has the potential to scratch your paint. Just don’t. plastic body trim tool, and a good microfiber towel and that’s only to assist.
Right up there with the front wheel wells, the light pods for the running boards made me stop, drink and think & not necessarily in that order. I didn’t want to drill into the steps or use zip ties, gorilla tape - those are reserved for friends and family. I thought about magnets but I was worried about some off road debris jumping up and ripping the pods off with the wires that relatively low, so I had some frame material left over from some hanging shelves. This fit nicely to the step mounts with just a little cutting.
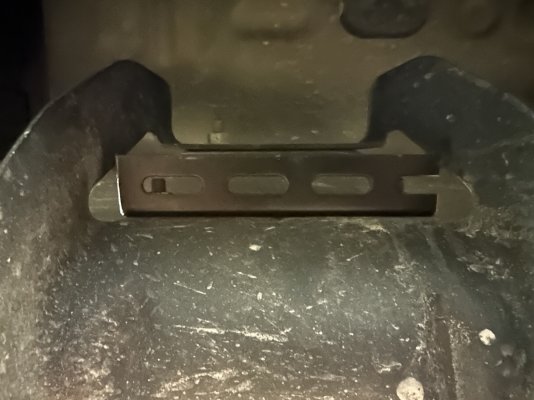
These have the pods secured higher up, so I think less chance they get caught on something and ripped off.
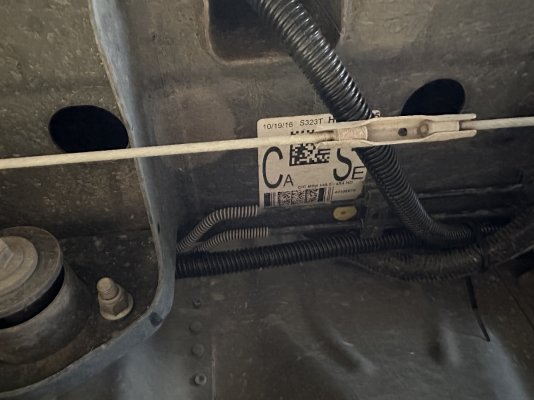
same plan as rear lights but in a different direction; I ran the running board light pod wires down the driver’s side, and across via another frame x member.
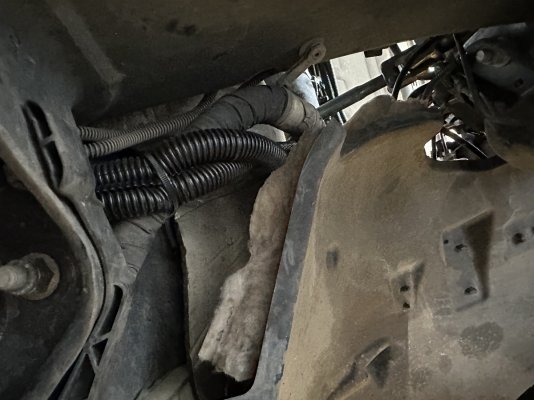
This was kind of a tough picture to snag, this is the running board pod light run, up the driver’s side fender well, to their home close to the air box.
Kit used: https://www.amazon.com/gp/product/B09V72QNM2/?tag=fordraptorforum-20
+
Plus about 100’ of wire loom, I used half inch.
I put a smaller kit from the same mfgr. on my Yamaha SxS, and they’re held up well for a year now, despite my best efforts. I’ve bottomed the suspension, plowed through water, done sand donuts, and climbed over all manner of crap. I did manage to tear one of the pods off my Yam’ roll bar, and procured replacements. Then, when I was replacing, I noticed I lost the green setting on the light pods. The Yam is dark green so ... I interacted with the seller. The issue was the ripped off pod, but just to be sure, they sent an entire replacement kit, so now I have a plethora of replacement pods...
1st test, no fire.
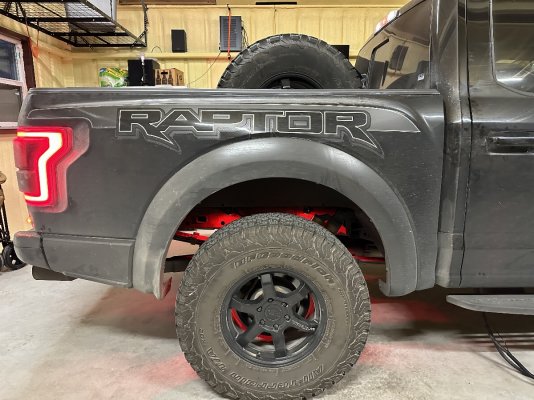
2nd test, still no fire.
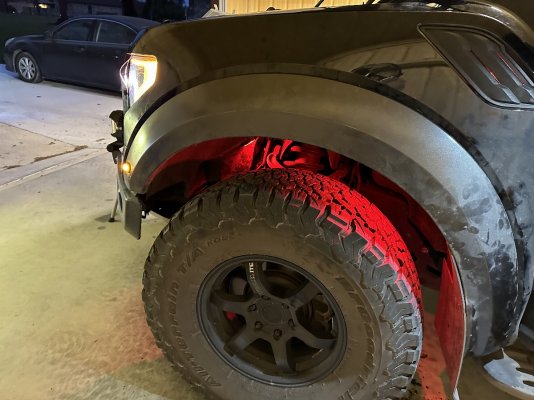
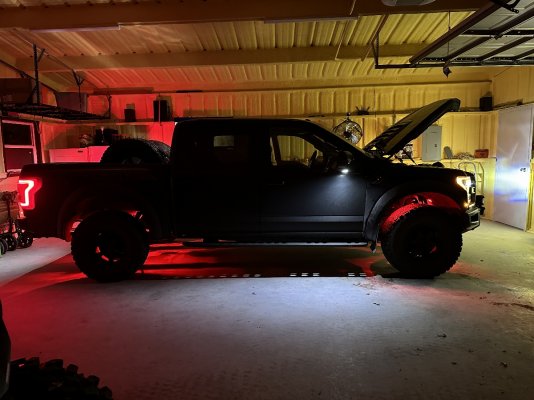
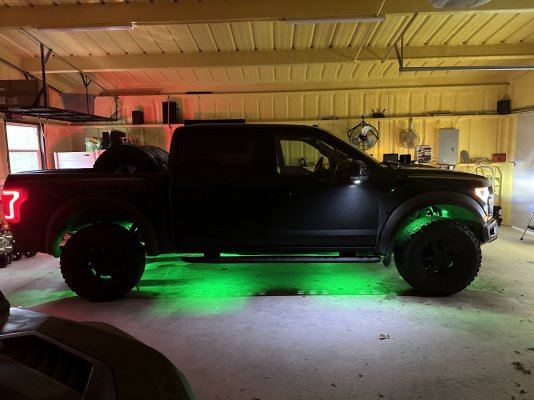
and after adding the running board lights
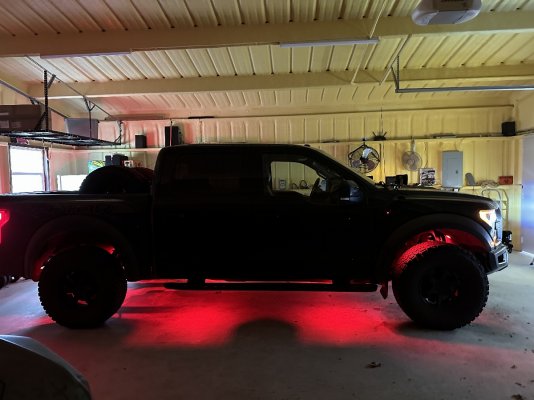
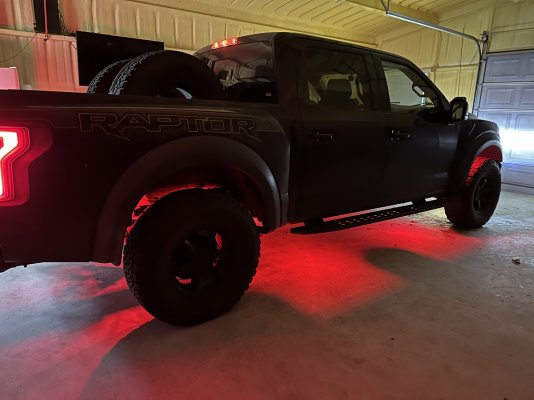
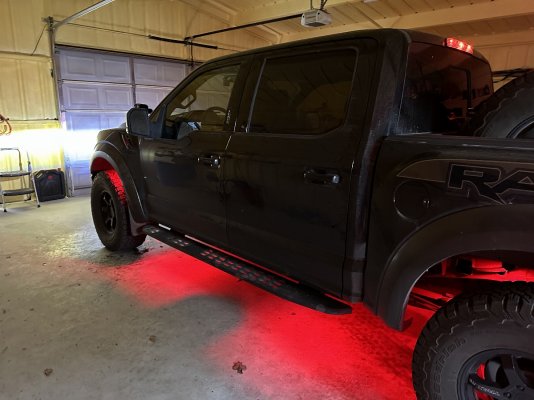
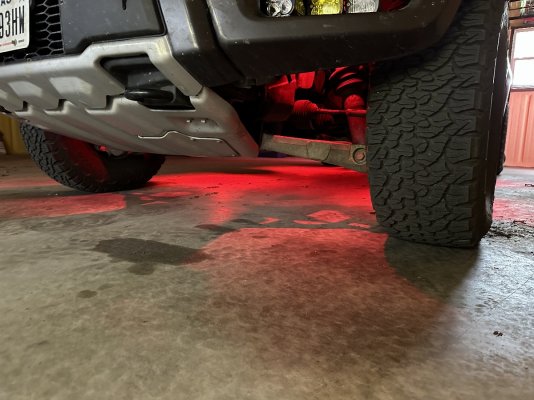
These are not need sunglasses at night bright, but do the job inexpensively and if I trash a few, NBD. Using red now because interior accent LEDs are red. I’ve got 14 pods in use, 2 left over. I’m thinking those may go on the rear, near the spare tire area.
I spent at least a pint figuring out where things would go that would make them less likely to get destroyed quickly and not be a PITA to replace. The front wheel well lights are a best effort. Rears appear to be out of the way, and I was able to mount light pods to the door step mount points, keeping the lights up higher than the steps themselves.
Just to warn you, a lot of pints were slain in this effort over the course of several days after work hours when I could cram the work in and on weekends in between chores. As a result, this project took about 2 weeks of small chunks of time and a couple longer days. I had to keep the truck in a drivable state. Also, if I never see wire loom again, it will be too soon.
The rear lights seemed easiest, so I started there. This run is easy, no disassembly required, and you can stop before undertaking any serious work in the engine bay.
I mounted the pods on the x rails for the bed. The existing holes lined up with what looks like a position that should survive some hard use ... for a while. I hope.
<amateur tip> Once you have wires run to the engine bay, check to see that your circuits work !
I had 3 runs that the connectors came apart in the wire loom as I was getting the runs up to the engine bay or run in the engine bay. At least I had the presence of mind to test before I buttoned up each circuit. So I ran the rears first, then tested, then secured then tested again to be sure they lit up. Repeated the process for the front wheel lights, vent lights, and finally the running board lights.


I ran the wires from the rear along the passenger side frame rail. I sent the wires for the 2 driver’s side pods through an existing brace in the frame.

I grabbed all the wires, zip tied up and secured on the passenger side.
Next, I went to the front wheels. I have to say I was dreading this because I could easily envision anywhere on the fender liner where these things would get totally smashed on full suspension compression. Anyway, after a few pints and test fitting I settled on the spots pictured. No way to do this without drilling, and no way to see where you’re drilling the rear pod mounts without pulling the fender wheel well trim. Another H/T to @Mjolnir here.
Here’s what the trim looks like taken off.

Looks easy, right?
SO, to remove these, you loosen all the screws, and mud flaps if you have any. Using only interior trim tools, along with a microfiber towel, get under the trim and pry -gently- until you pop out the front most piece. Don’t go nuts with force here or slide your tools between the trim and paint. Just take your time. Here’s where things get interesting. It looks like these push pin connectors are solidly mounted on the fender trim. They’re not. These yellow connectors slide on to the trim via a slot and this trim piece is not very hard, so it flexes easy and these push pin connecters will seem to pop off and it may look like you’re breaking the trim.
You’re not.
when you get a little past half way, on the rear of the trim - that is your military left in the picture above, there is a round “slot” for mounting on the truck and keeping it flush. You can loosen the front wire connector and continue popping the connectors loose while supporting with your hands. When you get to the last one the trim can be pulled away. When you reassemble, make damn sure the slot is correctly seated before sinking any of those push connectors in! There should be no gap between the trim and painted panels. This is a tricky fitting to get just right, so take your time here.

I picked 2 mount points on each wheel. Up front they are:

On the rear of the front wheel well, each side there’s a recess in the fender liner. This isn’t just good, it’s good enough!

up front, this mount point is well inside the normal up stroke and shouldn’t get hit ... I hope.
Not sure this pic really helps but I just used the light pod as a guide and drilled to fit. I made sure there was nothing behind there or close by.

ok, I know I’m going to get some cr@p from you tire shine loving pùtos, for this...
I had a couple leftover pods, so I put them in fender vents. These were 2 of the easier cable runs.

Those fender vent pieces are a PITA to get off, they’re just push pin connectors but they are quite difficult. Youtube is your friend. Do NOT use any tool or implement that has the potential to scratch your paint. Just don’t. plastic body trim tool, and a good microfiber towel and that’s only to assist.
Right up there with the front wheel wells, the light pods for the running boards made me stop, drink and think & not necessarily in that order. I didn’t want to drill into the steps or use zip ties, gorilla tape - those are reserved for friends and family. I thought about magnets but I was worried about some off road debris jumping up and ripping the pods off with the wires that relatively low, so I had some frame material left over from some hanging shelves. This fit nicely to the step mounts with just a little cutting.

These have the pods secured higher up, so I think less chance they get caught on something and ripped off.

same plan as rear lights but in a different direction; I ran the running board light pod wires down the driver’s side, and across via another frame x member.

This was kind of a tough picture to snag, this is the running board pod light run, up the driver’s side fender well, to their home close to the air box.
Kit used: https://www.amazon.com/gp/product/B09V72QNM2/?tag=fordraptorforum-20
+
Plus about 100’ of wire loom, I used half inch.
I put a smaller kit from the same mfgr. on my Yamaha SxS, and they’re held up well for a year now, despite my best efforts. I’ve bottomed the suspension, plowed through water, done sand donuts, and climbed over all manner of crap. I did manage to tear one of the pods off my Yam’ roll bar, and procured replacements. Then, when I was replacing, I noticed I lost the green setting on the light pods. The Yam is dark green so ... I interacted with the seller. The issue was the ripped off pod, but just to be sure, they sent an entire replacement kit, so now I have a plethora of replacement pods...
1st test, no fire.

2nd test, still no fire.


and after adding the running board lights


These are not need sunglasses at night bright, but do the job inexpensively and if I trash a few, NBD. Using red now because interior accent LEDs are red. I’ve got 14 pods in use, 2 left over. I’m thinking those may go on the rear, near the spare tire area.


