bigrig
Full Access Member
Juggernaut Catch Can Installation
Tools I used:
Extra Parts I Used:
About my experience with Juggernaut Power:
I placed the order easily enough on the Juggernaut Power website and it was processed and shipped in a couple days. I received the catch can about a week from that time. It arrived undamaged. The catch can itself appears to be built well and the connectors it uses mates directly to the engine’s ports.
I personally like the OEM connectors over the ones that Juggernaut gives you because the latching mechanism on the OEM connectors seem to be built better. That is just me nit-picking though. Overall I was pleased with the product.
Bracket Creation
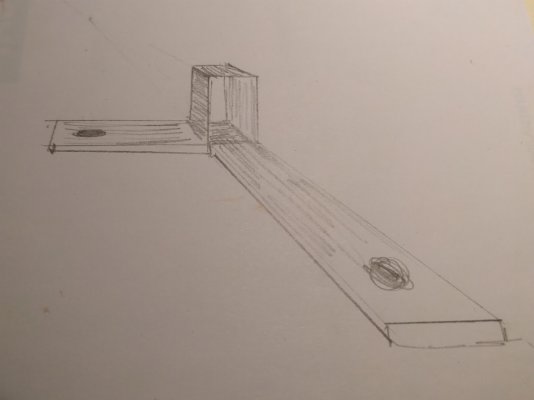
I decided to create a bracket that would mount on the battery tray and would raise the catch can a little bit so accessing the bottom to clean it out would be easy. I thought about what I wanted it to look like and sketched my idea out on paper. It looked like this:
Granted, this approach is probably overkill but it gave me something fun to work on, and I also wanted to practice aluminum welding.
I first cut a couple pieces of aluminum for the bottom part of the brace...
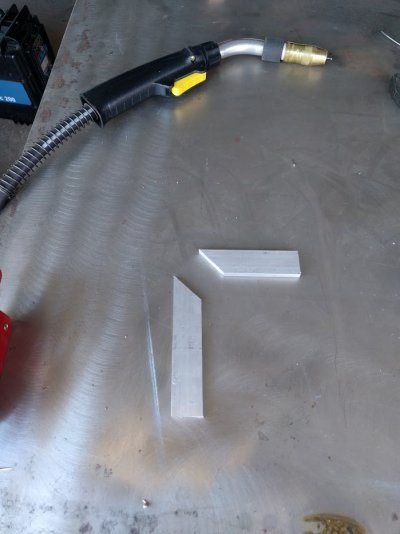
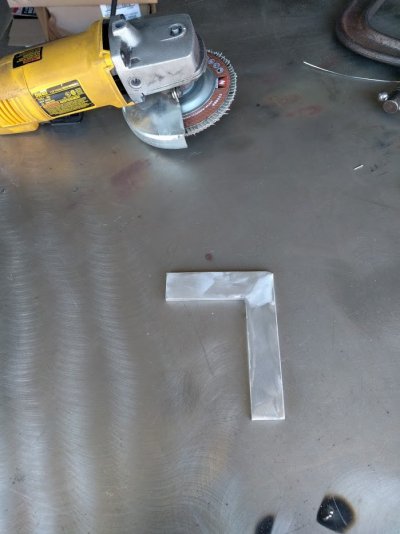
And welded them together.
I drilled a hole on the top lip of the battery tray where the screw on the top of the brace would go through. There is already a hole in the side lip of the battery tray that works perfectly as the second screw hole.
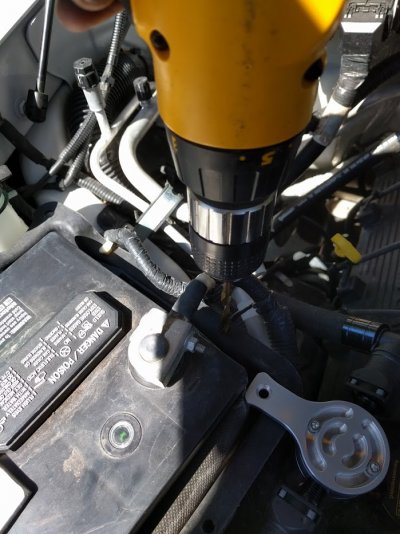
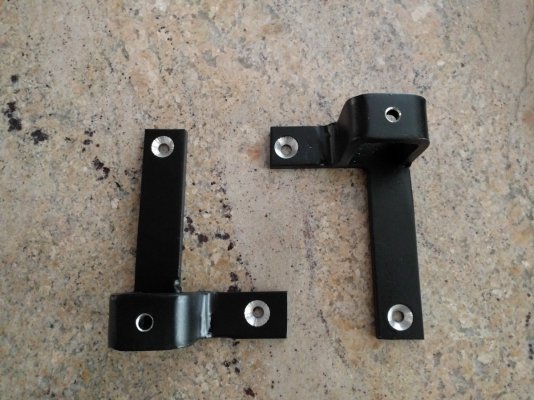
I marked each of the holes on my bracket by placing the bracket on the battery tray lip and poking a Sharpie through the bottom of the holes. Once marked, I drilled and countersunk holes in the bracket.
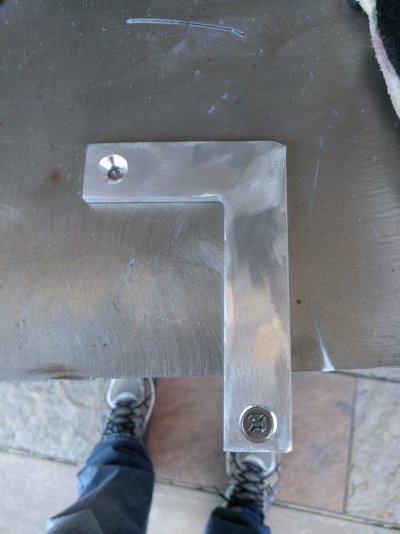
I created a top mount for the catch can by welding three small pieces of aluminum in a box like shape. I then welded that to my bracket.
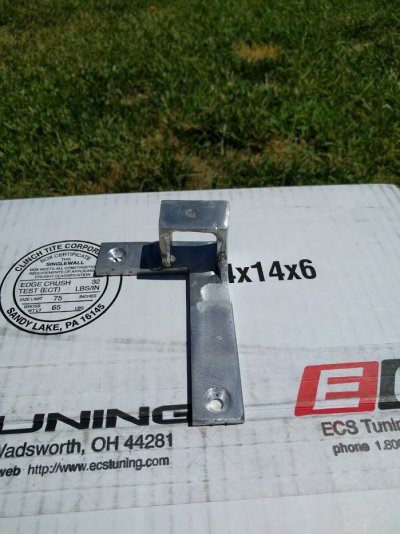
Bracket/Catch Can Installation
I threw a coat of paint on it (mostly to cover up my horrible welds on the catch can mount), and installed the bracket to the battery tray with two ¼” machine screws and matching washers and nuts.
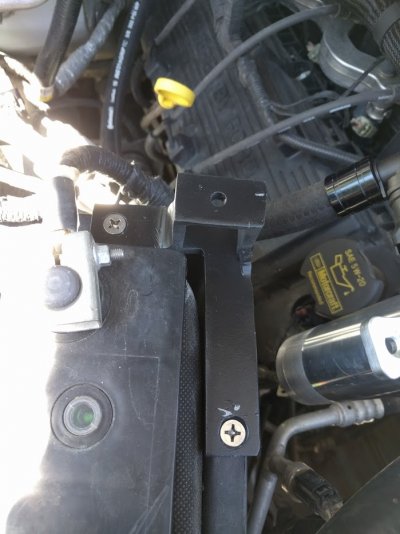
I then attached the catch can to the mounting bracket with ¼” machine screw and the matching washer and nylon lock nut that came with the Juggernaut kit.
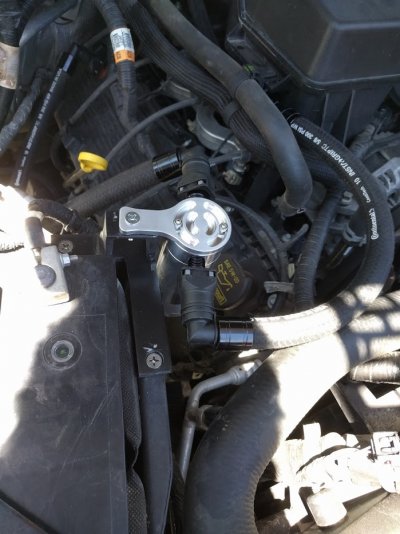
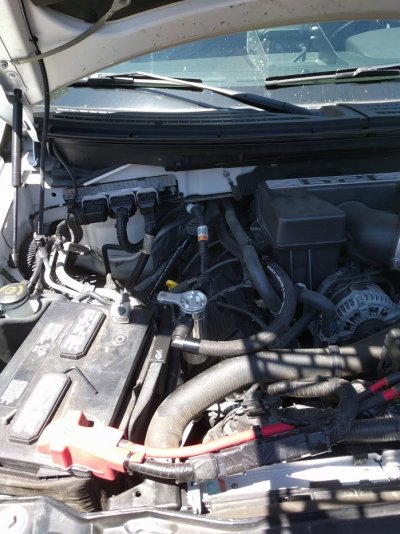
Good luck on your install! As I said in the beginning, this might be overkill for this install but it might also give you ideas on how to craft yours. Below are the dimensions in case that helps:
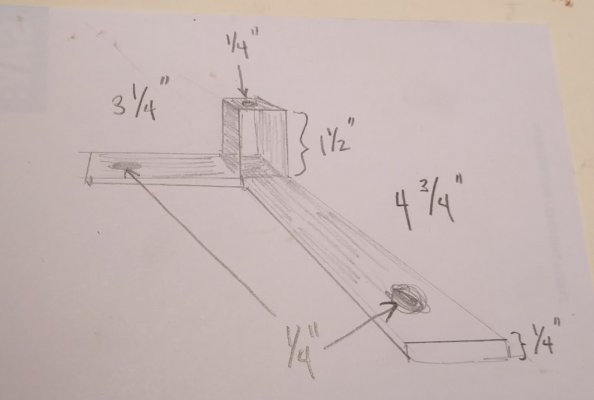
Measure twice, cut once, have fun, enjoy the process!
~bigrig
Tools I used:
- Mig Welder
- Angle Grinder
- Drill
- ¼” Drill Bit
- Phillips Screw Driver
- 11mm Box End Wrench
Extra Parts I Used:
- ¼” Aluminum Rectangular Bar Stock
- ¼” Machine Screws (3)
- ¼” Washers (2, I used the one included in the catch can kit)
- 11mm Nuts (2, I used the one included in the catch can kit)
About my experience with Juggernaut Power:
I placed the order easily enough on the Juggernaut Power website and it was processed and shipped in a couple days. I received the catch can about a week from that time. It arrived undamaged. The catch can itself appears to be built well and the connectors it uses mates directly to the engine’s ports.
I personally like the OEM connectors over the ones that Juggernaut gives you because the latching mechanism on the OEM connectors seem to be built better. That is just me nit-picking though. Overall I was pleased with the product.
Bracket Creation
I decided to create a bracket that would mount on the battery tray and would raise the catch can a little bit so accessing the bottom to clean it out would be easy. I thought about what I wanted it to look like and sketched my idea out on paper. It looked like this:

Granted, this approach is probably overkill but it gave me something fun to work on, and I also wanted to practice aluminum welding.
I first cut a couple pieces of aluminum for the bottom part of the brace...

And welded them together.

I drilled a hole on the top lip of the battery tray where the screw on the top of the brace would go through. There is already a hole in the side lip of the battery tray that works perfectly as the second screw hole.

I marked each of the holes on my bracket by placing the bracket on the battery tray lip and poking a Sharpie through the bottom of the holes. Once marked, I drilled and countersunk holes in the bracket.

I created a top mount for the catch can by welding three small pieces of aluminum in a box like shape. I then welded that to my bracket.

Bracket/Catch Can Installation
I threw a coat of paint on it (mostly to cover up my horrible welds on the catch can mount), and installed the bracket to the battery tray with two ¼” machine screws and matching washers and nuts.

I then attached the catch can to the mounting bracket with ¼” machine screw and the matching washer and nylon lock nut that came with the Juggernaut kit.


Good luck on your install! As I said in the beginning, this might be overkill for this install but it might also give you ideas on how to craft yours. Below are the dimensions in case that helps:

Measure twice, cut once, have fun, enjoy the process!
~bigrig


