Bajamod vs RPG

Disclaimer: Links on this page pointing to Amazon, eBay and other sites may include affiliate code. If you click them and make a purchase, we may earn a small commission.

Aaron

Meme Corps Commandant
Joined
Jun 13, 2011
Posts
13,097
Reaction score
7,475
Location
WA
I just tried to compress the spring enough to put the RPG unit on, I didn't even come CLOSE! I put the truck on a lift and lowered it, full weight, on the outside of the a arm, clamped it on, tightened it as much as I could, then lifted it again. I got MAYBE a 1/4" off the perch in the highest spot. If anyone manages to do it on the truck, my hat is off to you LOL.

Don't know about the Gen2s but on the Gen1s there was a method that RPG made a youtube video about on how to get spring compressors on there with the shock installed on the truck and move to mid perch. I assume a similar approach would work here too.

https://www.youtube.com/watch?v=aqJXF0KYp0I
 

JonasAtLethal

Member
Joined
Jan 30, 2017
Posts
16
Reaction score
26
Don't know about the Gen2s but on the Gen1s there was a method that RPG made a youtube video about on how to get spring compressors on there with the shock installed on the truck and move to mid perch. I assume a similar approach would work here too.

https://www.youtube.com/watch?v=aqJXF0KYp0I

Yeah I actually just watched that video, I had a single compressor, gonna try with the duals Wednesday maybe...for science
 

NJSP117

Full Access Member
Joined
Jun 27, 2012
Posts
344
Reaction score
142
Location
New Jersey
I just tried to compress the spring enough to put the RPG unit on, I didn't even come CLOSE! I put the truck on a lift and lowered it, full weight, on the outside of the a arm, clamped it on, tightened it as much as I could, then lifted it again. I got MAYBE a 1/4" off the perch in the highest spot. If anyone manages to do it on the truck, my hat is off to you LOL.

I tried to do it on my Gen 1 while they were on the truck and had the same issue. The springs are huge. I finally took my gen 1 shocks out and took them to a local auto shop that put them in a compressor that hung on the wall and even then it was hard to compress them. There's no way they're going to get compressed while on the truck...not enough space and springs are too big.
 

RPG

Supporting Vendor
Supporting Vendor
Joined
Mar 12, 2011
Posts
2,029
Reaction score
2,379
Location
Orange County
So when Pat is playing at Parker 425 and Colby is installing another Roush supercharger onto a 5.0, it was time for me to stop designing Gen 2 parts and get my hands dirty.

The install on these is identical to Gen 1 with the exception of snap ring. There is no set screw to worry about. Sliding the collar up on a Gen 2 is easier then and Gen 1. The spring rate is substantially softer on the Gen 2.

At the end of the install, it took me 1 hour and 30 including taking pictures and showing some tricks to Colby.

Patience is key. Remember to have fun. It's not a race but I think TMX has the current fastest install at 18 minutes.


Sent from my iPhone using Tapatalk

---------- Post added at 08:51 PM ---------- Previous post was at 08:38 PM ----------

Here are a few pictures.

Compress the suspension with a floor jack under the lower control arm balljoint, to the point where the jack stand gets free.

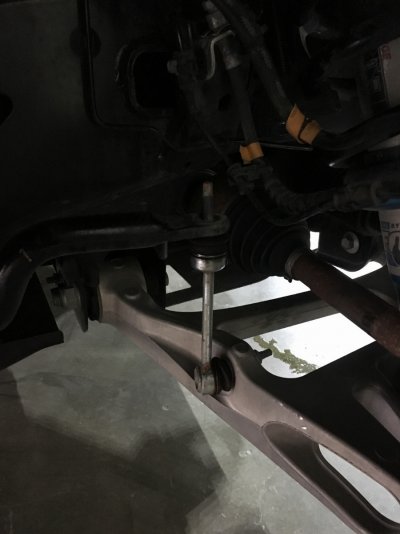
Loosen the nut on the top of the sway bar link.
6ecddea7a5ba778d469a92f8b0ed4edb.jpg

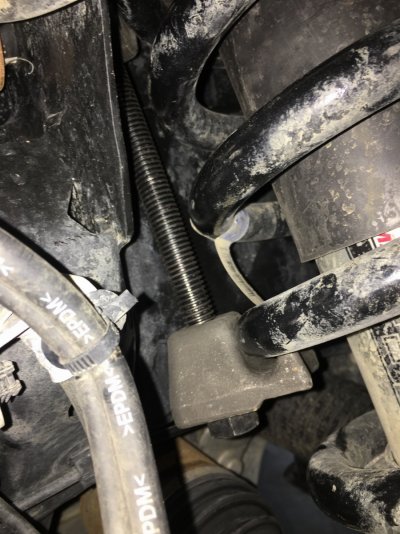
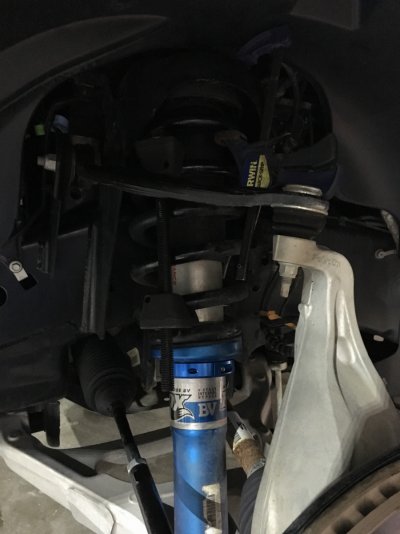
Place the rear spring compressor on first. It goes on the closer to the engine.

Place the forward spring on second. It goes closer to the spindle aka knuckle.
c0a38b9b56b53916ec1ba2fd51067218.jpg

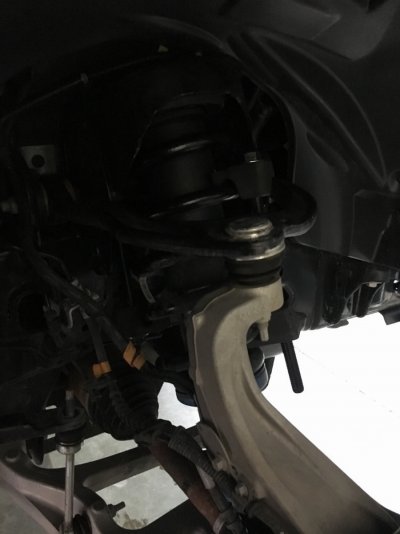
Lower the floor jack slowly to allow the suspension to uncompress.
cc7c10d453899c7407e09baecd81742d.jpg

c82aa6835b03c6e1e8a248d02b8a8ec2.jpg

2a3c696dd37e8c95e0ed53b4e14b72ea.jpg

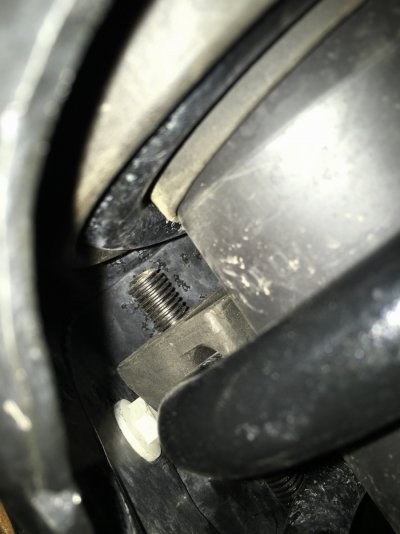
With something soft, tap the spring perch up about 1 1/8" to allow for sufficient room to install the Spring Perch Collars.

Make sure that the groove in the shock body is clean.

Torque the bolts to 75 inch pounds.

I'm going to update the install instructions to include these pictures.

Have fun and don't hesitate to call us.

Corey


Sent from my iPhone using Tapatalk
 

NJSP117

Full Access Member
Joined
Jun 27, 2012
Posts
344
Reaction score
142
Location
New Jersey
So when Pat is playing at Parker 425 and Colby is installing another Roush supercharger onto a 5.0, it was time for me to stop designing Gen 2 parts and get my hands dirty.

The install on these is identical to Gen 1 with the exception of snap ring. There is no set screw to worry about. Sliding the collar up on a Gen 2 is easier then and Gen 1. The spring rate is substantially softer on the Gen 2.

At the end of the install, it took me 1 hour and 30 including taking pictures and showing some tricks to Colby.

Patience is key. Remember to have fun. It's not a race but I think TMX has the current fastest install at 18 minutes.


Sent from my iPhone using Tapatalk

---------- Post added at 08:51 PM ---------- Previous post was at 08:38 PM ----------

Here are a few pictures.

Compress the suspension with a floor jack under the lower control arm balljoint, to the point where the jack stand gets free.

Loosen the nut on the top of the sway bar link.


With something soft, tap the spring perch up about 1 1/8" to allow for sufficient room to install the Spring Perch Collars.

Make sure that the groove in the shock body is clean.

Torque the bolts to 75 inch pounds.

I'm going to update the install instructions to include these pictures.

Have fun and don't hesitate to call us.

Corey


Sent from my iPhone using Tapatalk


Ok...SOLD...I"m in. I'll place the order on your website...or should I just send you a PM?
 

RPG

Supporting Vendor
Supporting Vendor
Joined
Mar 12, 2011
Posts
2,029
Reaction score
2,379
Location
Orange County
Ok...SOLD...I"m in. I'll place the order on your website...or should I just send you a PM?


Simply order them on our site. Shipping is calculated directly from UPS. Locks you into place on the order list.

Easy easy.


Sent from my iPhone using Tapatalk
 

NJSP117

Full Access Member
Joined
Jun 27, 2012
Posts
344
Reaction score
142
Location
New Jersey
Simply order them on our site. Shipping is calculated directly from UPS. Locks you into place on the order list.

Easy easy.


Sent from my iPhone using Tapatalk

Done...Can't wait to get them....hopefully the waiting list isn't too long at this point....thanks!
 

MajorAR

FRF Addict
Joined
May 28, 2013
Posts
2,078
Reaction score
2,189
Location
Kansas
Weekly update:

We shipped out another order yesterday, so those that just got on the list, turn around time is about 7 days at most. I'm trying to launch another batch of kits down range this Friday.

Thanks for the buiz and patience.
 
Last edited:
Top