How did that sub enclosure work out? I really want to do that with mine but I have the 2/3 fold seats.
Wiz's Build
- Thread starter wiz1500
- Start date
Disclaimer: Links on this page pointing to Amazon, eBay and other sites may include affiliate code. If you click them and make a purchase, we may earn a small commission.
raptor2012
Full Access Member
- Joined
- Aug 30, 2011
- Posts
- 286
- Reaction score
- 32
on the painting mod with the testers paint. I have a blue flame supercrew. I have one of the small factory paint bottles for touch up. that would work good wouldnt it and a definite match.
Sent from my SAMSUNG-SGH-I747 using Tapatalk 2
Sent from my SAMSUNG-SGH-I747 using Tapatalk 2
wiz1500
Full Access Member
- Joined
- Aug 24, 2011
- Posts
- 366
- Reaction score
- 466
How did that sub enclosure work out? I really want to do that with mine but I have the 2/3 fold seats.
on the painting mod with the testers paint. I have a blue flame supercrew. I have one of the small factory paint bottles for touch up. that would work good wouldnt it and a definite match.
Sent from my SAMSUNG-SGH-I747 using Tapatalk 2
My buddy Dave did that very thing and it came out great...He bought extra touch up paint from Ford.
The sub box................
This has been a long project in the works..
As some may or may not know..My whole build has always been in my drive way..The truck will not fit in the garage because of all the equipment I own. so I have always been at the mercy of the weather. Anyway.
I started off with some drawings and then some finished art work so I could visualize what I wanted..

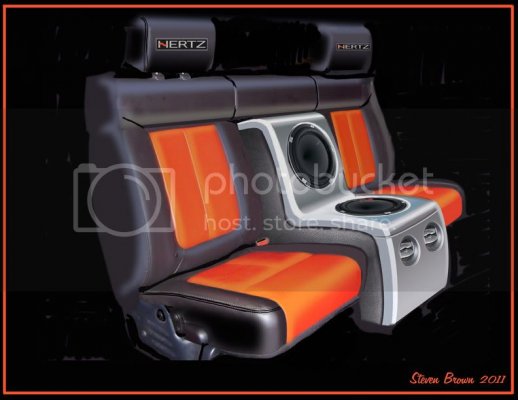
The goal here is to have it look like Ford did it. Not me.
The box will use Ford texture, colors and design cues.
To create the hole in the back seat I bought a second inner seat bracket and just trimmed the pivots off each inner side. You can see these in the lower portion of these photos as they have not been finished with powder yet..This was final fitment testing..

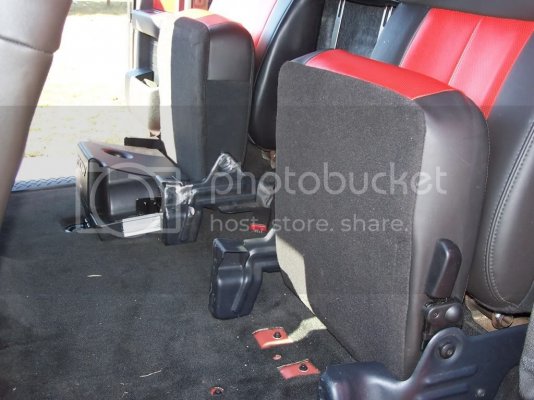
My daughter checking to make sure there is still proper side room for passengers .

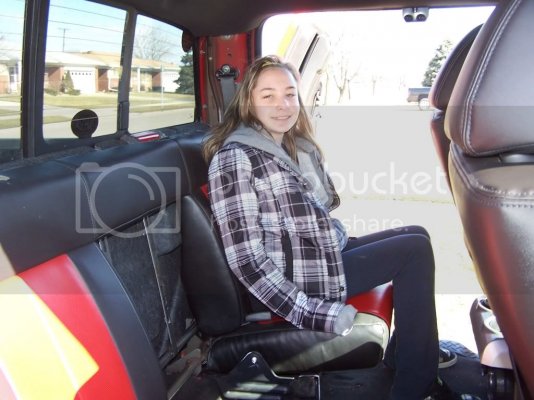
The upper piece is the section I cut out of the lower 60 portion of the 60-40 split.
So the only seat that was moded was the drivers side..The pass side is stock with the stock inner pivot bracket just the inside pivot pins cut off for clearance.
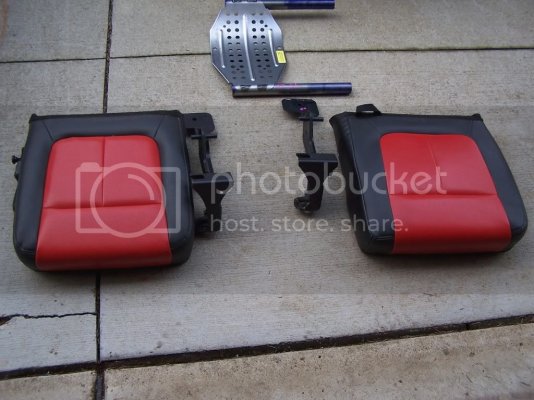
This is the stock seat assemble..
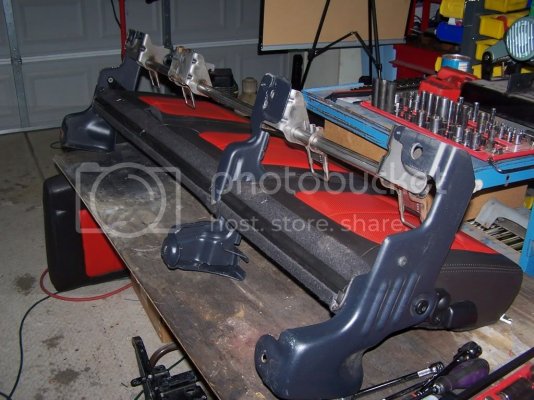
The empty silver pad you see on the upper seat lower mount (the silver pipe) is where the 4th bracket sits. So really the only mod to the truck it's self is one hole in the floor for the front of the 4th bracket..Everything else was Ford..
These are the pins I'm referring to.
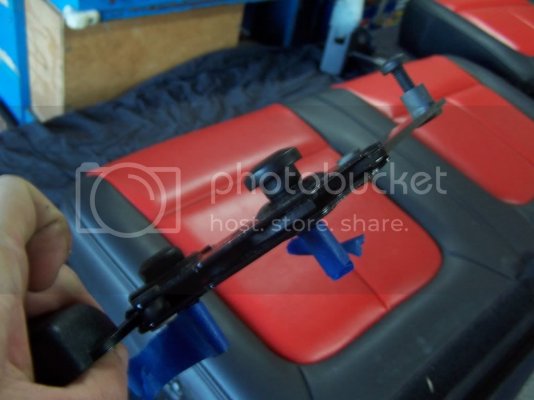
Lets get the lower 60 section of the seat apart.
There is a pinch clip that keeps the seem together then we pull the frame out..


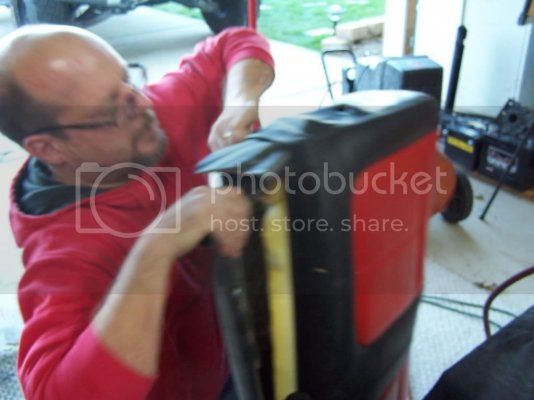
When the frame is out you have to make four cuts as you need to reuse the end that pivots so this needs to be welded back on..


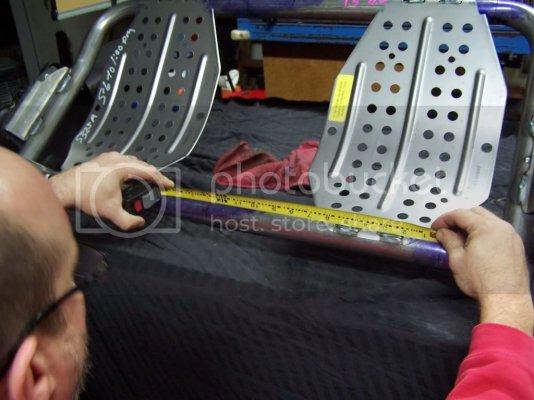
For strength and alignment I made two plugs for the pipes..
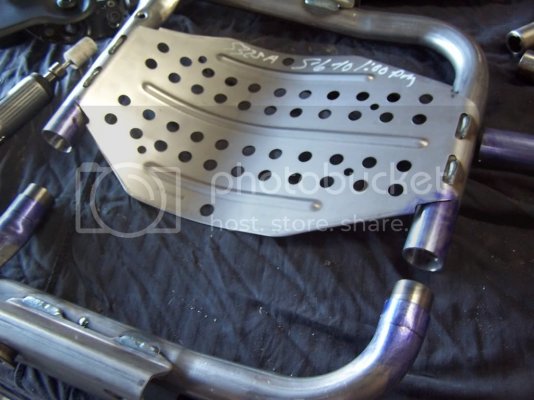
Weld it up and hand it to your apolstry guy with the old cover and he works his magic.
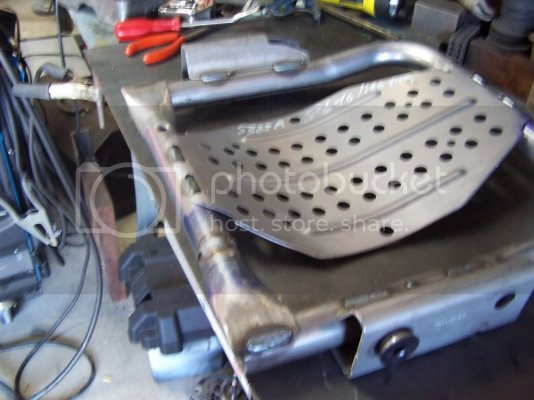
The upper...
Removing the cover is easy..
A few bull rings and you have to knock the head rest mounts out..


This is the frame pulled from the upper.. Started marking up the foam so nothing got cut wrong by the upholstery..

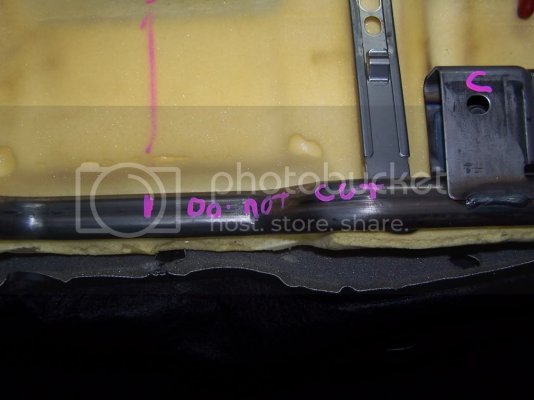
He basically un-stitched the cover in the factory seams and just rolled the ends with new caps. Leaving the header in place so the sub box will tuck up under it..

This box was made VERY quickly by my buddy..I threw him some dimensions over the phone..
We were getting ready to drive out west to run the Land Rush with Outlaw and I needed bass in the truck...
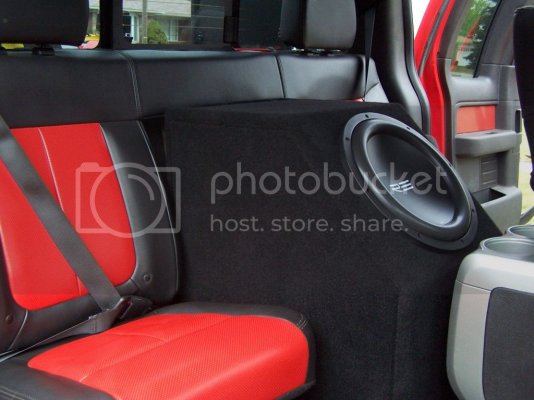
Trust me when I tell you the proper box will fit correctly.
MTUH3
FRF Addict
Great Idea Wiz. I half wish I could split the rear of the truck into a 40/40 set up, with a removable console in the middle. When the next kid comes in August, I am not going to have anyplace for my dog to sit on trips.
I would swing it quick, but since I break seats for a living, modifying them always scares me. I have seen too many things go flying out of seats...
Hmmm
I would swing it quick, but since I break seats for a living, modifying them always scares me. I have seen too many things go flying out of seats...
Hmmm
holy crap wiz! thanks for the extensive writeup, I wonder if nosbusa could pull off this build entirely. hint hint.
Cleave
FRF Addict
hey wiz, anything new on your truck?
MTUH3
FRF Addict
Wiz is too busy moding his new garage to post updates I think
wiz1500
Full Access Member
- Joined
- Aug 24, 2011
- Posts
- 366
- Reaction score
- 466
Yes MTUH is correct. My wife and I have been blessed with a wonderful new piece of property and I have been working night and day to build a new shop for the truck..

This is what we started with... (not my boat).

Insulated and dry walled every wall and the ceiling...


Just need to finish the taping and mud then we paint and do the floor..
I'll try and get some older stuff up on here for you guy's later tonight.

This is what we started with... (not my boat).

Insulated and dry walled every wall and the ceiling...


Just need to finish the taping and mud then we paint and do the floor..
I'll try and get some older stuff up on here for you guy's later tonight.
MTUH3
FRF Addict
I'll be out your way this weekend, but it is just a buzz in buzz out. Going to fix some things at the farm for my father-in-law
G & P Racing
FRF Addict
- Joined
- Mar 27, 2013
- Posts
- 226
- Reaction score
- 251
Would you get that shop done already !! LOL
Similar threads
- Replies
- 180
- Views
- 16K
- Replies
- 10
- Views
- 1K
- Replies
- 7
- Views
- 1K
- Replies
- 21
- Views
- 953

