I couldn't find a thread on this so figured I'd post a quick run through the process since I got this done last weekend. Good info to be found here in various threads like bigrig's and birdman's about some of the teardown to get to the lower balljoints (outer tie rod end, UCA balljoint, etc.), elsewhere like F150 forum and a few videos on youtube from FordTechMakuloco and ChrisFix that cover the basic process, albeit not on a Gen1 Raptor.
Tools:
Balljoint press
Floor jack
Jack stands
Impact (not a necessity but makes life easier if you have one)
8mm allen wrench (ABS sensor)
13mm socket (axle nut)
18mm socket (brake stays)
21mm deep socket (UCA balljoint nut, outer tie rod end nut)
24mm deep socket (LCA balljoint, I used a 15/16")
Breaker bar, cheater bar
BFH (doesn't have to be huge, ball-peen or framing hammer is probably enough, the 2.5 lb. sledge I used was likely overkill)
SDHQ Torque Specs
Various sockets, wrenches, hand tools (for shit I don't remember the size of, like the vacuum line and brake line bolts to the knuckle)
Parts:
Two lower balljoints
Antisieze, loctite, penetrating oil in your favorite flavors
I went with the above linked Moog balljoints from rockauto, although it said they came with a new style of boot these were original design as shown. At least they have a grease zerk. Motorcraft was my second choice of several available at rockauto.
Process:
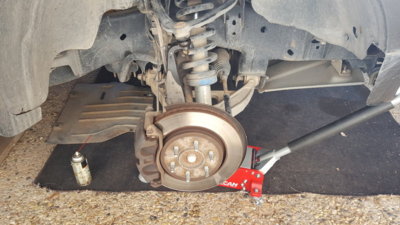
1. Jack up front end and jack stand under frame (I lifted on the a-arm below the swaybar link)
2. Remove tire/wheel
3. Soak UCA balljoint, LCA balljoint, and outer tie rod end with penetrating oil just below the boot (I actually did this every night after work for three days leading up to the removal-be careful not to get it on the brake pads as they may swell up like crazy)
4. Remove brake caliper stays from knuckle and hang caliper somewhere so the lines don't get stretched
5. Remove brake line/vacuum line bracket from knuckle and separate lines
6. Remove driveshaft bearing cap (I tried rocking it off with a pair of channel locks but all I got was an octagon-shaped ******* cap, a small chisel tapping it worked much better for me)
7. Remove 13mm nut on axle shaft
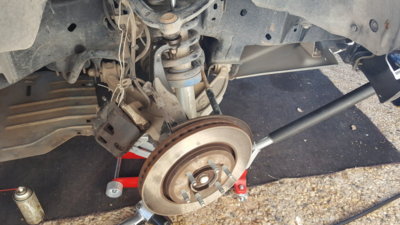
8. Remove brake disc (mine was on there pretty good, used a 2x4 on the back side where the caliper lives and a few hammer hits, rotate and repeat until it comes off)
9. Remove ABS sensor, rotate and snake wire from under brake shield
10. Remove outer tie rod end nut at knuckle, smack knuckle with BFH to release tie rod end
11. Loosen UCA balljoint nut but leave it on, smack knuckle with BFH to release UCA balljoint
12. Loosen LCA balljoint nut but leave it on, smack knuckle again with BFH to release LCA balljoint
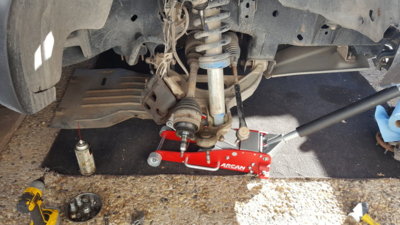
13. Hold on to steering knuckle with one hand and remove the UCA balljoint nut, then LCA balljoint nut, and set knuckle aside (CV will slide out of IWE)
14. Remove LCA balljoint snap ring and use a bungee or something to hold the CV out of the way
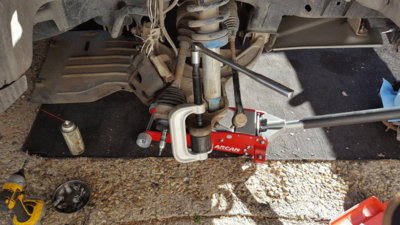
15. Smack the top center of the old balljoint a couple times to try to break any bond or loctite between it and the LCA, but be careful not to hit the edge of it because it might drag a gouge in the bore of the LCA as it presses out
16. Use balljoint press to press out old balljoint (mine came with zero instructions but there's a cap with a large hole and a large tube that was the right combination for removal)
17. Clean balljoint bore, knuckle, etc. and while it's apart check IWE seals, tie rod boot, CV boot
18. Grease driveshaft snout and IWE
Installation is just the reverse (with the exception of the hammer love taps, and the green loctite provided with the balljoint...which smells like licorice, use torque chart to torque all nuts and if your press doesn't tell you, use a cap above the balljoint that will let it press fully into the LCA and drive it with the tube that fits the balljoint-just larger than the rubber boot), and the other side is a mirror image of the first. Took me about 6 hours but I also did both inner & outer tie rods and boots so a rough estimate is a little over 2 hours a side.
Side notes:
Various sources stated or implied you could use an impact on the press tool to drive the old balljoint out, or that you just easily ratchet away on it with a little socket and Mister Balljoint will just happily ooze right out. **** no. Not on mine, once the tool really started pressing I switched to a 2' breaker bar, once that got tough I tried the impact and it said "nuh-uh". Lubricating the tool threads with light oil helped but in the end it took a 2' cheater bar (which doubles as half of my jack handle) and several obscenities, and it was hard all the way out AND all the way back in. Eat your ******* Wheaties.
I reused the UCA balljoint locknut and just used blue loctite on it (I'll be replacing those soon) as well as the LCA balljoint castle nut (might as well) and the outer tie rod end locknut (even though that was brand new) and the brake stay bolts. I gave the tapers on the balljoints and tie rod ends a little Never Sieze just to (hopefully) make it easier to take apart next time.
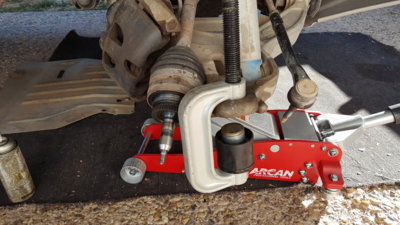
I've seen at least one post where the new balljoints didn't fit, wouldn't hurt to measure or mic the old ones right above or below the snap ring and make sure that diameter matches before going through all the trouble of removing the old ones (that would suck).


