You are using an out of date browser. It may not display this or other websites correctly.
You should upgrade or use an alternative browser.
You should upgrade or use an alternative browser.
DIY - Stock Raptor 2.5 Shock Rebuild.
- Thread starter m3dragon
- Start date
Disclaimer: Links on this page pointing to Amazon, eBay and other sites may include affiliate code. If you click them and make a purchase, we may earn a small commission.
mmaterni
Full Access Member
Was able to knock the first of the front shocks out today. Man those needles are super weak and fragile. I also spent like 2 hours trying to get the shock collar to move to mid perch. Done wasting my time there. Pounded on that thing with a sledge and 2x4 for two hours and barely budged. Just not meant to be I guess. Going after the other front shock tomorrow. The directions on this thread are spot on. Thanks so much for all the effort to make it so clear.
Attachments
mmaterni
Full Access Member
Okay so I completed the rebuild on a front shock yesterday. Today I am doing the second front shock and the IFP appears stuck. I have removed snap ring and charged chamber. IFP travels to half way out of chamber but will not come fully out. I have increased presure to 200 psi but still will not budge. Any ideas?
m3dragon
FRF Addict
we use a 20 tone press to move collors sometimes. they get that rusted.
mmaterni
Full Access Member
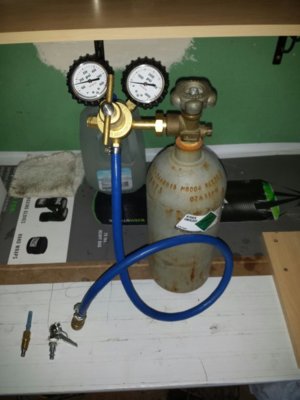
When filling shocks I noticed that it is sometimes hard to get the air chuck to stay on the needle valve and deliver consistent pressure. What is everyone using on their nitro setups to deliver pressure to the rebuilt shocks?
t_j
FRF Addict
My needle is mounted into a regular valve with a brass fitting, the valve is then screwed into the lossless air chuck
mmaterni
Full Access Member
After completing my recent rebuild I have a few suggestions for others before going after this. First off anyone with basic mechanical knowledge, common sense, and the right tools can do this. Don't be intimidated.
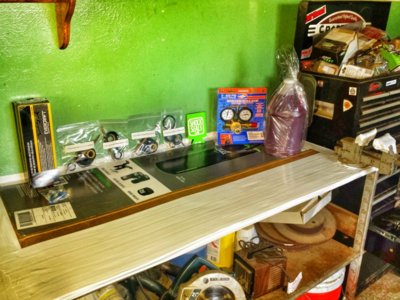
Having said that; buy everything you may need prior to opening them up. Don't be a cheap ass like me. Ended up having to get back in and replace rubber pellets in both front shocks after initial rebuild due to pressure loss. If I would have spent the extra few dollars ahead of time to have all recommended replacement items on hand it would have saved me a lot of time.
Also, use a lock on style or no loss air chuck. We are working with high pressures here and it can be difficult to get generic tire chucks to seal properly on the fill needle and then you are losing tank pressure all the time. This costs you more $. Eventually you will have to refill the tank and you are not properly charging the shock anyway. Not to mention you can easily damage the needle.
If you create your own hose make sure you properly tighten clamps or crimps. Put my own hose together from materials I had on hand and after charging first shock the fitting came off and almost hit my wife. Again we are working with high pressures here.
My shock caps were so tight I had to use 2 yes 2 pipes to get them off. Don't be intimidated just don't be afraid to get all man hands on it.
Hope this helps others doing these. Having all the right tools and knowledge now I feel very comfortable with knowing that I can rock this out as needed. Going to be going after my rear shocks in the next couple weeks and will post any other tips for those if I have any.
Finally, the FRF community is awesome. If you have an issue during or questions before the OP will help in any way they can. I will also be happy to help in any way I can.
Attachments
mmaterni
Full Access Member
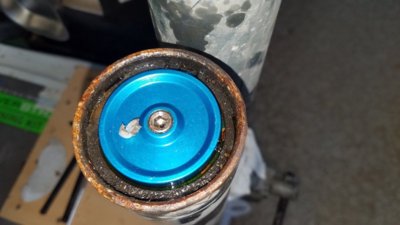
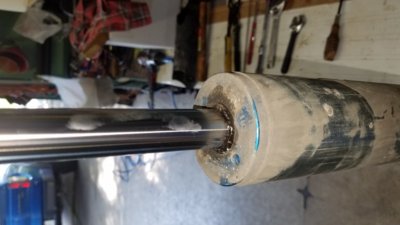
Just finished up the rebuild on my two rear shocks and a couple additional suggestions for that oh sh$# moment. As previously stated have extra rubber pellets on hand. Every one of mine needed to be replaced upon rebuild. Also the little plastic plug in the refill port can be stuck in there pretty good so hit it with penetrating oil before pulling shock. Also, the bleeder screws being stuck is a problem. I was able to get one loose on one rear shock. The rest were seized. I used a variation of the method mentioned by another poster earlier in the thread and am confident that very little if any air was trapped in the shock. Having an extra cap or two on hand just in case would be the ideal. It's a little hard to see the leak points on the rear shocks since the guards are blocking some of the shock. Both of mine were leaking and one had zero or close to it nitro. Was definitely due for some r&r. Included a pic showing plastic plug as well as leak point covered by guard.
Attachments
m3dragon
FRF Addict
Glad to see you got it all done.
We have been seeing a lot of other interesting stuff in our rebuilds.
We have been seeing a lot of other interesting stuff in our rebuilds.
mmaterni
Full Access Member
What kind of interesting stuff?[emoji133] Interesting like that?Glad to see you got it all done.
We have been seeing a lot of other interesting stuff in our rebuilds.
Sent from my SM-G930T using Tapatalk
Similar threads
- Replies
- 13
- Views
- 1K
- Replies
- 33
- Views
- 8K
- Replies
- 2
- Views
- 2K
- Replies
- 38
- Views
- 4K
- Replies
- 0
- Views
- 517
Members online
- Oldfart
- AZ35
- EZDA45
- RAPCAT
- Gumby
- RockHillRaptor
- votive
- Badboy4fun_wa
- 22R37
- Jhollowell
- Dudebrodude
- Rob O
- shaikhasm
- mleaky
- tonythis
- ToadSmasher2K1
- SSWIM
- Cenz22
- datazianguy
- Rustyseatbelt
- Sage
- StuartR
- Bozz
- samuel642000
- Svtweb
- dj30417
- DaveInMn
- Burt
- stevelp99
- figure1a
- F-22OR
- Mad Zeus
- CecilK12
- JBTAC
- taquitos
- letsgetthisdone
- BigTaco
- anthonyd608
- JohnyPython
- R4P70R
- RoNiN Raptor
- Muchmore
- RaptorHighLife
- thefulllouie
- Packman5
- parker3
- redsmoke
- Tommysyko
- smurfslayer
- Blown00gt
Total: 5,910 (members: 75, guests: 5,835)
Forum statistics
Latest posts
-
Best Intercooler for Stock Location?
- Latest: sixshooter_45
-


