You are using an out of date browser. It may not display this or other websites correctly.
You should upgrade or use an alternative browser.
You should upgrade or use an alternative browser.
Worked on it a bit today
- Thread starter Stevedm
- Start date
Disclaimer: Links on this page pointing to Amazon, eBay and other sites may include affiliate code. If you click them and make a purchase, we may earn a small commission.
Stevedm
Member
What’s the amp draw for the lights?
1.4 A per 18 W light.
Stevedm
Member
Donmatteo
FRF Addict
Any body panel removal or issues installing the bracket?
Stevedm
Member
Any body panel removal or issues installing the bracket?
Not at all. You have to take out the one bolt that holds the bumper support in place. The other bolt comes with the kit and fits into a pre-existing hole. So you literally just have to undo one bolt, put it back in through the bracket and then install one that comes in the kit. If you’re interested in purchasing I can go out and take a few pictures to show you. God knows the instructions were totally undecipherable.
Donmatteo
FRF Addict
Not at all. You have to take out the one bolt that holds the bumper support in place. The other bolt comes with the kit and fits into a pre-existing hole. So you literally just have to undo one bolt, put it back in through the bracket and then install one that comes in the kit. If you’re interested in purchasing I can go out and take a few pictures to show you. God knows the instructions were totally undecipherable.
When you have time, that would be amazing. I am interested in getting them.
Stevedm
Member
Stevedm
Member
Done aboveWhen you have time, that would be amazing. I am interested in getting them.
Donmatteo
FRF Addict
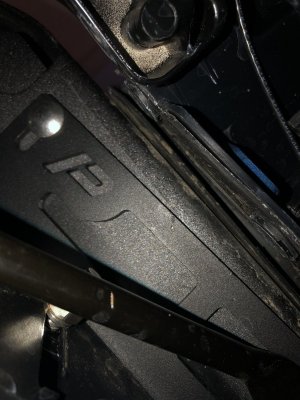
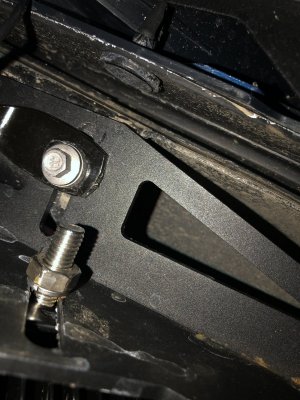
Looks super simple. Like you said, if they go bad, just replace them.You can see the bolt from the factory bumper support goes on the right hand side of the bracket/center. The smooth round head is the one that supplied in the kit itself and goes into a pre-existing hole in the metal bumper on the left edge. This is the passenger side one.
View attachment 135672
View attachment 135673
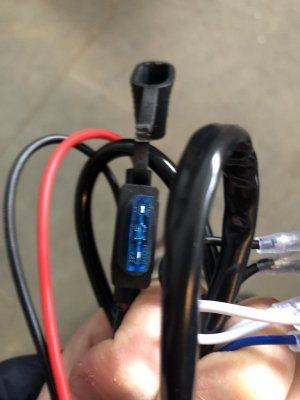
I am going to try and wire them a little different. Since the amp is low and I don’t have a need for all 6 switches. I’m going to wire the outer lights to 1/2, middle to 3/4 and inner to 5/6. That way if I swap them out to amber or something else, I would have individual control.
Thanks for the pics!
Stevedm
Member
Looks super simple. Like you said, if they go bad, just replace them.
I am going to try and wire them a little different. Since the amp is low and I don’t have a need for all 6 switches. I’m going to wire the outer lights to 1/2, middle to 3/4 and inner to 5/6. That way if I swap them out to amber or something else, I would have individual control.
Thanks for the pics!
Sounds good. The worst part about everything was getting all the lights lined up and perfect. I put everything together on my table 1st before I put them on the truck. I didn’t install the brackets first, then the lights on to the bracket. I put the lights on the bracket first but left them just a little bit loose then put the brackets on the truck. That’s by far the easiest way.
Similar threads
- Replies
- 8
- Views
- 478
- Replies
- 1
- Views
- 947
- Replies
- 6
- Views
- 1K
Members online
- GEN3LV
- redsmoke
- RoNiN Raptor
- 787Jet
- jnoshow
- Morrisabm
- dillard09
- Prormk
- MasonF
- beachcomber
- The Car Stereo Company
- cj_grnrt
- Rap Attack
- ActionJaxon
- c0rehax
- gofastdontdie
- teliosz
- taquitos
- dj30417
- ryeabs
- Zeusmotorworks
- Oldfart
- JohnyPython
- jeanco
- Inprogress
- RaptorFun
- jayspick
- 17baker
- fordfreek
- diabloblanco
- HORN HIGH ACES
- GCATX
- rick_duran
- lolsike
- Simplejack
- Matty The Baddy
- sofakingloud
- Kunz808
- DigbyRaptor
- RaptorND
- Backbone1976
- New recaros
- Fender150
- DMDRaptor
- spdklz
- zacharyguyjordan
- Mike27t
- alphablue
- Goose8651
- Jredraptor
Total: 2,631 (members: 70, guests: 2,561)


