CHMP
Full Access Member
Somehow this looks like a Frozen white or Frozen grey color...what am I missing?
I'd like to thank laziness for creating this sweet new color. Seriously though I haven't washed it in like 6 months.
Disclaimer: Links on this page pointing to Amazon, eBay and other sites may include affiliate code. If you click them and make a purchase, we may earn a small commission.
Somehow this looks like a Frozen white or Frozen grey color...what am I missing?
Looks great. I didnt realize you could get a 30inch OnX6 in there.
After four days of methodically taking our time installing the Alcon front BBK, rear Alcon Rotors/Pads and SS Brake lines/.7 MM spacers and ceramic coating on the calipers and another coat on the wheels, finally finished yesterday.
Even though I bought the tie rods to have on hand in case I needed them, my Raptor didn’t require them.
The front SS brake lines were very challenging, stripped one line and had to have it remade, completed the brake flush four times with the bleeder pump and then again manually with the old fashion two person way and again with turning the e-brake on and off.
Then did 20 60-5 mph hard stops without coming to a complete stop and then drove on the hwy for 20 minutes to allow the brakes to cool. When I got home, I didn’t apply the ebrake, just to error on the side of caution.
What a significant improvement, felt as if I was going to be thrown through the front windshield.
A huge thank you to Nick with Apollo Optics for helping me decide between Alcon and R1 Concepts and giving me all the Pros and Cons, which included Nick going above and beyond customer service by sending me, free of charge 1.5” wheel spacers for R1 Concepts wheel fitment and telling me I can return the tie rods if I didn’t need them.
highly recommend these Alcons.
View attachment 165703
View attachment 165704
View attachment 165705
View attachment 165706
View attachment 165707


I'd like to thank laziness for creating this sweet new color. Seriously though I haven't washed it in like 6 months.
Definitely better in road handling with a slightly stiffer feel.Did you see a big improvement over stock?
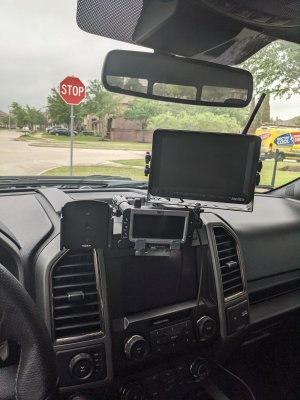
Finally got around to installing my Builtright dash mount! Got the components from the kids for Christmas and just hadn't had a chance to install. Heading out to Fredericksburg this weekend for their big Trade Days craft show and market. Taking the RV and needed to get this installed for my RV rear camera and for the RV TPMS monitor.
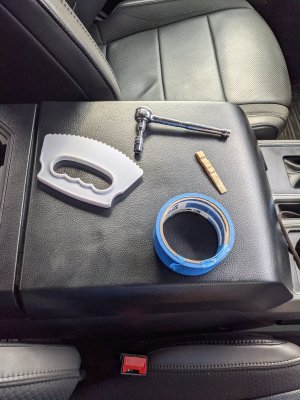
Here is a pic of the tools I used to get the dash apart so that I could then drill the holes for the mount.
View attachment 166104
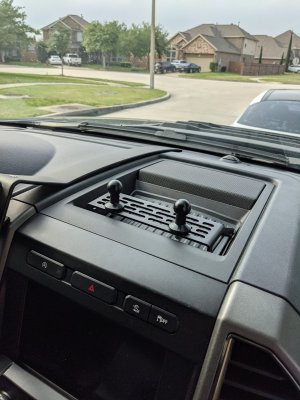
It wasn't difficult at all, but you do kind of pucker up when prying the panels up, hoping none of the plastic clips break!! Fortunately, I made it through the process without breaking anything or marring the dash panels. Here is a shot of the final installed bracket.
View attachment 166105
Looking forward to putting this to use this weekend! We've actually paid for a booth to try and sell some of my decorative iron pieces. New hobby of mine! Hopefully it goes well!!

What is the non-dirty color?
Definitely dirty as **** to look Avalanche Grey lolPlain old oxford white

