What did u do to your raptor today?

Disclaimer: Links on this page pointing to Amazon, eBay and other sites may include affiliate code. If you click them and make a purchase, we may earn a small commission.

suprspinner

Full Access Member
Joined
Jan 10, 2014
Posts
166
Reaction score
14
Location
westchester NY/ Hamden Connecticut
Installed Raptor Retro Fit 2014 OEM HIDs!

Gone is the crappy yellow hue that ford called "light" in 2012. And gone are all the pissed off drivers that were the victim of my own blinding HID bulb install effort.

Thanks Raptor Retro Fit!

ALSO

In my effort to ensure I can still be adequately annoying (but not as dangerously blinding);

Installed Kleinn Veloci-raptor 230 train horn and onboard air system with 3 gallon tank!

Loud as hell and wakes the dead.

I cant frikin' wait for some ******** to not go when the light turns green:ROFLJest:

Thanks RSi Works!


How did the install go? Do you have any pictures of it? I was wondering where it mounts? Thank you.


Sent from my iPhone using Tapatalk
 

Dirt Bag

Full Access Member
Joined
May 4, 2012
Posts
212
Reaction score
297
Location
California
How did the install go? Do you have any pictures of it? I was wondering where it mounts? Thank you.


Sent from my iPhone using Tapatalk

I am the WORST with pictures as I never seem to stop and take them during the install process. I will try to get under the truck tonight and take a couple.

The install kit is good. I would say a level 3 out of 6 being the most difficult.
Some interpretation and minor skill is required. A general knowledge of your truck is a must.
Compressor and tank mount to a really nice bracket which is bolted to the passenger side frame. Very secure with big 3/4" bolts that pass through existing holes on the frame rail.
Wire harness is all pre made to the relay so it is just a matter of routing the wires and air lines.
The 230 horns are all pre assembled on a bracket that holds the horns, solenoid, and air manifold.
That mates to a really clever bracket that fits between the frame rails in front and above the rear axle in a empty space under the bed. You cant see the location until you lower your factory spare tire. Horns face forward.
Once buttoned up, you cant see the horns at all unless you lay on your back under the front side of the bed.
As for being a good air source, I plan to alter the design by relocating coupler that is mounted on the tank to a location TBD on the bed or cab of the truck. That way I am not fighting dirt and contaminates that get in the coupler while under the truck. It will also be an easier location to plug in an air hose for tools or tire inflation.
Hope this helps paint the picture I neglected to take while working on it.
 

suprspinner

Full Access Member
Joined
Jan 10, 2014
Posts
166
Reaction score
14
Location
westchester NY/ Hamden Connecticut
I am the WORST with pictures as I never seem to stop and take them during the install process. I will try to get under the truck tonight and take a couple.


The install kit is good. I would say a level 3 out of 6 being the most difficult.

Some interpretation and minor skill is required. A general knowledge of your truck is a must.

Compressor and tank mount to a really nice bracket which is bolted to the passenger side frame. Very secure with big 3/4" bolts that pass through existing holes on the frame rail.

Wire harness is all pre made to the relay so it is just a matter of routing the wires and air lines.

The 230 horns are all pre assembled on a bracket that holds the horns, solenoid, and air manifold.

That mates to a really clever bracket that fits between the frame rails in front and above the rear axle in a empty space under the bed. You cant see the location until you lower your factory spare tire. Horns face forward.

Once buttoned up, you cant see the horns at all unless you lay on your back under the front side of the bed.

As for being a good air source, I plan to alter the design by relocating coupler that is mounted on the tank to a location TBD on the bed or cab of the truck. That way I am not fighting dirt and contaminates that get in the coupler while under the truck. It will also be an easier location to plug in an air hose for tools or tire inflation.

Hope this helps paint the picture I neglected to take while working on it.


That's perfect actually thank you, I'm really debating getting this now.


Sent from my iPhone using Tapatalk
 

t_j

FRF Addict
Joined
Sep 10, 2013
Posts
2,753
Reaction score
2,310
Location
Chicago, IL
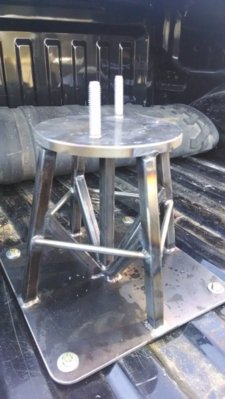
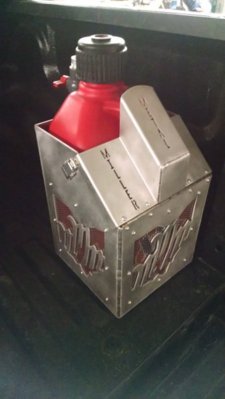
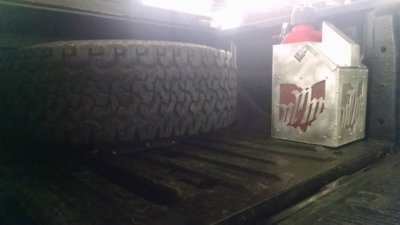
Finished up my bed organizer

710d9f8dd1e8f9c2e99c72f99a7436fb.jpg
68f2558b652f1c7348d5bed6ace85632.jpg
 

Staff online

Forum statistics

Threads
95,983
Posts
2,021,946
Members
59,706
Latest member
onthony
Top