JohntheDrummer
Full Access Member
- Joined
- Apr 6, 2010
- Posts
- 142
- Reaction score
- 2
Ok, Here we go. I spent some time writing this up based on my own installation and had trouble posting this with the pictures in the right spots. I now have a Photobucket account so let's see if I can get-R-done. Some of what I do for a living trickled into this (it was kind of humorous to me), so please forgive... You military guys who have read technical manuals will get it.  The link to get the red EL (or other colors) is: http://www.glowhut.com/electroluminescent-panelel-tapeback-light-with-12v-invert12.html
Tools Required:
· Old Credit Card
· 1” Wide Putty Knife
· Wire Cutters
· Wire Strippers
· 8 mm Socket, ¼” Drive
· Ratchet, ¼” Drive
· Razor Knife
Materials Required:
Electrician’s Tape
Cable Ties
Wire Nut (1)
RTV, Electrical
Formula 409
Tape, Two-way
Clean Towel
Equipment Conditions:
· Engine OFF
· Hood Opened
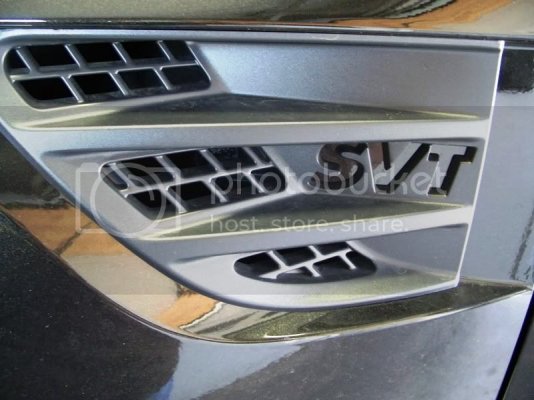
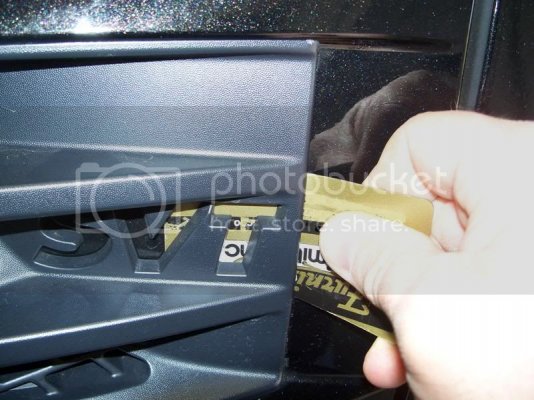
1. Carefully insert an old credit card behind your SVT vent.
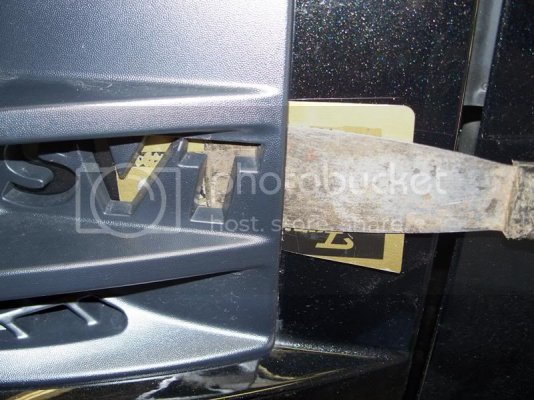
2. Carefully insert putty knife between SVT vent and credit card. Once tip of knife is past the “T” move knife up until you hear a click.
3. Carefully move the putty knife down until you hear a click.
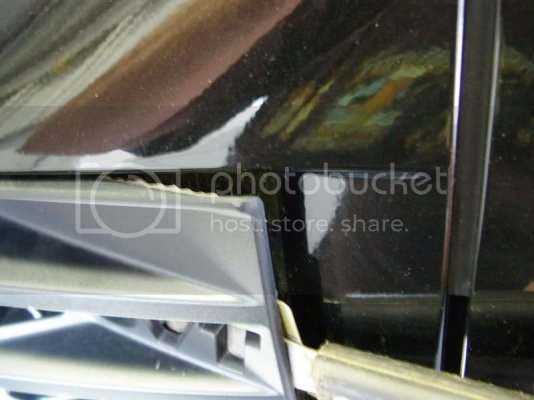
4. With your free hand, reach in over the top to the back of the SVT vent and apply pressure to the top of the clip to assist in releasing it from the fender while simultaneously applying pressure to the rear of the vent with the putty knife, releasing the SVT vent.
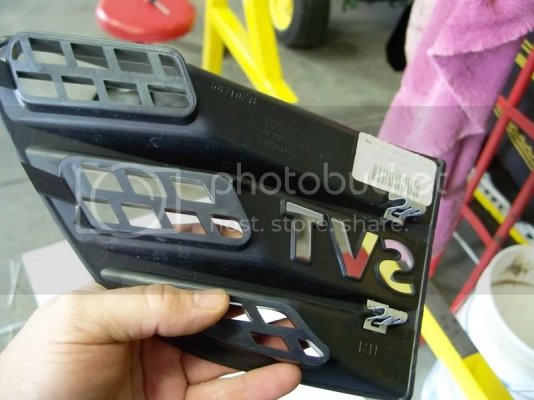
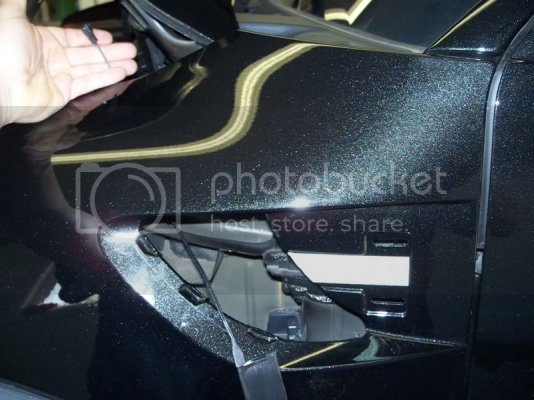
5. Once your SVT vent releases, slide the SVT vent towards the rear of the truck and remove.
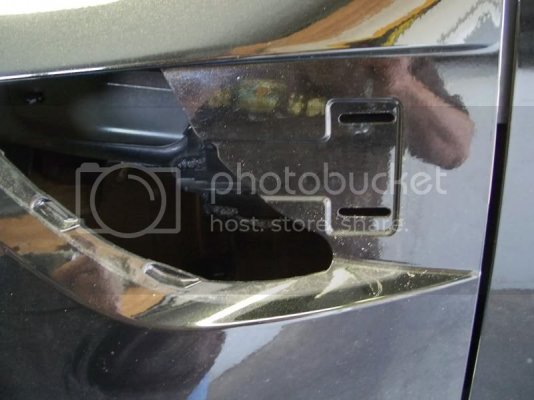
6. This is what you should be seeing now.
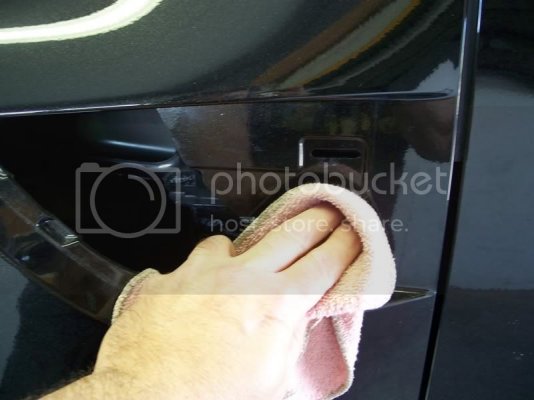
7. Clean surface with soft cloth and a cleaner such as Formula 409.
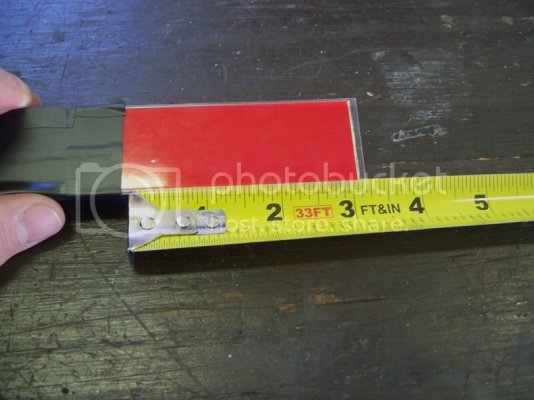
8. Prepare your EL tape by covering all but 3” with electrician’s tape, opposite the end with the connector. This will give you a clean look to the SVT and eliminates any extra glow to the vent area. Make sure the (EL) tape is clean so the tape will adhere properly.
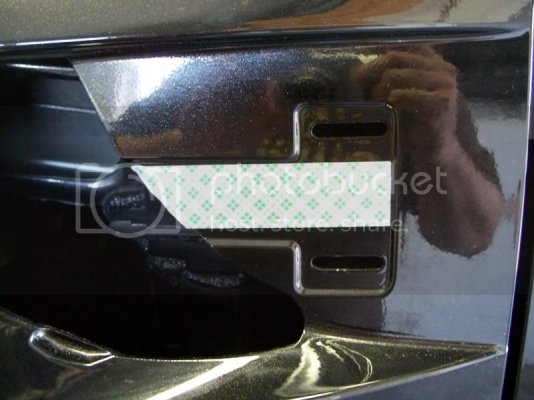
9. Cut a piece of two-way tape to the approximate length and apply to the indented portion of the vent. Rub on thoroughly. Then trim off excess tape with a razor knife.
10. Peel off the protective covering on the tape, revealing the sticky side.
11.
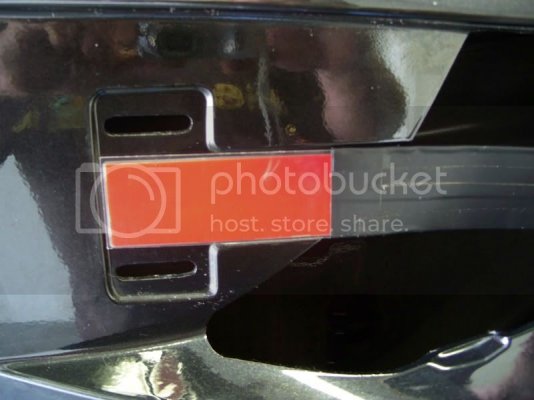
Route wire and connector through vent as shown. This well help support the end of the tape not being used and keep everything more secure.
12. Line up end of EL tape to the edge of the indent and press firmly into place.
13. Install your STV vent by sliding vent toward the front of the vehicle and snapping into place. Sweetness indeed.
14. Repeat Steps (1) through (13) for passenger side.
15. Install your 12V inverters where you see fit. I kept mine high and merely used cable ties to keep them in place on another component. I used two cable ties per inverter and snugged them down. I hooked the power into one of my AUX switches, so I can kill the light at will. I do not know the legality of running extra “side marker” lights as they could be construed, so use your best judgment. Connect your black ground wires to the nearest ground stud and enjoy. When you are done connecting your ground, apply RTV to exposed wire surfaces.
16. Crack a beer and admire your work.
END OF TASK
END OF WORK PACKAGE
 The link to get the red EL (or other colors) is: http://www.glowhut.com/electroluminescent-panelel-tapeback-light-with-12v-invert12.html
BACK-LIT SVT VENT INSTALLATION
· Old Credit Card
· 1” Wide Putty Knife
· Wire Cutters
· Wire Strippers
· 8 mm Socket, ¼” Drive
· Ratchet, ¼” Drive
· Razor Knife
Materials Required:
Electrician’s Tape
Cable Ties
Wire Nut (1)
RTV, Electrical
Formula 409
Tape, Two-way
Clean Towel
Equipment Conditions:
· Engine OFF
· Hood Opened
This is to take your F-150 Raptor SVT to the next
It may be necessary to cut your credit card slightly narrower to ensure that the credit card will fit between the clips on the SVT vent.
2. Carefully insert putty knife between SVT vent and credit card. Once tip of knife is past the “T” move knife up until you hear a click.
3. Carefully move the putty knife down until you hear a click.
4. With your free hand, reach in over the top to the back of the SVT vent and apply pressure to the top of the clip to assist in releasing it from the fender while simultaneously applying pressure to the rear of the vent with the putty knife, releasing the SVT vent.
5. Once your SVT vent releases, slide the SVT vent towards the rear of the truck and remove.
6. This is what you should be seeing now.
7. Clean surface with soft cloth and a cleaner such as Formula 409.
8. Prepare your EL tape by covering all but 3” with electrician’s tape, opposite the end with the connector. This will give you a clean look to the SVT and eliminates any extra glow to the vent area. Make sure the (EL) tape is clean so the tape will adhere properly.
9. Cut a piece of two-way tape to the approximate length and apply to the indented portion of the vent. Rub on thoroughly. Then trim off excess tape with a razor knife.
10. Peel off the protective covering on the tape, revealing the sticky side.
11.

Route wire and connector through vent as shown. This well help support the end of the tape not being used and keep everything more secure.
NOTE:
· Sorry, this view is from the passenger side vent!
· It is important to place tape to the very end of the indent to that all of the letters of SVT have coverage.
12. Line up end of EL tape to the edge of the indent and press firmly into place.
13. Install your STV vent by sliding vent toward the front of the vehicle and snapping into place. Sweetness indeed.
14. Repeat Steps (1) through (13) for passenger side.
15. Install your 12V inverters where you see fit. I kept mine high and merely used cable ties to keep them in place on another component. I used two cable ties per inverter and snugged them down. I hooked the power into one of my AUX switches, so I can kill the light at will. I do not know the legality of running extra “side marker” lights as they could be construed, so use your best judgment. Connect your black ground wires to the nearest ground stud and enjoy. When you are done connecting your ground, apply RTV to exposed wire surfaces.
16. Crack a beer and admire your work.
END OF TASK
END OF WORK PACKAGE


