You are using an out of date browser. It may not display this or other websites correctly.
You should upgrade or use an alternative browser.
You should upgrade or use an alternative browser.
PD1744's Build
- Thread starter PD1744
- Start date
Disclaimer: Links on this page pointing to Amazon, eBay and other sites may include affiliate code. If you click them and make a purchase, we may earn a small commission.
So you're telling me the ubolts are holding the lower shock mounts in place?
Nah, it's welded. But it could. At least for a bit anyway.
Thank goodness, I am a big fan of RPG but thinking those weren't welded solid did not give me the warm and fuzzy feeling! hahaNah, it's welded. But it could. At least for a bit anyway.
Outstanding work as always.
SVC BAJA SMURF BUMPER
Install went down last Friday. My first experience with SVC as most of my parts of this nature have come from RPG. Mostly good things to say about both outfits.
Customer service - Sales reps from both companies were really good to deal with. If I had to give the edge to one, I'd say RPG, but both were great. Along those same lines RPG's military discount was also slightly better (10% vs 7%).
Cost - Both pretty expensive, but not out of line with anybody else. SVC was significantly higher in shipping ($450 vs $200). More on this.
Quality - Both super high quality parts and fasteners as most of you know. Zero complaints here.
Delivery - Nightmares on both ends here. With the freight company for RPG (YRC), my delivery made it made it across most of the country smoothly and then got stalled in Memphis for like a week. The SVC carrier (RoadRunner) was quick across the country and got to my local terminal in a like a week, which is good because it was so expensive. And then no visible movement for a few days as they transferred it to a partner carrier for residential delivery. I ended up running it down and picking it up myself because they weren't going to make it in time for my planned install. Trying to get answers out of either carriers customer service was nearly useless.
Install - Both came with the same amount of instructions (zero), but both were also pretty straight forward.
I chose the SVC bumper purely because I prefer the aesthetic over all of RPG's offerings, but also curious to know what it was like to deal with them. I'm happy to work with both companies on anything moving forward. Top notch so far.
First step of the install is to pull off the old bumper obviously. You have to unbolt the hood release which I think was like 3x 10mm screws. Remove some of the lower and passenger side rubber flaps. Then the bumper itself is just 4 nuts from the back side. I think 21mm.
Marked the frame. The guidance I found online says use this small hole in front of the big hole for vertical. 2 inches up slope back 45 degrees. Should be in line with the forward edge of a rectangle cutout on the bottom. This worked out fine. No issues or re-cutting.
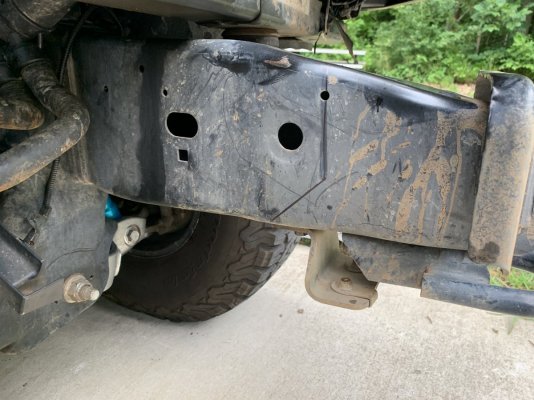
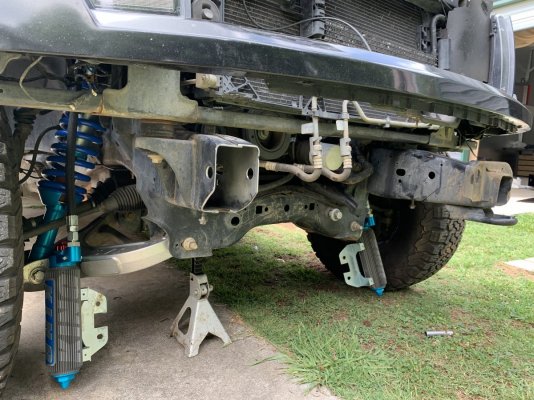
I had to open up the frame holes just a touch to get the bolt sleeves in. Step bit made light work of it:
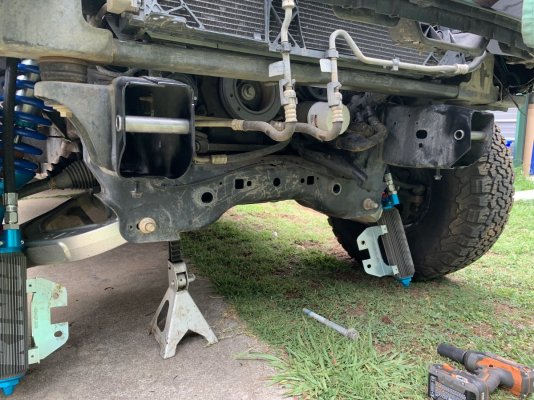
The bumper mounts off these points and the steering rack bolts:
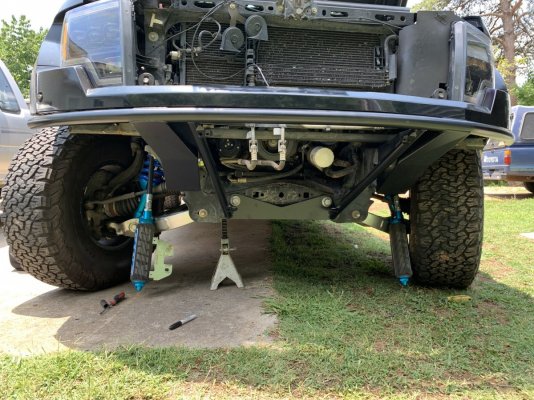
Looks like oil filter changes will be a good bit more accessible now.
Final result:
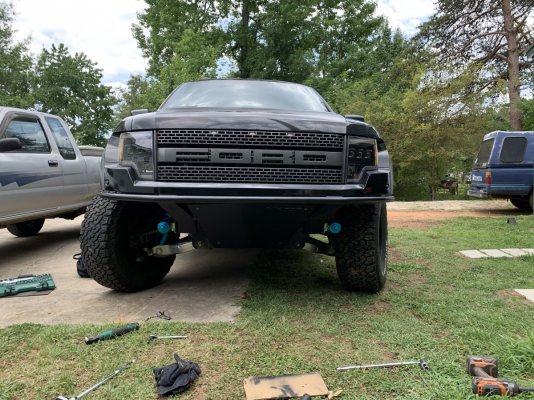
Other than cutting the frame, the worst part was figuring out the resi mounts. Still not happy with this as the cans protrude past the angle of the bumper, but I'm sort of at the mercy of the hose, fitting, and bracket configuration, so it sort of is what it is until I can figure out a better solution. But after the rear shocks last weekend and motor mounts the weekend before, this job was pretty easy.
Install went down last Friday. My first experience with SVC as most of my parts of this nature have come from RPG. Mostly good things to say about both outfits.
Customer service - Sales reps from both companies were really good to deal with. If I had to give the edge to one, I'd say RPG, but both were great. Along those same lines RPG's military discount was also slightly better (10% vs 7%).
Cost - Both pretty expensive, but not out of line with anybody else. SVC was significantly higher in shipping ($450 vs $200). More on this.
Quality - Both super high quality parts and fasteners as most of you know. Zero complaints here.
Delivery - Nightmares on both ends here. With the freight company for RPG (YRC), my delivery made it made it across most of the country smoothly and then got stalled in Memphis for like a week. The SVC carrier (RoadRunner) was quick across the country and got to my local terminal in a like a week, which is good because it was so expensive. And then no visible movement for a few days as they transferred it to a partner carrier for residential delivery. I ended up running it down and picking it up myself because they weren't going to make it in time for my planned install. Trying to get answers out of either carriers customer service was nearly useless.
Install - Both came with the same amount of instructions (zero), but both were also pretty straight forward.
I chose the SVC bumper purely because I prefer the aesthetic over all of RPG's offerings, but also curious to know what it was like to deal with them. I'm happy to work with both companies on anything moving forward. Top notch so far.
First step of the install is to pull off the old bumper obviously. You have to unbolt the hood release which I think was like 3x 10mm screws. Remove some of the lower and passenger side rubber flaps. Then the bumper itself is just 4 nuts from the back side. I think 21mm.
Marked the frame. The guidance I found online says use this small hole in front of the big hole for vertical. 2 inches up slope back 45 degrees. Should be in line with the forward edge of a rectangle cutout on the bottom. This worked out fine. No issues or re-cutting.


I had to open up the frame holes just a touch to get the bolt sleeves in. Step bit made light work of it:

The bumper mounts off these points and the steering rack bolts:

Looks like oil filter changes will be a good bit more accessible now.
Final result:

Other than cutting the frame, the worst part was figuring out the resi mounts. Still not happy with this as the cans protrude past the angle of the bumper, but I'm sort of at the mercy of the hose, fitting, and bracket configuration, so it sort of is what it is until I can figure out a better solution. But after the rear shocks last weekend and motor mounts the weekend before, this job was pretty easy.
Yanked this hunk of crap out last night:
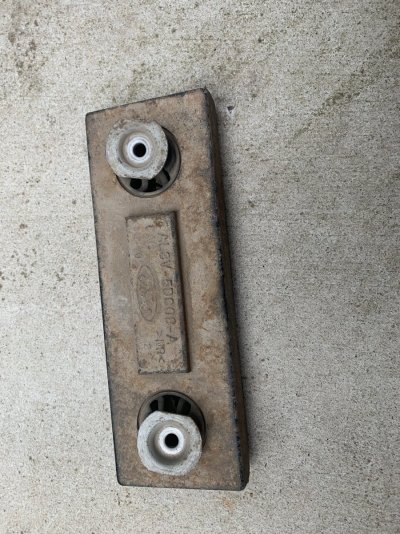
Bushings finally gave up the ghost. At first I thought my bypasses were way louder than I expected. Then I figured I’d check this thing out and sure enough was floppy as hell. After re-reading the 10 or so pages of merged threads regarding this I went out to tackle it. One dude mentioned being able to take it out with a ratcheting wrench so I figured I’d try that route. Is it possible? Yes. Is it easy? Not really. I think raising the box a little or cutting the bolts would have probably been the move but I’m hard headed. Also played with the idea of strapping a big zip tie around it which did work. Anyway if you go the ratchet wrench route and don’t have the kind that you can toggle the direction on be prepared to have your tool trapped between the bed and bolt if you back it all the way out. Advice would be to remove the tool while you can and then use the open end or fingers to back the bolt the rest of the way out. Got her done but it put up much more of a fight then I expected. All the clunking is gone now and I can hear the actual clicking of the bypasses. On to the next.

Bushings finally gave up the ghost. At first I thought my bypasses were way louder than I expected. Then I figured I’d check this thing out and sure enough was floppy as hell. After re-reading the 10 or so pages of merged threads regarding this I went out to tackle it. One dude mentioned being able to take it out with a ratcheting wrench so I figured I’d try that route. Is it possible? Yes. Is it easy? Not really. I think raising the box a little or cutting the bolts would have probably been the move but I’m hard headed. Also played with the idea of strapping a big zip tie around it which did work. Anyway if you go the ratchet wrench route and don’t have the kind that you can toggle the direction on be prepared to have your tool trapped between the bed and bolt if you back it all the way out. Advice would be to remove the tool while you can and then use the open end or fingers to back the bolt the rest of the way out. Got her done but it put up much more of a fight then I expected. All the clunking is gone now and I can hear the actual clicking of the bypasses. On to the next.
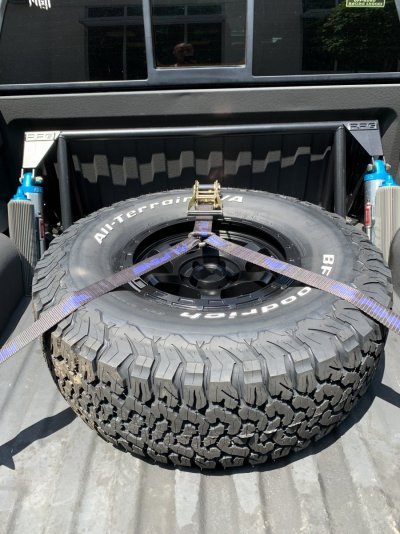
Quick update. Installed a full size spare and Alpine Y-strap.
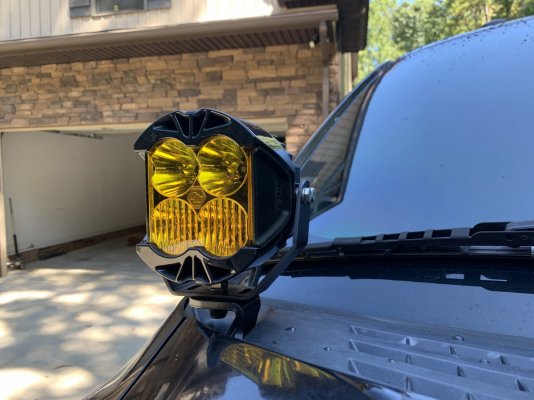
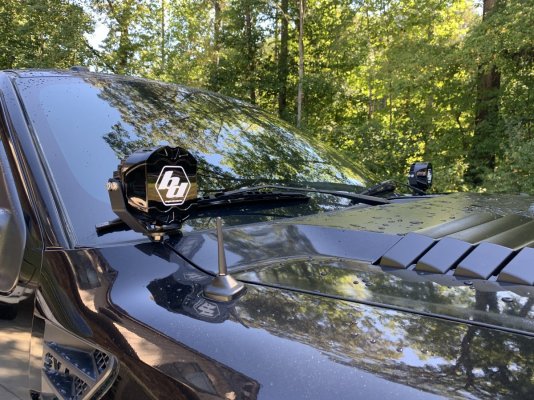
Installed some LP4 A-Piller lights using RPG brackets.
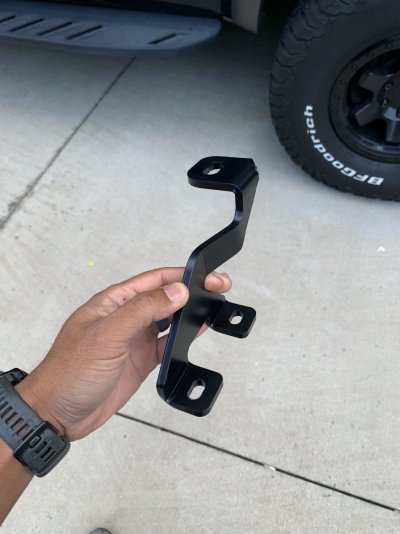
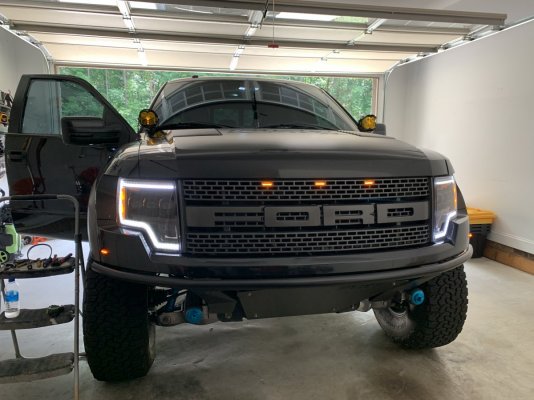
Brackets were beefy and straight forward to install. They do vibrate a bit though. Also 2 of my patch wires (the ones going through the firewall) were exactly the same color (purple). And congrats to the corporate penny pincher that figured out exactly the amount of wire lead to give you in the upfitter switches to **** you off. Three different views (side dash, glove, under dash) and none of them good. They just stare at you and say '**** you'
And washed it
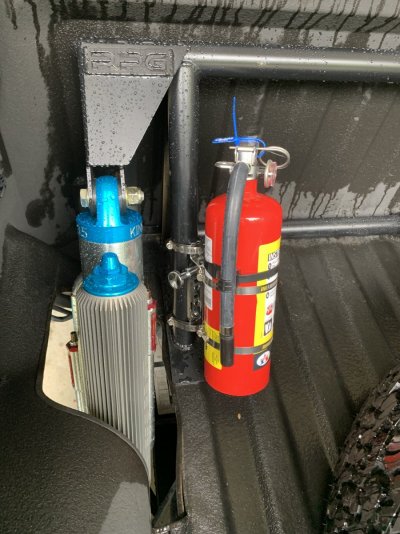
Currently working through an issue with my rear shocks. So for those that don't know, the RST18 is designed for use with Fox shocks. Which are actually shorter overall than Kings. So it looks like the shock will reach full bump before the bump stop. Not good. RPG's solution is custom shafts from King with shorter (welded) rod ends to match the Fox shock. At the cost of $150 per shaft and two week lead time which would require swapping the shafts out and probably some tooling. Not a fan of that solution. I'm going to cut these lower shock tabs off and clock them lower on the axle. More to come on that later. So yeah we have an event in less than two weeks. Glad I didn't find out then.

Installed some LP4 A-Piller lights using RPG brackets.


Brackets were beefy and straight forward to install. They do vibrate a bit though. Also 2 of my patch wires (the ones going through the firewall) were exactly the same color (purple). And congrats to the corporate penny pincher that figured out exactly the amount of wire lead to give you in the upfitter switches to **** you off. Three different views (side dash, glove, under dash) and none of them good. They just stare at you and say '**** you'

And washed it

Currently working through an issue with my rear shocks. So for those that don't know, the RST18 is designed for use with Fox shocks. Which are actually shorter overall than Kings. So it looks like the shock will reach full bump before the bump stop. Not good. RPG's solution is custom shafts from King with shorter (welded) rod ends to match the Fox shock. At the cost of $150 per shaft and two week lead time which would require swapping the shafts out and probably some tooling. Not a fan of that solution. I'm going to cut these lower shock tabs off and clock them lower on the axle. More to come on that later. So yeah we have an event in less than two weeks. Glad I didn't find out then.
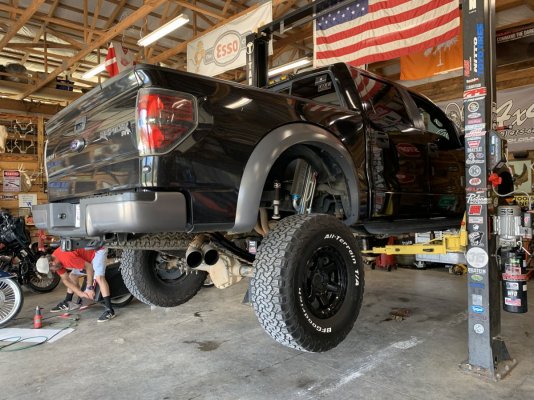
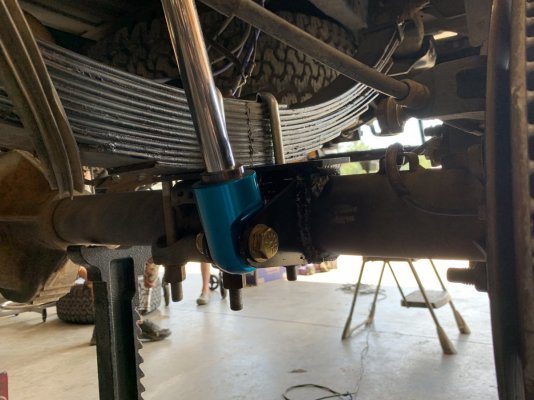
Got the lower shock tabs squared away last weekend in prep for our Durhamtown event this weekend. Took her to a shop with a lift so that I could get the rear properly drooped out:
When working through solutions, I was told anywhere from $125 to $450 for shock mounts some with a 2 week lead time. Then I found A&A Manufacturing. I was able to buy some mounts that could work for $5 a piece plus $10 shipping and some tabs for $3 a piece. Ordered both sorts just to give myself some options. They are in the middle of the country so I got parts in 2-3 days instead of a few weeks lead time as some are not in stock and coming from across the country.
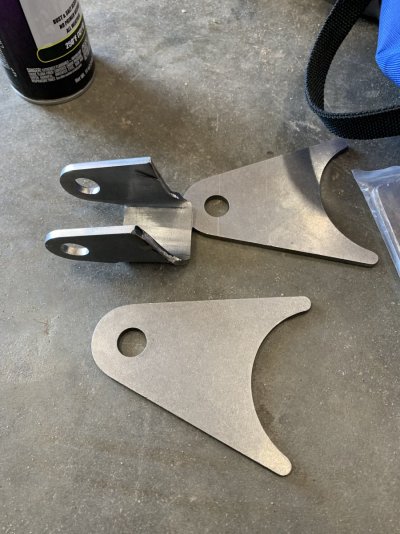
Could have made both work, but I decided to go with the birdcage tabs instead of the U shaped mount.
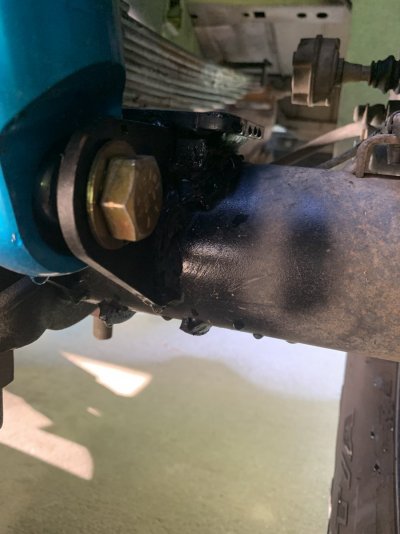
Hard to tell from pictures, but I was able to get them set up like I wanted to effectively putting the shocks in the ride zone and allowing adequate bump and droop travel.
BEFORE
AFTER
COIL BOOTS, SPRINGS, PELLETS
Replaced these yesterday. I noticed a lot of corrosion on the resistors the last time I had these out, so I figured it couldn't hurt. Was cheap and easy enough to do.
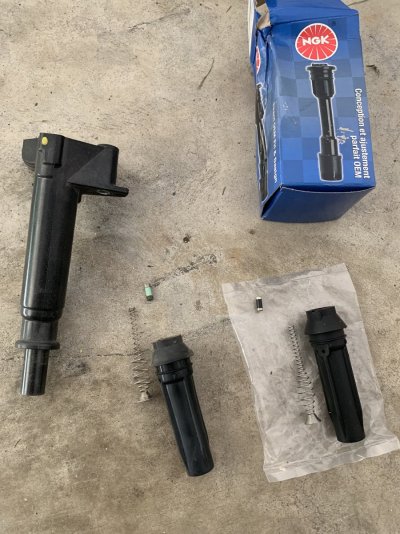
Again, while it's not completely gone, I can say that this significantly smoothed out my lumpy shudder/stumble at idle and super low speed. Could definitely make a case for weak spark with the amount of corrosion on the pellets that came out. I'd say give it a shot if you're experiencing this symptom.

When working through solutions, I was told anywhere from $125 to $450 for shock mounts some with a 2 week lead time. Then I found A&A Manufacturing. I was able to buy some mounts that could work for $5 a piece plus $10 shipping and some tabs for $3 a piece. Ordered both sorts just to give myself some options. They are in the middle of the country so I got parts in 2-3 days instead of a few weeks lead time as some are not in stock and coming from across the country.

Could have made both work, but I decided to go with the birdcage tabs instead of the U shaped mount.
Hard to tell from pictures, but I was able to get them set up like I wanted to effectively putting the shocks in the ride zone and allowing adequate bump and droop travel.
BEFORE

AFTER

COIL BOOTS, SPRINGS, PELLETS
Replaced these yesterday. I noticed a lot of corrosion on the resistors the last time I had these out, so I figured it couldn't hurt. Was cheap and easy enough to do.

Again, while it's not completely gone, I can say that this significantly smoothed out my lumpy shudder/stumble at idle and super low speed. Could definitely make a case for weak spark with the amount of corrosion on the pellets that came out. I'd say give it a shot if you're experiencing this symptom.
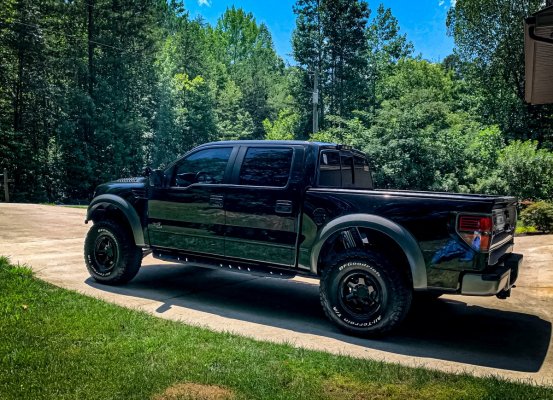
Our Durhamtown even (Georgia Off-road Adventures) event went down a couple weekends ago. Was great as always, hanging with Raptor enthusiasts. Finally got to truly shake down all of the work I've put in recently. She did great.
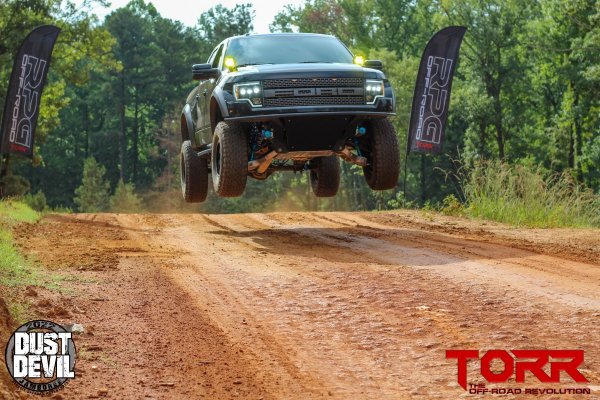
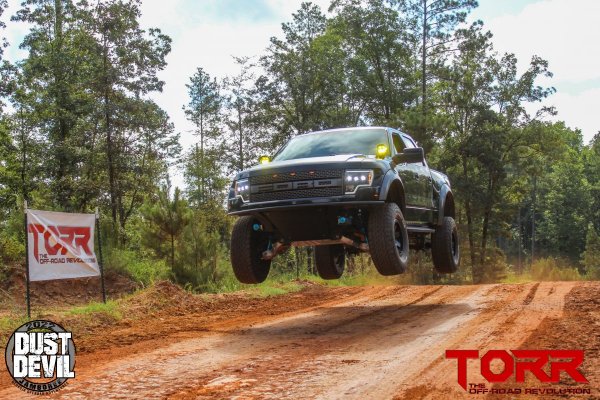
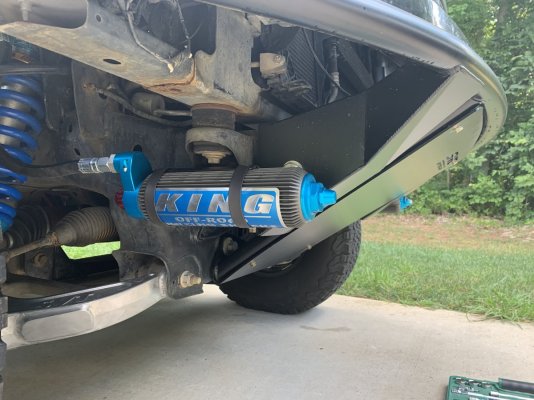
Had one incident with my driver side front reservoir bracket. Totally my fault. I ordered some Forged Offroad brackets. Needed a little bit of modification to work on my application, but I like the solution. Seems solid and was able to move the resi's up about 1/2" and back 1" without changing the hose or fittings.
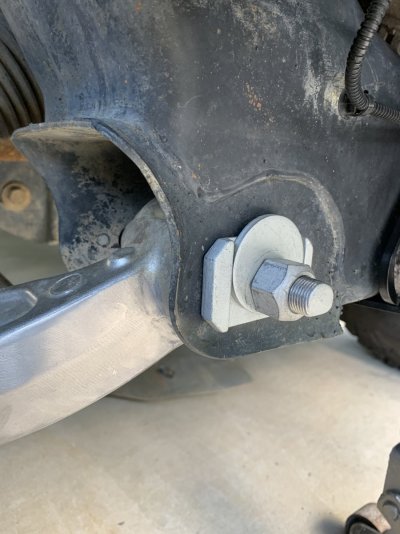
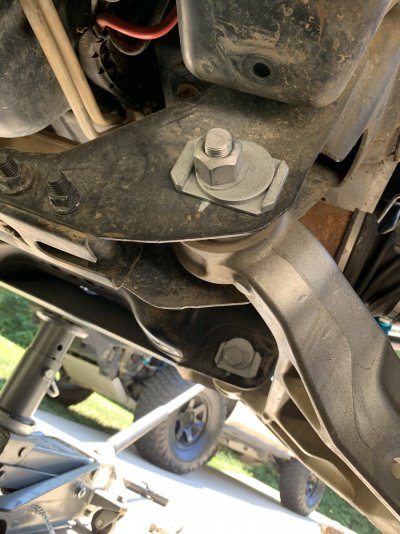
Installed some caster/camber adjusters that I got from my good buddy on here. Went around and around forever with a couple shops trying to get this thing aligned. Good now.


Had one incident with my driver side front reservoir bracket. Totally my fault. I ordered some Forged Offroad brackets. Needed a little bit of modification to work on my application, but I like the solution. Seems solid and was able to move the resi's up about 1/2" and back 1" without changing the hose or fittings.

Installed some caster/camber adjusters that I got from my good buddy on here. Went around and around forever with a couple shops trying to get this thing aligned. Good now.


Similar threads
- Replies
- 0
- Views
- 1K
- Replies
- 138
- Views
- 49K
- Replies
- 23
- Views
- 30K
Staff online
-
Big BlueAdministrator
Members online
Total: 3,695 (members: 12, guests: 3,683)


