Thanks for the info on the S2 Sport amperage! I knew it shoudln't be anywhere close to the 5 amp limit of the switch.Nice organized write up and excellent pics. Using upfitters adds to complexity but worth it if you want to control it. Tapping into the reverse wire of trailer harness was a breeze.
From BD website, draw for pairs of S2 Sport is 1.8 amps and 3.4 amps for Pros.
Sent from my iPhone using Tapatalk
You are using an out of date browser. It may not display this or other websites correctly.
You should upgrade or use an alternative browser.
You should upgrade or use an alternative browser.
My BD S2 Reverse Light Kit Install
- Thread starter Gerald
- Start date
Disclaimer: Links on this page pointing to Amazon, eBay and other sites may include affiliate code. If you click them and make a purchase, we may earn a small commission.
I clipped the wire on this harness. Is this the wrong one to use? Looks different than yours?
View attachment 134524
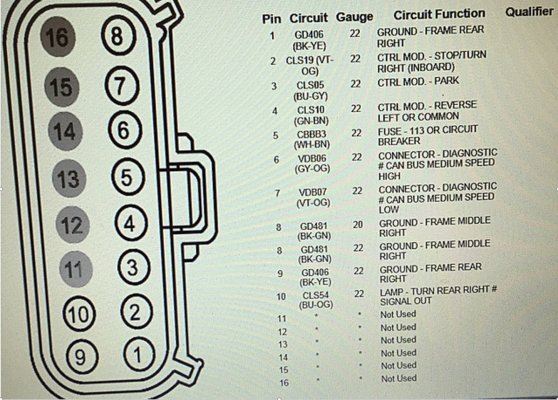
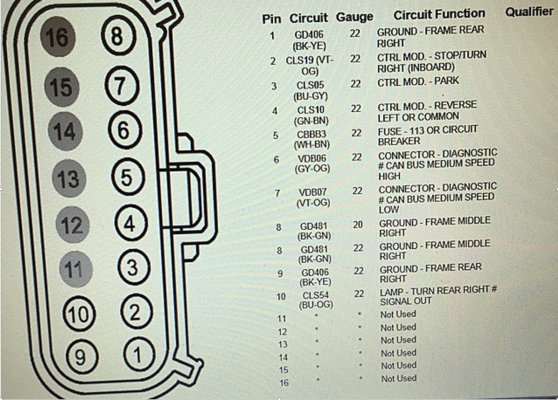
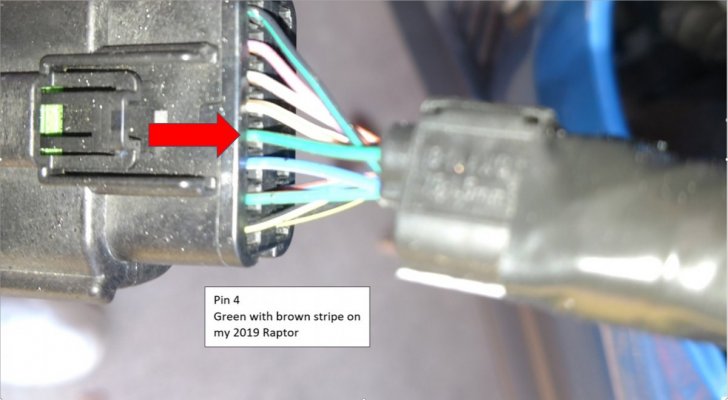
Yep, the taillight connector is different in my 2019 than what your picture shows. I thought I had remembered mine was 4 wires x 2 rows, but in looking at the picture provided in the instructions, it's actually 3 wires x 2 rows. See pic below, that is what mine looked like.
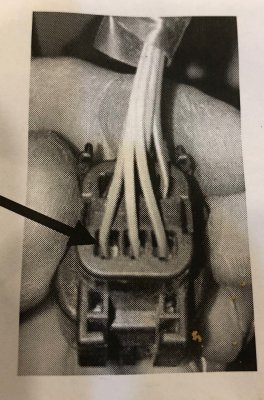
I seem to recall seeing your connector in another picture somewhere. I think maybe it was in a post where someone was connecting onto the trailer light connector to access the reverse circuit. That is an alternative approach to access the reverse circuit for these lights.
I hope you finally got the lights to turn on when the truck is placed in reverse. Good lcuk!!
- Joined
- Jul 18, 2017
- Posts
- 2,972
- Reaction score
- 1,385
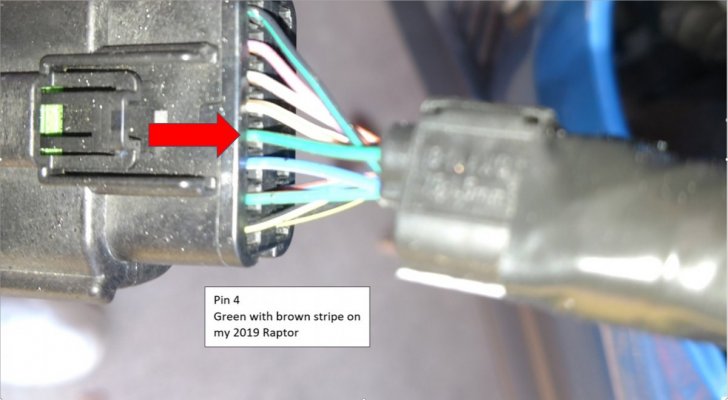
Yeah it looks like Baja's instruction manual shows a different plug. The wire color however is the same (The green wire w/brown stripe).
Their manual must have been from maybe a pre-production Raptor or something, as even in the instructions the bolts they are using to mount the S2 to the bracket, are not the same ones they give you in their kit. The heads are different on the bolt.
BUT, if you used the Green Wire W/Brown Stripe you are good to go
Latest update: When we made the connection to the upfitter switch, we accidently snipped the provided connector in half. So we had to cut off the connector from the wire and spliced them together, bare wire to bare wire. After twisting them together, I wanted to apply some solder to get a really good connection/contact on the wires and to keep it secure. I searched for my solder and could only find some plumber's silver solder (Oatey brand) that I had. I thought silver solder sounded pretty good and should work just fine. So I used that for the connection before putting the heat shrink insulation over the connection. Well I finally did a web search to see if there would be any issues using plumber's solder versus electrical solder. And the results were not what I was hoping for. 
Apparently plumber's solder has some acid in it to help clean the surface really well to ensure a good bond. The acid can degrade or corrode the wires and cause a bad connection. So over time, I could lose the upfitter control over the S2 lights.
I do plan to add another light to the bedside soon. So when I make that connection to the upfitter switches, maybe I'll cut the old S2 connection out and redo it with the proper solder.
Who knew plumber's and electricians can't get along and use common solder!!
Last edited:
Very interesting. I have a 2019 and my taillight connector is definitely like the photo in the instruction manual and not like this photo you posted. Here is a picture of my connector after I placed the clip onto the correct wire.
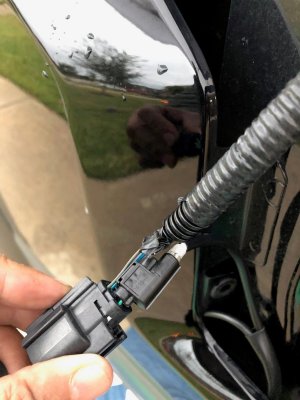
I wonder if the difference in connectors is associated with BLIS versus non-BLIS. I do not have the BLIS tailight assembly.
Last edited:
Very interesting. I have a 2019 and my taillight connector is definitely like the photo in the instruction manual and not like this photo you posted. Here is a picture of my connector after I placed the clip onto the correct wire.
View attachment 135256
I wonder is the difference in connectors is associated with BLIS versus non-BLIS. I do not have the BLIS tailight assembly.
Possible. All of the 2019+ we’ve had in the shop have the larger connectors.
Topshot GT
Member
I just in’s
Talked mine today, decided to connect to the trailer wiring, could not have been easier. Didn’t have to take out taillight. Works perfect..... absolutely love these lights
Talked mine today, decided to connect to the trailer wiring, could not have been easier. Didn’t have to take out taillight. Works perfect..... absolutely love these lights
Winchester30
FRF Addict
This write up inspired me to re-route my wires through the frame, looks so much better now.
Also wrapped the wires in braided nylon going through the frame.
Also wrapped the wires in braided nylon going through the frame.
Similar threads
- Replies
- 2
- Views
- 843
- Replies
- 0
- Views
- 505
- Replies
- 7
- Views
- 1K
- Replies
- 2
- Views
- 730


