My BD S2 Reverse Light Kit Install

Disclaimer: Links on this page pointing to Amazon, eBay and other sites may include affiliate code. If you click them and make a purchase, we may earn a small commission.

Gerald

Full Access Member
Joined
Sep 2, 2019
Posts
440
Reaction score
813
Location
Houston
We did Christmas a little early since the kids were in town. So I was able to get my BD S2 Reverse Light Kit from the under the tree! After our gift openings, I went outside to begin the installation process. I had seen some threads where reverse lights were installed and decided to try and document my install and capture my questions, confusing things, and problems I had. Hopefully I can also provide some insight for the next Raptor owner who wants to install these lights.

The BD S2 Sport Reverse Light Kit I purchased was from 4x4TruckLEDs (Forum Vendor). I purchsed them on the Black Friday deals and got the upfitter harness for free. BD was also running a $50 rebate on the S2 lights, so I chose them over the S1 lights. I figured either light would throw plenty of light behind the truck when in reverse. So the $50 rebate was the deciding factor in which light I purchased.

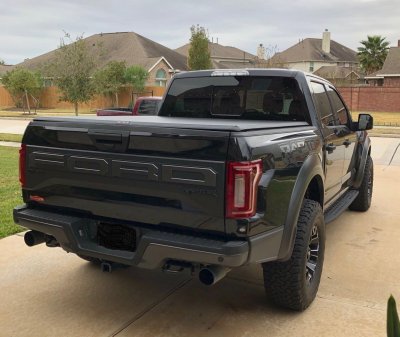
Here is the before picture of my Raptor. Looking forward to the installation. Here are a few more important tools needed to help with the installation!!
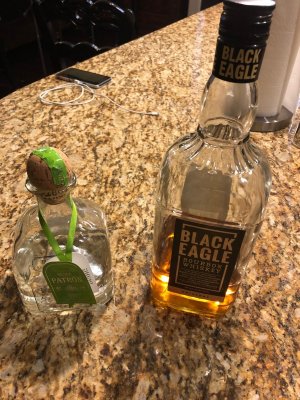
Raptor Before.jpg Alcohol.jpg
 
OP
OP
Gerald

Gerald

Full Access Member
Joined
Sep 2, 2019
Posts
440
Reaction score
813
Location
Houston
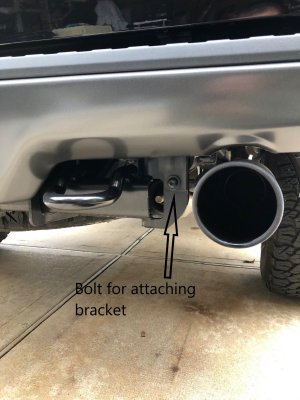
I guess I should mention that I have a 2019 SCREW. I think there might be some subtle differences between years. Anyway, here is the mounting location, as specified in the instructions I received.

Mount Location.jpg

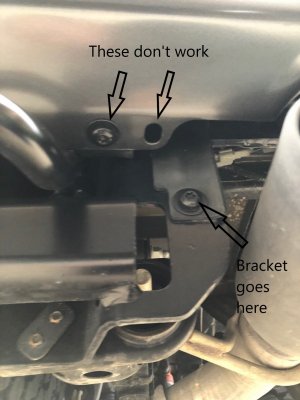
For some reason, in reading other installs, I had thought that the mounting bracket was mounted on the underside surface of the bumper. See picture below where the arrows show a potential bolt and a hole. Maybe that is the case for 2017 or 2018 versions. For my 2019, the mounting bolt is the picture above. Anyway, the bracket would not work in either of those two locations in the bottom picture.

Mount Location Upward View.jpg
 
OP
OP
Gerald

Gerald

Full Access Member
Joined
Sep 2, 2019
Posts
440
Reaction score
813
Location
Houston
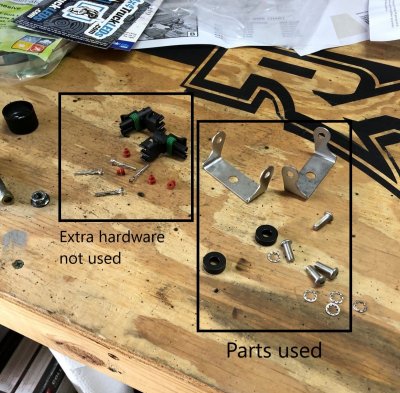
I opened up the bags of hardware that came with the lights and placed on my workbench. There were some extra hardware (noted in the picture) that I didn't need ot use. I'm not sure what these parts would have been used for. Perhaps if you don't use the special harness that also takes the wires to the upfitters, these pieces might be used. All I know is that they were not needed for my install.

Various Pieces 2.jpg
 
OP
OP
Gerald

Gerald

Full Access Member
Joined
Sep 2, 2019
Posts
440
Reaction score
813
Location
Houston
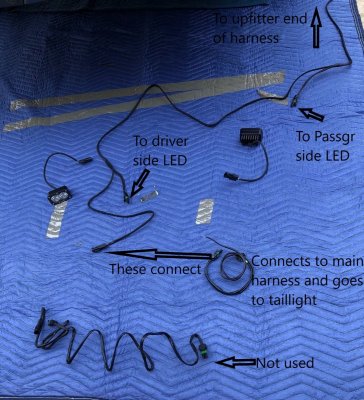
Here are the wire harness pieces.

Various Pieces.jpg

The long harness is the special upfitter wire harness that allows the LEDs to be connected to one of the upfitter or auxilliary swithces in the cabin. The wire harness in the bottoom of the picture was not needed. Again I think this harness would be needed if you didn't use the special upfitter harness. The special upfitter harness has great connectors that make the connections to the LEDs and to the tailight very easy.
 
OP
OP
Gerald

Gerald

Full Access Member
Joined
Sep 2, 2019
Posts
440
Reaction score
813
Location
Houston
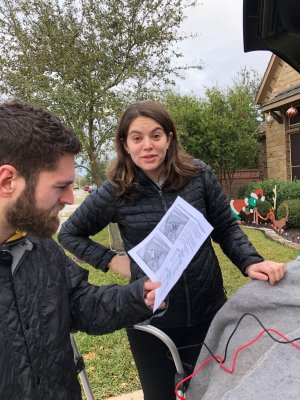
The first debate was regarding the wire harness routing from the rear of the truck to the engine compartment. I've read a few threads/posts where some routed inside the frame and some routed outside the frame. I had to bring in the big brains!

K & Z.jpg

That's my daughter and her boyfriend. She has a BSEE degree from MIT and he is a computer science and software engineer. They live up in Maryland and are in town for Christmas. So I had to take advantage of having them here! After a little debate, we decided to try and route inside the frame first. If that didn't work, we would then go outside. So the challenge was on!!
 
OP
OP
Gerald

Gerald

Full Access Member
Joined
Sep 2, 2019
Posts
440
Reaction score
813
Location
Houston
More of the installation posts to come tomorrow..........................
 
OP
OP
Gerald

Gerald

Full Access Member
Joined
Sep 2, 2019
Posts
440
Reaction score
813
Location
Houston
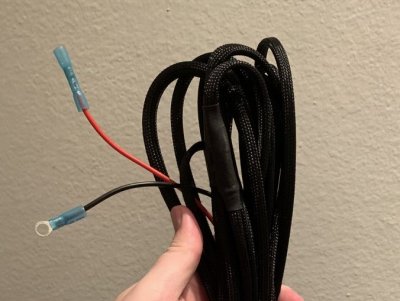
I purchased a cheap fish tape from Harbor Freight to help with the routing of the wire through the frame. The end of the long upfitter harness has two wires, one for ground and one for connecting to the upfitter bare wire. See picture below.

Upfitter Harness.jpg

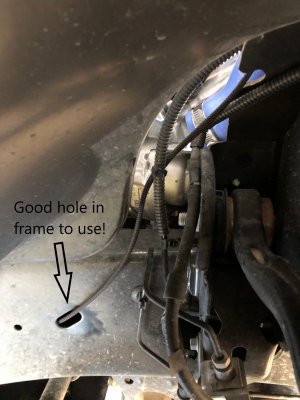
We taped the two wires together to help with the routing. There is a nice hole in the frame that can be accessed from the passenger side wheel well that is fairly well alligned with the rear of the engine compartment. So that is the hole we chose for the harness to come out of the frame and then get routed up into the engine compartment. Picture of the hole we used is below.

Harness Thru Frame Under Engine.jpg

Spoiler alert: This is a post harness routing picture. So you can see we were eventually successful in getting the harness routed through the frame!
 
OP
OP
Gerald

Gerald

Full Access Member
Joined
Sep 2, 2019
Posts
440
Reaction score
813
Location
Houston
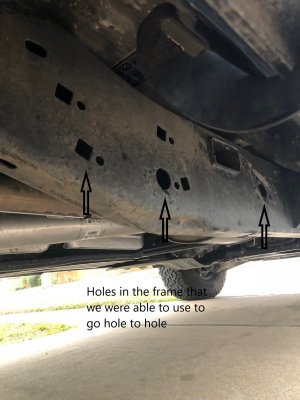
Our first attempt was to start the fish tape through this hole and try and push it all the way to the back of the truck. That didn't work for sh** with the crappy fish tape I bought. It would just bind up and then start coiling up after a few feet. So we decided to just try and push the wire harness through from the back. That worked well for only about 2 feet to another good access hole. After that, we used the fish tape from a much closer distance, access hole to access hole. That worked out really well. We could pull the harness through each hole and then do the same for the next hole. It was a little bit challenging on some holes which weren't as large, but with a little patience we got it all the way through the frame!! Success!!
 
OP
OP
Gerald

Gerald

Full Access Member
Joined
Sep 2, 2019
Posts
440
Reaction score
813
Location
Houston
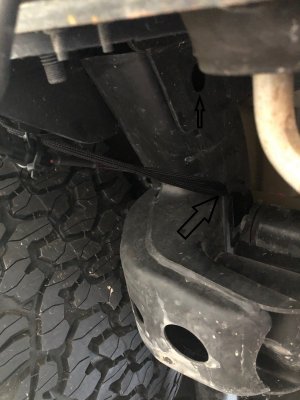
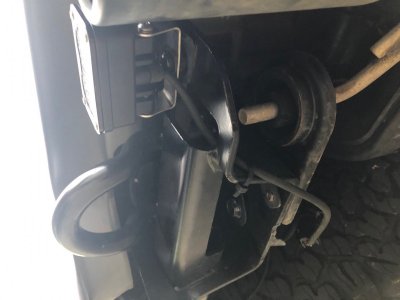
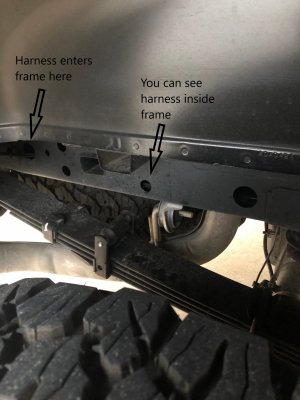
Here are a few pics to show how the routing was done through the frame. From the S2, we routed the harness up and over the rear mount of the leaf spring and then entered a good size hole in the frame. You can see a hole I identified with another arrow in the pic below that could have been used to enter the frame, but it was a little tight to get your hand and push the harness. So we decided to enter the frame at the next best opening.

Frame Routing Leaf Spring.jpg

Here is pic that show the harness from the back of the S2. You can see one of my zip ties I used to attach the harness hitch frame.

Frame Routing From LED.jpg

Here is a pic that shows the routing after the rear mount of the leaf spring and where the harness entered the frame. You can see additional holes we used to slowly use the fish tape to go from hole to hole. You can see the harness in one of the holes!

Frame Routing Rear Wheel Well.jpg

And here is another pic showing the holes we used mid frame as we continued to route the harness.

Frame Routing Hole Ex.jpg
 
Top