
andreb
Full Access Member
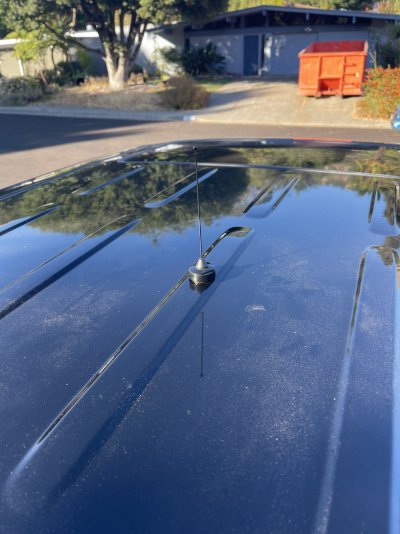
If you are into radios you know antenna placement is critical for the best performance. There are lots of antenna mounts for the Raptor but few take advantage of the ground plane created when installed dead center of your roof. That install can be tricky when you have a Super Crew and a sunroof! Here's how I did it...
This is the kit I installed: https://midlandusa.com/products/mic...r9q6fWCRV5gfbjyn8a5sq-IcJqZYctFUaAt_TEALw_wcB
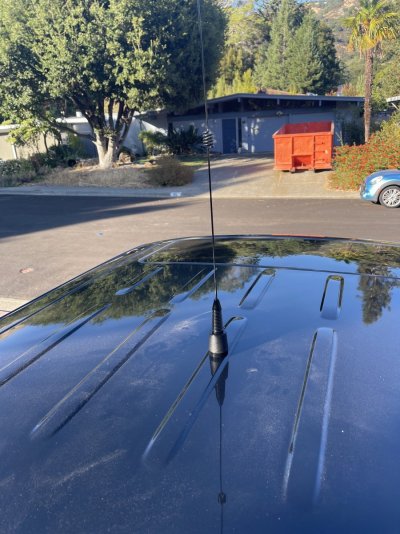
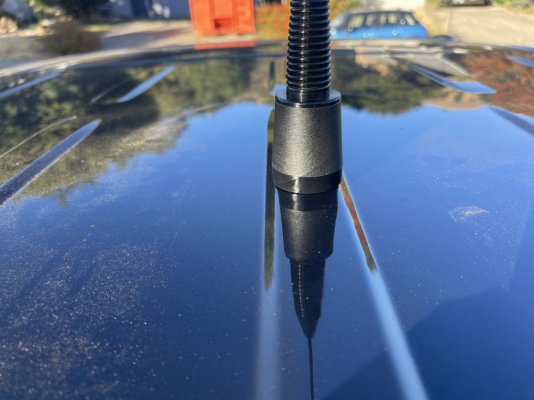
It's the only one I could find that is low profile (the coax exits the base of the mount at 90 degrees) and requires a small 3/8" hole in your roof. The NMO mount is standard for VHF/UHF radios and this works great with the stubby Midland antenna that came with my MXT500 and the optional 6 db gain whip antenna.
Start by dropping the headliner at the rear so you can access the underside of the roof. Plenty of videos on doing that. After the trim and coat hooks are removed, the headline is held up with a magnetic post (genius!). When you pop it off be careful to not crease the liner significantly. I did not pull the B pillar trim so that helps it from falling too far but also limits your work space. I contemplated removing the headliner all together and the rear seat but that seemed like overkill. I also had to confirm there is enough space to install the mount and not have it interfere with the sunroof or drive motor. My hole is directly above the motor, there is plenty of room for this mount.
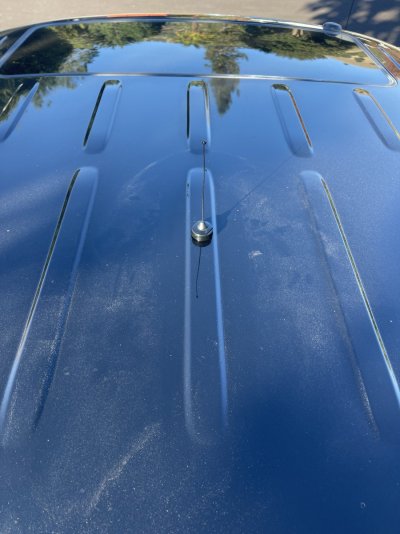
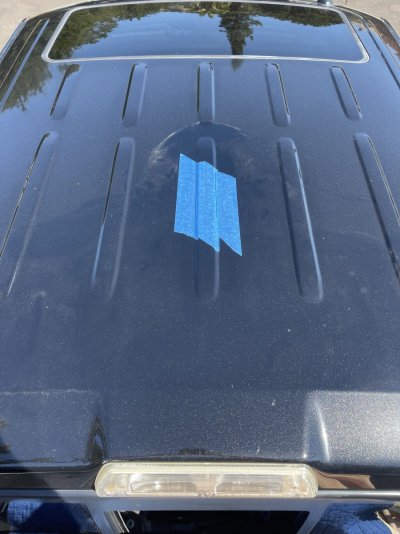
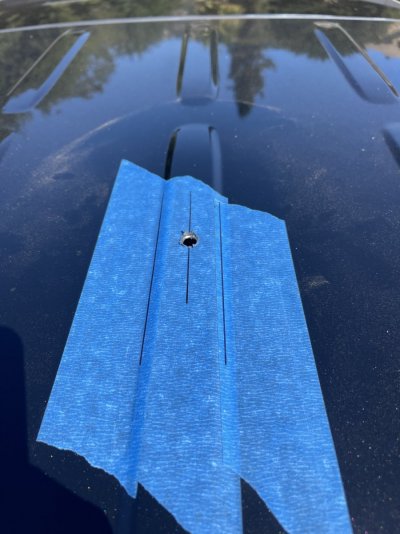
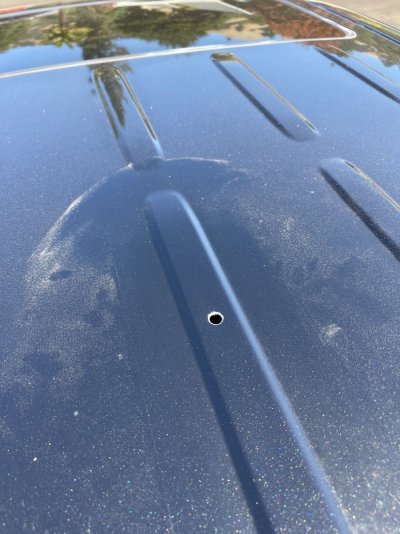
On the Super Crew you have about 44.5" of sheet metal from the rear edge of the sunroof to the rear roof line before it angles down to the third brake light. I chose 22.25" centered and taped out a space. I used the edges of the roof bump line to center the hole. With a dimple center punched (use an automatic one) I drilled 3/16" pilot hole. Use a short drill bit if possible or a stop collar to prevent hitting the drive motor assembly. I placed a scrap piece of wood between the roof and motor to keep the roof from collapsing. Once the pilot hole was drilled I switched to a large step bit and went up to 3/8" De-bur the hole and prime or paint any bare metal.
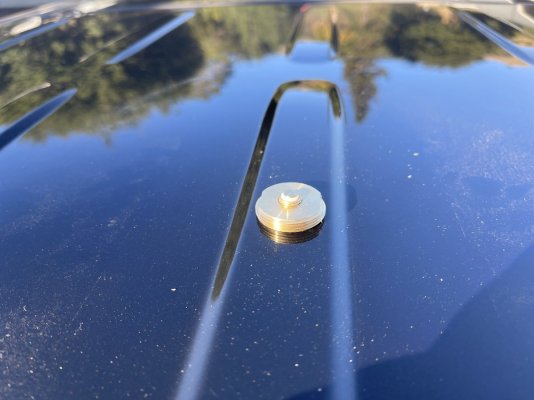
I test fit the mount and found I needed a small spacer to adjust how far the contact sticks out of the mount. I found a perfect size washer in my junk bin and sanded two flats into it so it fits under the special washer provided. The special washer spreads the load but also bites into the sheet metal to create a ground. I was worried about the roof not being stiff enough to support the antenna but after the test fit I stopped worrying. It's pretty stable even with the longer whip and I imagine if you really hit something hard the antenna would break away from the base before before causing too much damage.
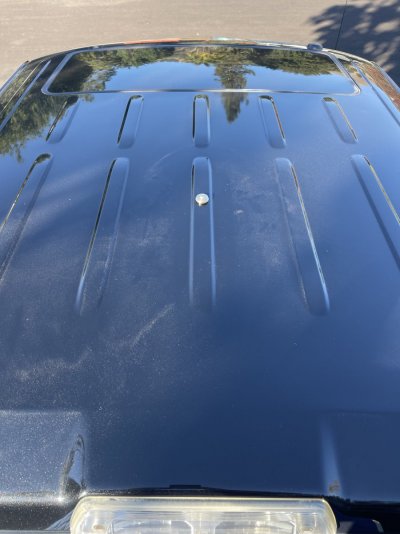
Before threading the mount base on I used some silicone around the base of the center post to prevent leaks. The mount base also has an O-ring and so does the whip antenna. I adjusted the base so the whip O-ring seals against the sheet metal when installed. The included stubby doesn't have an O-ring but I plan to add one. I routed the coax rearward and cable tied it onto the longitudinal bar that holds the drive motor then continued down onto the drivers side C pillar, under the jam trim plates, past the B pillar and made a right at the front of the drivers seat. I pulled the carpet up from the front then followed the HVAC routing coming from the center console. There was maybe a foot of extra cable so I looped this up behind the center console/SYNC. DO NOT coil left over cable.
The install took the better part of a day but I was taking my time and have have never had the headliner out/dropped before. I will hold my breath until the first rain or wash to see if it sealed properly. I keep the stubby on around town and on the highway, then switch to the whip off road so the mount will always be covered. Overall I am totally happy with the looks and the location. Glad I spent the time, its way better than the magnetic mount and routing the coax in through the rear slide lol. Someday I will borrow a SWR meter and see just how effective the location is. Until then, if you catch me going down the road shout out for WRYR258 on GMRS 16/19 and say hi.
This is the kit I installed: https://midlandusa.com/products/mic...r9q6fWCRV5gfbjyn8a5sq-IcJqZYctFUaAt_TEALw_wcB
It's the only one I could find that is low profile (the coax exits the base of the mount at 90 degrees) and requires a small 3/8" hole in your roof. The NMO mount is standard for VHF/UHF radios and this works great with the stubby Midland antenna that came with my MXT500 and the optional 6 db gain whip antenna.
Start by dropping the headliner at the rear so you can access the underside of the roof. Plenty of videos on doing that. After the trim and coat hooks are removed, the headline is held up with a magnetic post (genius!). When you pop it off be careful to not crease the liner significantly. I did not pull the B pillar trim so that helps it from falling too far but also limits your work space. I contemplated removing the headliner all together and the rear seat but that seemed like overkill. I also had to confirm there is enough space to install the mount and not have it interfere with the sunroof or drive motor. My hole is directly above the motor, there is plenty of room for this mount.
On the Super Crew you have about 44.5" of sheet metal from the rear edge of the sunroof to the rear roof line before it angles down to the third brake light. I chose 22.25" centered and taped out a space. I used the edges of the roof bump line to center the hole. With a dimple center punched (use an automatic one) I drilled 3/16" pilot hole. Use a short drill bit if possible or a stop collar to prevent hitting the drive motor assembly. I placed a scrap piece of wood between the roof and motor to keep the roof from collapsing. Once the pilot hole was drilled I switched to a large step bit and went up to 3/8" De-bur the hole and prime or paint any bare metal.
I test fit the mount and found I needed a small spacer to adjust how far the contact sticks out of the mount. I found a perfect size washer in my junk bin and sanded two flats into it so it fits under the special washer provided. The special washer spreads the load but also bites into the sheet metal to create a ground. I was worried about the roof not being stiff enough to support the antenna but after the test fit I stopped worrying. It's pretty stable even with the longer whip and I imagine if you really hit something hard the antenna would break away from the base before before causing too much damage.
Before threading the mount base on I used some silicone around the base of the center post to prevent leaks. The mount base also has an O-ring and so does the whip antenna. I adjusted the base so the whip O-ring seals against the sheet metal when installed. The included stubby doesn't have an O-ring but I plan to add one. I routed the coax rearward and cable tied it onto the longitudinal bar that holds the drive motor then continued down onto the drivers side C pillar, under the jam trim plates, past the B pillar and made a right at the front of the drivers seat. I pulled the carpet up from the front then followed the HVAC routing coming from the center console. There was maybe a foot of extra cable so I looped this up behind the center console/SYNC. DO NOT coil left over cable.
The install took the better part of a day but I was taking my time and have have never had the headliner out/dropped before. I will hold my breath until the first rain or wash to see if it sealed properly. I keep the stubby on around town and on the highway, then switch to the whip off road so the mount will always be covered. Overall I am totally happy with the looks and the location. Glad I spent the time, its way better than the magnetic mount and routing the coax in through the rear slide lol. Someday I will borrow a SWR meter and see just how effective the location is. Until then, if you catch me going down the road shout out for WRYR258 on GMRS 16/19 and say hi.
Attachments
Last edited: