G's Raptor

Disclaimer: Links on this page pointing to Amazon, eBay and other sites may include affiliate code. If you click them and make a purchase, we may earn a small commission.

OP
OP
E63

E63

Full Access Member
Joined
Feb 7, 2012
Posts
473
Reaction score
325
Location
Poway, CA.
Liner options

I spent quite a bit of time evaluating options for the truck bed liner. Choices are:
Drop in, Spray on (line-X or Rhino-Liner), or Bed-Rug

Drop In liners have some very cool cargo management features that I like, but cargo will slide easily, not good if you are always hauling a lot of materials and tools, great for loading and unloading. They protect the bed to a point but damage from sand and friction can damage the bed underneath. Think of it like putting slip covers over your seats and having them end up wearing the seats anyway, not a good thing.

Spray In liners are permanent. They create a non slip surface that is way better than stock. It is expensive though. I moved some appliances right after getting the truck and scratched the bed up pretty good. Doesn’t take much with the crappy paint they use now a days to limit VOCs . (but don’t get me started on environmentalists…)

Bedrugs come in two different model and you can do partial or the whole thing. They are very light weight, have deep foam that levels out the bed. It is designed to resist stains and can be easily cleaned. The perfectly molded sides zip to the bed cover and everything is attached with industrial Velcro. Cargo does not slide and the resulting surface is soft on the knees. I got mine thru Amazon complete for under $336.84 delivered. (model BRQ04SCK)

Installation was pretty straight forward, I zipped it together and left mine in the sun for a few hours to warm up prior to installing, letting it conform some to the bed. Then it was a simple mater to mark locations for where the cargo tie downs come thru. There are two ways to install. You can remove and re-attach to the outside of the cover, or what I chose to do was to make a small incision with razor blade from back side and simply slide cover one edge at a time. This minimizes installation time and makes it easier to remove cover when necessary. Other suggestions not in the instructions would be to place the Velcro tabs on the ribs instead of the valleys on the tail gate and head wall.

Sorry I did not take any pictures of the install of the rug or the F-1 as both were done quickly with only minor complications and are well documented on the internet by the manufacturers.

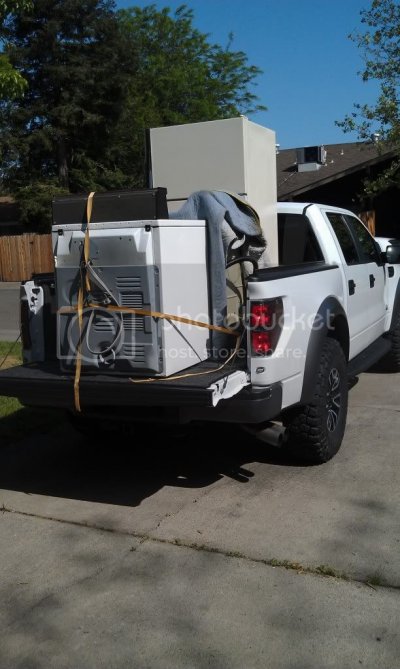
did a 1000 mile weekend trip to deliver a huge load of furniture for my son moving out of the dorms into a house. BedRug worked great to protect stuff, minimize pad wrapping. We also picked up a full size refrigerator , Washer and Dryer for $200 and moved it. This is a case where the BedRug may not have been the best choice as the feet of the Washer and Dryer want to catch. Fridge was on wheels so not much of an issue, but power lifting the washer was a chore.
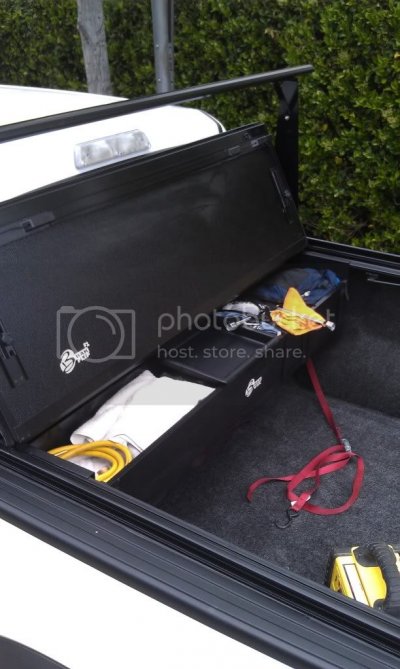
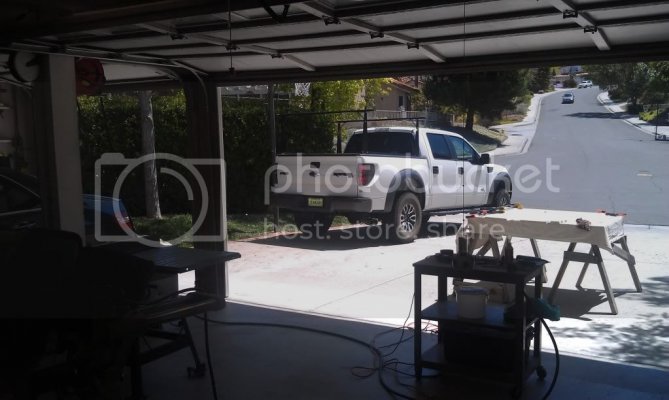
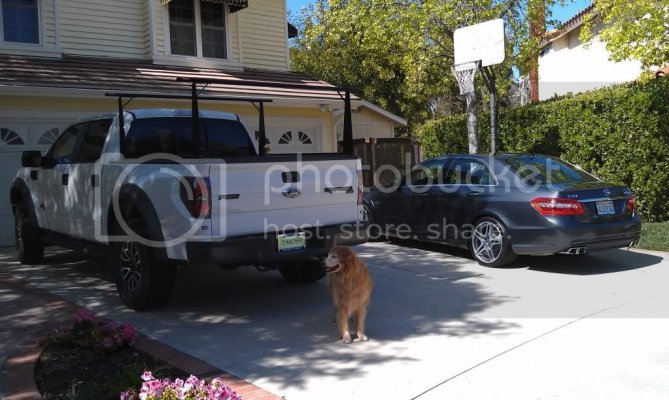
Here is what it looks like completed:

IMAG0514.jpg


IMAG0513.jpg

IMAG0598.jpg
 
OP
OP
E63

E63

Full Access Member
Joined
Feb 7, 2012
Posts
473
Reaction score
325
Location
Poway, CA.
Bed Covers:

Many options for covers, there are soft tops, one piece hard tops, flip back styles from several manufacturers, and roll back styles. For the longest time I went back and forth between the Roll Back and Bak Flip models from bakflip.com
What appealed to me most about the Roll Back design was that it does not obscure the back window when fully opened. Both designs allow you to secure the cover partially opened. The rollback is a little quicker to open and close. Both designs are strong enough for me to stand or sit on. This is another example of how the long wait time for my truck worked to an advantage as the Bak industries just came out with the BakFlip CS. It is a combination of the F-1 BakFlip and a Contractors Rack system.

Cool thing is that the rack is easily removed when not needed and the slight additional height of the side rails is not objectionable

They also included a set of 4 cargo hold downs that I keep behind the back seat that can be quickly and securely deployed without any tools and allows me to have anchor points anywhere along the top rails.

had a wife created emergency Estate sale pick up and got to use. My wife’s urgency became my emergency, and now no desert that weekend, 1000mile road trip to deliver this and a full truckload of home furnishings for my oldest son. Should be interesting.

I also opted to get the BakBox which is a really neat idea. I stored my Nitrogen bottle and emergency supplies in it. (Turned out to be a bad idea - mtf)
th_IMAG0512.jpg
IMAG0486.jpg
IMAG0499.jpg

Installation was completed in an hour or so. At least the first time I did it. I was in such a rush I forgot to install the drain tubes which required removal of the BakBox and to un-velcro the Bedrug, no big deal, took only about 15 minutes. What is more annoying is how the rails attach using a custom “C” clamp. As you tighten, the clamp wants to strip itself off the frame. The best way I found to keep this from happening and still get a strong torque on it is to use a couple bar clamps to counteract the forces while tightening.

The other thing is that the stock rail caps have some raised grooves that stop about 6 inches from the end. I plan on sealing this gap with some black caulk. Some water does run down the inside of the tailgate but the bedrug remains dry except for the crease between tailgate and bed. Not a big deal for me.

Other notables I reported to the manufacturer at time of installation was as follows:
1. do I still need to register the product with you as I purchased direct? (Yes)
2. Thought I would mention that one bracket (holds the cover down near truck window) on the right rail was bent almost 90 degrees, (freight damage?) we simply straightened and completed install
IMAG0468.jpg


3. bag that held hardware for the contractor rail assembly split along seam and we were missing several washers, I used personal stock to complete install.
4. I have concerns about overall functionality for transporting longer boards, pipes etc since there is no support above the front of the Cab. I had an idea that you could mount two long rails on each side and then an additional cross rail in the front. ( I may design my own)
5. The weak link in your system is the weak brackets that hold the track to the truck bed. I suggest modifying the bracket so it can-not twist loose while tightening; make it a semi-circle design. More holding power spread over a larger area and the outside portion will prevent twisting while tightening down.
6. One of the uprights had minor surface scratches.
7. The emergency release handle interferes with normal fold back operation - suggest locating further in board with additional cable length to allow it to be mounted to panel instead of floating freely.
8. The back rubber gasket (near tailgate) does not stop water from running in. Not sure what could be designed to fix this, maybe make it longer, or perhaps make it in an "L" shape so that the tailgate would compress the inside piece like a doorjamb weather stripping.

Regrets? I don’t like the look of the Raptor as a Contractor’s truck nor the whistle the rack makes at about 45PMH, but the functionality gives me the ability to haul longer stuff and still use the bed. I know I paid too much, If I had gone for the simple F-1 and BakBox I could have gotten from Amazon and saved several hundred dollars and could have added the BakBox on Amazon for $214.

As it was I paid $1679 for the CS, $250 for the BakBox and $99 for a set of 4 load stops that slide and lock on the top rails to help secure loads left to right.

There used to be a lot of pictures from Bak Flip's web site but if I list them you would get a virus warning when accessing my build as they have a problem on their web site.

I have had a lot of problems with my Bak-flip, the clamps coming loose and the bak-Box falling down. This has caused significant damage to the bed and bedrug. I have since reinforced the Box and will strap down to the bed and will post up once I get this thread caught up with my build thread from the other Raptor forum. Got a good chunk loaded today!
 

Humvee21

FRF Addict
Joined
Aug 17, 2011
Posts
4,848
Reaction score
538
Like I said on the Z, great build man. I think your build thread is just about to get a little bigger at the end of this month. Congrats in advanced. I'm honored to compete with a man of your dedication.
 
OP
OP
E63

E63

Full Access Member
Joined
Feb 7, 2012
Posts
473
Reaction score
325
Location
Poway, CA.
Radar Detectors

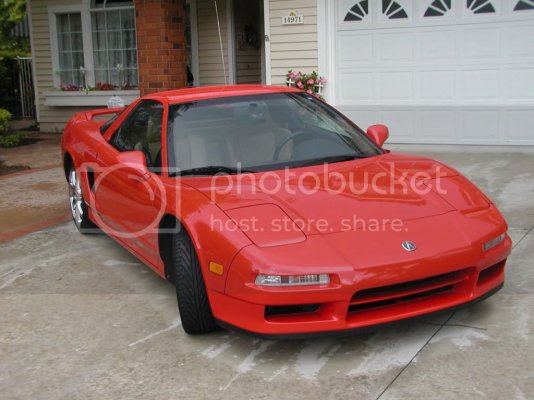
I have been a fan of Valentine 1 detectors since my first one in 1995 that I used on my NSX for 10 years and those that know me wonder why I was never arrested, lets just say I don’t normally go the speed limit while in high performance cars. In 10 years I only got one speeding ticket driving a Ferrari “arrest me red”. Here are pics from from 2005 when I sold the car (it was in mint condition):

Picture002.jpg
Picture001.jpg

Point is the Valentine works. Since it was 15 years old, I decide to take Valentine up on their upgrade offer and sent it back to them and they sent me a new one for $300. One thing I noticed is that the new one is more sensitive, almost to the point of me wanting to turn the thing off and not use it because of all the false alarms. I spoke to the head tech there and he explained that my old one was less sensitive outside the core part of the “K” bands. Luckily the new firmware allows some tweaking to how you want it to work so I set up parameters for it to ignore “K” band signals of 4 bars or less for up to 30 seconds. This has made the most difference as the cops here in Poway all use the “KA” band and Instant on Laser.
Valentine One radar and laser detectors

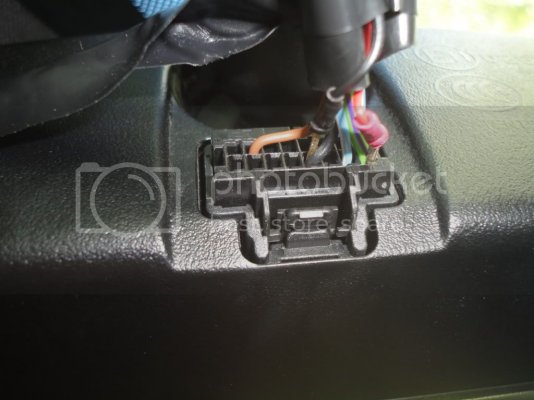
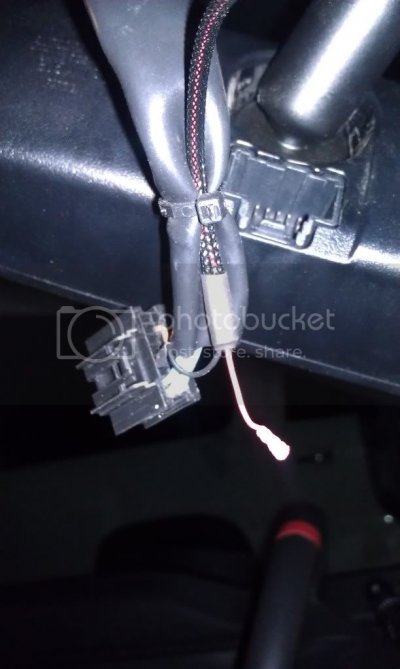
The Valentine has front and rear detection, stealth mounting options and a really strong windshield mount. I have two Valentines, my other is only 10 years old and have moved them into various cars over the years. It always involved fishing phone wires from the rear view mirror to under the dash to grab power. For about $32 plus $6 shipping, I bought the Mirror Tap from J28 Designs, it allows you to tap into the power of the rearview mirror with a ruggedized short phone cable with open leads. This page shows the Mirror Tap and the Blend Mount for the Valentine and the F150

http://store.blendmount.com/f-150-c382.aspx
DSC02013.jpg

I kept the normal suction cup mounts that have always worked just fine for me. Installation was straightforward yet surprisingly difficult for me. It was no problem finding the right place to install each wire using the multi meter. The only hard part was trying to cram the gold plated wire into a connector that already has a wire in it. The instructions say to try all four sides of the wire to see which one has more room. The ground for me went right in, the power connector bent some after several tries and kept coming loose, Finally after four tries I got it stuffed in there good and it has worked flawlessly until I had my windshield replaced two days ago. When the tech pulled the connector from the back of the mirror, both taps came out. When I tried to re-install last night it broke for good.

IMAG0624.jpg
I sent off a replacement request to the manufacturer and received a response same day. new kit was sent at no charge. Great service!

Pros:
Valentine is the undisputed champ in long range detection
It is the only one that has arrows to tell you where the signal(s) are coming from. Lights indicate strength of signal, how many, what type and it has two volume controls, one for initial alert and a second setting for after you acknowledge it.

It lasts a long time and the company stands behind the product. The fact it has not changed much in over 15 years means they made it right.

Cons: City false alarms, It is not the best choice for city driving where there are a lot of passive radar “How fast you are driving” pole displays. (****** is the best in removing these by use of GPS. Once you mark them it doesn’t warn you again. My son has this model, I don’t care for the very loud verbal warnings from what sounded like an annoying bitch IMHO
Note: If the “K” and “X” band false warning continue to bother me I can simply turn them off in the programing mode.

Notes: When I got the replacement kit, I used a little WD40 on the lead, this does help to jam it in, I was able to sink the black wire all the way, the red one , not so much. Do try various angles or positions/sides of the wire and the connector.
 
Last edited:
OP
OP
E63

E63

Full Access Member
Joined
Feb 7, 2012
Posts
473
Reaction score
325
Location
Poway, CA.
What is and what should never be

Or not.

Met up with Jarrett, out near Barstow along with my Sis who is a professional photographer and my two youngest kids to evaluate the RPG truck with 37” tires and the new Stage 4 setup with Fox 3.0 shocks.

The first two pics on this build were done by Lynne Glazer Imagery, additional pics from that outing can be seen here:
http://www.photo.lynnesite.com/Clients/Specialty/Raptor-Fun/

Stage 3 vs State 4 POV .wmv - YouTube

Stage 3 vs stage 4 jump.wmv - YouTube

Not a huge difference in performance on that front launching jump between the two setups, but it was the most fun to watch. The real difference was how the RPG rig blew my doors off going thru the whoops. I was sold.

Next up Prepare for the 37” tires and RPM Stage 4 install.

We had planned to also do UCAs and Tie rods from RPG but alas the Texas Raptor run wiped out RPG’s inventory and since we had the time scheduled we went ahead and did the work knowing full well that we were going to have to remove the front shocks again to do the UCAs

WHY 37” TIRES?
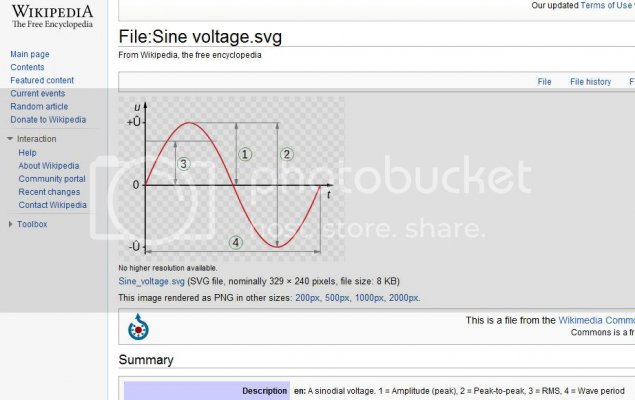
Good question. The extra height of the tire does several important things as it relates to going thru the whoops. First the extra height makes the whoops smaller as it relates to the impact on the suspension. This is measured from the radius of the tire in relation to the peak to peak amplitude of the whoop
5-3-201210-22-52AM.jpg

The extra height brings extra cushion to absorb shock (measure from the wheel to outside of tire), it also helps you to avoid wheel damage from large rocks

WILL 37” TIRES EVEN FIT?
My understanding is that it depends on what wheels you wish to use as the “Offset” will change the characteristic of the tire to the wheel well. Once again I listened to the experts at RPG. Corey has done several and knew exactly how to modify the stock Raptor wheel wells.

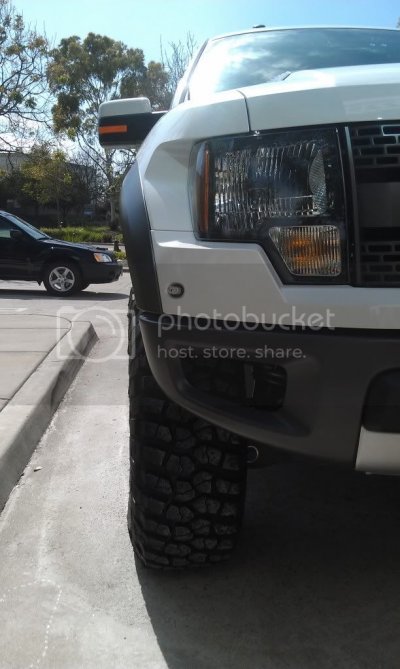
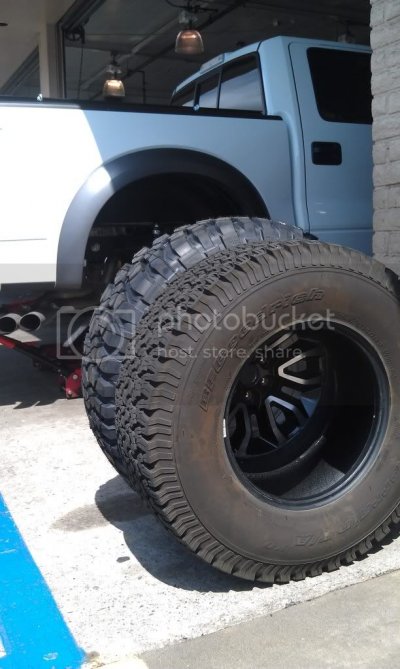
Here is another way to go: Fiberglass Fenders from RPG, look at the clearance on the RPG truck with 37” tires
IMAG0470.jpg

IMAG0471.jpg

IMAG0472.jpg

IMAG0473.jpg
 
OP
OP
E63

E63

Full Access Member
Joined
Feb 7, 2012
Posts
473
Reaction score
325
Location
Poway, CA.
Rpg installation phase ii

Here is a pic showing Bed Rug, BakFlip and Contractor rack, getting ready to tear into the Raptor.
DSC01974.jpg

I was pleasantly surprised to see Jarratt drive up along with Corey, together with my good friend Noah we had a whole of stuff going on all at once. We were modifying fenders on one side while the new Fox shocks were going in on the other. I was switching back and forth between helping do the work and trying to document everything. Frankly I liked the work more and often forgot or couldn’t take enough pics.

So lets continue the dialog on the fender modifications first. We worked on the front fenders first (frankly we forgot about the rears when we had the tires off and did later with the tires still on, they were very simple compared to the front.)

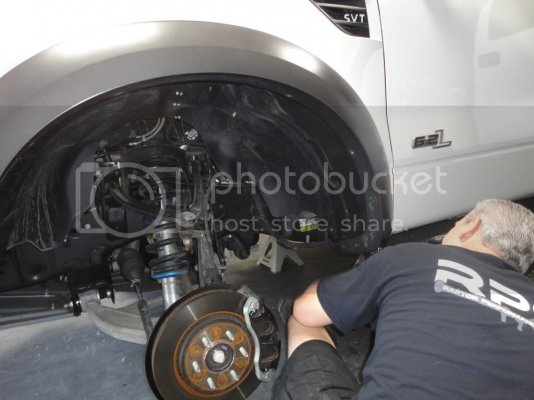
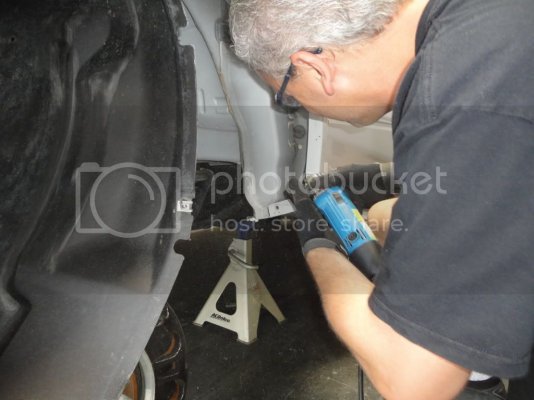
First remove the fender flare buy popping out the push in plugs on the inside of the wheel well. The carefully working from the bottom up lift up on the edge to slide off the clip from the flare leaving the clip snapped into the bumper, continue this process around the lip being careful to not damage the clips. Once you have the flare off use a small screwdriver to remove the clips from the fender by guiding the **** thru one at a time. Slide these back onto the flare for later re-attaching. Next remove the 5 small screws that hold the wheel liner into place. Leave the sixth – last screw in place closest to the bumper. Work out the liner from fender edge and pull back towards bumper.
The fender itself is made up of both plastic (outside) and metal inside. Trim both the plastic and metal using a angle grinder equipped with narrow ferrous blade.

Here is short video showing the master Corey at work: http://s1266.photobucket.com/albums/jj521/gglazer/Fun Raptor Pics/M4H01999.mp4

Once the trimming is done it is time to flatten the knife edge with a Sledge Hammer. It’s a lot of work and Corey, Noah and myself took turns with partner holding the liner back:

DSC01998.jpg
DSC01995.jpg

DSC01994.jpg

DSC01989.jpg

DSC01988.jpg

DSC01987.jpg
DSC01986.jpg


http://s1266.photobucket.com/albums/jj521/gglazer/Fun Raptor Pics/M4H01996.mp4

Once this is done put everything back in the reverse order. One trick Corey did was to remove one of the bolt clips and move to the far position near door sill and used a bolt instead of the push pin to better secure the flare. The next step will be for me to re-install my front mud flaps to seal the opening from where we trimmed the inside of the flare. I am going to wait until the new tires get put on so I can properly locate and align.

Here is the rear wheel before we did the Fox 3.0
DSC01977.jpg


As I mentioned earlier we forgot about the rear knife edge and RPG had already put away all their tools, so I brought the forklift over from the other suite and lifted the rear of the truck by the tow hooks. Worked great. BTW its not an echo you hear, it was a race of sorts with Noah pounding on one side and me on the other.

http://s1266.photobucket.com/albums/jj521/gglazer/swinginghammeronrearfender.mp4

With all that pounding the crack in my windshield tripled in size

DSC02010.jpg


And even though I had pressured washed the underneath of the truck a ton of dirt vibrated loose from the running rails.

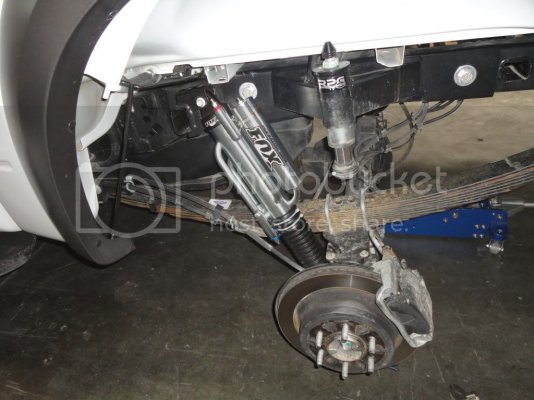
Note: I ran like this for some time, as the new springs settled a little I started to rub the fender liners. We ended up securing the liners up into the fender well with a couple well placed self tapping crews and washers. Worked great. Oh, I am getting of the build thread but I was at lowest position on the Fox 3.0 collar (low perch)
 
OP
OP
E63

E63

Full Access Member
Joined
Feb 7, 2012
Posts
473
Reaction score
325
Location
Poway, CA.
RPG Stage IV - INSTALLATION (continued)

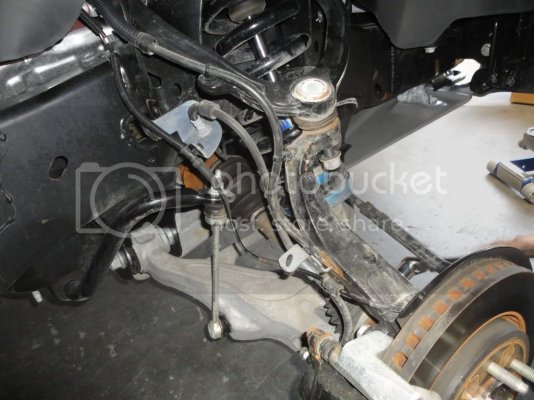
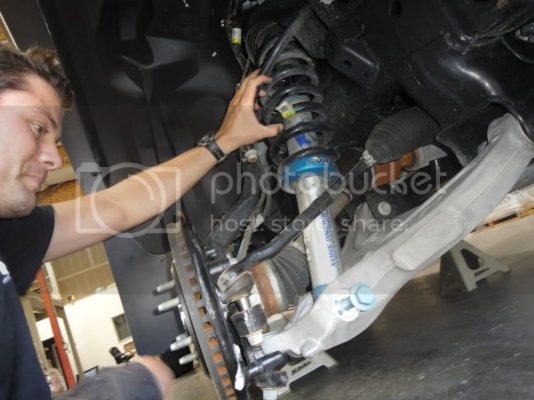
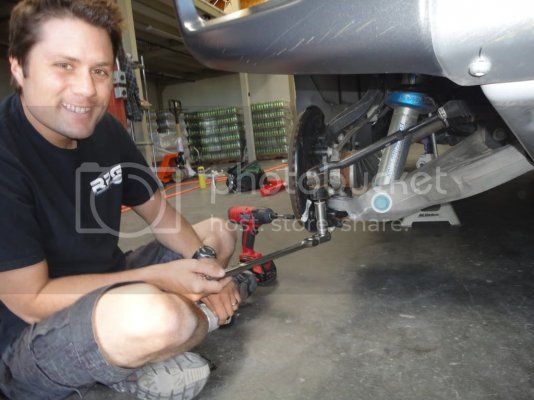
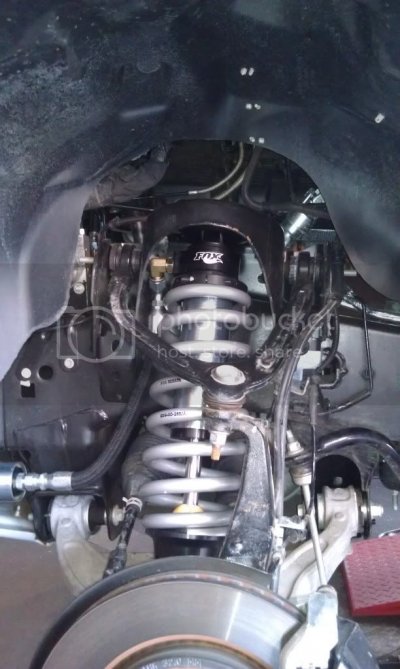
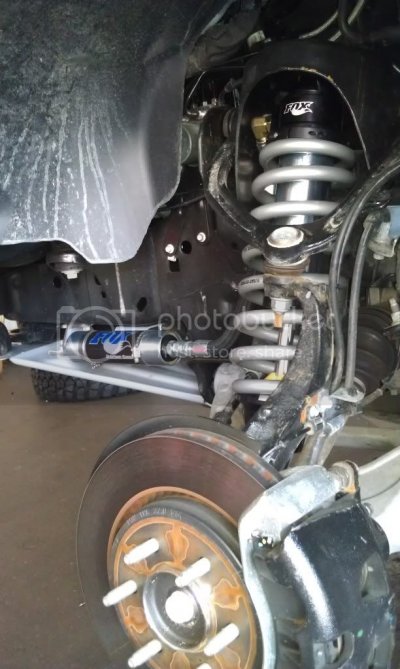
So as I mentioned earlier, we had both Jarrett and Corey from RPG at my vacant industrial suite, along with my friend and co-worker Noah doing the fender modifications at the same time we were doing the Fox 3.0 upgrade to the Stock shocks - essentially upgrading my Stage III to a Stage IV in RPG speak. I was mostly just the helper guy as Jarrett went to work, I was helping to position gear in place, follow directions, bang on some fenders, fetch tools etc. All in all a great day, learned a ton.

I got to spend a lot of time just looking at how the front end is put together and where the weak points are. The "Knuckle" that basically connects the wheel and brake assembly is particularly vulnerable if the driver screws up and brakes into a landing for example. Seeing this structure disassembled, you can understand how if the brake locks up the wheel how all that pressure and torque can snap this mission critical piece as it appears to be simple cast iron.

DSC01993.jpg
DSC01992.jpg
DSC01985.jpg
IMAG0574.jpg
IMAG0571.jpg
IMAG0570.jpg

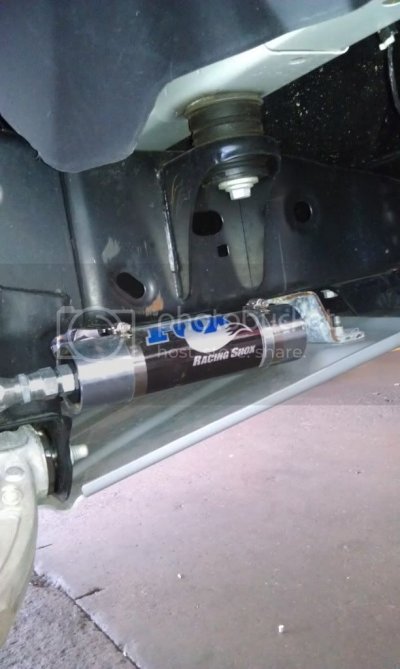
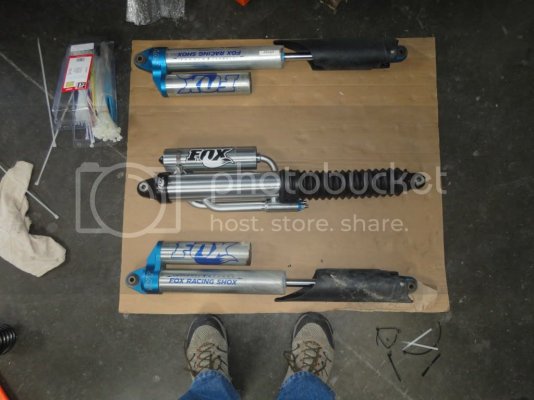
Rear Fox 3.0
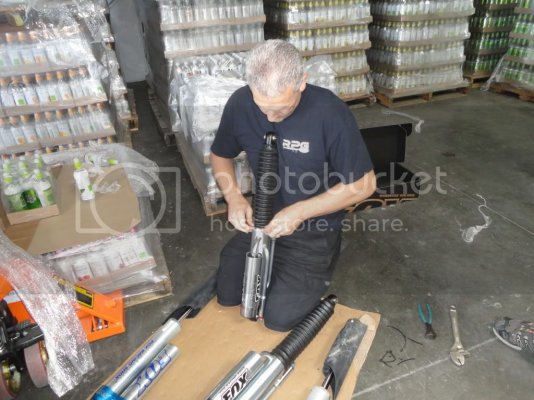
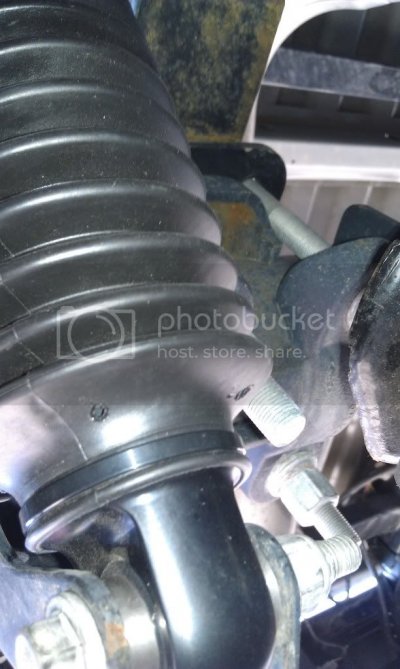
The stock boot is designed for the shock to be mounted 180 degrees opposite of how we need to use them. It requires the removal of about 5 (?) of the bottom (Ones with existing drain holes) bellows, this is then slid onto the shock body and secured with zip ties. But before you do that, make new holes on the other side by heating up a small screwdriver and melting them thru in the same symmetrical pattern.
DSC01981.jpg
DSC01979.jpg
IMAG0575.jpg
DSC01982.jpg
 
OP
OP
E63

E63

Full Access Member
Joined
Feb 7, 2012
Posts
473
Reaction score
325
Location
Poway, CA.
Tires:

I never expected that I would want to replace my OEM BFG TA tires. I have been running these tires for over 11 years on two different suburban’s. My 2006 Suburban has over 40K miles and the tires still look and perform great. Never had an issue with them, but then I never had a Raptor before either. I push the Raptor a whole lot harder than the Chevy and while testing the RPG Stage 4 several weeks ago I popped the sidewall of one of them sliding thru some twisties trying to keep up with Jarrett. The rock wasn’t very big but the hole sure was. I suspected something was not right as the truck started to vibrate some and wondered out loud if it was a change in the terrain causing it. Went for quite a ways before stopping and sure enough there it was.

IMAG0475.jpg


I reviewed the Go-Pro video at least a dozen times, you cannot even see the impact because the go-pro was mounted on the roof and the wide angle perspective distorts reality. But you can see it because the video starts vibrating.

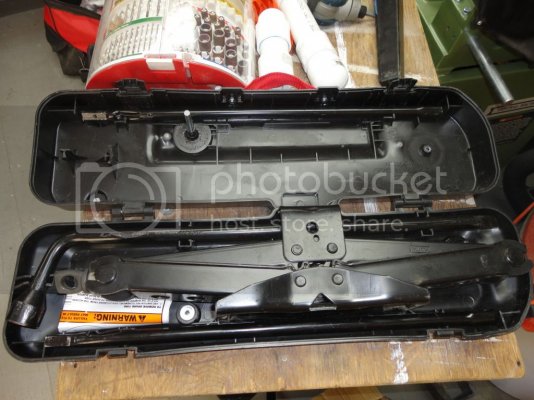
OK – you say it is just comes with the territory! One of those things! Fix it and move on. We did, got to learn how to use the Raptor jack, what a pain and got it changed in no time, I think it took us more time trying to figure out how to put all the pieces back into the stock container. I suggest you take a picture of it open before pulling out all the extensions or here, use this one:
DSC02486.jpg
So I wanted more sidewall protection that the MT style of tires provide, yet it was very important to me that the tires don’t degrade the ride comfort or the have a loud noise at highway speeds. I spent many hours at first looking thru both Raptor forums, 4 wheel drive forums and finally went to my old favorite on-line sources: Tire Rack - Your performance experts for tires and wheels and Discount Tire, Custom Wheels, Truck & Car Rims | Discount Tire

I like Tire Rack site the best as it allows you to check about 10 various variables against one another quite easily.

The BFG Mud Terrain T/A KA2 came out way ahead of all the tires I reviewed, several dozen, again based upon my requirements.

SuperView of the BFGoodrich Mud-Terrain T/A KM2

Description:
The BFGoodrich Mud-Terrain T/A KM2 (KM for Key feature: Mud traction and 2 identifying it as BFGoodrich's 2nd generation KM tire) is an Off-Road Maximum Traction tire developed for off-roaders driving full-sized, lifted trucks that participate in rock climbing and/or other challenging off-road driving. The Mud-Terrain T/A KM2 is designed from the mud up to overcome almost any obstacle in its path by combining more traction and mud-clearing ability than its predecessor with a smoother ride and less road noise than normally expected from an aggressive tire.
The Mud-Terrain T/A KM2 molds an off-road tread compound into a Krawler T/A KX-inspired symmetric design that features deep, self-cleaning independent tread blocks and linear transverse flex zones that provide the elasticity needed to allow the tire to conform to off-road obstacles when aired-down and driven at low speeds.
The tire's internal structure includes twin steel belts and BFGoodrich's Krawler TEK sidewalls and carcass. Krawler TEK consists of three components that include aggressive sidewall lugs, cut- and chip-resistant sidewall compounds and BFGoodrich's TriGard carcass (three-ply polyester construction) with sidewall cords that are up to 33 percent stronger than the previous Mud-Terrain T/A KM tire. These advancements allow for more bite and sidewall protection along with increased strength and resistance to bruising caused by rocks and rough trails. Single strand beads (a single strand of bead wire is continuously wrapped multiple times until the desired strength is provided) enhance the tire's fit to the wheel to improve uniformity and ride quality.
While Off-Road Maximum Traction tires are branded with the M+S symbol and able to churn through deep snow, their typical oversize applications and the absence of snow-biting sipes in their large smooth lugs can challenge their on-road wintertime traction on packed snow and icy surfaces.


Here is a comparison chart against the other 4 leading contenders in the 37” x 12.5 x 17” size I want to go with.

BFGKM2.jpg

Tirerackcomparison.jpg


My Wheel had a nice ding right near the bead, I sent it out to a local wheel repair shop that did a nice job repairing for $100
IMAG0582.jpg
IMAG0581.jpg
IMAG0580.jpg
IMAG0579.jpg
IMAG0578.jpg

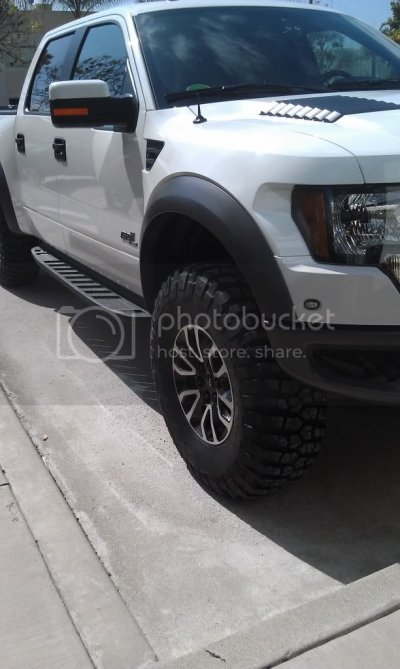
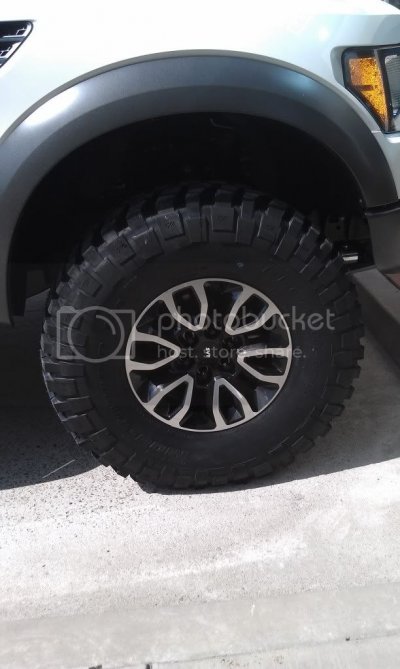
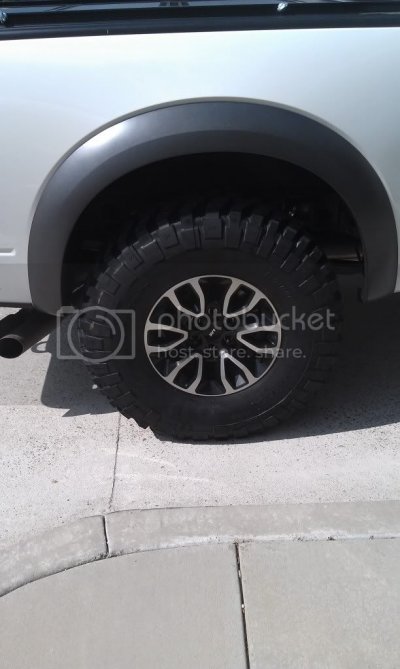
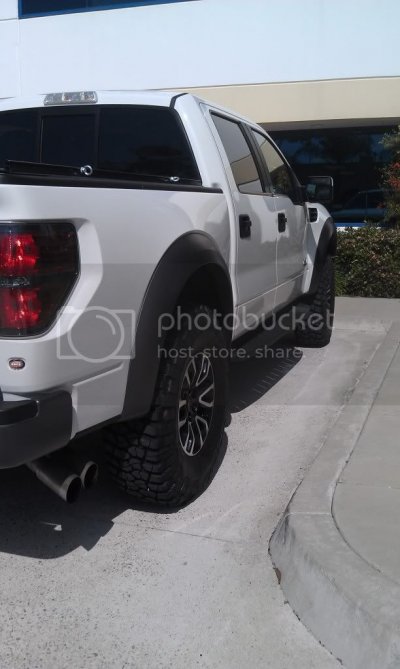
Here is the OEM 35” vs the KM2 37”
IMAG0576.jpg

First Impressions:
At time of original post had not yet the chance to take off road or even install the mudflaps to complete the fender mods, but I had driven them over 1000 miles. (unfortunately, my wife suffered a long trip at to high a pressure...)

Pros: They look awesome, they are taller than stock as I got the 37” and I do like the higher riding perspective, they should suit my needs for sidewall protection, grip, Snow, Ice and rock climbing

Cons: They are noticeably louder at all speeds, not obnoxious, but you can definitely can hear a drone from them that changes pitch based upon speed. It is a bumpier ride on highways, and I do feel every little bump in the road.
Now is it because I am running too much air pressure in the tires? Not sure yet, Discount Tire guys all kind of got together to discuss what they thought would be best as the rated 44 PSI for the stock tires. seemed to be to high. Tire is rated for 50 PSI and I had them set at 40 PSI seemed like a nice compromise. Turns out 35PSI is the right compromise air pressure.


Take Away
Don’t trust comparisons when looking at different types / classes of tires. Each rating is relative to the class of tire being compared. So my take away is that the KM2 may in fact be the quietest and best ride quality of the MT type tires, and even though they have a higher rating than the stock BFGs, it is like comparing apples and oranges. The stock BFGs are much quieter and have a far superior highway ride quality. Doesn’t mean I regret the decision, I bought the truck primarily as a desert “toy” yet justify its existence with utilitarian functions. I still believe these new tires will kick ass in the desert.

Note: they do kick ass
 
Top