ForScan for Newbs and must have mods

Disclaimer: Links on this page pointing to Amazon, eBay and other sites may include affiliate code. If you click them and make a purchase, we may earn a small commission.

m4can2

Active Member
Joined
Sep 21, 2021
Posts
86
Reaction score
117
Location
Texas/Georgia
Any Forscan savvy folks around SATX willing to preform a few changes for me for a small fee? Or is this only good for 1 vehicle?
 

BryBurger

Full Access Member
Joined
Feb 27, 2022
Posts
116
Reaction score
117
Location
NorCal
Hey everyone! Learning forscan and did a few updates today from this thread. However, upon driving today I noticed my gauge cluster looks like this now. Any tips on how to reset? View attachment 395633
I notice that this happens when you are using CarPlay with Apple Maps. The nav on dash doesn't seem to work with other Nav apps (Google, Waze, etc).

Also glare free already works on Gen 3 (at least on my '23). Noticed it working and do not recall setting it up so may be a default.

I just want to use FORScan to help me program the new HVAC module with digital knobs. If anyone has more input on that I would be grateful @Wichadicha . It sounds like all I have to do is save the current hvac module then copy that hvac file onto the new hvac module. Should be easy since FORScan appears to be much more user friendly these days but I hate to spend a full day tinkering if I can avoid it.

Best center console removal videos I have found that will help with the hvac mod:

*May do the turn signal mod from 3 to 5 too!
 
Last edited:

leftie712

Member
Joined
Mar 22, 2018
Posts
33
Reaction score
27
Location
Minnesota
Trying to "Disable auto-reverse-braking and the alert that lets the driver know the driver toggled it off"
it says to "set ModuleFeatureCfg_RBA (MFCRBA) to disabled" but I am not able to find where to change that setting.
 

BryBurger

Full Access Member
Joined
Feb 27, 2022
Posts
116
Reaction score
117
Location
NorCal
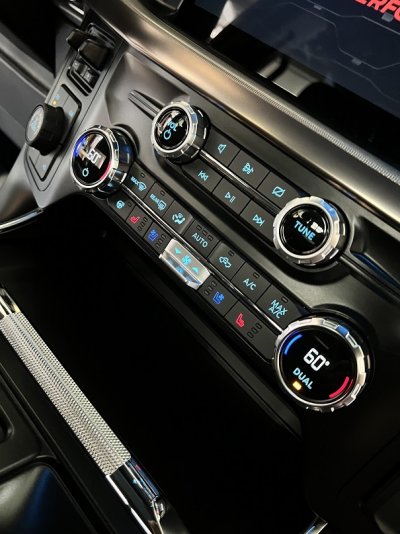
I managed to upgrade the HVAC with the digital knobs and was much easier with a used unit that was advertised as new (yet isn't but in new condition) on eBay. Due ot this I didn't have to restore the hvac module which actually made this process easier (plug & play). I also did not disconnect the battery, just made sure the key was not near the truck during the process as well as made a back up using FORScan (prior to knowing if hvac was P&P and make sure to plug in the OBD2 first before starting the app).

Update - I LIED! Definitely load and write the hvac backup file to make sure all of the functionality of the replacement hvac module work. The heated/cooled seat buttons did not work until I wrote the backup file on to it.

So I wanted to share some advice on disassembling the interior that I did not see covered yet. First and obviously, be careful! Cant emphasize how easy it is to scuff or divot the interior pieces so use masking tape on areas you want to pry and take it slow.

Center console side trim pieces:

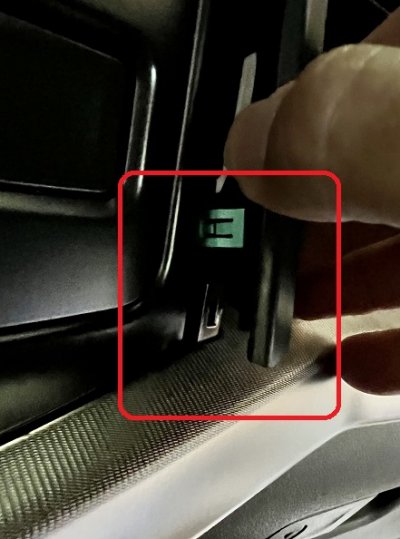
I started with the lower center console side pieces that are fairly easy. I opened the center arm rest and pulled them straight out from center then carefully pull up and out from dash when tabs are clear of center. Use pry tool if needed but should be possible using hands only. Doing this first will make removing the center trim easier and to me removing the center trim was the hardest part of the whole process.

Center trim:

For me it seemed easier to start from the outside in when removing the center trim piece with the push button start area last. I also opened both glove boxes to make the task easier.

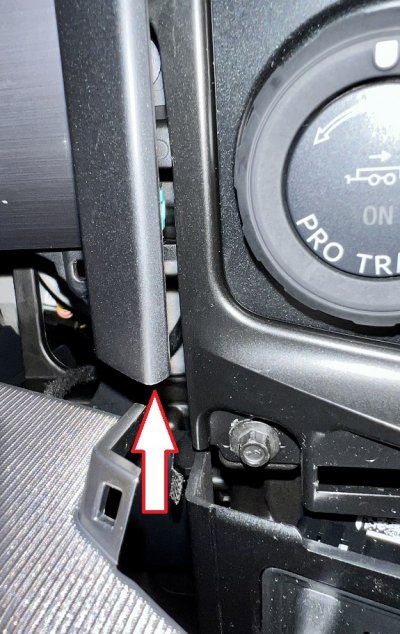
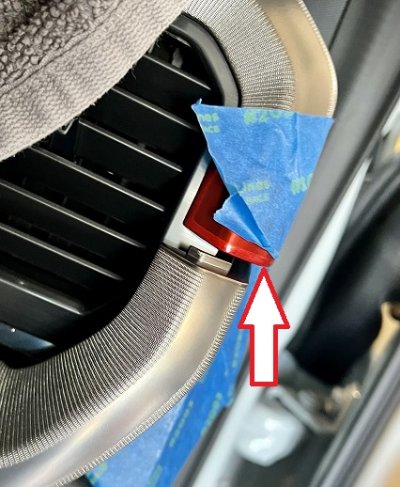
The end has a tab that fits under the flag piece so carefully pry out and slightly down when loosening it. I started prying from the back and used my plastic pry tool to push the tabs forward along the length of the trim; do NOT try to pry it out like a long lever. Go slow and easy by using a pry tool underneath to pop each tab. Around the start button was a bit tricky so I pried from the bottom with tape around the plastics and slowly applied pressure.
IMG_7730.jpg

While removing the center trim I highly recommend loosening the bottom of the center screen bezel since the center piece have plastic posts that integrate with screen bezel. Once done keep prying the tabs outward. At this point I placed a towel between the center trim and dash to preventing scratching from trim tabs.
IMG_7732.jpgIMG_7729.jpg

Center stack to access hvac module:

Removing the center stack is easy (pull straight out with some pressure) but removing some of the connectors can be challenging. The larger ones do have tabs that may fight you a bit so use a small plastic pry tool or shimmy, especially on bottom large connector with the black tab lock which is stubborn. Also put a towel down when taking center stack out to lay on when removing connectors to avoid scuffing.

:grd:

The finished product is satisfying and sucks Ford felt they had to remove this feature! I live in CA so heated steering wheel isn't essential but may be desirable if/when I sell the Raptor.
IMG_7733.jpg

On to the next mod!!!
 
Last edited:

Mallon3194

Member
Joined
Nov 1, 2022
Posts
31
Reaction score
10
Location
bay are
I'm not sure that the spreadsheet and the info in the thread is what I need. Check out this video. It seems that there is an updated program everyone is ussing that is much more user friendly and doesn't require detailed editing of code. It's shown in this video so I am not sure that the infomation being discussed applies to those of us that are usiing the new updated software.

Does doing this effect warranty?
 

BryBurger

Full Access Member
Joined
Feb 27, 2022
Posts
116
Reaction score
117
Location
NorCal
Does doing this effect warranty?
It should not unless the mod is proven to have caused a serious issue/malfunction. Since most of these mods are software based which just cause slight tweaks to the module's programming and does not affect the entire vehicle. This is not as aggressive as a ecu tune which will void the warranty in most cases; especially the higher stage tunes.

Just make sure to run a full backup which FORScan will ask you to do by default (pop up) when initially connecting to the modules. Then backup (save all) the specific module you are modding so you can revert it back using the load all option to oem if anything does not work correctly. Also make sure to make one change at a time (click write before next change) since multiple mods in one go may cause unexpected results.

btw - There are exception to tunes. For example my Focus ST had a SVP tune by Ford that did not void warranty and I wish Ford would make a tune for the Raptor!
 
Last edited:

ekalb

Full Access Member
Joined
Apr 13, 2023
Posts
144
Reaction score
202
Location
Cape Cod, Ma
lane change blinker from standard 3 to choice of either none to 8 blinks (personally, changed mine to 5).
where is this on the excel sheet? I took care of most of the changes I really wanted done, but can't seem to locate this one. thanks
 
Top