First Detail - Adamized the Raptor

Disclaimer: Links on this page pointing to Amazon, eBay and other sites may include affiliate code. If you click them and make a purchase, we may earn a small commission.

ADDGrant

Supporting Vendor
Supporting Vendor
Joined
Sep 17, 2013
Posts
531
Reaction score
406
Location
Arizona
I finally found the time to do the first detail of the new F150 Bumper Raptor. After reading most of the detailing threads and seeing how much everyone liked the Adam's products, I went all-in and ordered just about everything, including a Cyclo polisher. I was never much into detailing before but this truck made me want to do everything I could to protect the finishes. I also wanted a good layer of protection to make it easier to wash, since having a black truck takes a little more work if you want it to look good.

Here is the process that I used. For some of the steps, I listed how much product I used and also about how long it took. The paint did not have any scratches or swirl marks so I did not do any correcting.

Detailing Process without paint correction (machine application):

  1. Clean tires and rims with Deep Wheel Cleaner, wheel wells with All Purpose Cleaner [30 minutes].
  2. Wash vehicle with pressure washer and Car Wash Shampoo 2-bucket method, pressure washer rinse [60 minutes].
  3. If needed, do iron decontamination on body with Deep Wheel Cleaner, rinse within 5 minutes, do not let dry.
  4. Thorough rinse and then apply Detail Spray, do not dry.
  5. Clay Bar treatment with Detail Spray (used 1.5 bars or 75% of one pack) [45 minutes]
  6. Wash vehicle with Car Wash Shampoo and 2-bucket method [45 minutes].
  7. Dry with Great White Drying Towel, do not use Detail Spray [30 minutes].
  8. SVRT on trim with Block Applicator and Microfiber Utility Towel (used 10%) [50 minutes].
  9. SVRT on tires with Hex Grip Pro Tire Dressing Applicator (used 15%) [10 minutes].
  10. Quick Sealant spray on vinyl graphics, wipe with Double Soft Towel [10 minutes].
  11. Quick Sealant spray on wheels, wipe with Microfiber Utility Towel [10 minutes].
  12. Liquid Paint Sealant with Black Machine Sealant Pad and Double Soft Towel (used 20%) [90 minutes].
  13. Brilliant Glaze with Red Machine Glazing Pad and Double Soft Towel (used 20%) [90 minutes].
  14. Americana Paste Wax with Black Machine Waxing Pad and Double Soft Towel (used about 15%) [120 minutes].
  15. Glass Cleaner on exterior windows with Microfiber Glass Cleaning Towel [10 minutes].
  16. Glass Sealant on exterior windows with Mini Applicator and Microfiber Glass Cleaning Towel (used 10%) [30 minutes].
  17. Invisible Undercarriage Spray in wheel wells.
  18. In & Out Spray on front grill.
  19. Vacuum interior.
  20. Total Interior Detailer on dash and door panels with Microfiber Utility Towel.
  21. Glass Cleaner on interior windows with Microfiber Glass Cleaning Towel.
  22. Leather & Interior Cleaner on seats with Microfiber Utility Towel.
  23. Leather Conditioner on seats with Microfiber Applicator and Microfiber Utility Towel.

I was very impressed with the Adam's products. The sealant, glaze and wax were easy to use and the Double Soft Towels are amazing. Using the SVRT on the trim before sealing was important since I hate cleaning product off the rubber and trim. After waxing, there was very minor clean-up to do.

:cheers::drool2:
 

RAPTORSV

FRF Addict
Joined
Sep 15, 2011
Posts
2,611
Reaction score
1,423
Location
S. California
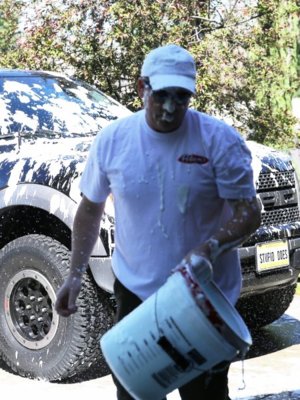
Good eye Wilson! Truck looks clean because it took me three attempts to get the foam toss right. After the first two attempts, I had to rinse it off, so it ended up mostly clean.

The first attempt did not go so well...

View attachment 64495

Man you have the cleanest truck in town! I'm envious, I'm always in a rush. Give anything to spend the weekend cleaning my truck. To busy with work, so I can get it paid off and buy a new toy!
 
Last edited:

JackDiesel

Member
Joined
May 15, 2014
Posts
46
Reaction score
23
After spending a couple months in the Midland sand/mud I finally got back home. Truck was a mess, the mud/sand was everywhere, literally. My door jams were caked in mud, the rubber trim around the windows and sun roof had mud dried into it so much so that soap and water wouldn't remove it and I had enough mud/sand under the body that it seemed to effect the steering, acceleration and even shifting it into manual required a little more force that usual (which was surprising). Even the interior had it's fair share of mud in it.

I pressure washed all the heavy stuff away but it was still in rough shape. I recruited a friend and took the Adam's treatment to his truck and mine. Took us 6 hours between both trucks, mine took double the time. The all purpose cleaner cut through the dried on mud that I thought had ruined the rubber trim, it still took some hard scrubbing but after that and a treatment of SVRT it looked as good as new. Skipped the sealant and just did the wax, it'll need another detail soon as I noticed sand was still coming out of every nook and cranny.

My biggest complaint was it was clean enough that I discovered a nasty chip where the front quarter panel and the door meet and a crack on the other quarter panel near the hood. This was my first time using Adam's products and I was definitely impressed, also converted my friend who used to swear by Turtle Wax products.
 
OP
OP
TheWolf

TheWolf

Full Access Member
Joined
Nov 15, 2013
Posts
970
Reaction score
1,337
Location
Spokane, Washington
Glad to hear you got it cleaned up good, @JackDiesel.

I now exactly what you mean with sand in the nooks and crannies. My last trip to the dunes, it was a windstorm, and it ended up with sand in cracks I never knew I had. Took about four washes before I stopped seeing it come out of hidden places when I pressure washed.

Do you have an underbody lance for your pressure washer? Makes it easier washing off all the caked on, dried on mud. I have some pics of my setup way back on Post #65, Page 7. Works great on the suspension components and barrels of the wheels, too.
 

JackDiesel

Member
Joined
May 15, 2014
Posts
46
Reaction score
23
Glad to hear you got it cleaned up good, @JackDiesel.

I now exactly what you mean with sand in the nooks and crannies. My last trip to the dunes, it was a windstorm, and it ended up with sand in cracks I never knew I had. Took about four washes before I stopped seeing it come out of hidden places when I pressure washed.

Do you have an underbody lance for your pressure washer? Makes it easier washing off all the caked on, dried on mud. I have some pics of my setup way back on Post #65, Page 7. Works great on the suspension components and barrels of the wheels, too.

No I don't even own a pressure washer, I did it at one of those coin operated places. About to move into a house though so maybe I'll get one. Heck, I spent enough at the coin place that I could have bought one. First I'm going to try and use a sprinkler for the underbody.

I remember seeing your setup, very jealous.
 
Last edited:

BIGt0007

FRF Addict
Joined
Jan 16, 2012
Posts
1,541
Reaction score
818
Location
CT
I finally took bed rail covers off...got tons of dirt out. Highly recommend it's easy to take off once you find all the tabs under bed rail....need pliers and something like a wood wedge to hold the cover up as you pop tabs loose... Good luck finding all the dirt!
 
Top