dont take it personal, he is canadiEHn....... he probably listens to that western french crap.......Metallica crap? Them are fight-n words!
You are using an out of date browser. It may not display this or other websites correctly.
You should upgrade or use an alternative browser.
You should upgrade or use an alternative browser.
Blackened is the End...
- Thread starter Harblar
- Start date
Disclaimer: Links on this page pointing to Amazon, eBay and other sites may include affiliate code. If you click them and make a purchase, we may earn a small commission.
Harblar
Full Access Member
As promised. Pictures of the new fire breathing Demon! Think the Amber is going to stick around for awhile! Thanks to GJMcManus for the idea about the velcro! Worked perfect. Took a 3/4" piece of clear velcro, cut it down the middle and it fit nicely top and bottom of light.
Picture of the 40" installed (looks like a freaking lightsaber in the grill!)
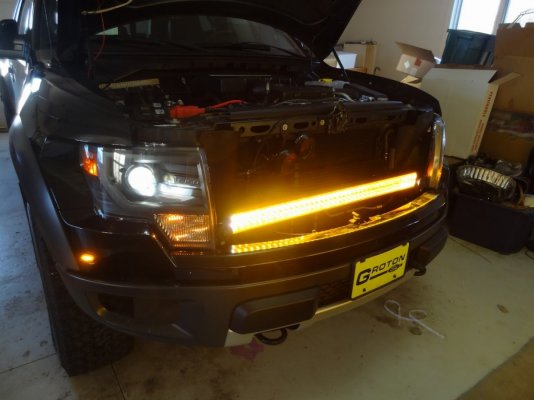
A closer look at the front
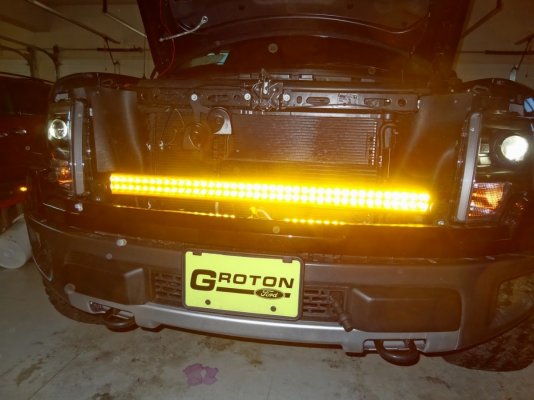
30" light mounted (wires still need to be covered and tucked a little better.)
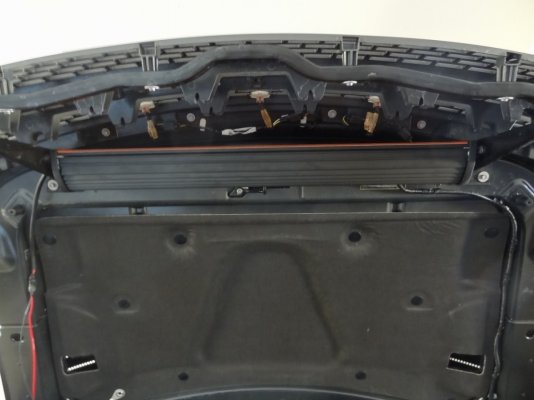
Hood Closed, HID's off
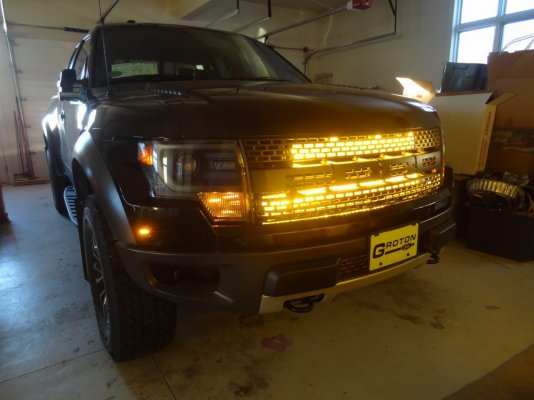
Now For the Sexy night shots!
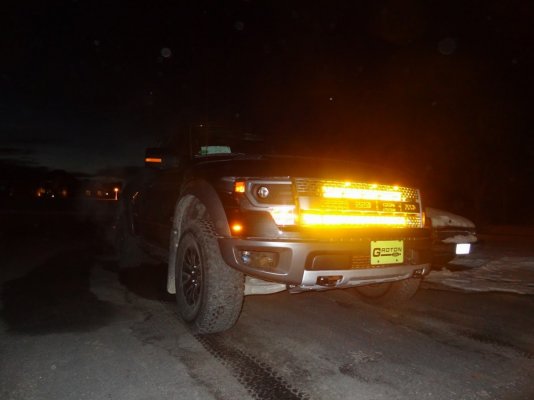
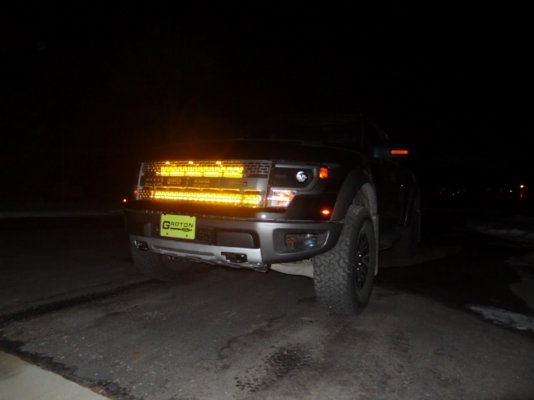
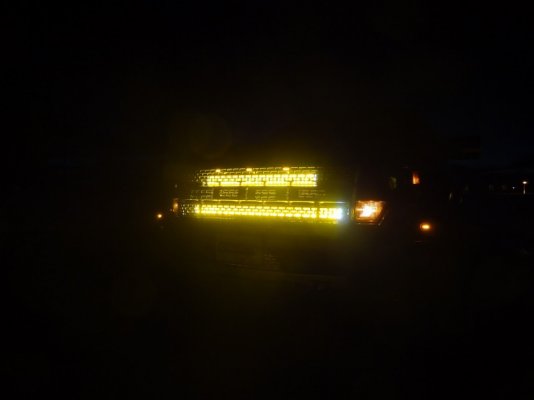
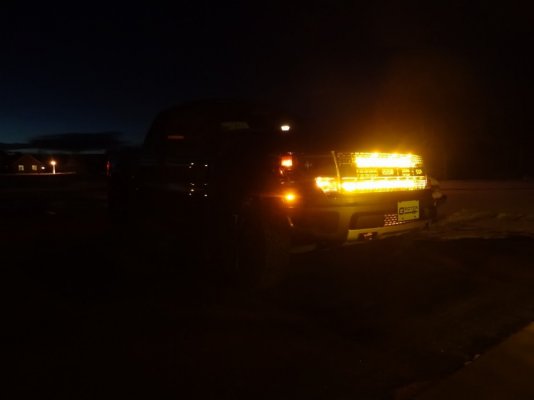

Picture of the 40" installed (looks like a freaking lightsaber in the grill!)

A closer look at the front

30" light mounted (wires still need to be covered and tucked a little better.)

Hood Closed, HID's off

Now For the Sexy night shots!


Harblar
Full Access Member
Ok... So it's been a busy month for me and so not much in the way of getting stuff done on the Raptor. With are little blizzard out here this weekend, I had some time to work on some graphics and what not to put on the truck. I decided to go vinyl over paint since I'm not even sure there are any custom paint shops around capable of doing what I want and if there are I'm fairly certain I'd have a mild cardiac event when I saw the estimate. Plus vinyl isn't permanent so I've always got the option of changing things up down the road if I get bored with it or decide to go another direction. I've been in contact with a local vinyl guy, but I haven't had the chance to go in and talk about what I want done yet. That's ok though. I'd prefer to have the graphics all ready to go prior to going in and giving them the go ahead. They include 1 hour of computer/design time in the job. After that it's $40/hr... I'm good enough on Photoshop that I should be able to save myself a chunk of change if I just go in prepared.
That being said, here's some rough pics of what I'm looking at doing...
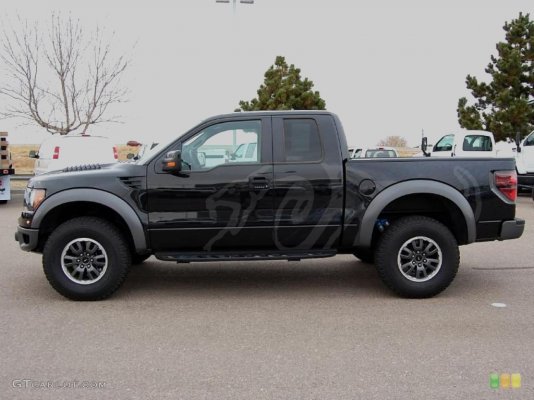
Down the sides... (ps, not my actual truck. just a similar one I found on google for the rough mock up.)
The rear end...
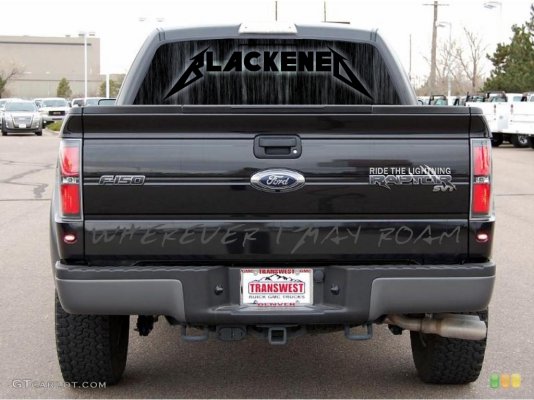
Got my custom plates on a few weeks back. I went with "BLACKND". Already I've had 4-5 people ask me, "What's Black N D mean?"
To combat that problem I decided to go with a rear window graphic. If someone asks after that, then they are just stupid. The above was a very preliminary design. I'm still working on it, but here is what I have so far...

Not sure whether I'm going to leave the background black or not. Might add some more stuff just underneath it to round it out. Haven't had a chance to play with it too much yet. Also not sure how it will look with the ghosted snake down the sides and this on the back window. I'm toying with the idea of doing the snake and text on the tailgate in a similar style. It would blend better with the window, but it might be a little much for the truck... I suppose I could always do a full wrap that makes it look like the whole truck had been torched, but that's getting out of my price range again and is maybe a little more gaudy than I'm looking for.
And Finally, the eagle eyes out there may have noticed I'm playing with the Raptor badge as well. This, too, is a very early mockup. I'm planning on getting a Billet badge made up to stick on directly above the Raptor/SVT Logo. The idea is to have it say 'Ride The Lightning' with claw marks/slashes through 'Lightning'. This seems like the perfect Metallica/Ford crossover badge to me. After all... I'm riding a Raptor! Not some lowriding street queen.
In the meantime, I finished up the design to replace the ford emblem on the tailgate. I'll be contacting Billet Badges to get cracking on this sometime this week.
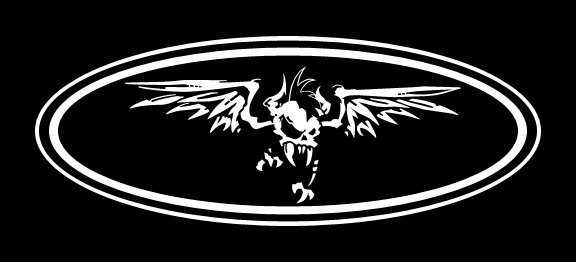
Also been talking with TMX about a possible light bar/bumper guard mounted up front... Still haven't seen a shot of that yet, but I'm looking forward to seeing what they've come up with.
That's about it for now. Stay tuned for some actual progress!
That being said, here's some rough pics of what I'm looking at doing...
Down the sides... (ps, not my actual truck. just a similar one I found on google for the rough mock up.)

The rear end...

Got my custom plates on a few weeks back. I went with "BLACKND". Already I've had 4-5 people ask me, "What's Black N D mean?"

To combat that problem I decided to go with a rear window graphic. If someone asks after that, then they are just stupid. The above was a very preliminary design. I'm still working on it, but here is what I have so far...

Not sure whether I'm going to leave the background black or not. Might add some more stuff just underneath it to round it out. Haven't had a chance to play with it too much yet. Also not sure how it will look with the ghosted snake down the sides and this on the back window. I'm toying with the idea of doing the snake and text on the tailgate in a similar style. It would blend better with the window, but it might be a little much for the truck... I suppose I could always do a full wrap that makes it look like the whole truck had been torched, but that's getting out of my price range again and is maybe a little more gaudy than I'm looking for.
And Finally, the eagle eyes out there may have noticed I'm playing with the Raptor badge as well. This, too, is a very early mockup. I'm planning on getting a Billet badge made up to stick on directly above the Raptor/SVT Logo. The idea is to have it say 'Ride The Lightning' with claw marks/slashes through 'Lightning'. This seems like the perfect Metallica/Ford crossover badge to me. After all... I'm riding a Raptor! Not some lowriding street queen.

In the meantime, I finished up the design to replace the ford emblem on the tailgate. I'll be contacting Billet Badges to get cracking on this sometime this week.

Also been talking with TMX about a possible light bar/bumper guard mounted up front... Still haven't seen a shot of that yet, but I'm looking forward to seeing what they've come up with.
That's about it for now. Stay tuned for some actual progress!
Captain Awesome
FRF Addict
looks good. like the badge but would do in vinyl too that way you can change it out when you want. i almost bought the black/grey badge from billet badges but didnt like what you need to do to mount them.
Wrong Way
Full Access Member
- Joined
- Jul 21, 2012
- Posts
- 442
- Reaction score
- 132
I would take the blackened off the back window and have an emblem made and put it where the f150 is on the tailgate. Just my 2cents.
Harblar
Full Access Member
You need to do a tribute to Cliff Burton!
I'm thinking of doing something with the sub box the Car Stereo Company is building me.

And with that let me segway into my latest update!
Plans are in motion for my audio system upgrade. I've been in contact with Noah over at The Car Stereo Company (CSC) for the last couple weeks and I've got my plan of attack laid out for a massive overhaul. So, without further adieu, Here's the build:
Speakers: Front - Hertz HSK 165 Components. I demo'd these locally and really liked them. This is the only thing I didn't get through CSC, since they are not a Hertz dealer.
Rear- Hertz HCX 165 Coaxials (I may hold off on these for a little while and just leave the rears stock, but we'll see how I'm feeling in a couple weeks when I start the install)
Amps: Front - JL XD600/6. The plan is to run an active frontstage, so one channel to the tweeters and the other four bridged to the woofers. *obligatory Tim Allen Mo-Powa grunt.
Rears - JL XD400/4. Bridged to the coaxials when I do them. Considered the XD200/2, but I've learned that's it's always better to have more headroom.
Processor: Rockford Fosgate 3Sixty.3 there were a number of options for this, but in the end I like the flexibility and options vs. price of the RF 360.3 the best. Hopefully it ends up being a nice bug free install... If not I may look at trading up to a Bit 1 down the road.
Sub: And now the corner stone. I'm having CSC build be a nice custom Scab Box, but with a bit of a twist. Instead of going with the dual pioneers I opted to go for a single JL 13TW5V2 powered off from a JL XD600/1 amp. Due to the bigger diameter/airspace requirement of the woofer, Noah's going to have to fiddle with the design to make it work. (not too worried. I'm sure it's going to kick some Major Ass.) The amp is going to be built into the box and the whole thing should fit under the 2/3rds section. I told him to feel free to post a build log on the construction if he wanted, but it might take the rest of you Hooligans hounding him a little to get it posted. hahaha.
All the wiring was custom ordered from KnuKonceptz. I've used them in the past and was very impressed with the quality. I ended up going with 1/0 gauge for the main run and and then 4 gauge off from blocks to the individual amps. I'm currently working on an amp board design for the back wall. hopefully I'll be able to get started on that fairly soon. When it comes time to getting the build installed, I'll post a separate build log in the audio/video board and try to provide a lot of pics and a walk-through of the process. (after spending a lot of time digging, there really isn't much out there in one complete guide for the 10-13 Sony/Nav powered F-150's. So far I've had to piece a lot together from many various sources, so hopefully someone will get a benefit from a comprehensive walkthrough.)
In other news, I got my rear ford emblem replacement ordered. Billet Badges is apparently working on a new design of the 7" ovals that doesn't require any modification to the camera frame... So we'll see how that works out. I'm really looking forward to the end product. It's should be pretty bad ass.
And, finally, I haven't had much time to make progress on the graphics or any other further badge ideas. I'm going to make an effort this week and then try to get in and talk the local vinyl guy about it. May also inquire about some embroidery work on the headrests. I've got some ideas there as well. I'm also going to be talking to my Taxidermist (yeah that's right, taxidermist) about another interior upgrade I'm planning to make. Stay tuned for more on that, at a later date!

Harblar
Full Access Member
Let the modpocolypse begin!!!
Been awhile since I've updated this thread and I've done quite a bit in the last two weeks, so... Lots of pics and some quick descriptions. I'll go into more detail in some separate threads when I get time.
First Audio...
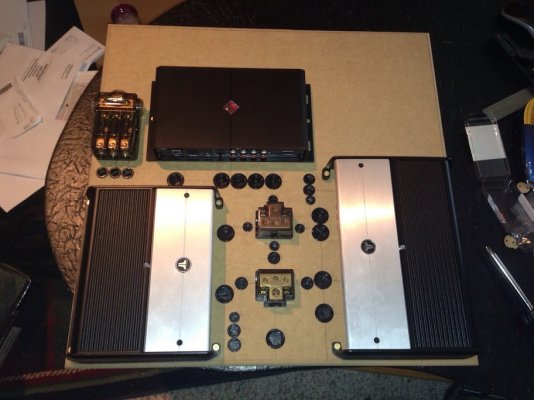 amp board lay out and drilled for wire.
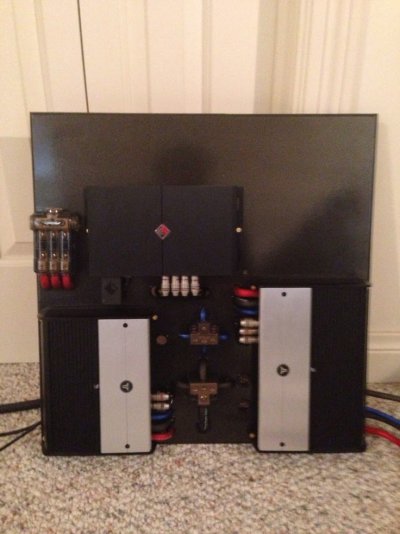
Painted and wired.
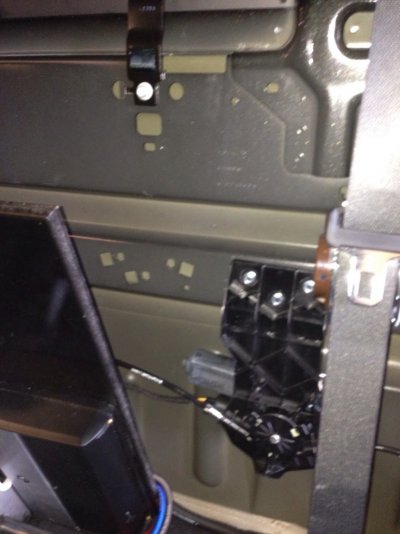
In order for the amp rack to fit I had to move the rear sliding window motor to the right. Easy mod. Un bolt, line up next to seat belt, reattach with three self tapping screws.
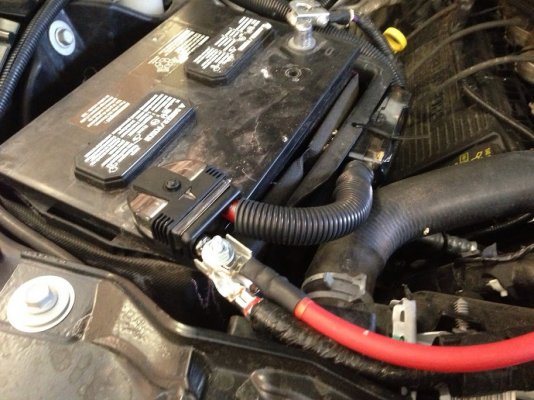
Replaced the positive battery terminal with a JL terminal. It provided a place to connect the factory wires and a nice 0/1 gauge connection for the main audio wire.
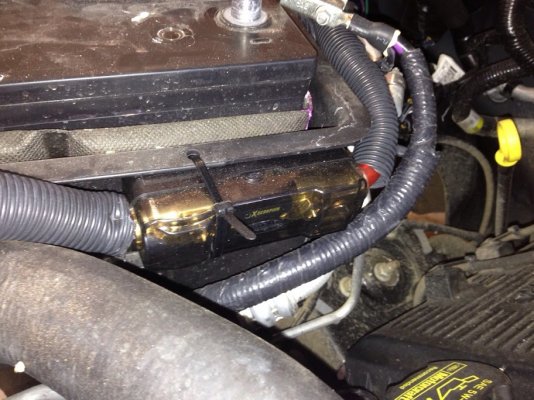
Zip tied the Xscorpion fuse holder to the battery box.
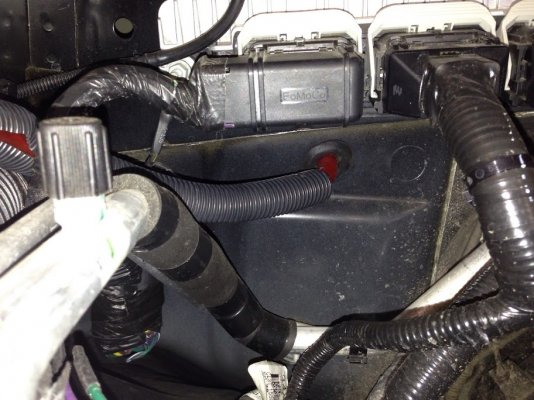
Ran wire through factory grommet. This can be tricky fishing with the big wire. Tape it to a stiff 12ish gauge wire and run that first. Much easier.
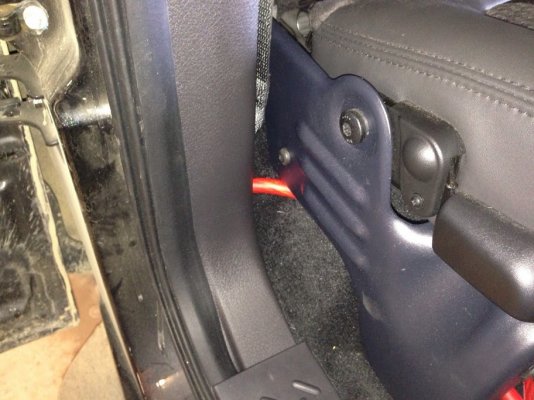
Ran under the passenger door trim wire channel.
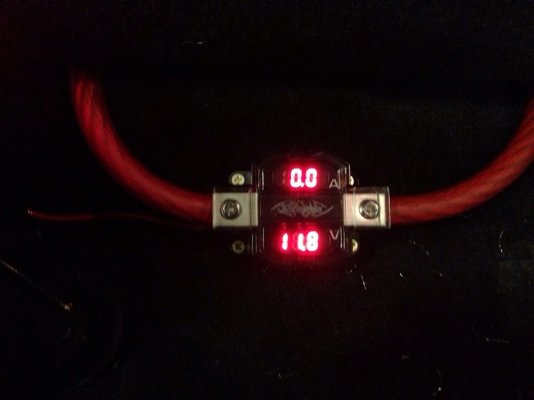
Put a Xscorpion volt/ammeter under the one third section.
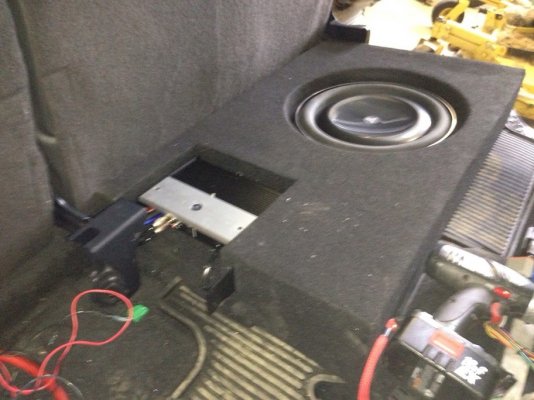
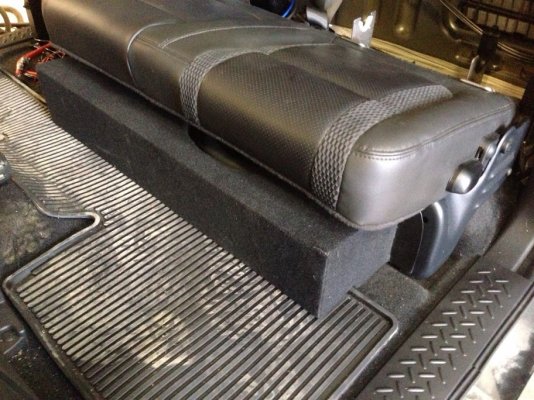
Noah built me this box for a 13.5inch JL shallow mount. Boom!
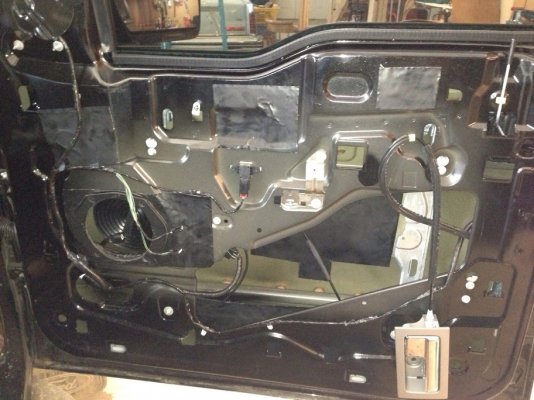
Sound deadened front door with damplifier pro. Also put a speaker tweeker pad behind the woofer. Also covered the door panel with luxury liner pro (mass loaded vinyl and closed cell foam.) and stuffed the door panels with blue jean acoustic insulation.
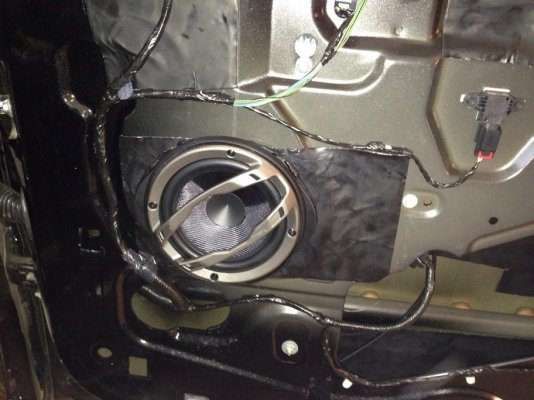
Hertz HSK165 woofer installed.
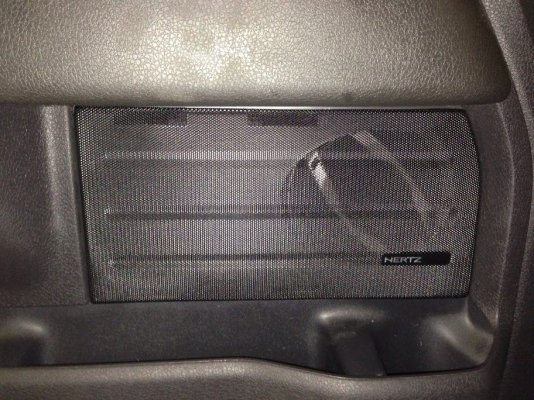
Painted the front door speaker grills satin black and replaced the Sony logo with a Hertz logo.
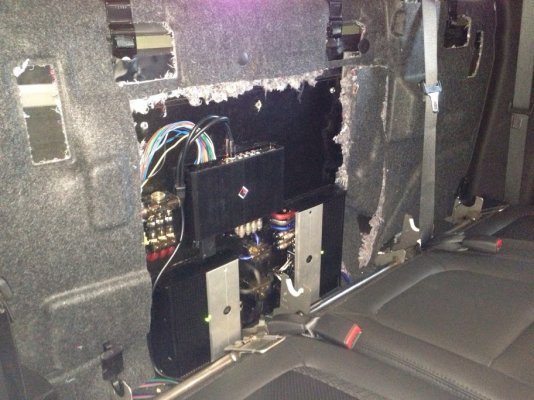
Amp rack installed. Completely covered the back wall in damplifier pro and luxury liner pro. Much quieter!
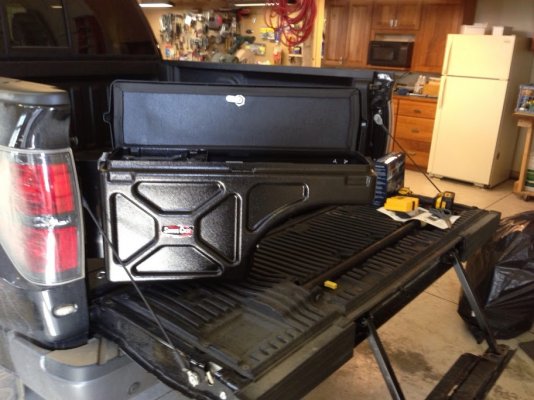
Installed an undercover swingcase.
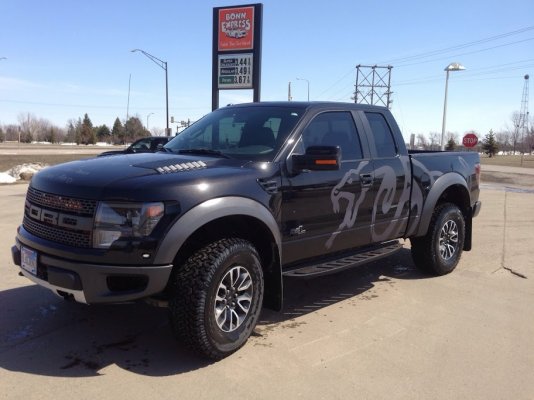
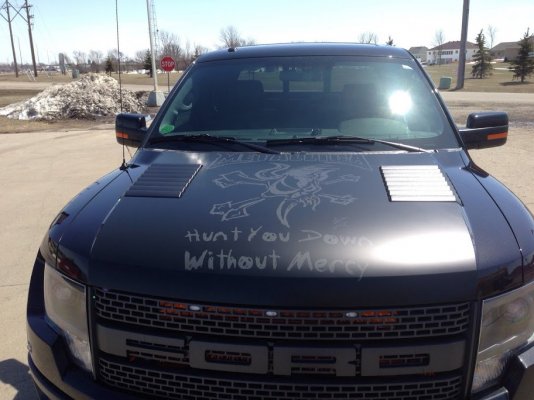
Some vinylly goodness from designs and signs. Thanks Chris!
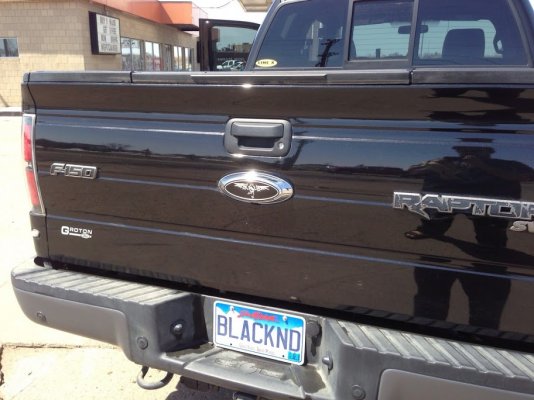
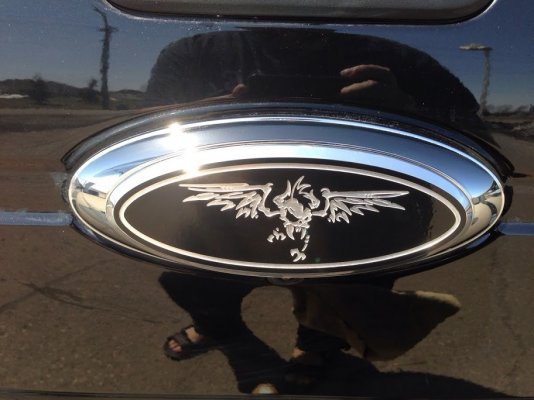
And finally my custom billet emblem from Billet badges. This is the new model with the molded back and blended edges. Fits perfect!
That's it for now, though I've got a full intake, header, and exhaust system enroute... So, more to come!
Been awhile since I've updated this thread and I've done quite a bit in the last two weeks, so... Lots of pics and some quick descriptions. I'll go into more detail in some separate threads when I get time.
First Audio...
 amp board lay out and drilled for wire.
Painted and wired.

In order for the amp rack to fit I had to move the rear sliding window motor to the right. Easy mod. Un bolt, line up next to seat belt, reattach with three self tapping screws.

Replaced the positive battery terminal with a JL terminal. It provided a place to connect the factory wires and a nice 0/1 gauge connection for the main audio wire.

Zip tied the Xscorpion fuse holder to the battery box.

Ran wire through factory grommet. This can be tricky fishing with the big wire. Tape it to a stiff 12ish gauge wire and run that first. Much easier.

Ran under the passenger door trim wire channel.

Put a Xscorpion volt/ammeter under the one third section.


Noah built me this box for a 13.5inch JL shallow mount. Boom!

Sound deadened front door with damplifier pro. Also put a speaker tweeker pad behind the woofer. Also covered the door panel with luxury liner pro (mass loaded vinyl and closed cell foam.) and stuffed the door panels with blue jean acoustic insulation.

Hertz HSK165 woofer installed.

Painted the front door speaker grills satin black and replaced the Sony logo with a Hertz logo.

Amp rack installed. Completely covered the back wall in damplifier pro and luxury liner pro. Much quieter!

Installed an undercover swingcase.


Some vinylly goodness from designs and signs. Thanks Chris!


And finally my custom billet emblem from Billet badges. This is the new model with the molded back and blended edges. Fits perfect!
That's it for now, though I've got a full intake, header, and exhaust system enroute... So, more to come!

JD_27
Full Access Member
Sweet, love the detail.
Similar threads
- Replies
- 5
- Views
- 410
- Replies
- 23
- Views
- 2K
- Replies
- 3
- Views
- 1K
- Replies
- 16
- Views
- 1K
Members online
- Mind Goblin
- stevelp99
- 91Eunos
- omalley72
- ob917
- unashamed7
- TXRaptor37
- hooligan
- Jredraptor
- 06z
- DinoNuggets
- trav7314
- JayRods
- scotteveratt24
- BigTaco
- MOTOR10
- TXCobra
- redsmoke
- MotorsportsAustin
- SAWraptor
- taquitos
- Ox3721
- Unleaded
- bigrig
- GV_SUCCULENTS
- LargeNinCharge
- MotoDad
- Peterb
- 970rap
- Inprogress
- Rustyseatbelt
- Hard R
- Audis
- mikemxbike4
- guvars
- Fender150
- RaptizedBK
Total: 3,644 (members: 44, guests: 3,600)

