Blackened is the End...

Disclaimer: Links on this page pointing to Amazon, eBay and other sites may include affiliate code. If you click them and make a purchase, we may earn a small commission.

OP
OP
Harblar

Harblar

Full Access Member
Joined
Oct 28, 2012
Posts
466
Reaction score
371
Location
Aberdeen, SD
Ok, so trying to get decent sized pictures from an ipad to a forum via an ipad, just plain doesn't work right.

Pictures uploaded to my google album... problem solved!

Line-x Is scheduled up for next Wednesday! Spraying the bed and rear wheel wells in premium. Should look great and wear forever.

Other mods close at hand? Looking to continue working on the bed, which means I need to decide on a cover. I've been leaning towards the retrax. Spendy, though they are, I like the look and they appear to be very well built. The powertraxx version is even more appealing... not needed, but very cool. Just don't know if it's a $700 premium cool. Other bed gear is going to be a set of Tailgate assists, some Tailgate seals and a Pace Edwards Powergate.

Also looking at doing some lights!
I'm leaning towards the M & R holiday special (30" & 40" behind the grill kit for $1000).
I'm still not 100% sure what I'm going to do with the front bumper, but I'm leaning towards something that's got 4 big HIDs bolted onto some kind of a bar... or a big LED bar. Either way, I figure these will work for now, and down the road could easily be moved to front and rear lights on an ADD Stealth chase rack I'm looking at.

Finally, I'm looking at doing my own version of the illuminated SVT sidevents. I've gotta a little playing around to do before I go into too much detail, but if it works right it should be bright, cheap, and LED powered... maybe even changeable colors. We'll see where I end up this weekend.

Till next time! ;-)
 
OP
OP
Harblar

Harblar

Full Access Member
Joined
Oct 28, 2012
Posts
466
Reaction score
371
Location
Aberdeen, SD
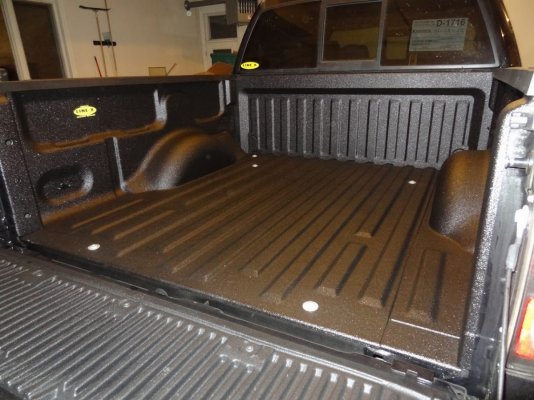
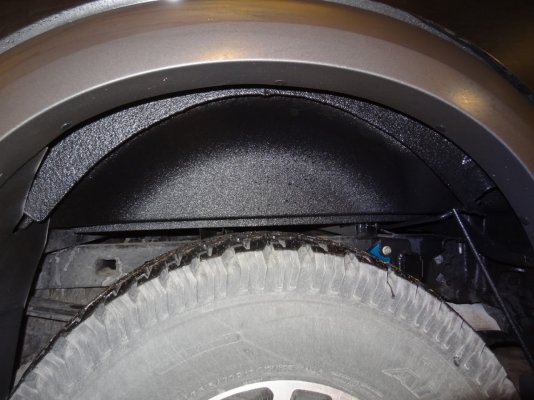
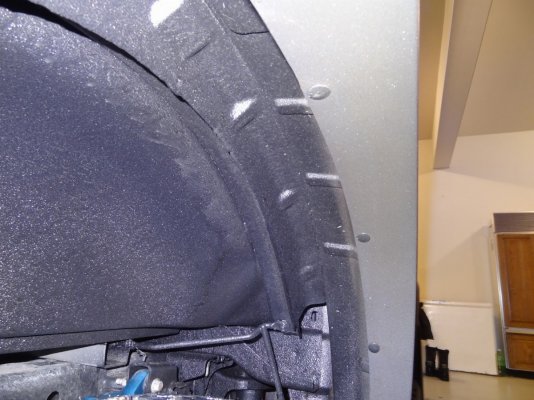
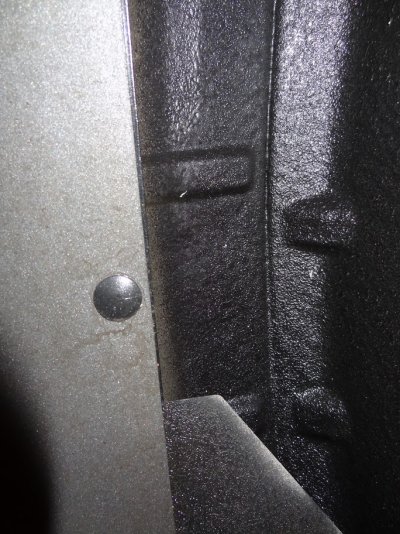
Line-X Premium applied today! Stuff looks good. Got it done at Line-X of Sioux Falls.
Here's some pics:
DSC02408.jpg

DSC02409.jpg

DSC02411.jpg
As you can see they did a pretty thorough job.
DSC02412.jpg

I'd originally tried to get a hold of a place in Fargo before my truck got here, but after submitting their online quote request, i never heard back from them (still haven't). Submitted the same request to the guys In Sioux Falls on the 26th and had a call back inside of an hour. These guys were great to work with and were completely fair on the price... less than $800 for everything in Premium. Couldn't be happier!

Learned something else today... this Raptor can handle ice nice! (pardon the rhyme) Had to drive 3 and half hours down the interstate to get to Sioux Falls this morning. After about an hour and a half we must have hit the icy part of the interstate, because the cars started piling up in the ditches. Must have seen at least 7-8 vehicles in the ditch (at least half of them were Tango Uniform) in about an 80 mile stretch. Despite all this, I didn't even know it was slick, or couldn't hardly tell, anyway. The Raptor tracked true the whole way! In a couple spots we had to slow to a crawl to get by an accident (brand new black suburban/escalade got flatten somehow by the rear end of an older model f-150... nasty for the suburban. Apparently at least one fatality. Couldn't have been more than 30-45 minutes before we got there. Still an ambulance on site and everything... Anyway, I digress). In these spots I took an opportunity to check the slickness by tapping the brakes hard and goosing the throttle a little. Now, either the road wasn't very slippery at all, the Raptor hooks up really well! I could barely get the Anti-locks to chatter and I never did get the Traction control to kick in (Yes it was on.) I can only assume it was slick, based on the number of trucks (rolled trucks) in the ditch, but I never had an issue once, granted I did back it off from 80mph a little bit... but not much. Woot and what not! :banana-mario:

Anyway, more modding for this weekend (if the postman shows up anyway).

Broke down and bit on the M & R holiday special. Hopefully by next Monday I'll have an active rocker switch hooked up to a set of behind the grill deathrays! Can't wait!
 
OP
OP
Harblar

Harblar

Full Access Member
Joined
Oct 28, 2012
Posts
466
Reaction score
371
Location
Aberdeen, SD
What happened to all the Metallica crap?

What do you mean?

I'm still planning on it, but I wanted to get some simpler/more practical ones done first while getting the truck broke in. It'd really suck to get a whole bunch of paint and/or semi permanent/expensive stuff on there and then find out I have a lemon. I'm at about 8-900 miles on the OD so far and haven't had any hiccups yet, so I'm probably not going to wait too much longer. I'll probably be working on designs for some custom Billet badges over the weekend and maybe getting started on a the design for the headrests.

:head3:
 
OP
OP
Harblar

Harblar

Full Access Member
Joined
Oct 28, 2012
Posts
466
Reaction score
371
Location
Aberdeen, SD
So... my behind the grill kit from M & R showed up! I put them in this Saturday and all I can say is Wow! The lights look great and are very bright... I need to do a little re-aiming when I get a chance, but other than that they are in nice and tight. Haven't had a chance to get any pictures uploaded yet, but will post some in the next day or so when I get a chance.

Some notes on the install that I'm sure most everyone has heard before...

Overall it went great. The kits arrived usps in good shape. The 30" kit was packed in the hard breakable messy Styrofoam versus the 40" kit which arrived in the softer non messy styrofoam... if that makes sense. (the 30" light had to have little white bits of foam blown off it with the air compressor after unpacking) Not a big deal. The 30" kit was pretty straight forward on the install, and the brackets worked good. The 40" arrived with no instructions and so required a peak at the internet for some installed pictures to compare to. Once I had a general idea of where the L brackets attached it wasn't too tough (though, it was a tight fit). Supplied power cables for both could be a bit longer. After routing the 40" light's cable was about 3-4 inches short of the upfitter splices. The 30" was much shorter than that. A little wireloom and some black electrical tape and it will look as good as factory.

The only real problem area ended up being behind the glovebox... which I know has been ******* about more than once by people. Was it overly complicated to figure out? No. Was it a pain to get to and strip the wires? Not bad. Was it a major pain in the ass to join the little yellow wire to the little red wire? You Better Freakin Believe It!!! How are these not connected from the factory??!?!? It makes Zero sense!! 50k+ truck, the very least they could do was make the wires 3 frikkin inches longer! :emotions122: After an hour of cursing and fiddling I finally determined the best (only) option I had was to make a jumper out of some spare wire and a barrel connector. It ain't pretty, but it's solid and ain't nobody ever going to see it anyway... So Screw it. i know I should have hooked up the other wires while I was there, but I was tired, pissed, and late for something else. At the very least it might prevent me from buying anymore spendy lights in the near future.

Anyway, I wired both lights up to switch 1. Not sure if this is standard protocol or not, but it's what I did and I like it. ;-)

M & R was cool and they sent a couple of amber lenses for the lights. I haven't put them on yet... I like the white so far, though, with the orange marker lights and all, the amber might look pretty cool too. I'll tape em on and give it a try when I get some free time and then make the call from there.

In other Mod news I installed (more like plugged in and set) a 1tb mobile usb harddrive in the center console. Mostly so I could store all my high quality audio files with out having to unplug/replug my phone every time I get in and out. Plus, all my tunes won't fit on anything smaller than 100gb. I probably should have gone with an SSD in an usb powered enclosure, but oh well. If the harddrive crashes while bombing through a corn field I guess it is what it is.

Still working up designs for my badges. Taking awhile since I can't find any good high quality art to work with, so I have ended up having to redraw what I want from scratch in photoshop. Time consuming, but it should look really nice when I'm done.

That's about it for now.
 

Squatting Dog

FRF Addict
Joined
Jun 1, 2011
Posts
8,602
Reaction score
4,103
Location
Kansas City, MO
So... my behind the grill kit from M & R showed up! I put them in this Saturday and all I can say is Wow! The lights look great and are very bright... I need to do a little re-aiming when I get a chance, but other than that they are in nice and tight. Haven't had a chance to get any pictures uploaded yet, but will post some in the next day or so when I get a chance.

Some notes on the install that I'm sure most everyone has heard before...

Overall it went great. The kits arrived usps in good shape. The 30" kit was packed in the hard breakable messy Styrofoam versus the 40" kit which arrived in the softer non messy styrofoam... if that makes sense. (the 30" light had to have little white bits of foam blown off it with the air compressor after unpacking) Not a big deal. The 30" kit was pretty straight forward on the install, and the brackets worked good. The 40" arrived with no instructions and so required a peak at the internet for some installed pictures to compare to. Once I had a general idea of where the L brackets attached it wasn't too tough (though, it was a tight fit). Supplied power cables for both could be a bit longer. After routing the 40" light's cable was about 3-4 inches short of the upfitter splices. The 30" was much shorter than that. A little wireloom and some black electrical tape and it will look as good as factory.

The only real problem area ended up being behind the glovebox... which I know has been ******* about more than once by people. Was it overly complicated to figure out? No. Was it a pain to get to and strip the wires? Not bad. Was it a major pain in the ass to join the little yellow wire to the little red wire? You Better Freakin Believe It!!! How are these not connected from the factory??!?!? It makes Zero sense!! 50k+ truck, the very least they could do was make the wires 3 frikkin inches longer! :emotions122: After an hour of cursing and fiddling I finally determined the best (only) option I had was to make a jumper out of some spare wire and a barrel connector. It ain't pretty, but it's solid and ain't nobody ever going to see it anyway... So Screw it. i know I should have hooked up the other wires while I was there, but I was tired, pissed, and late for something else. At the very least it might prevent me from buying anymore spendy lights in the near future.

Anyway, I wired both lights up to switch 1. Not sure if this is standard protocol or not, but it's what I did and I like it. ;-)

M & R was cool and they sent a couple of amber lenses for the lights. I haven't put them on yet... I like the white so far, though, with the orange marker lights and all, the amber might look pretty cool too. I'll tape em on and give it a try when I get some free time and then make the call from there.

In other Mod news I installed (more like plugged in and set) a 1tb mobile usb harddrive in the center console. Mostly so I could store all my high quality audio files with out having to unplug/replug my phone every time I get in and out. Plus, all my tunes won't fit on anything smaller than 100gb. I probably should have gone with an SSD in an usb powered enclosure, but oh well. If the harddrive crashes while bombing through a corn field I guess it is what it is.

Still working up designs for my badges. Taking awhile since I can't find any good high quality art to work with, so I have ended up having to redraw what I want from scratch in photoshop. Time consuming, but it should look really nice when I'm done.

That's about it for now.

what I would suggest is using 1/2" pieces of velcro put the hook part on the lights and loop part on the lens.. this way you can have best of both worlds with out fighting double sided tape, and you can make up some black plastic covers with velcro on it so you can protect them during day to day driving...
 
OP
OP
Harblar

Harblar

Full Access Member
Joined
Oct 28, 2012
Posts
466
Reaction score
371
Location
Aberdeen, SD
what I would suggest is using 1/2" pieces of velcro put the hook part on the lights and loop part on the lens.. this way you can have best of both worlds with out fighting double sided tape, and you can make up some black plastic covers with velcro on it so you can protect them during day to day driving...

Hadn't thought about that... figured the lights had to be taken apart to install the amber lenses. Honestly hadn't looked at the amber lenses too closely. I'll have to look into that. Thanks for the suggestion!
 
Top