Turf Tamer
Full Access Member
Let me start off by saying this is a huge undertaking and is extremely time consuming. I would recommend setting aside the better part of a weekend to be on the safe side before attempting this.
The components used where all purchased from The Retrofit Source. com
For this particular build I used
Morimoto Mini H1 5.0 Projectors
Morimoto 3five.1 Ballasts
Morimoto XB35 H1 Bulbs
Motocontrol H13 Relay Harness
Apollo Shrouds
Required tools
T-20 torx bit
flat head and phillips screwdriver
dremel tool
heat gun
scissors
10MM and 7mm sockets
adjustable wrench
pair of good gloves
Additional recommended items
OCI Butyl resealing glue (purchased from TSR)
Plastic epoxy
Rolled aluminum sheet (used to make shroud extensions)
Beer and lots of it
Ok, so lets get started............
First you will need to remove your headlights. Using your 10mm socket, remove the three bolts that hold the HL assembly in place the pull straight out.
Now to the fun part, getting these suckers open. Preheat you oven to 265 degrees and place your Headlight inside for 7 minutes. Using your now gloved hands remove your headlight and use your flat blade screwdriver to pry the the lens from the housing in small increments. Take your time and use the heat gun to reheat the area you are working on. This will most likely take over an hour to complete one headlight. Before removing the lens you will need to remove the bezel retaining screw on the back of the headlight. This is done with the 7mm socket. Once you are ready to remove the lens through the light in the oven again for another 7 minutes and once you remove it it should come off with a little encouragement. Repeat steps for 2nd light.
Now that your lights are opened up use your T-20 trox bit to remove your factory bulb shield. Remove the rubber boot and factory bulb from the rear of the housing. So now your left with just the main reflector and the headlight housing.
Front and rear pics
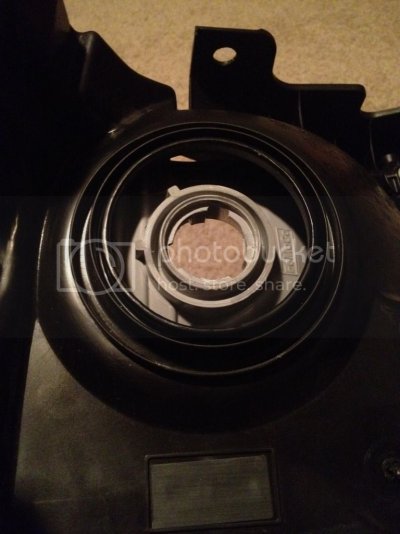
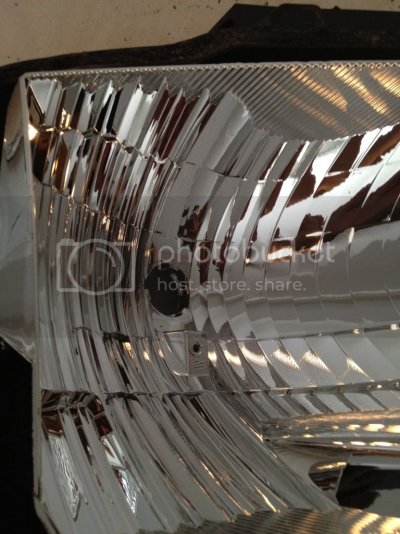
The stock reflector bucket requires permanent modification to allow the threaded end of the projector to protrude far enough out the rear to allow the lock-nut to thread below the recessed groves used to mount the bulb retention plate. (sorry if that is a little confusing)
Use your dremel and remove the excess material from the reflector side of the bucket. You will also need to drill through and widen the screw hole that was used to mount the bulb shield, this will provide a channel to run the Hi/Lo wires through at a later time.
should look like this once complete.
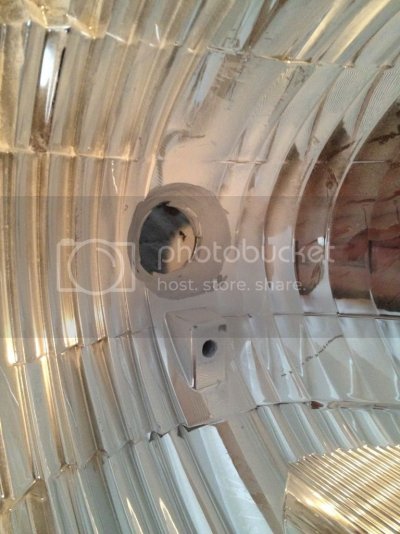
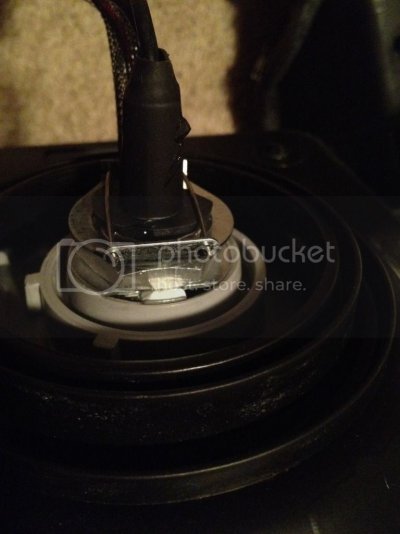
Remove any dust created from the previous step and place the projector in the housing. Thread the Hi/Lo wires through the hole you created earlier. Place adapter plate 1 (refer to pic below) on to the threaded end of the projector making sure the grooved end is facing up. Thread the lock-nut over the adapter plate and tighten lock-nut. Be sure not to over tighten at this point, you will need to be able to adjust the horizontal plane when aiming the lights at a later time. Using your phillips screwdriver, mount your bulb retention plate to the rear of the projector.
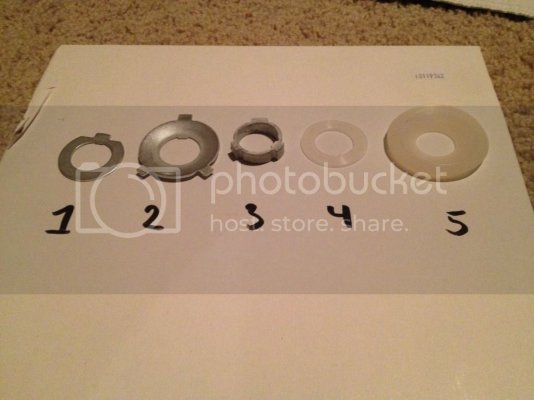
it should look like this once completed
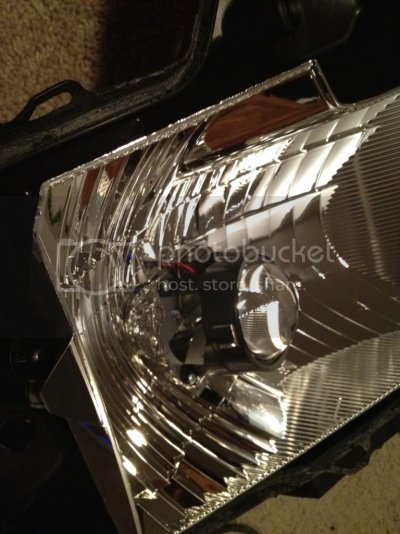
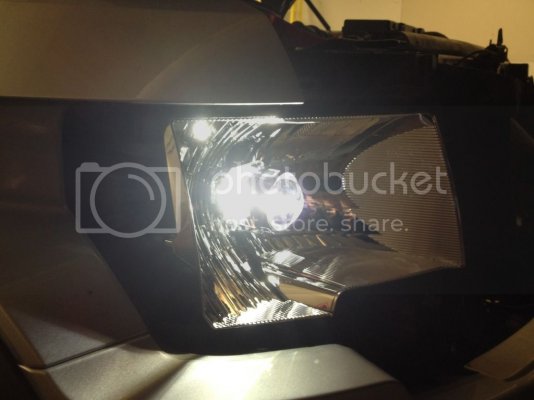
Now its time to test these bad boys out and aim them. Park your truck on a level surface and find a wall or fence to project the light on. Fire them up and with a gloved hand adjust the horizontal plane of the lights by rotating the projector body clockwise or counter clockwise. The vertical adjustment is made by rotating the height adjuster screw located on the back of the headlight assembly. Once everything is set to your liking carefully remove the headlight assembly and use the optional plastic epoxy to permanently set the projectors in place.
beem shot after adjustments
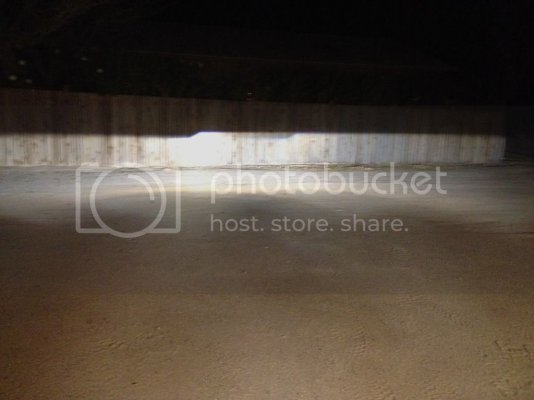
Allow the epoxy to cure before moving on to the next step.
In cert the shroud-centric ring into the shroud and place it on the projector. Form a cylinder using construction paper the same diameter as the widest portion as the shroud. Slide the cylinder over the shroud until it makes contact with the reflector bucket. Trace a outline of the contours of the bucket onto the paper and remove and unroll the paper. Cut the excess paper away and repeat this process until the paper evenly contours the curves of the reflector bucket. Now use the paper as a stencil and cut out your shroud extension on your aluminum sheet.
Affix your shroud extension to your shroud and test fit once more before permanently mounting it to the projector.
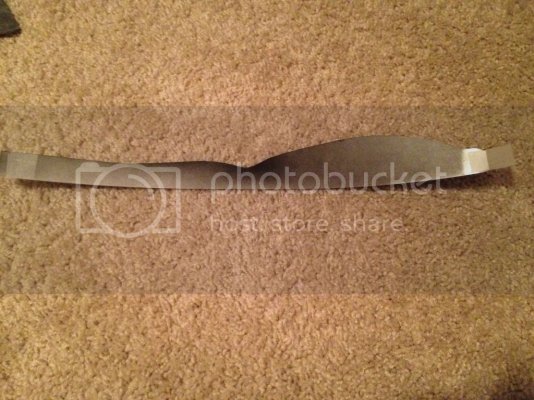
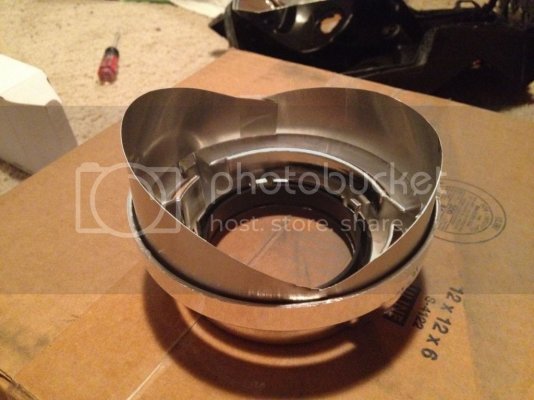
Test fitting
I decided to paint the shroud extensions to match the black factory bezel.
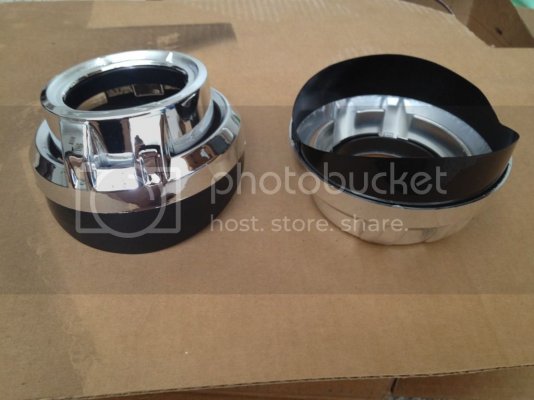
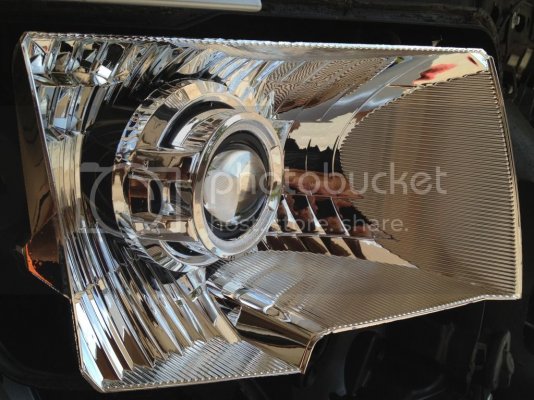
Once it fits properly, permanently affix the shroud extension to the shroud using glue or epoxy. Now its time to attach the shroud to the projector. Prior to doing this I recommend removing all the excess OEM sealant from the headlight assembly and the lens. This will allow you to place the lens over the assembly so you can see exactly what everything will look like once it is sealed back up. Clean the area with rubbing alcohol to remove any oils and apply a light coating of plastic epoxy on the projector bezel. This stuff sets in 5 minutes so you will need to work fast and make sure everything lines up the way you want it. Slide the shroud over the projector and set it in place, I did this while the the headlights where mounted, so I took a few paces back and made sure everything was level.
Shroud mounted with plastic epoxy, the lens is just there to give me a idea of what it will look like when complete.
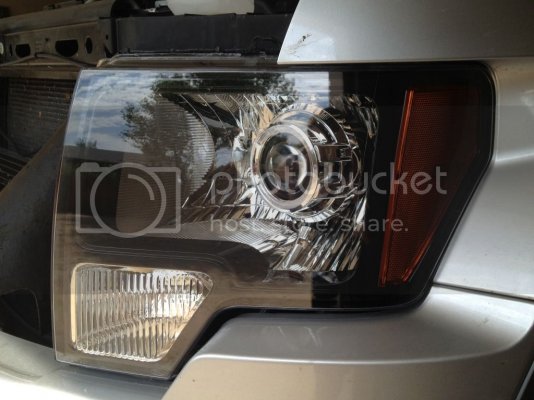
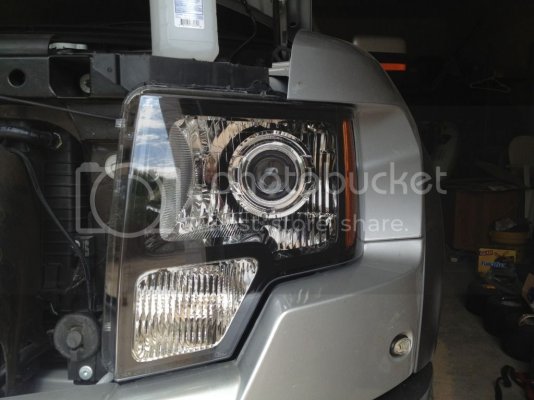
both shrouds mounted
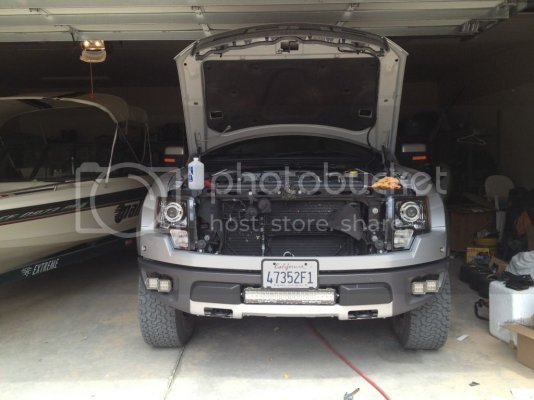
Two things I just learned the hard way.
1. Don't use rubbing alcohol to clean the chrome the shroud, it will leave permanent slight haze.
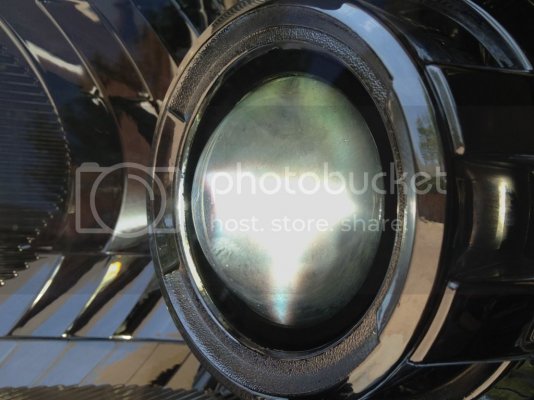
2. Do not use super period. I used it to secure the shroud extensions to the shroud and I just took the second headlight out of the oven and the glue went all CSI on my ass and partially vaporized leaving a coating on the inside of the projector lens. At this point I'm unsure if it will have a dramatic affect on performance. Man I'm pissed right now.
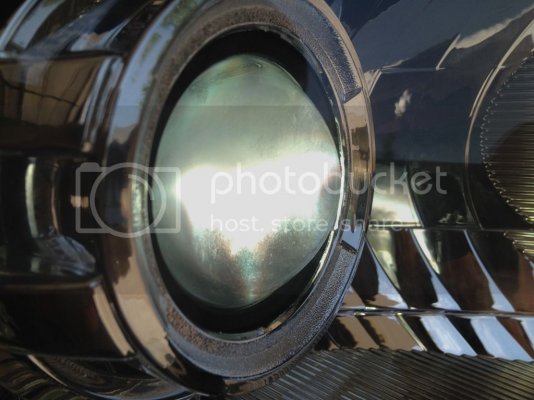
Well it looks like I will have to open up the headlight assembly and replace the lens in the future.The one headlight is definitely brighter than the other. I was hoping this would serve as a (how to), but its looking like this thread will serve as a (what not to do).
this is what the lens looks like with the glue haze
left HL
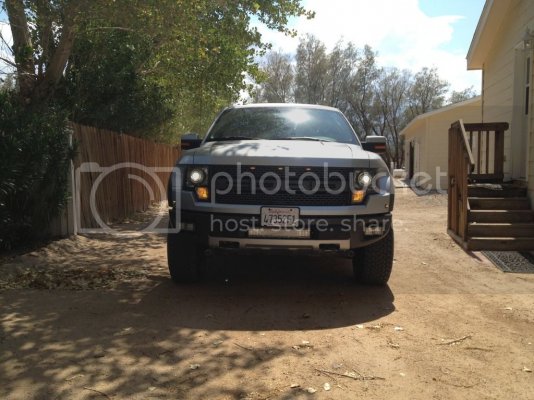
Pics of the final install
Still looks killer though
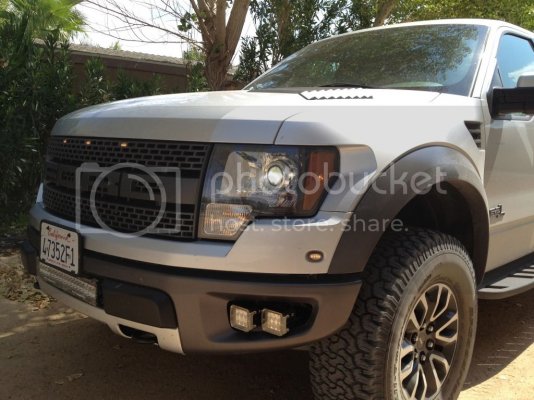
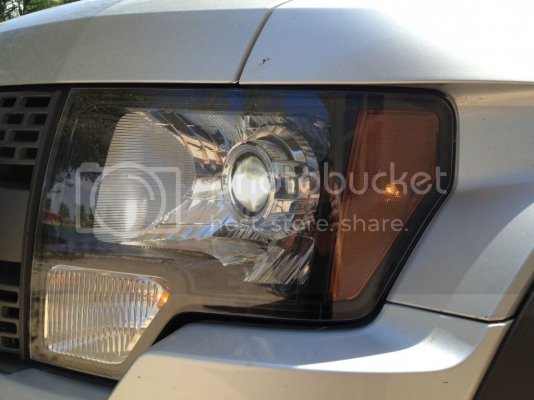
Thats it for now, I may update the thread if and when I replace the lenses.
Hope this will help those who are considering having a go at it. My guess is most of you will look at this and say "F- that, I'm calling Ducati."
The components used where all purchased from The Retrofit Source. com
For this particular build I used
Morimoto Mini H1 5.0 Projectors
Morimoto 3five.1 Ballasts
Morimoto XB35 H1 Bulbs
Motocontrol H13 Relay Harness
Apollo Shrouds
Required tools
T-20 torx bit
flat head and phillips screwdriver
dremel tool
heat gun
scissors
10MM and 7mm sockets
adjustable wrench
pair of good gloves
Additional recommended items
OCI Butyl resealing glue (purchased from TSR)
Plastic epoxy
Rolled aluminum sheet (used to make shroud extensions)
Beer and lots of it
Ok, so lets get started............
First you will need to remove your headlights. Using your 10mm socket, remove the three bolts that hold the HL assembly in place the pull straight out.
Now to the fun part, getting these suckers open. Preheat you oven to 265 degrees and place your Headlight inside for 7 minutes. Using your now gloved hands remove your headlight and use your flat blade screwdriver to pry the the lens from the housing in small increments. Take your time and use the heat gun to reheat the area you are working on. This will most likely take over an hour to complete one headlight. Before removing the lens you will need to remove the bezel retaining screw on the back of the headlight. This is done with the 7mm socket. Once you are ready to remove the lens through the light in the oven again for another 7 minutes and once you remove it it should come off with a little encouragement. Repeat steps for 2nd light.
Now that your lights are opened up use your T-20 trox bit to remove your factory bulb shield. Remove the rubber boot and factory bulb from the rear of the housing. So now your left with just the main reflector and the headlight housing.
Front and rear pics


The stock reflector bucket requires permanent modification to allow the threaded end of the projector to protrude far enough out the rear to allow the lock-nut to thread below the recessed groves used to mount the bulb retention plate. (sorry if that is a little confusing)
Use your dremel and remove the excess material from the reflector side of the bucket. You will also need to drill through and widen the screw hole that was used to mount the bulb shield, this will provide a channel to run the Hi/Lo wires through at a later time.
should look like this once complete.

Remove any dust created from the previous step and place the projector in the housing. Thread the Hi/Lo wires through the hole you created earlier. Place adapter plate 1 (refer to pic below) on to the threaded end of the projector making sure the grooved end is facing up. Thread the lock-nut over the adapter plate and tighten lock-nut. Be sure not to over tighten at this point, you will need to be able to adjust the horizontal plane when aiming the lights at a later time. Using your phillips screwdriver, mount your bulb retention plate to the rear of the projector.

it should look like this once completed


Now its time to test these bad boys out and aim them. Park your truck on a level surface and find a wall or fence to project the light on. Fire them up and with a gloved hand adjust the horizontal plane of the lights by rotating the projector body clockwise or counter clockwise. The vertical adjustment is made by rotating the height adjuster screw located on the back of the headlight assembly. Once everything is set to your liking carefully remove the headlight assembly and use the optional plastic epoxy to permanently set the projectors in place.
beem shot after adjustments


Allow the epoxy to cure before moving on to the next step.
In cert the shroud-centric ring into the shroud and place it on the projector. Form a cylinder using construction paper the same diameter as the widest portion as the shroud. Slide the cylinder over the shroud until it makes contact with the reflector bucket. Trace a outline of the contours of the bucket onto the paper and remove and unroll the paper. Cut the excess paper away and repeat this process until the paper evenly contours the curves of the reflector bucket. Now use the paper as a stencil and cut out your shroud extension on your aluminum sheet.
Affix your shroud extension to your shroud and test fit once more before permanently mounting it to the projector.


Test fitting
I decided to paint the shroud extensions to match the black factory bezel.


Once it fits properly, permanently affix the shroud extension to the shroud using glue or epoxy. Now its time to attach the shroud to the projector. Prior to doing this I recommend removing all the excess OEM sealant from the headlight assembly and the lens. This will allow you to place the lens over the assembly so you can see exactly what everything will look like once it is sealed back up. Clean the area with rubbing alcohol to remove any oils and apply a light coating of plastic epoxy on the projector bezel. This stuff sets in 5 minutes so you will need to work fast and make sure everything lines up the way you want it. Slide the shroud over the projector and set it in place, I did this while the the headlights where mounted, so I took a few paces back and made sure everything was level.
Shroud mounted with plastic epoxy, the lens is just there to give me a idea of what it will look like when complete.


both shrouds mounted

Two things I just learned the hard way.
1. Don't use rubbing alcohol to clean the chrome the shroud, it will leave permanent slight haze.
2. Do not use super period. I used it to secure the shroud extensions to the shroud and I just took the second headlight out of the oven and the glue went all CSI on my ass and partially vaporized leaving a coating on the inside of the projector lens. At this point I'm unsure if it will have a dramatic affect on performance. Man I'm pissed right now.

Well it looks like I will have to open up the headlight assembly and replace the lens in the future.The one headlight is definitely brighter than the other. I was hoping this would serve as a (how to), but its looking like this thread will serve as a (what not to do).
this is what the lens looks like with the glue haze
left HL


Pics of the final install
Still looks killer though


Thats it for now, I may update the thread if and when I replace the lenses.
Hope this will help those who are considering having a go at it. My guess is most of you will look at this and say "F- that, I'm calling Ducati."
Last edited:


