www.FordRaptorLights.com

Disclaimer: Links on this page pointing to Amazon, eBay and other sites may include affiliate code. If you click them and make a purchase, we may earn a small commission.

ChevTillNow

Full Access Member
Joined
Jun 21, 2017
Posts
350
Reaction score
314
Location
PNW WA
Took me way longer than 2 hours....but I am OCD.

Yup... that be me too...

I even went so far as to put black silicone behind the plastic inserts to eliminate all and any light that I could see when I held them up after I shaved them and snapped them in LOL

Once I get my harness correct I'll finish my install. The lights and brackets are in just not wired up.

I'm going to move on to my onx6 and get that working first I guess, because that has the right connectors.

But eventually... it'll be done...

But this kit of Jeffs is a well-thought-out quality piece of kit that's for sure.:biggrin:
 

hamster

FRF Supporting Member
Supporting Member
Joined
Mar 14, 2016
Posts
1,172
Reaction score
856
Location
Northern VA
Yup... that be me too...

I even went so far as to put black silicone behind the plastic inserts to eliminate all and any light that I could see when I held them up after I shaved them and snapped them in LOL

Once I get my harness correct I'll finish my install. The lights and brackets are in just not wired up.

I'm going to move on to my onx6 and get that working first I guess, because that has the right connectors.

But eventually... it'll be done...

But this kit of Jeffs is a well-thought-out quality piece of kit that's for sure.:biggrin:

U win on OCD contest.:ROFLJest:

Agree on quality of kit....real nice.
 

Baja Designs

Supporting Vendor
Supporting Vendor
Joined
Apr 12, 2012
Posts
1,778
Reaction score
1,255
Thanks for this... You might want to make that an option moving forward for us "wiring is NOT my thing" guys :baby:

I have already started to modify my harness; haven't snipped yet, but exactly HOW do you crimp the connectors, without a crimping tool?

I at first thought I could just take apart the KC connectors and use those in the BD end...But they are not big enough for the BD lights... So it is SNIP TIME!

I do have some solder adhesive tubing, which I can use, but would prefer the connectors... so...do tell how to do it without the crimping tool!

hey chev,

I discovered the same thing when I got the harness and had to figure out myself that those weather pack connectors in the box with the baja designs lights are what you need to use with the harness after you cut off the connectors that came on there. I had no idea how to put together a weather pack connector so I did have to watch a few internet videos and pull up some pictures. It took me a couple of hours to figure it out but now I feel like I am one with the force and the force is with me. This should definitely be better explained in the directions that come with the kit at least. If I was selling these I would put on the weather pack connectors especially if the customer ordered the baja lights with the kit prior to shipping it. Having said that, it would take some of the fun out of the experience in being able to wire you own truck.

You will need a crimping tool...go to walmart or home cheapo or wherever after you watch some online youtube video on how to make a weather pack connector and pick one up. You could try needle nose pliers but you will likely not be one with the force and the force will not be with you. Good luck!

The second method listed above might be easier actually. Go to walmart or wherever and get some heat shrink butt connecters. Look at a you tube video on how to use them. It is easy. You will still need a wire stripper tool and something to heat up the heat shrink connectors.

The weatherpack connectors are real nice. Admittedly it helps to see a diagram to know what order the parts should go together, but honestly I thought it was easy to do with a pair of needle nose pliers. Just pay close attention and dont just try to MASH it hulk style


Hey everyone,

Sorry about the difficulty or confusion when assembling weatherpack connectors. Hopefully this will help for future use:
https://www.pegasusautoracing.com/document.asp?DocID=TECH00002
Note: A correct crimp can be done without the special tool. It is a little bit more difficult but is achievable

WEATHER-PACK-STEP1.jpg

Step 1
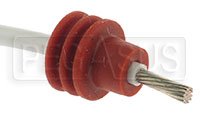
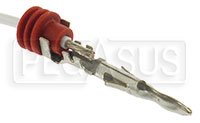
Strip wire 3/16" from the end and install the terminal seal over the insulation. The small OD of the seal should face the end of the wire.

WEATHER-PACK-STEP2.jpg

Step 2
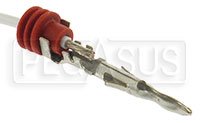
Position terminal (you may squeeze the insulation crimp lightly with your fingers to maintain position while crimping).

WEATHER-PACK-STEP3.jpg

Step 3
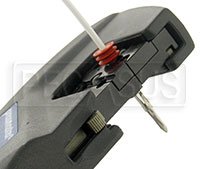
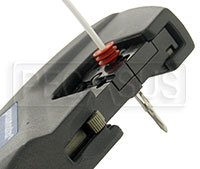
Crimp the terminal (the Pressmaster tool is shown here). The Pressmaster tool crimps the wire and the dust seal/strain relief in a single operation.

WEATHER-PACK-STEP4.jpg

Step 4
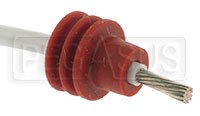
Both the wire and insulation have perfect crimps! Just snap the terminal into the connector body and you're done.
If you ever need to remove a terminal from a connector body, use the Weather Pack Terminal Extraction Tool or De-Pinning tool
 

4x4TruckLEDs.com

Supporting Vendor
Supporting Vendor
Joined
Jul 18, 2017
Posts
2,975
Reaction score
1,390
Did Diego tell you about my issue yesterday using cheap aftermarket fake weather pack connectors that didnt line up :) Lesson learned, BUY THE REAL STUFF (that's my lesson learned, I bought the no-name cheap ones)
 

ChevTillNow

Full Access Member
Joined
Jun 21, 2017
Posts
350
Reaction score
314
Location
PNW WA
Hey everyone,

Sorry about the difficulty or confusion when assembling weatherpack connectors. Hopefully this will help for future use:
https://www.pegasusautoracing.com/document.asp?DocID=TECH00002
Note: A correct crimp can be done without the special tool. It is a little bit more difficult but is achievable

WEATHER-PACK-STEP1.jpg

Step 1
Strip wire 3/16" from the end and install the terminal seal over the insulation. The small OD of the seal should face the end of the wire.

WEATHER-PACK-STEP2.jpg

Step 2
Position terminal (you may squeeze the insulation crimp lightly with your fingers to maintain position while crimping).

WEATHER-PACK-STEP3.jpg

Step 3
Crimp the terminal (the Pressmaster tool is shown here). The Pressmaster tool crimps the wire and the dust seal/strain relief in a single operation.

WEATHER-PACK-STEP4.jpg

Step 4
Both the wire and insulation have perfect crimps! Just snap the terminal into the connector body and you're done.
If you ever need to remove a terminal from a connector body, use the Weather Pack Terminal Extraction Tool or De-Pinning tool

Good detailed explanation. But you're really need to have that crimping tool to do it right I suppose.

I'm just glad we have Jeff to help with install calls day and night, and 4 x 4 truck LEDs.com available as needed as well.

Kudos to everyone for the help and sympathy LOL
 

4x4TruckLEDs.com

Supporting Vendor
Supporting Vendor
Joined
Jul 18, 2017
Posts
2,975
Reaction score
1,390
We do our best. Jeff and I take customer service VERY seriously and try and do what we can to help everybody out. So i'm glad to pick up his line knownig he backs his product like he has.
 

ChevTillNow

Full Access Member
Joined
Jun 21, 2017
Posts
350
Reaction score
314
Location
PNW WA
Well I was able to get all my lights in however I haven't wired them up yet. That will happen as soon as I've fixed my harness.

I am also able to determine that lowering my license plate bracket using the stow and show modified bracket is going to work just fine with my Onyx light :biggrin:
 

Attachments

  • 20170809_211421.jpg
    20170809_211421.jpg
    96.1 KB · Views: 69

4x4TruckLEDs.com

Supporting Vendor
Supporting Vendor
Joined
Jul 18, 2017
Posts
2,975
Reaction score
1,390
Is that stow and show what i've seen on some of the overlander vehicles? I think someone makes one that is actually a Fairlead for the winch and then flips up to expose it, flips down to cover it
 

ChevTillNow

Full Access Member
Joined
Jun 21, 2017
Posts
350
Reaction score
314
Location
PNW WA
Is that stow and show what i've seen on some of the overlander vehicles? I think someone makes one that is actually a Fairlead for the winch and then flips up to expose it, flips down to cover it

I've seen those not sure if it's the same thing though.
 
Top