What did you do to your Raptor today? (Gen2)

Disclaimer: Links on this page pointing to Amazon, eBay and other sites may include affiliate code. If you click them and make a purchase, we may earn a small commission.

Joined
Mar 13, 2023
Posts
26
Reaction score
83
Location
Washington
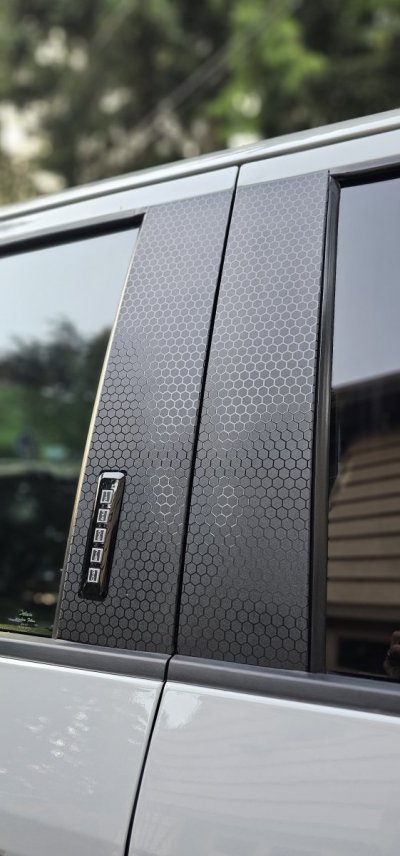
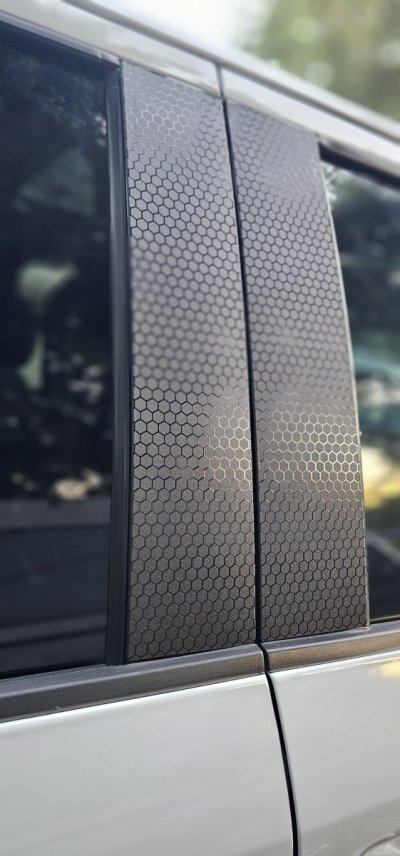
Got bored of trying to keep the b pillar shiny so I switched it up a bit. Was going to do forged carbon. But, when I saw this I thought it would be a bit different. Fired up the cutter and made these this evening. Took a little bit to get all the measurements close. Just thought I'd share.
 

Attachments

  • 20240715_203935.jpg
    20240715_203935.jpg
    119 KB · Views: 62
  • 20240715_205054.jpg
    20240715_205054.jpg
    116.5 KB · Views: 63

OEMPlus Raptor

OEM preferred....
Joined
Aug 17, 2020
Posts
1,074
Reaction score
1,145
Location
Oxnard CA
Got bored of trying to keep the b pillar shiny so I switched it up a bit. Was going to do forged carbon. But, when I saw this I thought it would be a bit different. Fired up the cutter and made these this evening. Took a little bit to get all the measurements close. Just thought I'd share.
Looks cool, reminds me of the cloth insert on the 19-20 seats. Its like a honeycomb.
 

91Eunos

Full Access Member
Joined
Oct 18, 2018
Posts
867
Reaction score
1,642
Location
Hill country, Tejas
Diff fluid was a lot cleaner/clearer than I expected:

i-hCPWcbG-4K.jpg

Of note, the bolt heads on my cover were definitely 1/2”, and not 13mm as I’ve read in several places. My truck is an early ‘18MY build though, actually built in ‘17, so that could be the difference.

Now begins the tedious task of removing all the old gasket material, and prepping the case for the new gasket and diff cover:

i-X6qL7vB-4K.jpg
 

91Eunos

Full Access Member
Joined
Oct 18, 2018
Posts
867
Reaction score
1,642
Location
Hill country, Tejas
…OK, not gonna lie, cleaning that case lip was a pain in the ass.

i-dbkWqjj-4K.jpg

But I wanted that surface to be absolutely clean; spend the time and effort now so it’s one and done. Spent a fair bit of time degreasing and cleaning all the holes for the mounting hardware too, and used Locktite Red since I shouldn’t ever have to remove these fasteners now that I have a cover with fill and drain ports.

i-hKtS8X9-4K.jpg

If I do need to remove ‘em, a little heat will take care of it pretty easily.

At any rate, once I got it all buttoned up, I put in 3 qts of 75-90 gear lube, then pulled it onto level ground for the last little bit.

I honestly expected it to be full, and start dribbling out when I pulled the lower fill plug, but mine took a couple ounces from a 4th quart before it overflowed the fill port.

Double checked for leaks or any obvious missed bolts, etc. and took it for a couple of miles test drive, going up and down the steepest hill in our neighborhood in the process.

All good!

i-8n3ZGtb-X4.jpg

Only thing I’m not happy with is that little bracket above the diff that holds the brake lines. It’s bolted down securely on the top, but there’s a tab that hangs over the front of the diff that used to go over a small stud on the cover.

However, the new ARP fasteners obviously don’t allow that, so I’ll go back in there and use a cutoff wheel on a Dremel to remove that little lip/tab that hangs over the front of the diff cover.
 
Top