What did u do to your raptor today?

Disclaimer: Links on this page pointing to Amazon, eBay and other sites may include affiliate code. If you click them and make a purchase, we may earn a small commission.

Joined
Sep 18, 2023
Posts
24
Reaction score
45
Location
North Carolina
Hey folks,
Got most of my engine and bay apart. Cleaning up this mess of wiring still (as mentioned in my intro post lol), but any preventative disaster tips on what to change/ secure while I'm in there?
Also pulled water pump (replacing), idler pullies & tensioner (rebuilding), alternator (just inspecting and cleaning), radiator (replacing), all fluid reservoirs, and drained all fluids for my 2nd change since owning the truck. New water pump showed messed up, so recent the bracket and painted it.
Might end up replacing several electrical connectors, as they disintegrate, when removing the connectors. Same happened to my coils and radiator.
Hope you ******* are doing well.
 

Attachments

  • 20240215_185611.jpg
    20240215_185611.jpg
    138.3 KB · Views: 29
  • 20240217_025753.jpg
    20240217_025753.jpg
    192.4 KB · Views: 29

BenBB

FRF Supporting Member
Supporting Member
Joined
Apr 21, 2016
Posts
1,828
Reaction score
2,505
Location
Lots of different places
Yeahh that impeller doesn't look good haha! UPS Gorilla?

3 things come to mind in regards to wiring in the engine bay; A) that big harness that disappears down the firewall just aft of the passenger side cylinder head, make sure it's routed as far as possible from the exhaust, known to melt and cause all kinds of transmission issues. B) check the big-ass harness at the driver side wheelwell just forward of the ABS unit, mine was rubbing against the wheelwell liner so I added some sheet HDPE to keep it from cutting. C) maybe not engine bay but close, re-route the harness from the driver side rear corner down to the frame rail and back to the fuel pump so it doesn't hang down and get caught on something or smashed into the frame rail.
 

laselvasurf

Active Member
Joined
Oct 6, 2020
Posts
86
Reaction score
321
Location
Santa Cruz, CA
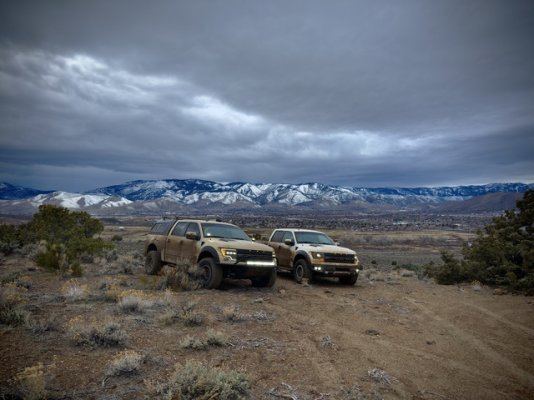
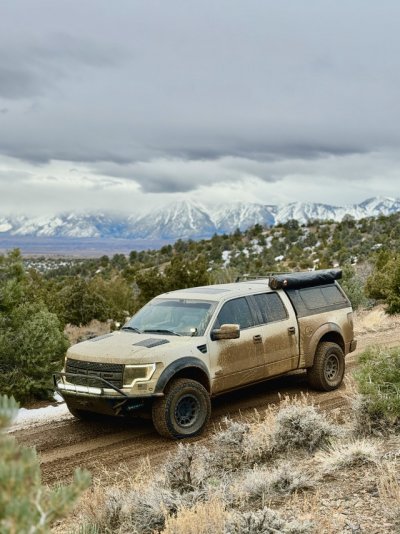
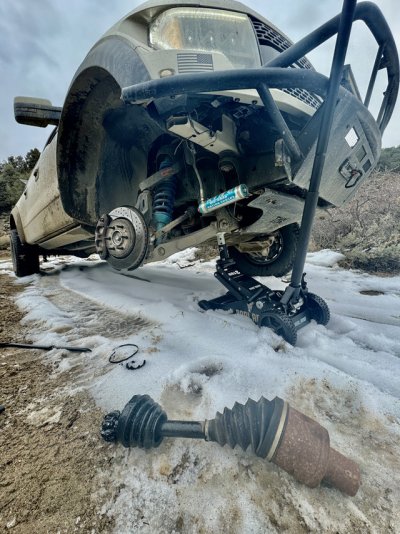
I spent the day outside of Carson City exploring trails with a friend who also has a raptor. Had a great time and managed to snap one of my CV axles... Thankfully I had my off-road jack and basic tools so I was able to remove it and carry on. I had to keep it in 2x4 for the rest of the run(50+ miles) and had a blast spending most of the time sideways in the mud. Anyone have any recommendations on CV Axle replacements? I don't want to do the full $3K upgrade as that seems crazy, but the stock and auto parts store versions seem to fail often.


Made an absolute mess of the truck, but had a blast!

IMG-4401.jpg
IMG-4381.jpg
IMG-4373.jpg
 
Last edited:
Joined
Sep 18, 2023
Posts
24
Reaction score
45
Location
North Carolina
Yeahh that impeller doesn't look good haha! UPS Gorilla?

3 things come to mind in regards to wiring in the engine bay; A) that big harness that disappears down the firewall just aft of the passenger side cylinder head, make sure it's routed as far as possible from the exhaust, known to melt and cause all kinds of transmission issues. B) check the big-ass harness at the driver side wheelwell just forward of the ABS unit, mine was rubbing against the wheelwell liner so I added some sheet HDPE to keep it from cutting. C) maybe not engine bay but close, re-route the harness from the driver side rear corner down to the frame rail and back to the fuel pump so it doesn't hang down and get caught on something or smashed into the frame rail.
UPS? I wish! It was actually FedEx this time. Took it out and saw it and thought "have all my other water pumps been screwed up and they make them pre bent now?" Little percussion persuasion fixed it though.

Great info on those locations! I'm de-pinning most things, running that nylon sheathing loom, some electrical connector shrink tube, then re-pinning them for that sealed tightness and that new loom just looks better. Also thought about adding some distribution blocks for grounds and an external fuse box for the rocker switch wires.
 

laselvasurf

Active Member
Joined
Oct 6, 2020
Posts
86
Reaction score
321
Location
Santa Cruz, CA
This is the Trackmotive Heavy-duty Raptor CV axle. It's the Driver side but RockAuto has them both in stock, and there's no "Raptor Tax" on them.View attachment 445208
Thanks! They have both in stock, but only list the drivers side as compatible with our trucks. For anyone that may stumble on this post, the PN for the passenger side is: FD-8274XTT
 

slade8

Active Member
Joined
Dec 27, 2023
Posts
82
Reaction score
194
Location
Nevada
What I have done to my recently purchased 94k miles, 2014 ruby red screw I recently purchased.
-Fuse 27 moved
-Replaced purge valve(had code)
-replaced shocks via a shock swap with Brian of Hammer Shocks. (mid perch, schaders of course) What a difference, love it.
-Replaced tranny pan with a drain plug type.
-Replaced rear differential with a drain plug type.
-Replaced tranny(+filter), transaxle, front and rear diff fluids. Flushed and replaced power steering fluid.
-Replaced skid plate nut clips and bolts since I had to cut them off.
-Fixed previous owners led frt. bumper lights install.
-replaced lug nuts with oem size black 1 piece lugs
-Restored headlights the old fashion way aka sanding-polishing my arse off.
-Replaced interior lights and license plate bulbs with leds.
-Removed 3rd brake light lens, polished it and added led bed lights.
-Polished and cut open the puddle lights and installed leds(no I didnt look online and see you can buy a pair until I finished my ocd project).
-Replaced reverse bulbs with leds.
-Novus polished the instrument panel, taillights and mini running leds
-detailed interior
-applied plastic restorer to exterior
-had to use my random orbital to buff out the mineral deposits on all the windows and mirrors
- restored the paint (5 step process

A lot more left on my to do list but I think the truck is finally starting to look like it's my own.
 

Attachments

  • 20240208_183122.jpg
    20240208_183122.jpg
    209.2 KB · Views: 35
  • 20240211_134530.jpg
    20240211_134530.jpg
    275.9 KB · Views: 35
  • 20240128_163428.jpg
    20240128_163428.jpg
    164.3 KB · Views: 36
  • 20240216_184514.jpg
    20240216_184514.jpg
    183.7 KB · Views: 39
  • 20240213_185756.jpg
    20240213_185756.jpg
    200.9 KB · Views: 36
Top