
I worked with Sidney @Specialtyperformanceparts to upgrade the lighting on my 24 Raptor. Really happy with the outcome after discussing several options. That team did a tremendous job with the wiring harnesses to make the job super simple!
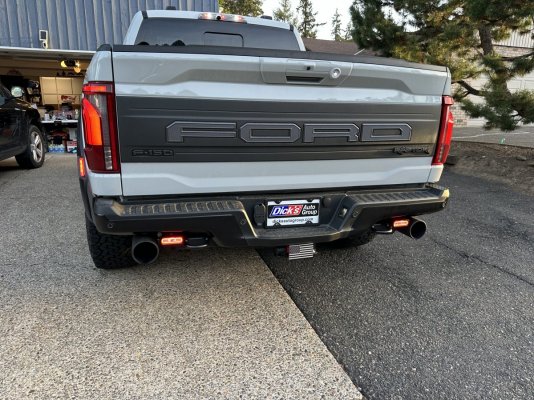
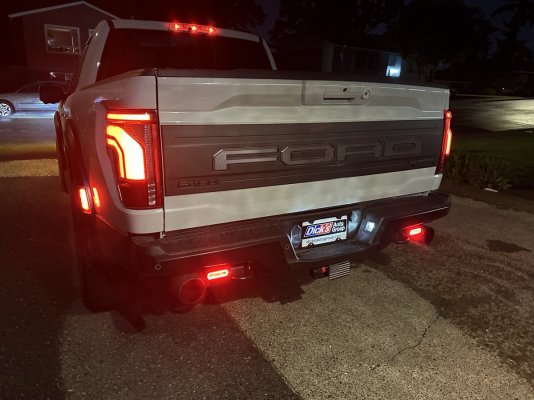
I ended up with the Rigid SRLs for the rears which project a great pattern for extra light when backing up. The red Halo is a great match for the tail/fender lights (pictures don’t do it justice)
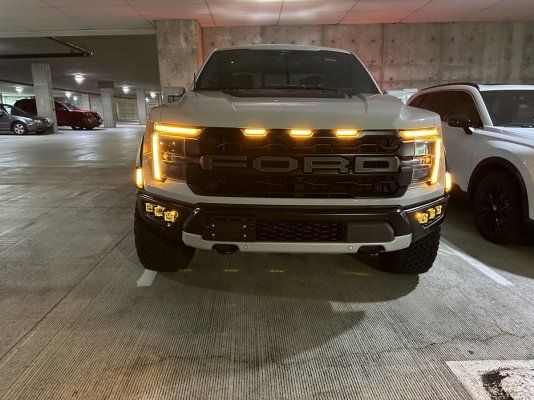
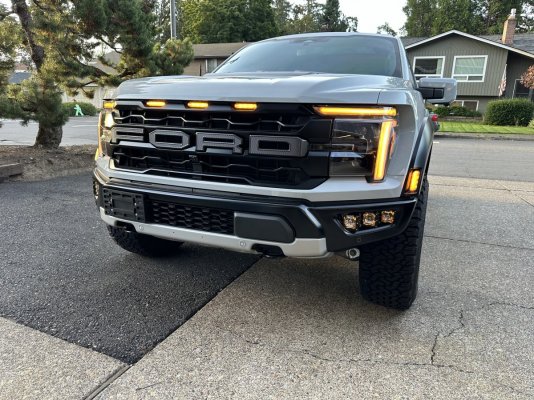
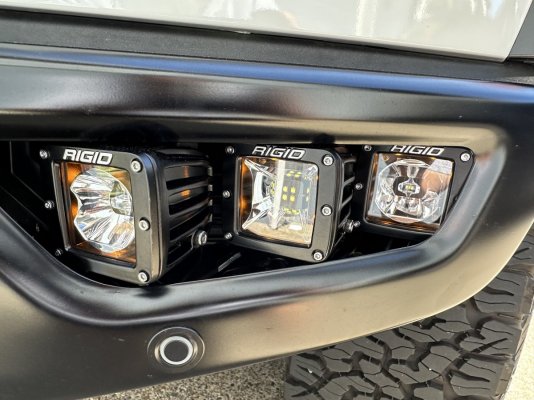
I had a hard time deciding on the fronts, but the Rigid Radiance series Amber Halo really looks great on the truck!
If you watch John’s videos the install is super simple. I did the marker light adapter, aux/sw1 relocate, pigtails for the rigid lights and the pigtails for aux switch wires. Everything came bagged up, labeled well, and was stupid plug and play simple. With a cheap heat gun, a 20v ratchet and some zip ties you will be up and running quick. I did this all without a lift in the driveway and garage.
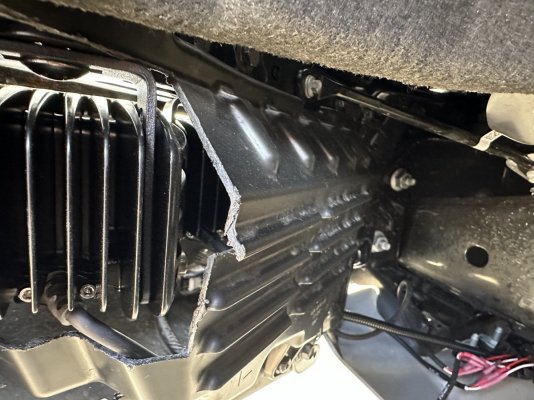
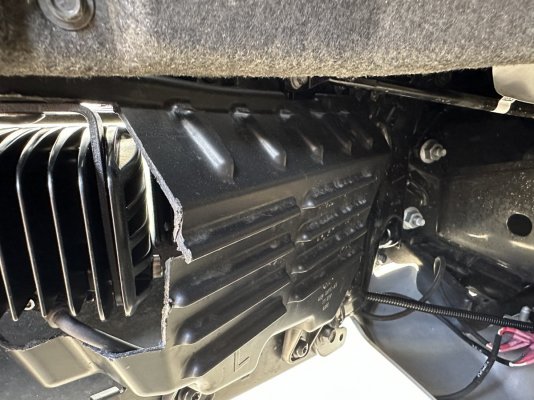
I was able to notch out the factory fog light rear covers to clear the outer lights and bracket and it really helps clean up the look from the front. I would like to do some more wire management between the fogs assemblies but need to get it on a lift to make life much easier. I could have probably dropped the skid plate too, but it was already getting late by the time I got to that part. I did the work over a few nights after work, and that included the neighbors stopping by to chat and see what I was doing.
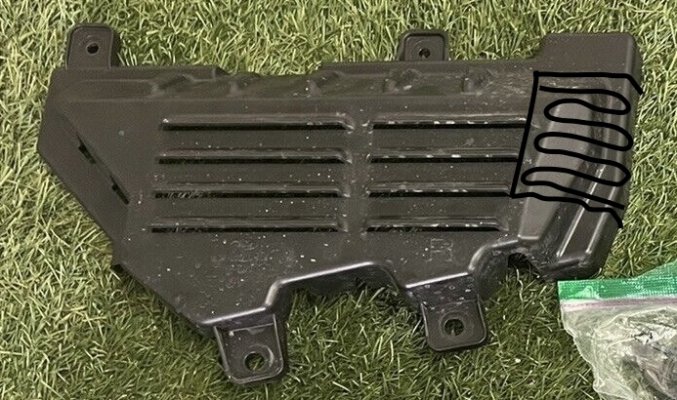
Super impressed with the team at SPV, the quality and ease of their harnesses and brackets, and the fast shipping and response on questions! If anyone needs to know where to notch the rear covers I’ll provide some pics. Took me about 5 mins with an oscillating tool.
I ended up with the Rigid SRLs for the rears which project a great pattern for extra light when backing up. The red Halo is a great match for the tail/fender lights (pictures don’t do it justice)
I had a hard time deciding on the fronts, but the Rigid Radiance series Amber Halo really looks great on the truck!
If you watch John’s videos the install is super simple. I did the marker light adapter, aux/sw1 relocate, pigtails for the rigid lights and the pigtails for aux switch wires. Everything came bagged up, labeled well, and was stupid plug and play simple. With a cheap heat gun, a 20v ratchet and some zip ties you will be up and running quick. I did this all without a lift in the driveway and garage.
I was able to notch out the factory fog light rear covers to clear the outer lights and bracket and it really helps clean up the look from the front. I would like to do some more wire management between the fogs assemblies but need to get it on a lift to make life much easier. I could have probably dropped the skid plate too, but it was already getting late by the time I got to that part. I did the work over a few nights after work, and that included the neighbors stopping by to chat and see what I was doing.
Super impressed with the team at SPV, the quality and ease of their harnesses and brackets, and the fast shipping and response on questions! If anyone needs to know where to notch the rear covers I’ll provide some pics. Took me about 5 mins with an oscillating tool.