Skid Plate bolts stripped. Now what?

Disclaimer: Links on this page pointing to Amazon, eBay and other sites may include affiliate code. If you click them and make a purchase, we may earn a small commission.

D

Deleted member 12951

Guest
Does that mean there is a square slot on the bottom of the frame that allows the nut clips to be installed?

Does the OEM engine skid even need to come off/be replaced with this bumper?

Ughh... Maybe I just need to call Rogue in the morning to clarify somethings. (Need to call them anyway since they forgot to include the side panel dimple inserts for the bumper). Seriously... Why can't things ever just be simple?.

To answer your questions.

1. Yes, there is a square slot
2. Yes, Rogue replaces the engine skid. You want it off now anyways with those broken nut clips.
3. Yes, call them. And it seems almost every vendors screws something up so start getting used to it.... :hidesbehindsofa:
 

madmex

Full Access Member
Joined
Aug 5, 2014
Posts
119
Reaction score
41
Location
South Texas
I installed my Rogue Renegade front bumper a few weeks ago and if I remember correctly you're going to need to reuse 2 oem bolts for the belly skid plate that comes with the bumper.
 

PropDr

FRF Addict
Joined
Nov 29, 2010
Posts
2,114
Reaction score
1,122
Location
Eugene, Oregon
The new nut clips that Ford uses uses real nuts, that is good; sadly the way the nuts are secured to the clips causes the clips to split easily allowing the nuts to spin freely.
If you can not find a way to get a wrench on to the nut you have to grind off the bolt head.
Note: Using this nut clips it is important that during installation you apply proper lubrication to prevent corrosion; the clip does not break during torqing or untorquing but during the load applied getting a corroded bolt out of a corroded nut.
 
Last edited:
OP
OP
Harblar

Harblar

Full Access Member
Joined
Oct 28, 2012
Posts
466
Reaction score
371
Location
Aberdeen, SD

I think we have a winner!! That is exactly what is happening. I'd found that opening in the frame but didn't think it would be big enough to get anything through. I'll give it a try this morning and see what happens.

Worst case scenario, I feel better about grinding them off now that I know exactly what I'm dealing with.

Thanks a ton!

---------- Post added at 09:35 AM ---------- Previous post was at 09:24 AM ----------

3. Yes, call them. And it seems almost every vendors screws something up so start getting used to it.... :hidesbehindsofa:

I'm a farmer. I'm more than used to it. This is like the third different project that got overly complicated because of something like this in just the last week.
Just got a grapple fork bucket for our loader tractor last week and can't use it because they put the wrong mounting plate on it. Still waiting for the right one.

Just because I'm used iTo it doesn't mean I have to like it and just once it might be nice to have everything go easy as advertised. A guy can hope! ;-)
 
OP
OP
Harblar

Harblar

Full Access Member
Joined
Oct 28, 2012
Posts
466
Reaction score
371
Location
Aberdeen, SD
Well... I managed to finally get it installed. Only took about 4-5 times longer than the estimated "45 minutes" in the leaflet, but it's on there!

I was able to get a box end wrench through the frame on the sides like Busa suggested, but apparently whoever last put those bolts in used God's torque wrench to do it. I got on the nut and when I turned the bolt it rounded the nut off instantly... On both sides. Ugh... Sooooo out came the grinder and off went their heads. I used the spare clips to replace them.

The bumper looks good and is very solid. That being said, Rogue's packing and shipping department is a joke! Not only did they forget to include the bumper side panels (which to my understanding were suppose to be rivited on during the bumpers construction) they also didn't include the three bolts needed to connect the belly skid to the rear frame of the bumper. They did include three bolts... They were just the wrong size so I had to scrounge up three 3/8" bolts to get it working. Speaking of size, the instructions had a list of needed tools, all metric. Imagine my surprise when I went to tighten the four new frame bolts with my 21mm socket and they rounded off! Turns out the supplied frame bolts were 3/4" sae... Not a single mention of that anywhere in the instructions.

The last instruction is to "reinstall the hood latch." That's it. Where and with what? Turns out the mounting location for it was on the old bumper. Well there was an included plate that I couldn't find mention of anywhere else. Turns out the holes fit the latch perfectly. Great, except for they of course didn't include any bolts or nuts to secure it so, back to the bolt bin.

All in all, it's pretty nitpicky complaints, but we are talking about $2000 for a custom purpose built add on. I think most people would expect a little more attention to detail. I mean, how hard would it be to add a part list and a few pics to the installation instructions? Every body has a digital camera right in their phone these days and pretty much anybody with 15 minutes worth of computer experience should be able to figure out how to insert pics into those instructions using any basic word processor. And how tight is the profit margin that you can't be bothered to even print and include a hard copy of the single page instruction sheet you do have? Hell... I ordered a $10 vinyl sticker off eBay the other day and even they included an installation sheet... With pictures!

Well, that'll about do it for my ranting. All things considered I'm happy with the bumper and love the new look. In the end, I guess that's all that really counts.
 
OP
OP
Harblar

Harblar

Full Access Member
Joined
Oct 28, 2012
Posts
466
Reaction score
371
Location
Aberdeen, SD
Hahaha.

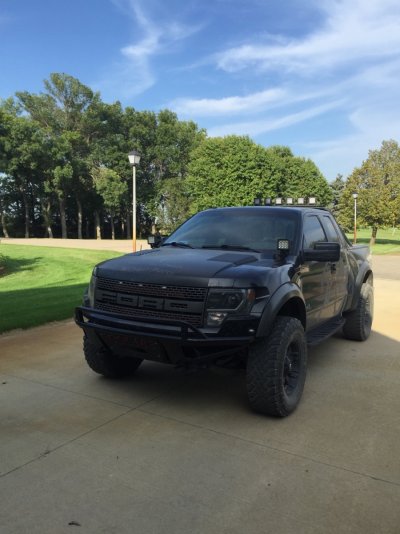
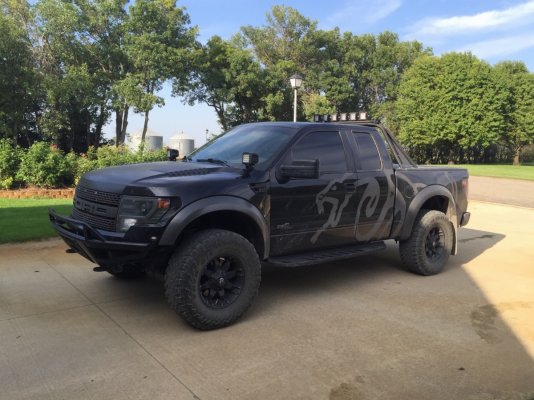
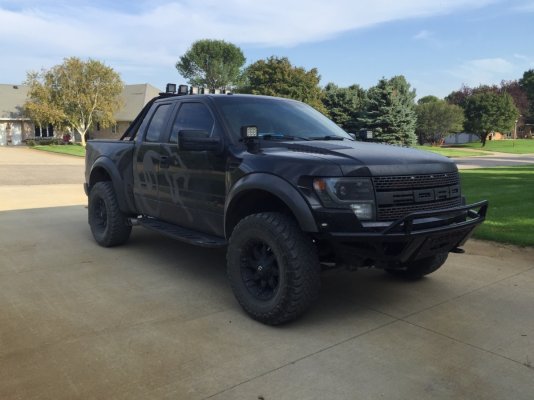
Ok, pics as promised!
bb0378070f4f75e9af0e1b666a4220d1.jpg
852e67ae996bda6687e99e5000bee03f.jpg
8d8941e547a9e83010e113291a2cb34b.jpg

Just need to pull the light bar out from behind the grill, get the side inserts for the bumper, and get the whole damned thing cleaned up. Still amazes me, though, how a Raptor can look just as good dirty as it does freshly waxed! :)
 
Top