Sitdown 2.0 Build
- Thread starter Sitdown
- Start date
Disclaimer: Links on this page pointing to Amazon, eBay and other sites may include affiliate code. If you click them and make a purchase, we may earn a small commission.
@Sitdown
What model lugs are those? They look like Gorillas, are they?
I think I want to order some like that.
Thanks in advance
Yes gorilla's, the other cheapys will rust in a month... Can only get in set of 32 on amazon, but useful to have spares
https://www.amazon.com/gp/product/B004U3TEF0/?tag=fordraptorforum-20
Just don't do the "bought frequently with" option to add a spare key, its the wrong size. It comes with one, if you want spares get this one (or atleast mine used this one, lug box will state key pattern
https://www.amazon.com/gp/product/B00BI4U96W/?tag=fordraptorforum-20
Robtor310
FRF Addict
Yes gorilla's, the other cheapys will rust in a month... Can only get in set of 32 on amazon, but useful to have spares
https://www.amazon.com/gp/product/B004U3TEF0/?tag=fordraptorforum-20
Just don't do the "bought frequently with" option to add a spare key, its the wrong size. It comes with one, if you want spares get this one (or atleast mine used this one, lug box will state key pattern
https://www.amazon.com/gp/product/B00BI4U96W/?tag=fordraptorforum-20
Thanks for the detailed info. I appreciate that.
Have a good weekend man
Yukon Joe
FRF Addict
Subbed!
Nice to see a real purpose build going on the new Raptor.
When is your first expedition trip to Starbucks? Lol
Nice to see a real purpose build going on the new Raptor.
When is your first expedition trip to Starbucks? Lol
Last edited:
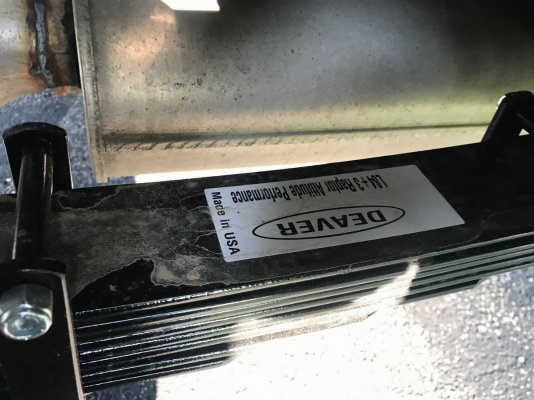
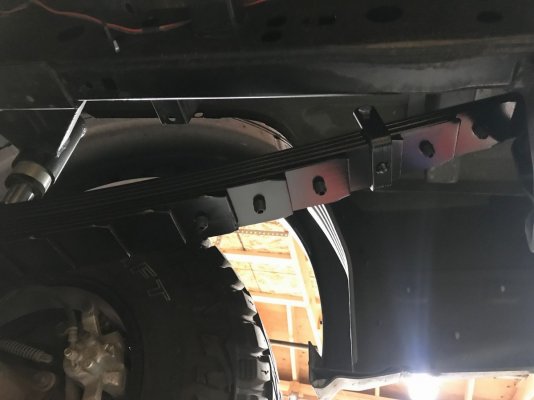
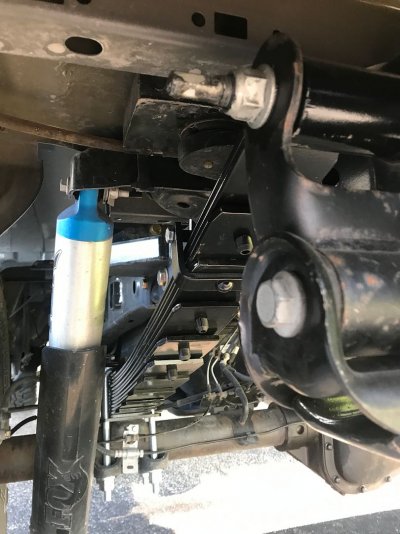
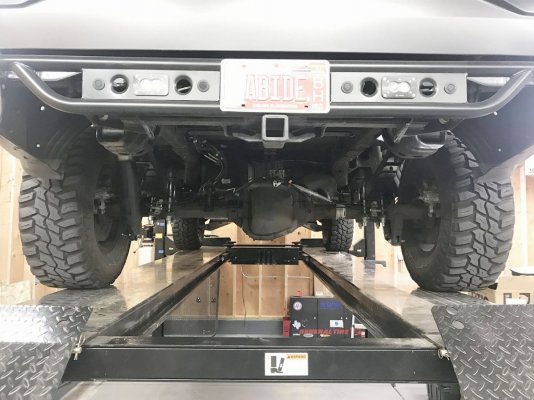
Deaver +3s
I can repeat what I said after installing them on my '12... best mod for these trucks, hands down. Bigger price tag for what they are, but worth it imo
With my bedrack, and after out last trip, my stock leafs seemed to have sagged quite a bit. I'm now back up to stock height with all the gear in bed. May settle some still, and still don't have my rear winch mounted, but hoped for a slight front high stance. Currently perfectly level with 3" collars @ a little over 42" fender to ground in all corners. I did get the rear shackles to drop the rear, but held off installing to see how much it settles and keep the cushier ride for the time being. Been running 3months now, smiles ear to ear.
As done on my last set, had them powdercoated from Deaver
Corsa Exhaust - Dumped
Been running the stock exhaust dumped, and have been quiet happy with it thus far. Once i heard the corsa kit idling though, i really wnated to try it.
Having the bump kit and diff rear bumper, i did not want to run tailpipes.
While Corsa was against making an off-road dump style kit, I was happy to see you can get their kit w/o their tailpipes, meant to bolt up to stock tailpipes. They include the sections that bend up for the connection, which make for great dump tips when spun upside down. I wound up just using one, cut in half for both tips, but plan to do slightly longer ones, angled them out slightly and see if tone changes. You can use the (2) turns supplied to do longer ones though. Keep in mind, their kit is tuned for tailpipes so my comments below apply to this modified dump setup.
I installed with their resonator delete pipe, and it’s quite loud under throttle. Idling, it’s great. Nice, loping tone, with turbos whispering in background. Putting through traffic, drive-thru’s etc, it’s glorious! But… under anything beyond minor acceleration, it gets pretty loud. Almost as if 25%-50% throttle was nearly as loud as WOT. Normally I’m all for louder, but seeing how more refined everything is on this truck I got used to the modest stock exhaust. I love the idle, and don’t mind the WOT, just hoped the mid-range wasn’t so obnoxious.
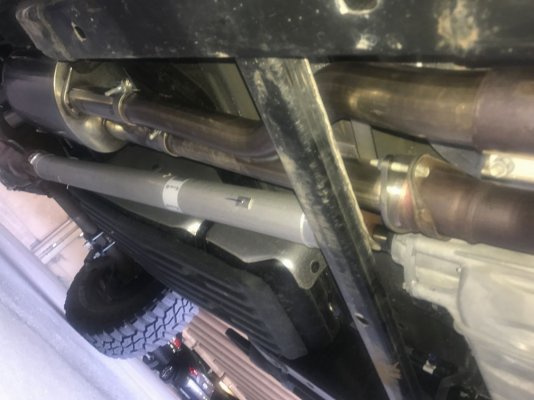
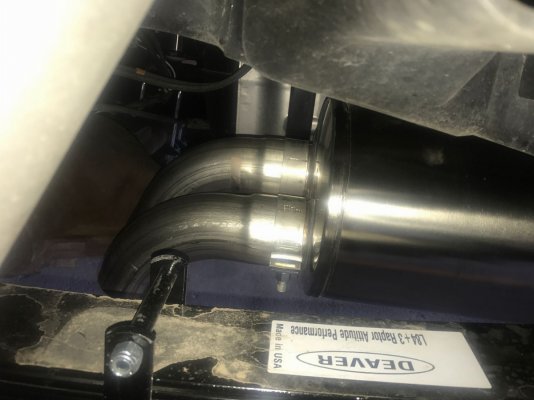
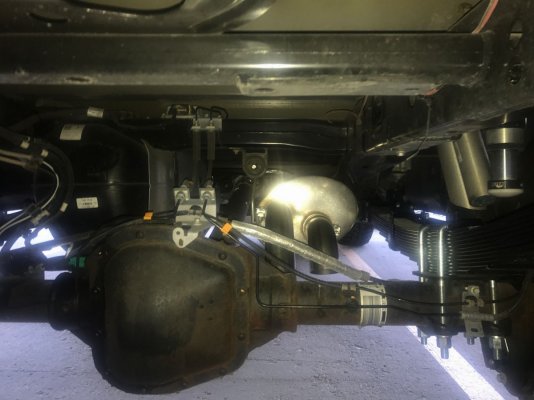
Note to self, notice the giant red stop sign on instructions and read them before cutting off a factory connection clamp :\ Had to borrow a connection end from a tailpipe section
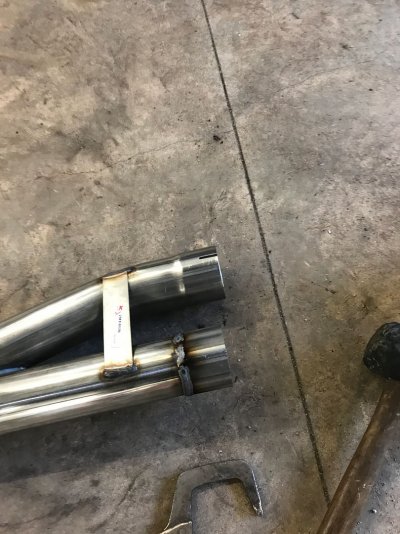
After a month or so, the louder exhaust did grow on me slightly, but decided to try a middle ground... replacing the Delete k pipe, with the stock resonator. As expected, it’s back to being pretty quiet, so semi disappoinitng. While I missed the subtle stock exhaust when I had the full kit on, I now miss the louder exhaust... Goldilocks dilemna. While this is middle ground per se, You get a slightly better tone overall, as well as an improved idle tone, you do lose the turbo whining and louder idle. While I did say it’s a middleground, it does lean more towards closer to quiet stock than the louder muffler and k pipe kit.
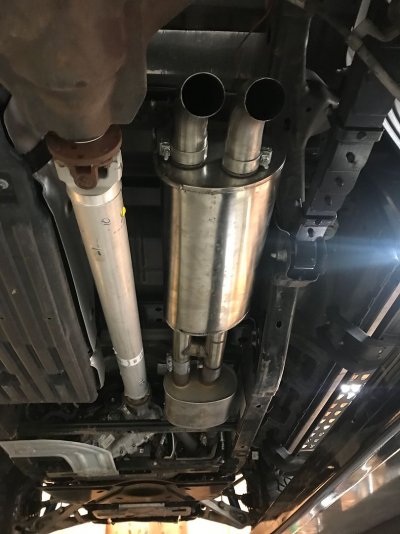
Ideally I think something in between these 2 above mentioned setups would be great. If I had not purchased this already, I’m thinking the stock exhaust dumped with the corsa or x brand resonator delete might be a nice combination, and cheap. Since I did purchase, next play is likely to chop up one of the mid pipes and add/replace resonator with bullet style ones.
I can repeat what I said after installing them on my '12... best mod for these trucks, hands down. Bigger price tag for what they are, but worth it imo
With my bedrack, and after out last trip, my stock leafs seemed to have sagged quite a bit. I'm now back up to stock height with all the gear in bed. May settle some still, and still don't have my rear winch mounted, but hoped for a slight front high stance. Currently perfectly level with 3" collars @ a little over 42" fender to ground in all corners. I did get the rear shackles to drop the rear, but held off installing to see how much it settles and keep the cushier ride for the time being. Been running 3months now, smiles ear to ear.
As done on my last set, had them powdercoated from Deaver


Corsa Exhaust - Dumped
Been running the stock exhaust dumped, and have been quiet happy with it thus far. Once i heard the corsa kit idling though, i really wnated to try it.
Having the bump kit and diff rear bumper, i did not want to run tailpipes.
While Corsa was against making an off-road dump style kit, I was happy to see you can get their kit w/o their tailpipes, meant to bolt up to stock tailpipes. They include the sections that bend up for the connection, which make for great dump tips when spun upside down. I wound up just using one, cut in half for both tips, but plan to do slightly longer ones, angled them out slightly and see if tone changes. You can use the (2) turns supplied to do longer ones though. Keep in mind, their kit is tuned for tailpipes so my comments below apply to this modified dump setup.
I installed with their resonator delete pipe, and it’s quite loud under throttle. Idling, it’s great. Nice, loping tone, with turbos whispering in background. Putting through traffic, drive-thru’s etc, it’s glorious! But… under anything beyond minor acceleration, it gets pretty loud. Almost as if 25%-50% throttle was nearly as loud as WOT. Normally I’m all for louder, but seeing how more refined everything is on this truck I got used to the modest stock exhaust. I love the idle, and don’t mind the WOT, just hoped the mid-range wasn’t so obnoxious.


Note to self, notice the giant red stop sign on instructions and read them before cutting off a factory connection clamp :\
 Had to borrow a connection end from a tailpipe section
After a month or so, the louder exhaust did grow on me slightly, but decided to try a middle ground... replacing the Delete k pipe, with the stock resonator. As expected, it’s back to being pretty quiet, so semi disappoinitng. While I missed the subtle stock exhaust when I had the full kit on, I now miss the louder exhaust... Goldilocks dilemna. While this is middle ground per se, You get a slightly better tone overall, as well as an improved idle tone, you do lose the turbo whining and louder idle. While I did say it’s a middleground, it does lean more towards closer to quiet stock than the louder muffler and k pipe kit.

Ideally I think something in between these 2 above mentioned setups would be great. If I had not purchased this already, I’m thinking the stock exhaust dumped with the corsa or x brand resonator delete might be a nice combination, and cheap. Since I did purchase, next play is likely to chop up one of the mid pipes and add/replace resonator with bullet style ones.
LVJ Upfitter Panel
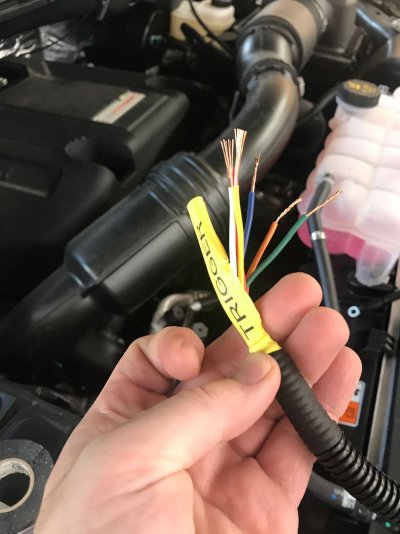
One of the first mods I did add to my 17 in the spring, but never got a chance to write up, was the LVJ panel made by @Kmandoske. This is his new Gen2 upfitter panel. This converts all the upfitter switches to 30a capable. I went a bit overboard on my ‘12 building a panel setup, and this time around it was a no brainer to just buy one of his kits. It’s extremely compact, well made, and all labeled up so super simple to install. Mind you was one of his protoype kits so no fancy badging etc yet
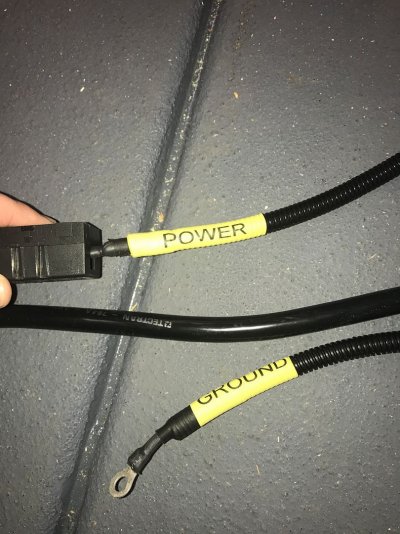
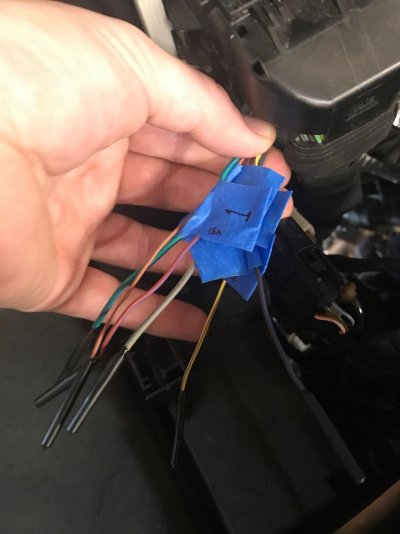
On my previous panel, I added a forward junction box to more easily add/remove/change lighting sources from different switches easily, accessible with hood opened. I had Keith add a similar feature on mine, but with the new hood and grill assy, this is really not as helpful on the new trucks. I wound up not using it, but is an option for anyone wanting to do something similar. I wound up just doing GM weatherpack connectors on each upfitter trigger, so makes for easily switching between sources/triggers.
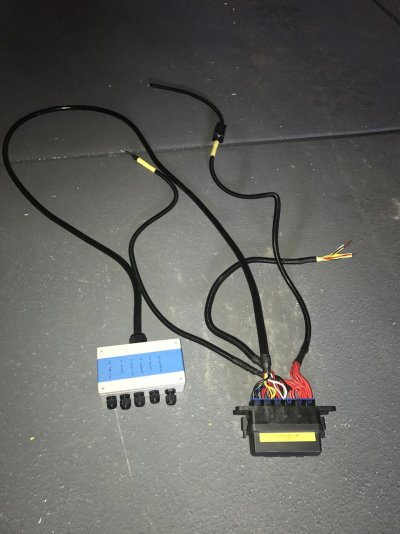
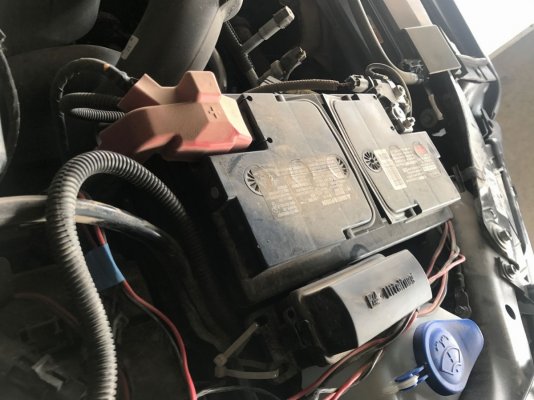
The panel fits nicely beside the the battery, and he now includes brackets to mount it in this location. 2018s battery tray mount changed slightly, and he is working on a solution for the new model as well. Being an early adopter, my unit is zip tied in place and wiring is quite the disaster since this was all changed the day before leaving for a trip.
Bedrack - RackOne
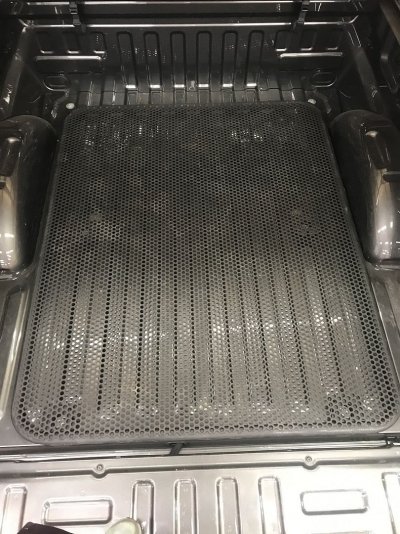
Was real bummed to learn the new trucks used a different bed bolt configuration. We spent a great deal of time making my Gen1 ruck, and considered it a sin to chop it up to make compatible. Its FS if anyone is interested
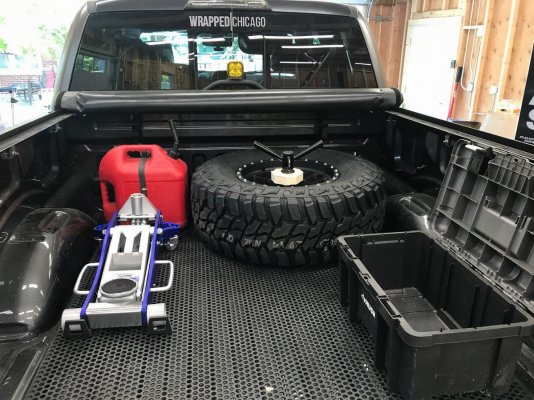
Being tight on time, Jimmy @ WSI/Allied Offroad set me up with a compatible Gen1 RackOne, until we could make a more Gen2 specific unit.
Love the modular capability, really any configuration is possible and changeable in minutes. This all was installed and configured by myself the night before a trip, custom wood chock and all ha ha
Custom Skid Assy
Noted above my adding of the RPG Prerunner bumper, but didn’t get to detail the skid assy we made. The bolt-on RPG bumper utilizes the factory Skid plate. This feature is great for lower control arm protection, which we all seem to mangle at some point with our bikini skids…. That said I wanted a different look similar to my gen1 bumper we built. RPG now has their own skid solution in the works, but like always I was short on time to achieve what I wanted so had to get crafty
Being on tight timeline, simple was the goal. Wound up making a beefy cross brace that bolts to the factory tow hook mounts, sitting in between the factory hooks and the frame. This provided for a rigid cross member and then had a ¼” sheet of 6061 bent up to bolt to the existing skid mounts on the bumper, the new brace, and factory lower plate mounts.
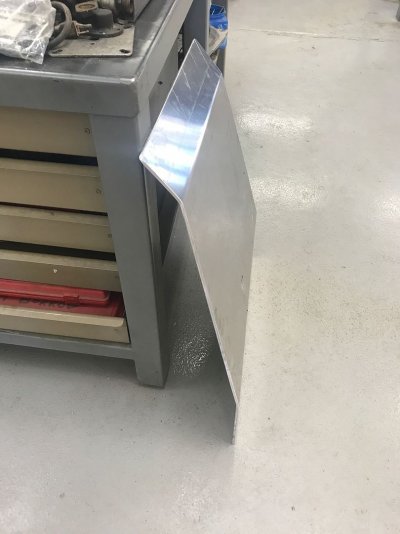
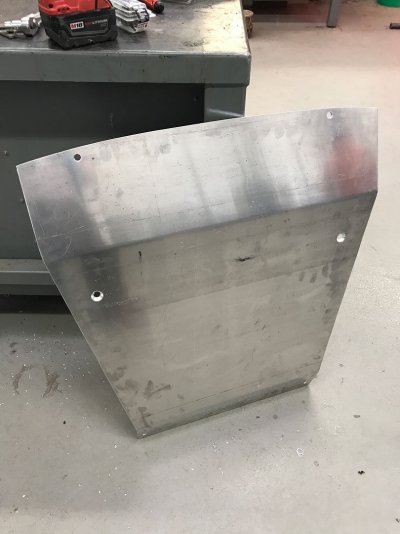
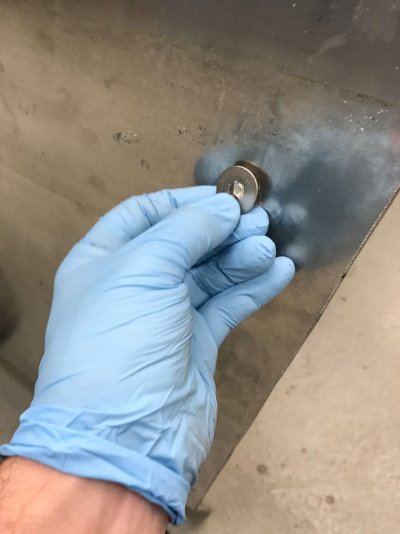
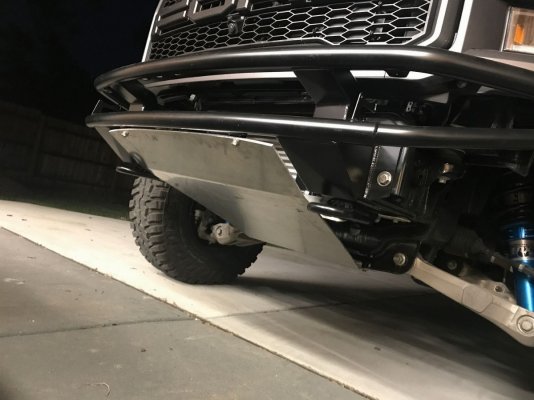
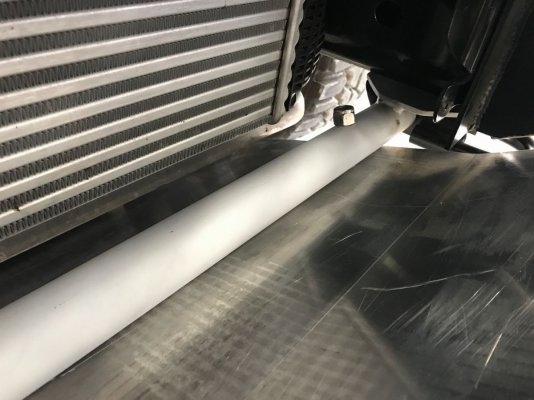
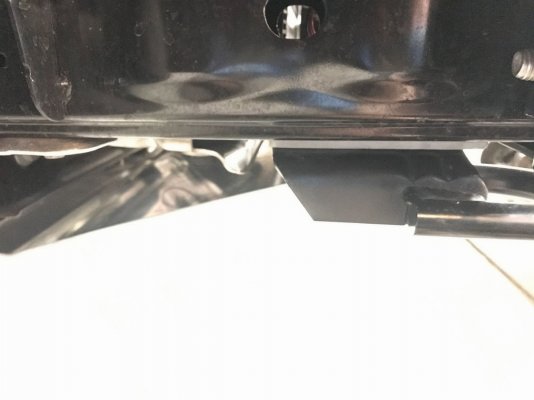
Quick 4 coats of plastidip and done!
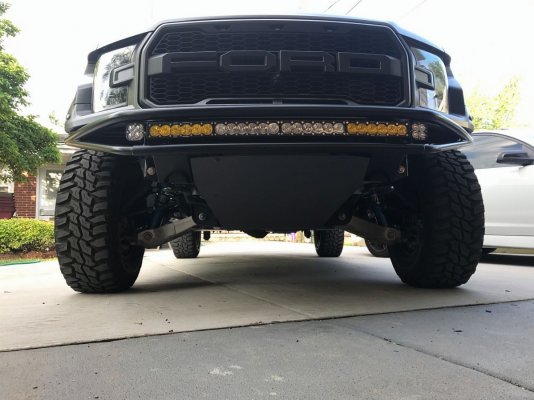
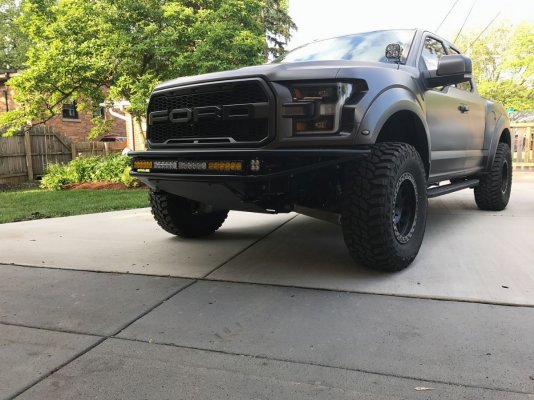
Think it turned out excellent, but no skid is ever really a match for the trails from Barstow
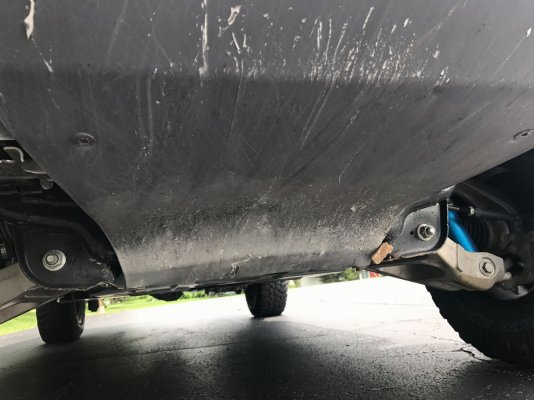
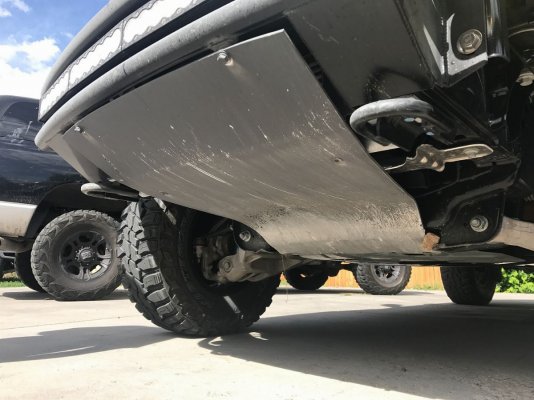
Semi good news is the Skid & support achieved what I wanted, look cool and protect the Intercooler. While even my brace did bow slightly from the impact, there was still clearance between intercooler, which remained unscathed from a week of abuse. New design coming soon, might add some extra bracing to better direct impact past the lower subframe and not folding before it, but were short on time for v1.
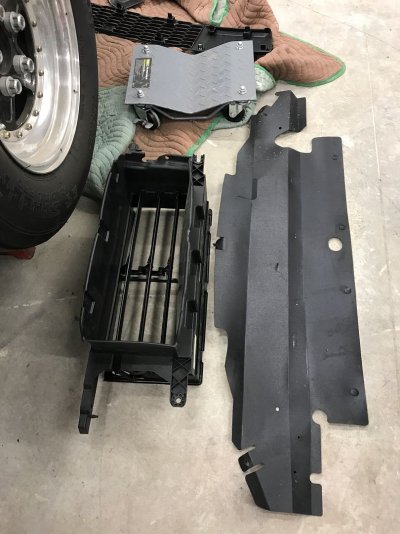
Somthing to note, I didn’t notice any obvious IAT changes from my stock bumper assy to this one. There is a significant amount of ducting with oe assy, and rubber/plastics to direct air/restrict it/etc, so im sure there is some give/take. In the end a solid (non vented) skid is not an IAT deal breaker for folks who want to retain the factory intercooler in its factory location, atleast from what ive found so far...cant hurt to add more flow though
One of the first mods I did add to my 17 in the spring, but never got a chance to write up, was the LVJ panel made by @Kmandoske. This is his new Gen2 upfitter panel. This converts all the upfitter switches to 30a capable. I went a bit overboard on my ‘12 building a panel setup, and this time around it was a no brainer to just buy one of his kits. It’s extremely compact, well made, and all labeled up so super simple to install. Mind you was one of his protoype kits so no fancy badging etc yet
On my previous panel, I added a forward junction box to more easily add/remove/change lighting sources from different switches easily, accessible with hood opened. I had Keith add a similar feature on mine, but with the new hood and grill assy, this is really not as helpful on the new trucks. I wound up not using it, but is an option for anyone wanting to do something similar. I wound up just doing GM weatherpack connectors on each upfitter trigger, so makes for easily switching between sources/triggers.

The panel fits nicely beside the the battery, and he now includes brackets to mount it in this location. 2018s battery tray mount changed slightly, and he is working on a solution for the new model as well. Being an early adopter, my unit is zip tied in place and wiring is quite the disaster since this was all changed the day before leaving for a trip.


Bedrack - RackOne
Was real bummed to learn the new trucks used a different bed bolt configuration. We spent a great deal of time making my Gen1 ruck, and considered it a sin to chop it up to make compatible. Its FS if anyone is interested
Being tight on time, Jimmy @ WSI/Allied Offroad set me up with a compatible Gen1 RackOne, until we could make a more Gen2 specific unit.
Love the modular capability, really any configuration is possible and changeable in minutes. This all was installed and configured by myself the night before a trip, custom wood chock and all ha ha


Custom Skid Assy
Noted above my adding of the RPG Prerunner bumper, but didn’t get to detail the skid assy we made. The bolt-on RPG bumper utilizes the factory Skid plate. This feature is great for lower control arm protection, which we all seem to mangle at some point with our bikini skids…. That said I wanted a different look similar to my gen1 bumper we built. RPG now has their own skid solution in the works, but like always I was short on time to achieve what I wanted so had to get crafty
Being on tight timeline, simple was the goal. Wound up making a beefy cross brace that bolts to the factory tow hook mounts, sitting in between the factory hooks and the frame. This provided for a rigid cross member and then had a ¼” sheet of 6061 bent up to bolt to the existing skid mounts on the bumper, the new brace, and factory lower plate mounts.


Quick 4 coats of plastidip and done!


Think it turned out excellent, but no skid is ever really a match for the trails from Barstow


Semi good news is the Skid & support achieved what I wanted, look cool and protect the Intercooler. While even my brace did bow slightly from the impact, there was still clearance between intercooler, which remained unscathed from a week of abuse. New design coming soon, might add some extra bracing to better direct impact past the lower subframe and not folding before it, but were short on time for v1.
Somthing to note, I didn’t notice any obvious IAT changes from my stock bumper assy to this one. There is a significant amount of ducting with oe assy, and rubber/plastics to direct air/restrict it/etc, so im sure there is some give/take. In the end a solid (non vented) skid is not an IAT deal breaker for folks who want to retain the factory intercooler in its factory location, atleast from what ive found so far...cant hurt to add more flow though

WRCRaptor
FRF Addict
Wow! The Devers are a true must do on the Gen1 good to see the same for the Gen2. Great looking work.
looks great. nice choices of mods as well. the build overall is great. nice work!
recurvehunt
Member
- Joined
- Jan 18, 2017
- Posts
- 17
- Reaction score
- 12
Nice build! Have a SCAB as well and will likely go to that RPG rear bumper w/winch mount due to front bumper choice.
Have any pics showing how/where the winch is mounted behind the bumper?
Have any pics showing how/where the winch is mounted behind the bumper?
Similar threads
- Replies
- 8
- Views
- 998
- Replies
- 0
- Views
- 710
- Replies
- 7
- Views
- 721
Members online
- ranger22
- Def
- mSimon
- CRP
- Misfit_1122
- Sparda1123
- tywilkerson96
- New recaros
- GooseTuned
- simplicity365
- Solidred
- taquitos
- Shane361
- Topher1136
- jond
- Sage
- david khrypta
- ToadSmasher2K1
- StuartR
- elking
- CleverGirl_
- Sano Dano
- Sozzy12
- Braaaaptor
- downforce137
- SCAR911
- James O
- cody919
- pat247
- SeasickLI
- wyomingraptor
- GordoJay
- pavz
- 04Ram2500Hemi
- Flash1034
- BigTaco
- SurfRaptor
- dsg2003mach1
- Jwod1993
- JDMCTR00
- MurderedOutSVT
- Dalejbrass
- dillard09
- ilikebmxbikes
- tominphx
- abrown
- khildebr
- NickyF25
Total: 2,247 (members: 52, guests: 2,195)

