BigJ
FRF Addict
- Joined
- Aug 5, 2010
- Posts
- 5,448
- Reaction score
- 1,560
Philips X-treme Power Headlamps
I had bought these long before my Raptor showed up. I read a ton of complaints on other F150 boards regarding the stock headlights and how little light they throw. The Philips X-treme Power bulbs seemed to the be the bulb of choice (the Silverstar's were more popular, but the data proves they're actual light output less than stock and that their perceived improvement is nothing more than a trick of the eye).
I actually forgot I had them until tonight. I've been happy with the Raptor's headlights so it didn't even occur to me. Never the less, they were sitting on the shelf, so I figured what the hell.
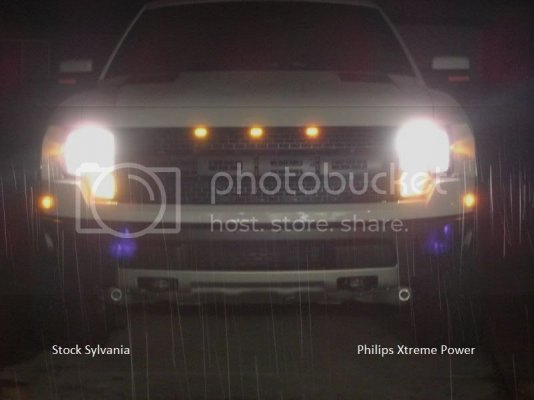
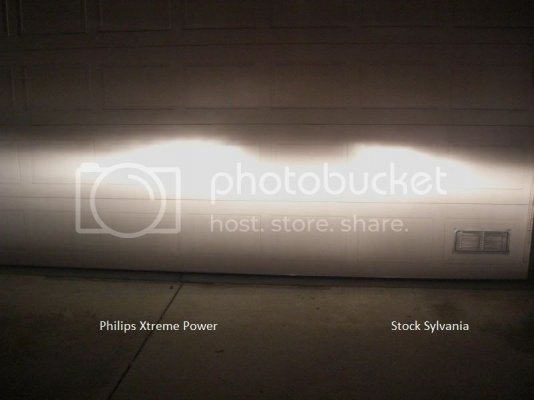
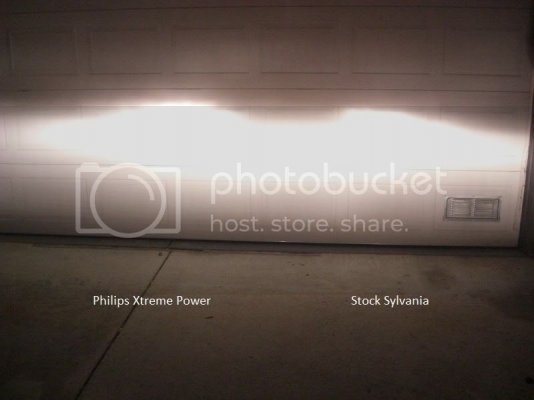
Install as per the manual is straight forward and simple. The first side took me all of 10 minutes, and the second took half that. I took the following pics after installing just one side, in hopes of seeing the differences.


The pics show everything but the color change. There's a slighly whiter light coming from the Philips, as compared to the slightly browner of the Sylvania. The pics do show the improved pattern though, and I verified this effect on the road. I'd guess they're reaching maybe 10-15% further down range, and easily 15-20% to the sides.
All in all this was a worthy mod. I'm not sure I'd run right out and replace the stockers, but as they wear you might want to consider choosing the Philips over the Sylvanias.
I had bought these long before my Raptor showed up. I read a ton of complaints on other F150 boards regarding the stock headlights and how little light they throw. The Philips X-treme Power bulbs seemed to the be the bulb of choice (the Silverstar's were more popular, but the data proves they're actual light output less than stock and that their perceived improvement is nothing more than a trick of the eye).
I actually forgot I had them until tonight. I've been happy with the Raptor's headlights so it didn't even occur to me. Never the less, they were sitting on the shelf, so I figured what the hell.
Install as per the manual is straight forward and simple. The first side took me all of 10 minutes, and the second took half that. I took the following pics after installing just one side, in hopes of seeing the differences.


The pics show everything but the color change. There's a slighly whiter light coming from the Philips, as compared to the slightly browner of the Sylvania. The pics do show the improved pattern though, and I verified this effect on the road. I'd guess they're reaching maybe 10-15% further down range, and easily 15-20% to the sides.
All in all this was a worthy mod. I'm not sure I'd run right out and replace the stockers, but as they wear you might want to consider choosing the Philips over the Sylvanias.


