Mil T
Full Access Member
This thread is being done as a tech article on how to remove your steering wheel. It was due to problems with the electronics of the dash and the Nav system giving me lots of various faults and shutting down on me. I decided that I needed to go into the steering column behind the steering wheel to check or replace the Clock Spring. The clock spring is the device that allows the steering wheel to turn without disconnecting the wires etc. to all the components that are controlled by steering wheel switches and horn etc. So here goes.
The first step is to park your truck with the wheels and steering wheel straight ahead. Disconnect your battery positive so that there is no chance of the Airbag deploying, Before you get to the removal of airbag that approx 15-20 minutes go by.
I found that removing the bezel around the steering column worked well so you can see everything.
The top bezel has clips to release it from the steering column. push the clips and the bezel comes right off.
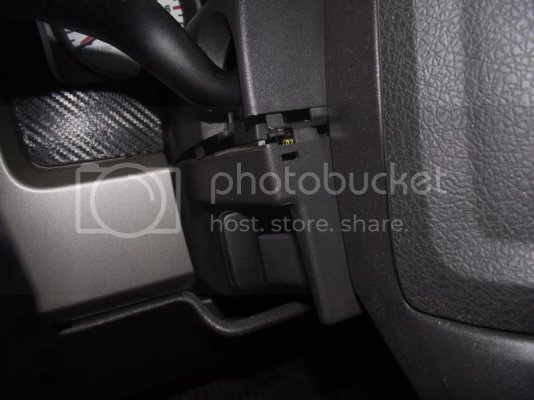
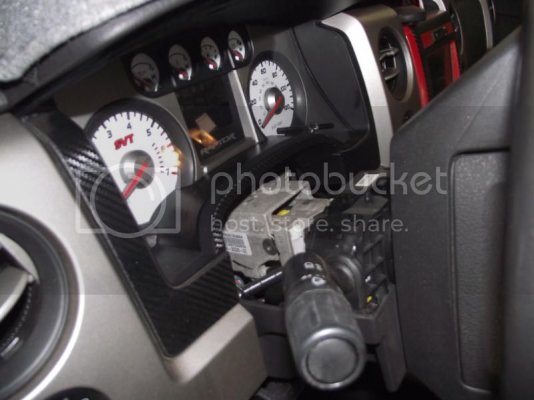
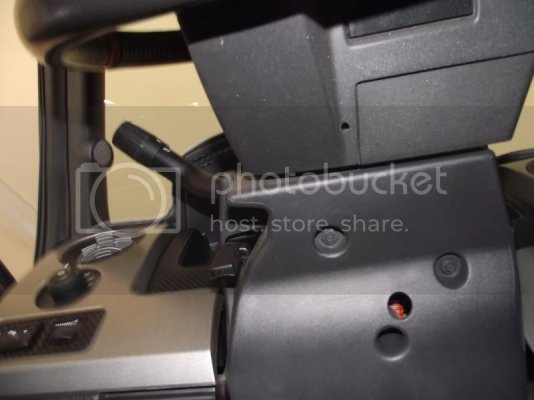
The dash piece under the steering wheel takes the removal of 3 hex head screws with a 5.5 mm socket at the bottom. The top is held with clips on each side. just pull out and the piece will unclip from the dash.
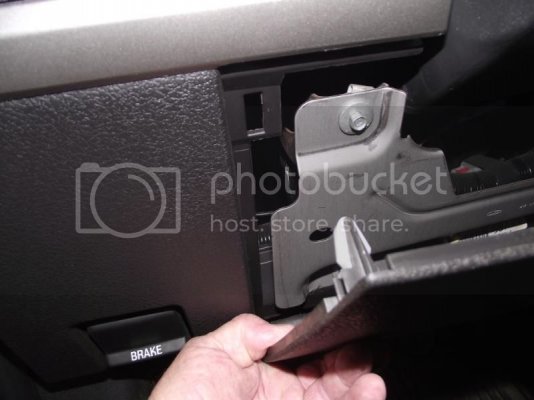
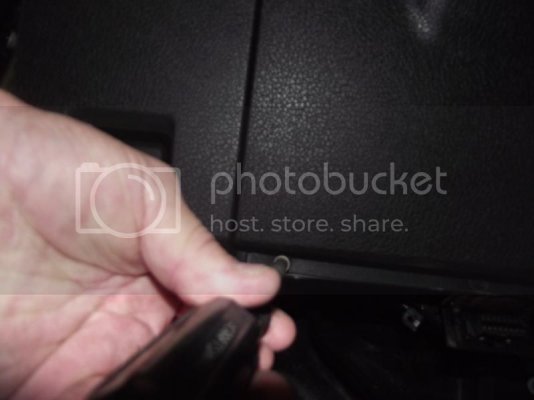
To remove the bottom bezel it took a 9/32 socket to remove 3 hex screws from under the steering wheel.
---------- Post added at 08:19 PM ---------- Previous post was at 07:58 PM ----------
On the steering wheel you will find 3 small holes at 3, 6 and 9 oclock.
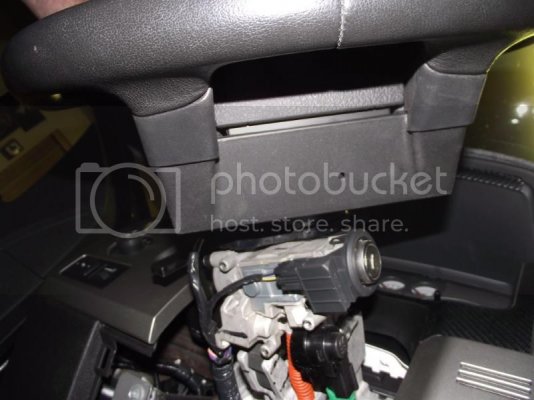
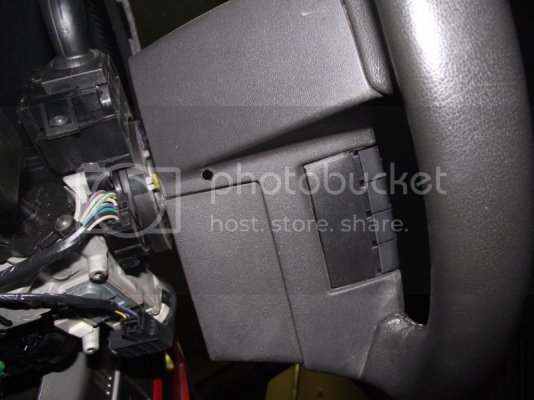
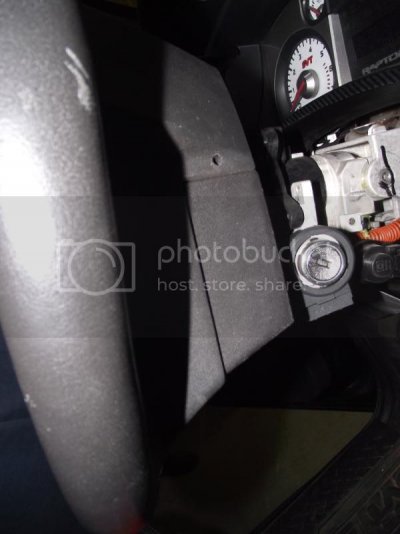
Using a small object that will insert into these holes approx 3-4 inches (I used a long shaft drill bit) insert the tool into the bottom 6 o'clock hole. You are pushing on a small spring that releases the airbag. When you push it the bottom of the airbag should pop out a little bit. Now do the other holes the same way and the airbag will release. Just lay it out a little and you need to remove the airbag wire clips and horn wire clip.
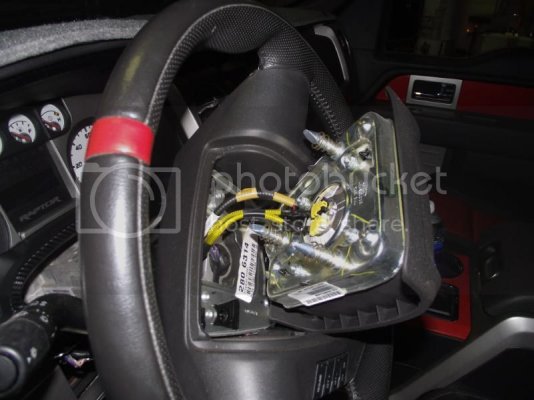
You can see where you squeeze to release the airbag wire clips. The horn clip pulls right off. I used needle nose because I've got fat fingers.
Once you get the wires disconnected just pull the airbag out and lay it to the side.
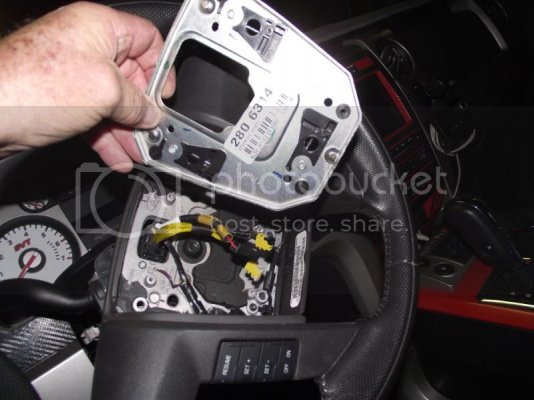
Now you have to remove the plate that the airbag attaches to make it easier to remove the large torx nut that holds the steering wheel on.
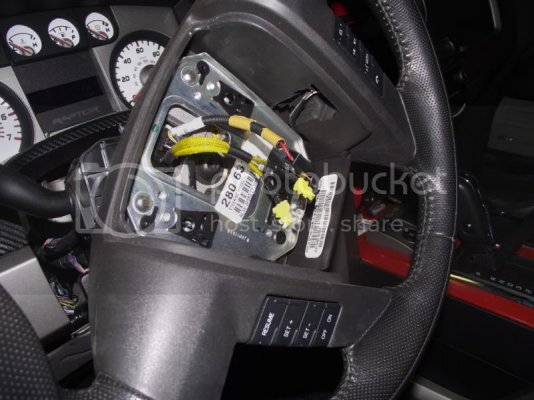
Using a t20 torx socket remove the 4 screws holding the plate on the steering wheel and lift it up and out to lay to the side.
---------- Post added at 08:41 PM ---------- Previous post was at 08:19 PM ----------
I was pleasently surprised to find out that a steering wheel puller is not necessary to remove the SW. I choose to remove the small wiring harness that went to the airbags and the steering wheel controls prior to removing the steering wheel bolt. Be careful as the wiring clip has a small tab to release the clip by pushing towards the clip. If you try and push it to the outside, it will break easily. Don't ask how I know.
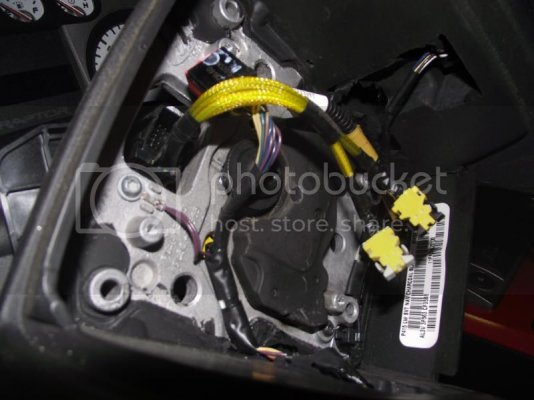
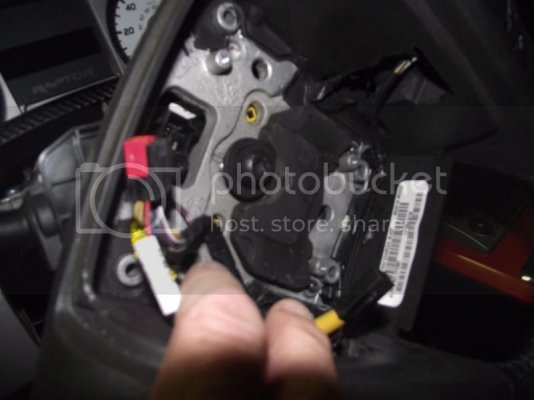
In the picture above you can see the large torx bolt that holds the Steering Wheel on. Use a T-50 Torx socket to remove the bolt. I used my impact to do it. The SW will lift right off and you can set it off to the side.(When reinstalling the bolt the manual says to use a new bolt to reattach the steering wheel but I used the old one. Torque it to 34ft.lbs.)
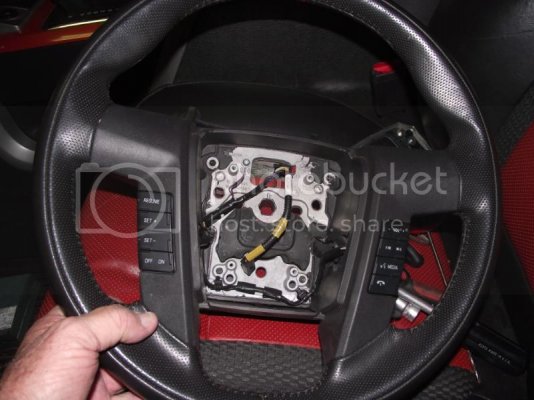
At this point you want to use tape at the clock spring center piece and secure it to the outside piece so it cannot spin out of the position it is in. You can see the clock spring with the wiring harness going to it. It can spin around in circles so it has to be secured in the postion it is in. The reason it is called the clock spring is because on the inside, their is a strip wire (kind of like the type of wire they use to connect components inside a computer) that is wound around inside the mechanism like a clock spring. When you turn the steering wheel the wires unwind or wind up depending on the way you turn. This keeps the connection between the two wiring harness clips. If the wire is wound to tight on one end then you can rip the wire loose in side the housing and you loose all connections.
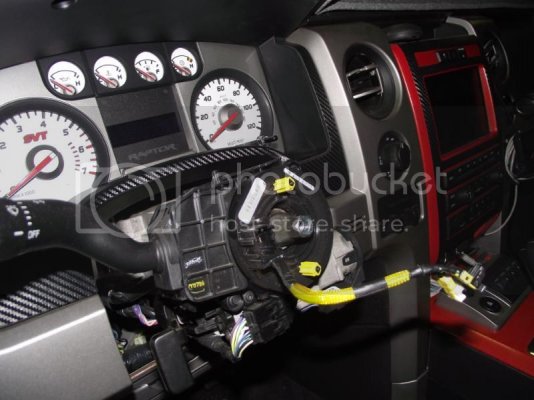
There are two t-20 torx screws that hold the clock spring in place. disconnect the wiring harness attached to it and just lift out.
Reasembly should be easy as it is just the reverse of what you just did. Be sure to insert the clock spring in the proper alignment when you bolt it back up and insert the steering wheel over the harness.
This should help anyone with moderate mechanic ability to be able to trouble shoot some of the weird electonic bugs that seem to haunt these trucks and possibly help save a few bucks on labor.
It took me approx. 30 minutes to remove it without any manual and just feeling my way along piece by piece. I do not see a ford tech taking that long and once it's off everything is exposed and easy to get to.
There is a plate that can be removed also under the steering wheel that makes it very easy to get to the pedals etc. under the dash behind the plastic dash piece under the steering wheel.
Mil T
The first step is to park your truck with the wheels and steering wheel straight ahead. Disconnect your battery positive so that there is no chance of the Airbag deploying, Before you get to the removal of airbag that approx 15-20 minutes go by.
I found that removing the bezel around the steering column worked well so you can see everything.
The top bezel has clips to release it from the steering column. push the clips and the bezel comes right off.


The dash piece under the steering wheel takes the removal of 3 hex head screws with a 5.5 mm socket at the bottom. The top is held with clips on each side. just pull out and the piece will unclip from the dash.


To remove the bottom bezel it took a 9/32 socket to remove 3 hex screws from under the steering wheel.

---------- Post added at 08:19 PM ---------- Previous post was at 07:58 PM ----------
On the steering wheel you will find 3 small holes at 3, 6 and 9 oclock.


Using a small object that will insert into these holes approx 3-4 inches (I used a long shaft drill bit) insert the tool into the bottom 6 o'clock hole. You are pushing on a small spring that releases the airbag. When you push it the bottom of the airbag should pop out a little bit. Now do the other holes the same way and the airbag will release. Just lay it out a little and you need to remove the airbag wire clips and horn wire clip.

You can see where you squeeze to release the airbag wire clips. The horn clip pulls right off. I used needle nose because I've got fat fingers.
Once you get the wires disconnected just pull the airbag out and lay it to the side.
Now you have to remove the plate that the airbag attaches to make it easier to remove the large torx nut that holds the steering wheel on.

Using a t20 torx socket remove the 4 screws holding the plate on the steering wheel and lift it up and out to lay to the side.

---------- Post added at 08:41 PM ---------- Previous post was at 08:19 PM ----------
I was pleasently surprised to find out that a steering wheel puller is not necessary to remove the SW. I choose to remove the small wiring harness that went to the airbags and the steering wheel controls prior to removing the steering wheel bolt. Be careful as the wiring clip has a small tab to release the clip by pushing towards the clip. If you try and push it to the outside, it will break easily. Don't ask how I know.


In the picture above you can see the large torx bolt that holds the Steering Wheel on. Use a T-50 Torx socket to remove the bolt. I used my impact to do it. The SW will lift right off and you can set it off to the side.(When reinstalling the bolt the manual says to use a new bolt to reattach the steering wheel but I used the old one. Torque it to 34ft.lbs.)

At this point you want to use tape at the clock spring center piece and secure it to the outside piece so it cannot spin out of the position it is in. You can see the clock spring with the wiring harness going to it. It can spin around in circles so it has to be secured in the postion it is in. The reason it is called the clock spring is because on the inside, their is a strip wire (kind of like the type of wire they use to connect components inside a computer) that is wound around inside the mechanism like a clock spring. When you turn the steering wheel the wires unwind or wind up depending on the way you turn. This keeps the connection between the two wiring harness clips. If the wire is wound to tight on one end then you can rip the wire loose in side the housing and you loose all connections.

There are two t-20 torx screws that hold the clock spring in place. disconnect the wiring harness attached to it and just lift out.
Reasembly should be easy as it is just the reverse of what you just did. Be sure to insert the clock spring in the proper alignment when you bolt it back up and insert the steering wheel over the harness.
This should help anyone with moderate mechanic ability to be able to trouble shoot some of the weird electonic bugs that seem to haunt these trucks and possibly help save a few bucks on labor.
It took me approx. 30 minutes to remove it without any manual and just feeling my way along piece by piece. I do not see a ford tech taking that long and once it's off everything is exposed and easy to get to.
There is a plate that can be removed also under the steering wheel that makes it very easy to get to the pedals etc. under the dash behind the plastic dash piece under the steering wheel.
Mil T
Last edited:

