New Guy: From Gen 1 to Gen 2

Disclaimer: Links on this page pointing to Amazon, eBay and other sites may include affiliate code. If you click them and make a purchase, we may earn a small commission.

OP
OP
ayoustin

ayoustin

Full Access Member
Joined
Jul 31, 2018
Posts
166
Reaction score
259
Guess I'll just keep updating this thread haha. Got the bed sprayed with line-x a couple weeks ago. Really lucked out with that, when I dropped the truck off I was chatting with the owner of the shop and he was telling me there is a national shortage on their chemical so all they had in stock was their top of the line Platinum liner so he upgraded me to that at no extra cost which I was super thankful about.

Got the truck back that afternoon and it turned out immaculate. Much much better than the factory spray in I had on my first gen.
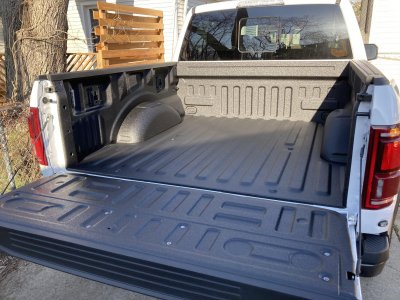
Bedliner.jpg


I picked up a Boosted Grey Goose Designs speed override harness for the mirror lights so I can use them at speeds higher than 5mph. It's a cheap light upgrade that I think will be useful for when I'm on trails at night or just need a bit extra light setting up camp etc. Their instructions tell you to trim the keyway on the factory connector but I chose to cut their female connector in case I ever want to remove it.
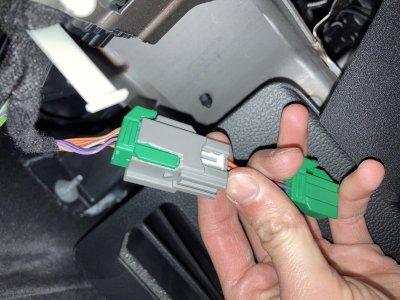
Mirror Light Override.jpg


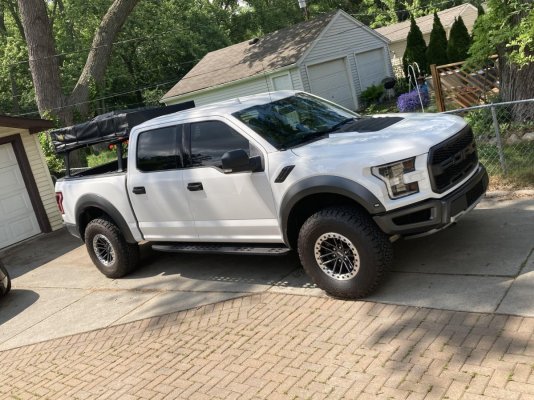
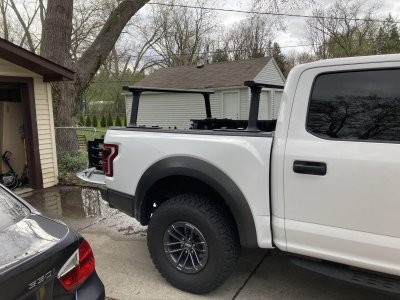
Then after I gave the bedliner enough time to dry I installed my OEM bed extender and Thule xsporter pro mid bed rack. I was pretty annoyed with the condition I received it in, Thule put zero protective padding in the packaging so all the pieces were banging around against each other. Literally every single piece had marks/scratches/dents.

I was able to make it a bit less noticeable using some paint cutting compound on it but you can still see a lot of them if you're next to the truck. Not a big deal by any means but certainly annoying. The rack is exactly what I was looking for though, something that doesn't obstruct my rear view mirror and doesn't hold everything way above the truck where it will affect fuel economy too bad. It's also quick and easy to remove for whenever I have to haul my motorcycle or something else large and was a very appealing price compared to a lot of other options out there.

In the next month or so I should be getting the Smittybilt RTT that I ordered. The GF and I go camping whenever we get the chance and we're going out to CO at the end of June for a week and a half to hit a few national parks and watch the Pike's Peak International Hill Climb. Super excited for that and will for sure have some cool stuff to share afterwards!
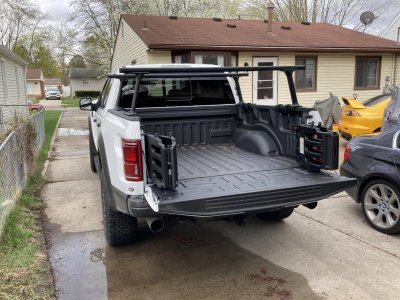
Rack 1.jpg

Rack 2.jpg
 
Last edited:
OP
OP
ayoustin

ayoustin

Full Access Member
Joined
Jul 31, 2018
Posts
166
Reaction score
259
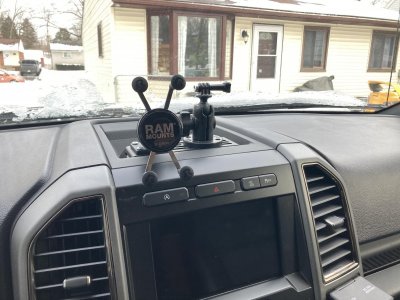
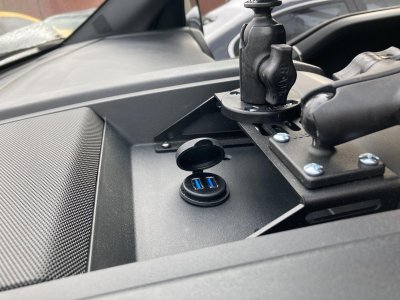
Also, just to consolidate everything I've done to the truck in this thread. Here's the setup I did with my center dash. Picked up a Builtright dash mount and grabbed some RAM mount accessories. For the moment I just have a phone holder and a gopro mount.

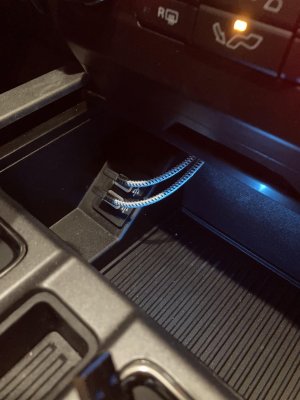
I also added a USB bulkhead extension that plugs into the factory sync usb ports in the dash cubby. There's a slot in the upper left hand of the cubby hole and I was able to find some 90° slim usb cords that barely fit through the slot so didn't have to modify or drill the cubby to get the cords back into the dash. From there they plug into the bulkhead extension and I can plug my phone or gopro into the bulkhead with short cords. Sync works perfectly fine without issue. While I had the dash apart I also threw in an auto start/stop eliminator which works flawlessly.

Overall I'm pretty happy with how it turned out!


Dash 2.jpg

Dash 3.jpg

Dash 4.jpg
 

K223

FRF Addict
Joined
Sep 15, 2019
Posts
5,192
Reaction score
3,459
Location
Florida
Some nice crafty mods. Line-x does a really good job and comes out like the factory should have done it.

Let us know how that Boosted Grey Goose Designs side light mod works out. Looks simple and gives you complete control over those side lamps. Where did you find this?
 
OP
OP
ayoustin

ayoustin

Full Access Member
Joined
Jul 31, 2018
Posts
166
Reaction score
259
Some nice crafty mods. Line-x does a really good job and comes out like the factory should have done it.

Let us know how that Boosted Grey Goose Designs side light mod works out. Looks simple and gives you complete control over those side lamps. Where did you find this?

Absolutely. My factory spray in on my first gen would hold water at the front of the bed because there weren't any gaps to drain it which was always frustrating. Plenty of drain gaps with the line-x. Their platinum liner is also UV and chemical resistant. My old liner got a good amount of staining from tearing down engines in the bed a few times so happy to hear that oil and coolant will clean off without leaving behind any stains now.

This is the product page: https://www.boostedgreygoosedesigns.net/2015-2020fordf150/spot-lamp-low-speed-override-adapter

I ordered the constant 12V option. I didn't see a reason for the switched version. The cost for just the connectors are about the same price so I was happy to just buy their harness. Like I said, I cut their grey female connector. I just heated up a razor blade with a torch and cut the relief, a quick 2 minute job. Installation couldn't be easier. Works as advertised without a hiccup.
 

MacClean

Member
Joined
Apr 12, 2021
Posts
1
Reaction score
0
Location
London,GB
Absolutely. My factory spray in on my first gen would hold water at the front of the bed because there weren't any gaps to drain it which was always frustrating. Plenty of drain gaps with the line-x. Their platinum liner is also UV and chemical resistant. My old liner got a good amount of staining from tearing down engines in the bed a few times so happy to hear that oil and coolant will clean off without leaving behind any stains now.

This is the product page: https://www.boostedgreygoosedesigns.net/2015-2020fordf150/spot-lamp-low-speed-override-adapter/time tracking software

I ordered the constant 12V option. I didn't see a reason for the switched version. The cost for just the connectors are about the same price so I was happy to just buy their harness. Like I said, I cut their grey female connector. I just heated up a razor blade with a torch and cut the relief, a quick 2 minute job. Installation couldn't be easier. Works as advertised without a hiccup.
Thank you!!!
 
OP
OP
ayoustin

ayoustin

Full Access Member
Joined
Jul 31, 2018
Posts
166
Reaction score
259
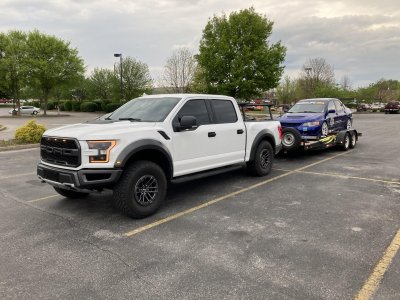
Towed a friend's time attack track car to NCM Motorsports Park this past weekend. The truck was definitely squatting harder than my first gen but that's due to the softer suspension. Despite that it still towed better than my first gen. Seriously couldn't have been any easier of a time towing, though I do want to address the squat in the future when I'm towing my own car more regularly. The total pictured is about 5000lbs on the trailer and about 200-250lbs in the bed (spare set of wheels and tires, jack and jack stands, tool boxes, ramps, fluids etc.)

I was considering some +2 or 3 HD Deavers and an SVC adjustable bump kit but will hold off for a while or until a deal pops up, the $3k for it isn't a pill I want to swallow at the moment. A weight distribution hitch is for sure in the cards too but I think I may try some Timbrens or something similar as an interim solution.

Tow.jpg
 
OP
OP
ayoustin

ayoustin

Full Access Member
Joined
Jul 31, 2018
Posts
166
Reaction score
259
Getting ready for a week and a half trip out to CO at the end of the month with the GF. We're going to be camping at a couple national parks and watching the Pike's Peak International Hill Climb amongst other things.

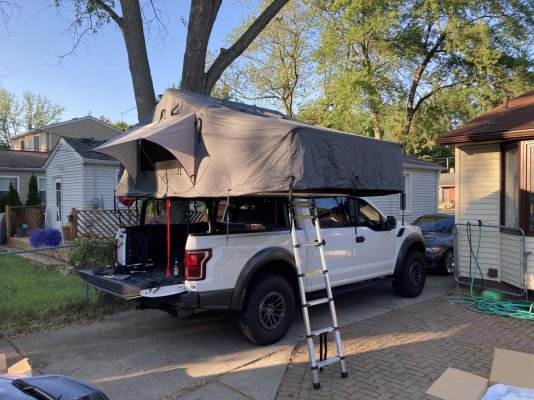
Finally got the Smittybilt Gen 2 XL tent. Went to go pick it up from 4WP and they had the wrong one so had to wait another week or so for them to ship me the right one. Very happy with the purchase other than that. Doesn't take too long to setup and has way more space than the two of us need but we also bought it for camping at the track on race weekends and we'll have more shit those times. Overall I'm happy with the build quality of it for its price and the features it has.

Tent.jpg

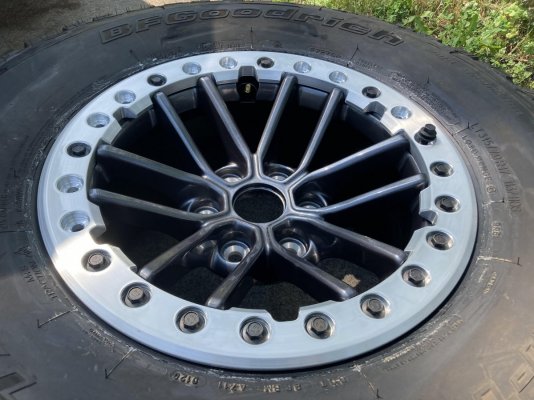
I also decided to pull the trigger on some FP lock rings for my wheels. Just finished getting those installed the other day and am happy that is finally done with. I can only fit 2 wheels at a time in my daily so ended up having to go to the tire shop 4 times to drop off and pick up each pair of wheels to get the outer beads dismounted and the spare balanced. I also made the mistake of installing the first ring without tire lube, ABSOLUTELY DO NOT FORGET LUBE. Took me the better part of 30 mins to pry the ring off with prybars and still ended up nicking the paint on the wheel in an indiscreet area.

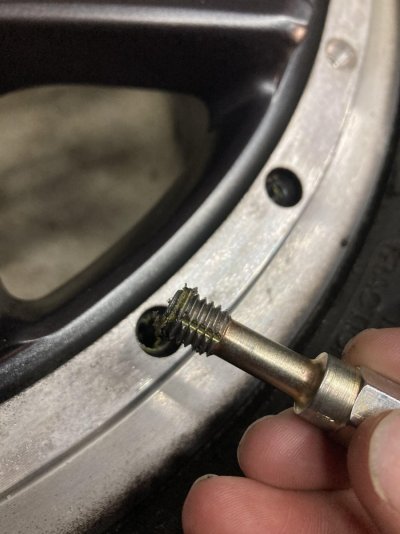
Be sure to clean the loctite out of the threads where the beauty ring bolts are. Dirty threads make for inconsistent torque readings. Use a thread chaser like pictured, not a thread tap. Run it in and out until the loctite is all gone. Blow out with an air gun afterwards.

Clean Threads.jpg

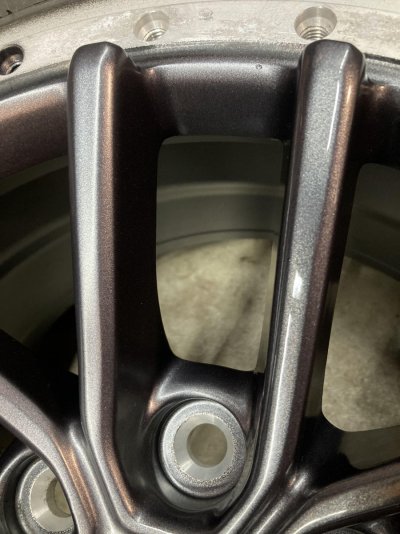
I also decided to polish the wheels which turned the finish from a matte into a gloss, I felt it went with the shiny lock rings better. Factory finish on the left, polished on the right. Doesn't make a huge change but definitely reflects light a bit better.

Polish vs Not.jpg

Getting the bolts all snugged down until the ring is seated takes longer than anything else!

Lock Ring 1.jpg

Very satisfied with the outcome look. Rotated the tires at the same time and did a 5 tire rotation so going to need to buy a 5th ring for the wheel that's the spare now. Planning to take a trip to Silver Lake Dunes next month or August. Looking forward to seeing how it does with single digit tire pressure :D

Wheels Installed.jpg

I've only got a few more things left to do to the truck until I've got it where I want. Only stuff left is get some fog lights installed, a pair of oil catch cans, a better stock location intercooler, and some Deavers + hydro bump combo.
 
OP
OP
ayoustin

ayoustin

Full Access Member
Joined
Jul 31, 2018
Posts
166
Reaction score
259
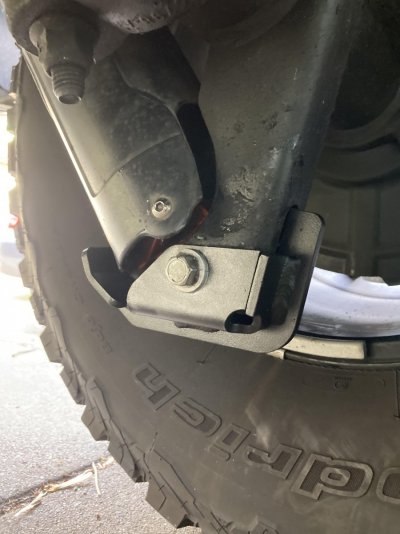
Ooh, also forgot to mention I grabbed a pair of Swarfworks rear shock guards. Got the passenger one on and the driver's side should be here tomorrow. Super beefy and definitely gives me some piece of mind. Install wasn't terrible but compressing the shock to line up the lower eyelet was a bit of a chore haha.

Shock Guard.jpg

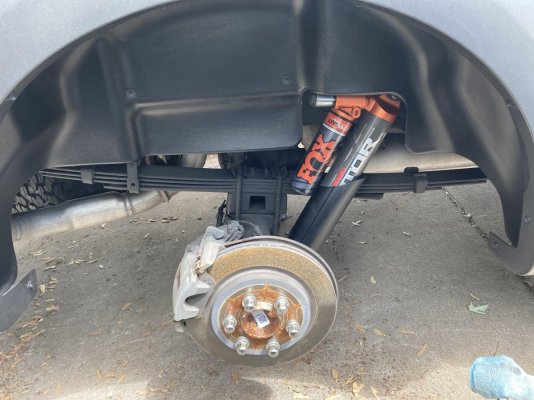
Also cleaned out the rear wheel wells and some of the underside of the truck while I had the wheels off. Not a spec of rust on any hardware after this past winter all thanks to the Wool Wax!

Rear Wheel Well.jpg
 
OP
OP
ayoustin

ayoustin

Full Access Member
Joined
Jul 31, 2018
Posts
166
Reaction score
259
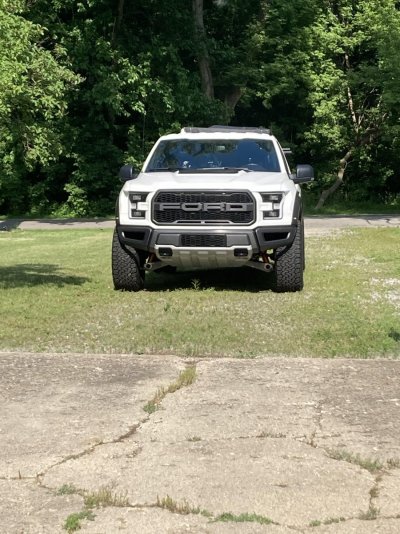
I'm seriously loving how the bead lock rings make the stock wheels fit just right. They pull the outside of the tire about an inch further out.

Heading out to Colorado this weekend for a week long camping trip with the GF. Can't wait to get some good photos of the truck!

Truck 1.jpg
 
Top