MotoX11B
Member
Hey FRF,
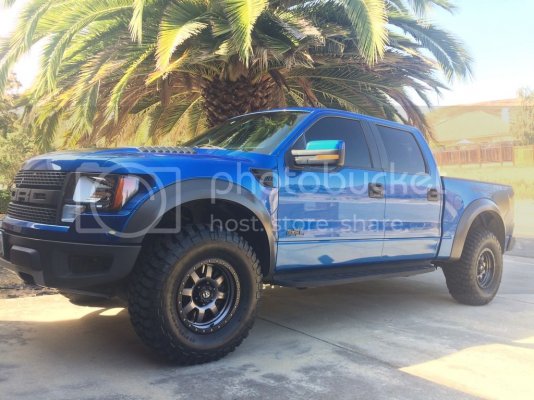
I am relatively new to the forum and this is my first write up so, sup y'all! This is not the most difficult install ever, but it does yield some information that I found otherwise difficult to find on the internet. I have a 2012 Screw that had the "Sony HD 700W" system in it...I was not a fan of that sound system to say the least.
This is my truck
So I tried the cheaper option at an attempt for a better sound. (By cheaper, I mean not dumping 2000$ on a custom system)
Stage 3 Kicker door speaker upgrade kit
Stage 3 Kicker tweeter set
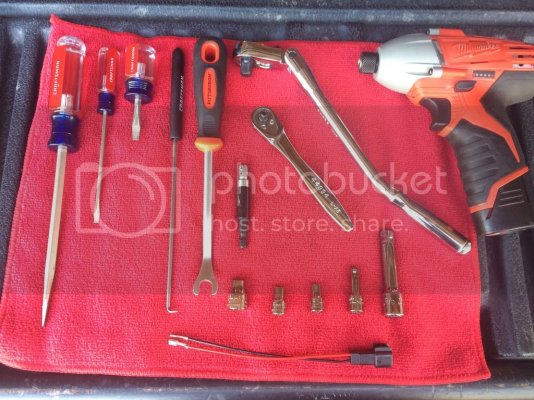
TOOLS I USED:
3x Flathead screwdrivers
1x 90 Degree pick
1x Trim removal tool "This one is really not necessary but it helped a little"
2x ratchet extensions
Impact Drill
1/4" socket adapter for drill
Dremel (Rotary Tool)
5.5mm socket
6mm socket
7mm socket
8mm socket
DOOR PANEL REMOVAL:
Front Door Panels
-The front door panels have 4 screws, 2 at the bottom, 1 behind the door handle and 1 in the grab handle pocket.
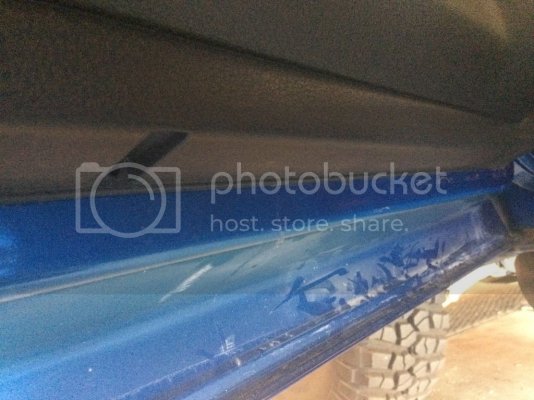
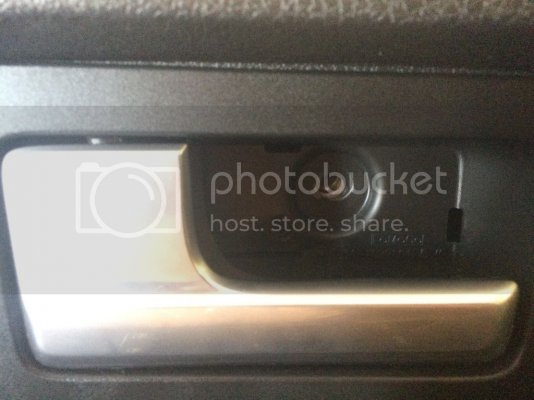
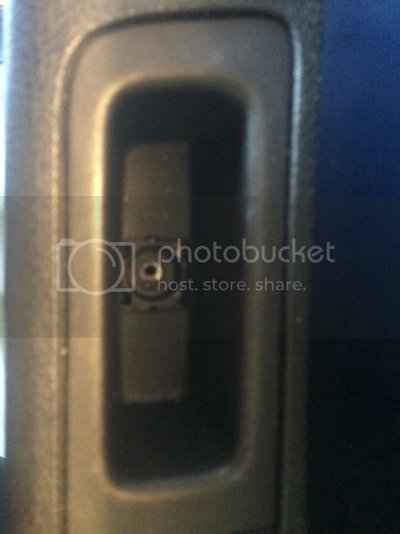
-The 2 at the bottom are 6mm and the hidden 2 are 8mm.
-It is a little tricky to get the plastic panel behind the handle. I found it easiest to use a small flat head screwdriver (not the stubby) and the 90 degree pick. Get the small flat head in there first and wiggle the pick behind it, then pull forward. It should pop out.
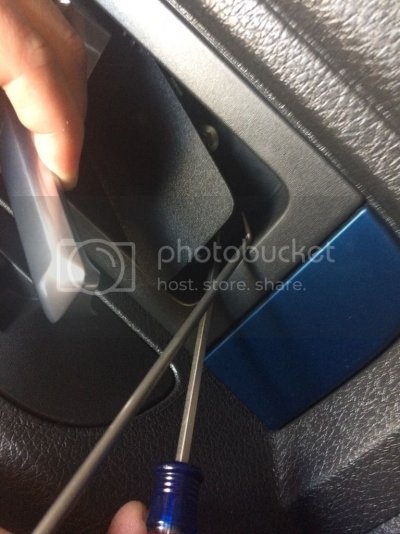
-After all the screws are removed, you need to pop out the window control panels. This is where I used the door trim removal tool, I felt a little more prying surface area was a safer bet to not break anything.
-Disconnect the electrical harness by pushing down on a little "button", then pull.
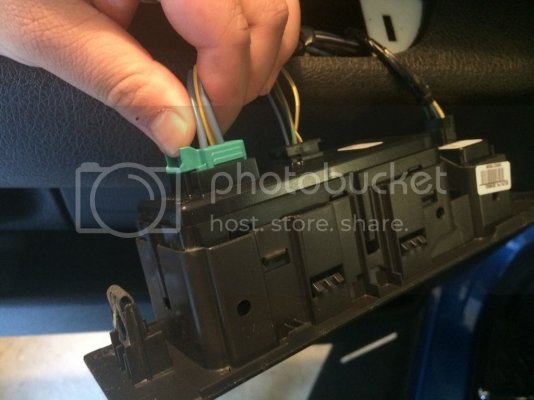
-Now that everything is disconnected, just pull UP on the entire door panel and it comes off with ease.
-At this time, you CAN remove the door lock cable, but I did not as it would have been more work that I found unnecessary.
Rear Door Panels
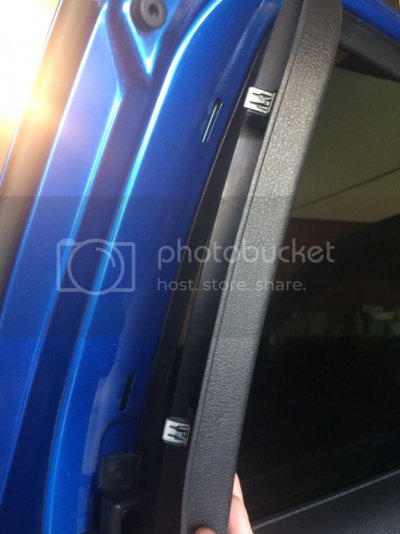
Repeat the same as the front door, with the exception of a hidden bolt behind a trim piece. Once again, I used the trim removal too, but this can be done with a screwdriver. This will expose a 6mm screw. Also, there is no screw in the bottom of the grab handle.
SWAPPING THE DOOR SPEAKERS
Oddly enough, the 4 screws holding in the door speakers are 5.5mm. Remove those screws and detach the wire harness by pressing a little "button" on the side and remove the speaker.
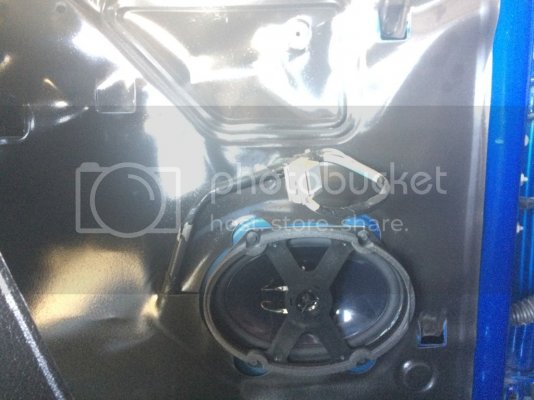
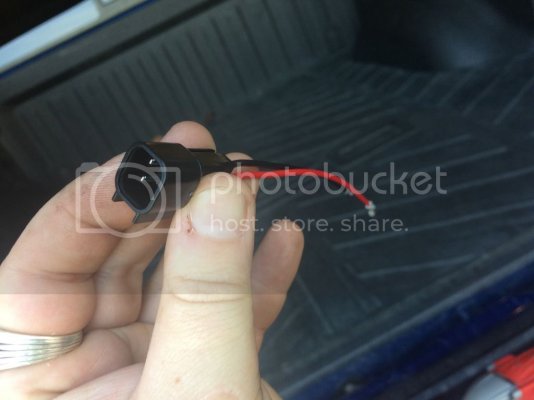
-If you bought the kit from Stage3, it comes with 4 OEM harness attachments, NO SPLICING. However, some of them do go in kind of hard. If you run in to some resistance, try lightly bending the contacts up in the supplied harness's.
BUTTONING UP THE PANELS
-Now that you have replaced the speakers and verified they work. It is time to put the panels back on.
PRO TIP: When putting the door panels back on, put the door lock in the up or "unlocked" position. Otherwise, you will have a bear of a time getting that panel back on.
-After all of the screws and trim pieces are back in place, you are now done replacing the door speakers.
SWAPPING THE TWEETERS
This step will require some splicing. Also, I strongly recommend getting the tweeters. The stock ones in conjunction with the newly installed Kicker speakers get kind of "drowned out". I did not care for that sound, so replace the tweeters and you will be much happier.
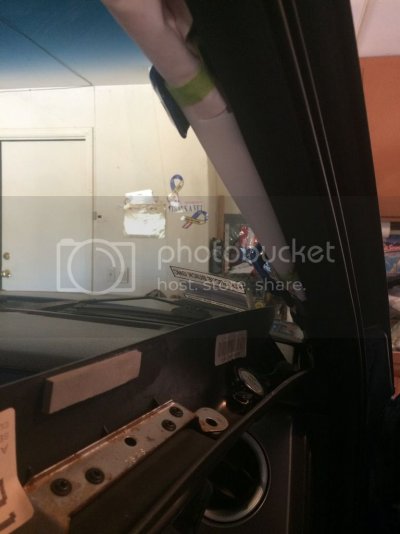
Removing Driver Side A Pillar
BE CAREFUL!!!!! There is a curtain airbag behind this thing, so do not shove a screwdriver in there and start prying.
-Using your fingers, just start pulling at it. There are 2 metal trim clips that hold the pillar on. The will give and the pillar will come up and out.
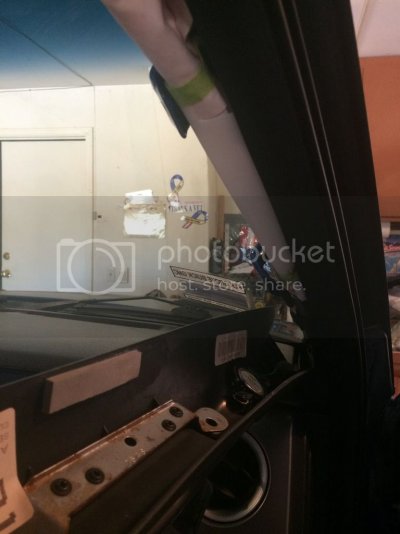
-Remove the plastic trim piece on the side of door frame (With the hole for the air vent that goes to the door. This will expose where the connector for the tweeter. Press the button on the connector and pull off the harness.
-For those who dont know, the harness connected to the tweeter has a crossover on it. What that does is force only a specific signal to go to that speaker. This is needed as the "Sony HD system" is made up of an 80% component system. Meaning only the rear door speakers have tweeters built in to them.
PRO TIP: I spliced in to the factory harness that I cut off the factory tweeters. Make sure to give yourself plenty of slack!!!! I barely made it long enough on the first one because I wasnt paying attention.
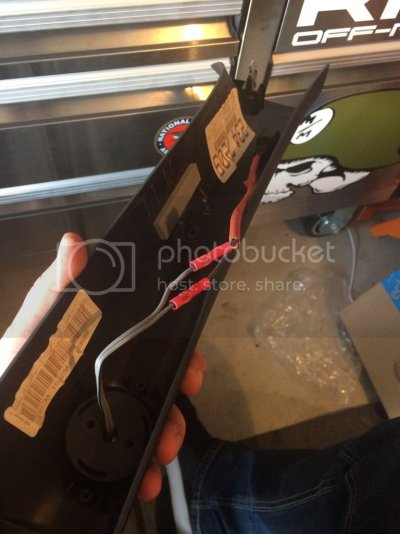
Also, Green to Grey (Positive), Purple/Green to Grey/Blackstripe (Negative). Or simply, Solid to solid and stripe to stripe.
-Time to bust out the Dremel. In order to get the new tweeters to fit, you need to hog out the tweeter opening jussssssst a little. Go slow making the opening a little wider each time until the tweeter fits.
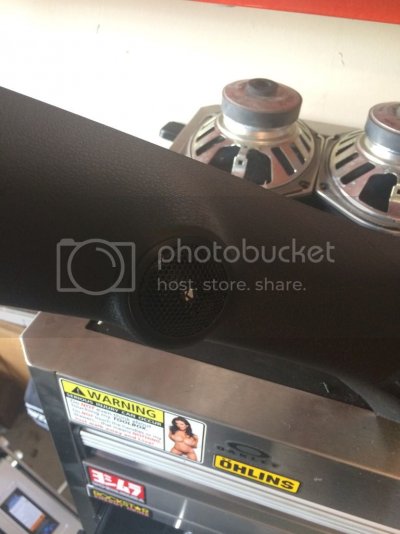
In order to mount the tweeter, you have 2 options.
1 - Make a strap to hold it in place.
2 - Use the supplied "Surface Mount" cap and run it over a belt sander to make it a little shorter. (This is what I did)
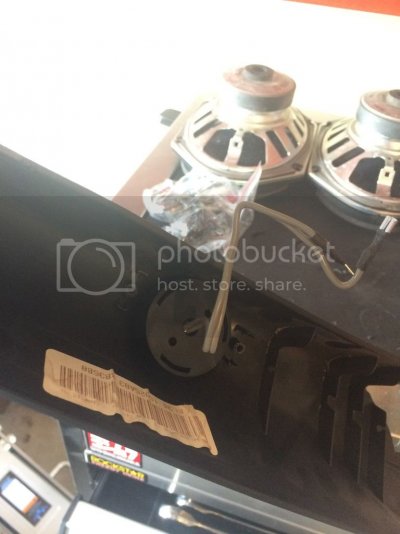
-Reconnect the wire, turn the treble ALL the way up and the bass ALL the way down and verify the tweeter is working.
The passenger side has 2 screws (7mm) behind the hidden panels on the grab handle. Otherwise, it is the same process as the driver side.
Everything all said and done, I do like the sound over the stock system. Even though we have not changed the amount of power going to each speaker, I find the sound to be; crisper and a little more punchy than before. I will more than likely add the VSS kicker sub at a later date. But I am finding it hard to stomach the idea of a 10" 200watt sub for 700$...Seems a little high, but hey, xmas is around the corner...maybe stage 3 will do a sale this year.
Thanks for reading and I hope this helped answer some questions anyone may have had about doing this particular mod.
-Moto-
I am relatively new to the forum and this is my first write up so, sup y'all! This is not the most difficult install ever, but it does yield some information that I found otherwise difficult to find on the internet. I have a 2012 Screw that had the "Sony HD 700W" system in it...I was not a fan of that sound system to say the least.
This is my truck

So I tried the cheaper option at an attempt for a better sound. (By cheaper, I mean not dumping 2000$ on a custom system)
Stage 3 Kicker door speaker upgrade kit
Stage 3 Kicker tweeter set
TOOLS I USED:
3x Flathead screwdrivers
1x 90 Degree pick
1x Trim removal tool "This one is really not necessary but it helped a little"
2x ratchet extensions
Impact Drill
1/4" socket adapter for drill
Dremel (Rotary Tool)
5.5mm socket
6mm socket
7mm socket
8mm socket

DOOR PANEL REMOVAL:
Front Door Panels
-The front door panels have 4 screws, 2 at the bottom, 1 behind the door handle and 1 in the grab handle pocket.


-The 2 at the bottom are 6mm and the hidden 2 are 8mm.
-It is a little tricky to get the plastic panel behind the handle. I found it easiest to use a small flat head screwdriver (not the stubby) and the 90 degree pick. Get the small flat head in there first and wiggle the pick behind it, then pull forward. It should pop out.

-After all the screws are removed, you need to pop out the window control panels. This is where I used the door trim removal tool, I felt a little more prying surface area was a safer bet to not break anything.
-Disconnect the electrical harness by pushing down on a little "button", then pull.

-Now that everything is disconnected, just pull UP on the entire door panel and it comes off with ease.
-At this time, you CAN remove the door lock cable, but I did not as it would have been more work that I found unnecessary.
Rear Door Panels
Repeat the same as the front door, with the exception of a hidden bolt behind a trim piece. Once again, I used the trim removal too, but this can be done with a screwdriver. This will expose a 6mm screw. Also, there is no screw in the bottom of the grab handle.

SWAPPING THE DOOR SPEAKERS
Oddly enough, the 4 screws holding in the door speakers are 5.5mm. Remove those screws and detach the wire harness by pressing a little "button" on the side and remove the speaker.

-If you bought the kit from Stage3, it comes with 4 OEM harness attachments, NO SPLICING. However, some of them do go in kind of hard. If you run in to some resistance, try lightly bending the contacts up in the supplied harness's.

BUTTONING UP THE PANELS
-Now that you have replaced the speakers and verified they work. It is time to put the panels back on.
PRO TIP: When putting the door panels back on, put the door lock in the up or "unlocked" position. Otherwise, you will have a bear of a time getting that panel back on.
-After all of the screws and trim pieces are back in place, you are now done replacing the door speakers.
SWAPPING THE TWEETERS
This step will require some splicing. Also, I strongly recommend getting the tweeters. The stock ones in conjunction with the newly installed Kicker speakers get kind of "drowned out". I did not care for that sound, so replace the tweeters and you will be much happier.
Removing Driver Side A Pillar
BE CAREFUL!!!!! There is a curtain airbag behind this thing, so do not shove a screwdriver in there and start prying.
-Using your fingers, just start pulling at it. There are 2 metal trim clips that hold the pillar on. The will give and the pillar will come up and out.

-Remove the plastic trim piece on the side of door frame (With the hole for the air vent that goes to the door. This will expose where the connector for the tweeter. Press the button on the connector and pull off the harness.
-For those who dont know, the harness connected to the tweeter has a crossover on it. What that does is force only a specific signal to go to that speaker. This is needed as the "Sony HD system" is made up of an 80% component system. Meaning only the rear door speakers have tweeters built in to them.
PRO TIP: I spliced in to the factory harness that I cut off the factory tweeters. Make sure to give yourself plenty of slack!!!! I barely made it long enough on the first one because I wasnt paying attention.

Also, Green to Grey (Positive), Purple/Green to Grey/Blackstripe (Negative). Or simply, Solid to solid and stripe to stripe.
-Time to bust out the Dremel. In order to get the new tweeters to fit, you need to hog out the tweeter opening jussssssst a little. Go slow making the opening a little wider each time until the tweeter fits.

In order to mount the tweeter, you have 2 options.
1 - Make a strap to hold it in place.
2 - Use the supplied "Surface Mount" cap and run it over a belt sander to make it a little shorter. (This is what I did)

-Reconnect the wire, turn the treble ALL the way up and the bass ALL the way down and verify the tweeter is working.
The passenger side has 2 screws (7mm) behind the hidden panels on the grab handle. Otherwise, it is the same process as the driver side.

Everything all said and done, I do like the sound over the stock system. Even though we have not changed the amount of power going to each speaker, I find the sound to be; crisper and a little more punchy than before. I will more than likely add the VSS kicker sub at a later date. But I am finding it hard to stomach the idea of a 10" 200watt sub for 700$...Seems a little high, but hey, xmas is around the corner...maybe stage 3 will do a sale this year.
Thanks for reading and I hope this helped answer some questions anyone may have had about doing this particular mod.
-Moto-

