bigrig
Full Access Member
Hefty Fabworks Rock Rails Installation
Let me start this post by saying this project was very involved and took me much longer than I initially had thought it would. It also required me to dig deep in my tool box and get creative while mounting these rails. I have Hefty Fabworks Skids on my truck and I was really impressed by the fit and finish of those. Everything in that kit fit perfectly and works amazingly. The rails unfortunately didn’t fit right out of the box. As you will see below I had to trim the mount points in order to get the rails to fit correctly. I consulted Chris Hefty about the fit and he said it is to be expected since the trucks have changed a little over the different years and trimming would be expected. This, along with tight spacing made these rails really difficult to install.
Tools I used:
About my experience with Hefty Fabworks:
I waited over 6 months for the delivery of the rails. It took a really long time but it was due to the fact that Hefty Fabworks fired their powder coater and had to find a new one. Chris was good at responding to all my calls requesting updates on the order status during that time.
Once the rails were finally delivered, they arrived in excellent condition. The rails were wrapped securely on a wood pallette that FedEx loaded via forklift in the bed of my truck.
About the Hefty Fabworks Rock Rails:
Before doing anything to the rails I weighed the new rails against the old running boards. The new rails were 50 pounds more per side. So the overall weight increase was 100 pounds.
The powder coating looked clean but isn’t super durable. I have been able to scratch it in some places. I expected the powder coat to be more durable than that. Touchup can be done with some black Rustoleum.
Installation:
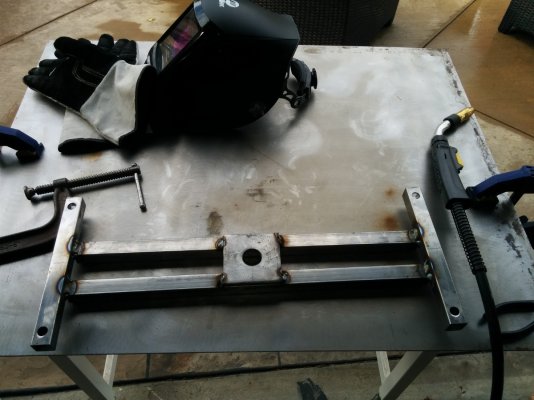
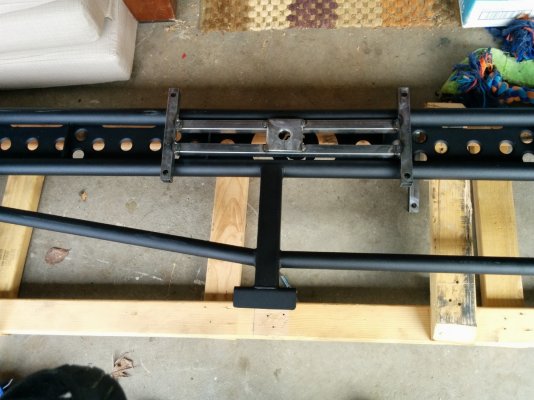
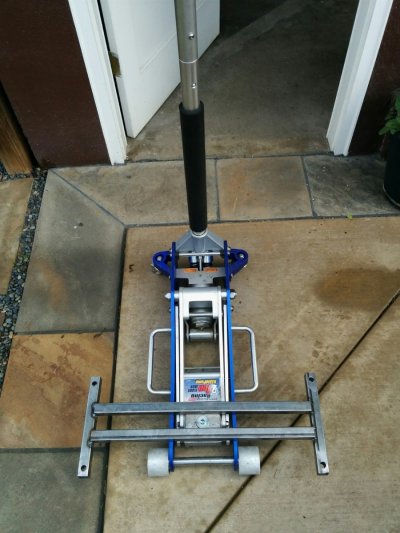
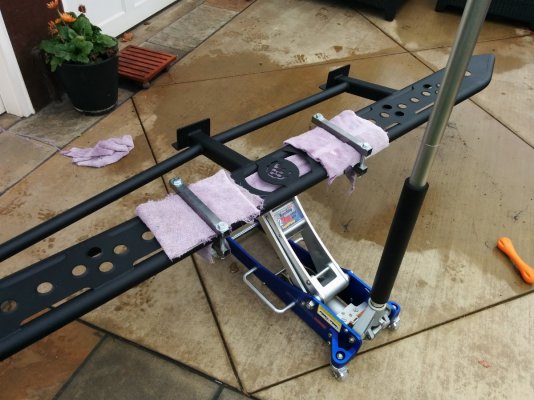
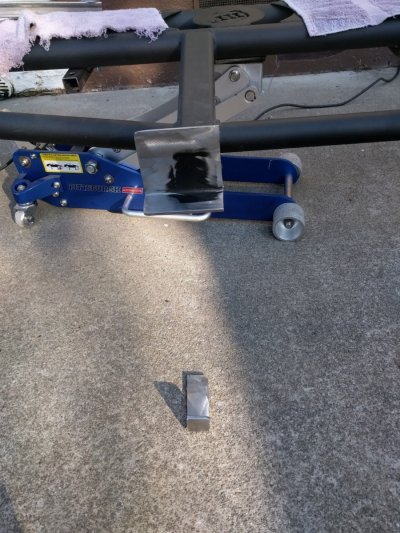
I first made a jig that could hold the rails as well as be attached to my floor jack. This enabled me to move the rails around and lift them up against the frame of the truck.
Before welding the rails on, the original step had to be removed. I used an impact wrench with a 12mm socket to make quick work of that.
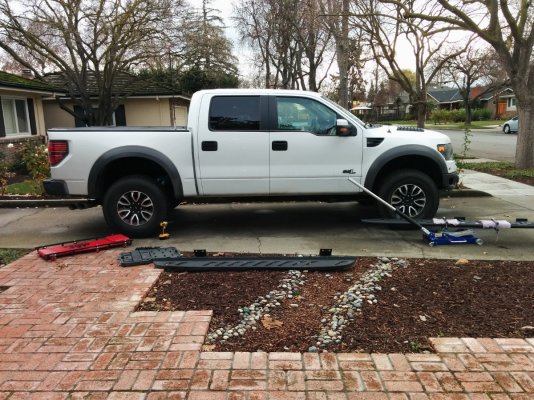
For the drivers side, I had to detach the electrical harness attached to the frame. I then had to grind the paint off the truck frame as well as the powder coating on the rails where weld points were. I think Hefty Fabworks should have requested from their powder coater, that the rails be masked off at the mounting points since they knew those spots would need to be welded.
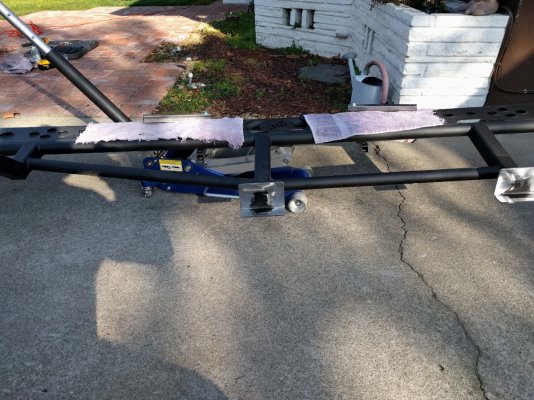
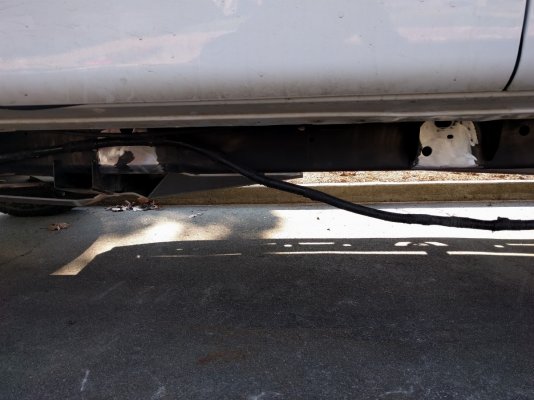
When fitting the rails to the frame, two of the mounting points on the rails needed to be trimmed to accommodate the body mounts already on the frame. I checked with Chris at Hefty Fabworks about this modification and he said there are variations in frames and that would be expected. It wasn’t the answer I really expected since my experience with the skids they make fit perfectly.
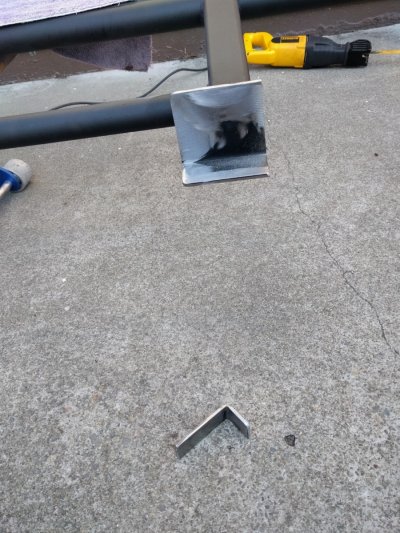
I wanted to use 220V power for my welder since I was going to have to use an extension cord to reach the truck in the front yard. It was my plan to run a 50ft welding extension cord from my laundry hookup to the welder. That plan came to an abrupt halt when I found that the extension cord didn’t fit my laundry plug. A 10-30P to a 6-50R adapter made it possible though.
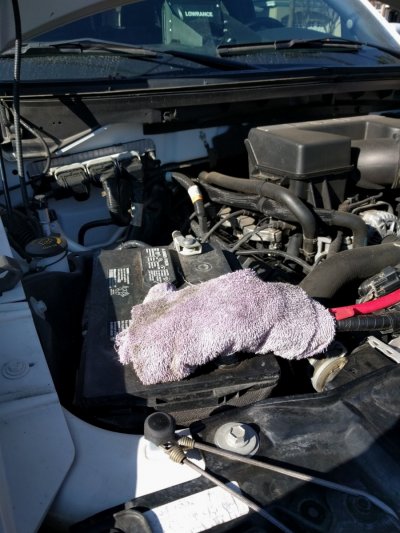
Before doing any welding on the truck I unhooked the battery’s positive cable using an 8mm box end wrench and wrapped it in a rag to ensure the terminal wouldn’t touch the cable while I was working on the truck.
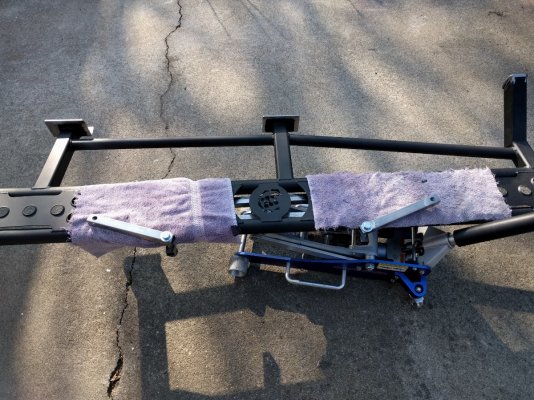
I found that my jigs top bars had to be moved sideways to allow the rails to be raised without getting in the way of the truck body. Luckily the rails are well balanced and moving the top bars didn’t affect its stability
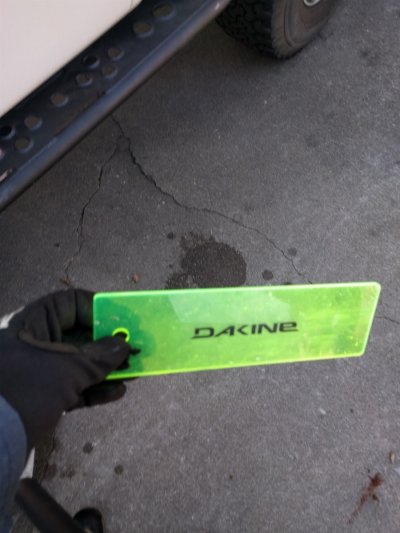
I positioned the rails against the frame, centered it, and used some one handed bar clamps to jockey it into position against the frame. I used a piece of plastic and some leftover 3/16 metal bits to enforce space between the rails and the body.
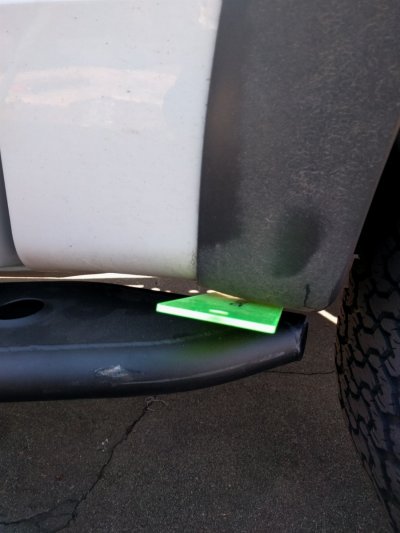
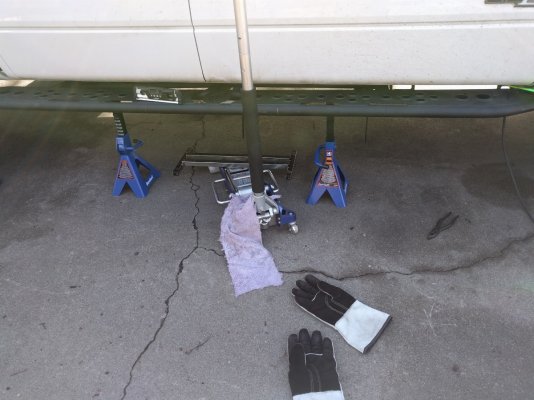
I first tack welded the front and placed jack stands under the rails while I moved my jig with the floor jack to the rear. Once the rear was positioned correctly I tacked it as well. The middle required a little pressure from the floor jack to get the mount to lie flush with the frame. Once in place I tacked that as well.
After verifying that the rails looked straight I started laying the bead for all the seams. Some welds turned out great while others required grinding and rework due to the tight spacing around the mount points. After the welds cooled, I cleaned the seams and painted the bare metal with black primer Rustoleum.
Final Thoughts
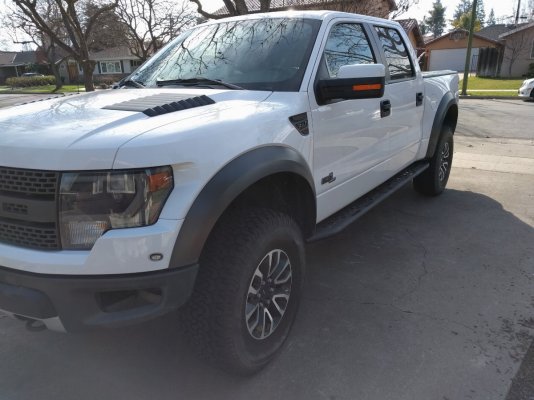
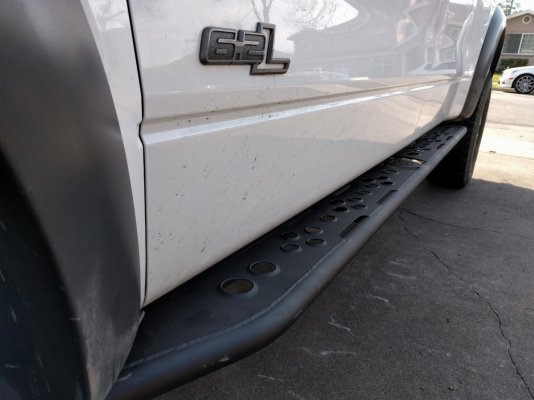
To say this was an awkward install would be an understatement. I am pleased with the final result but it took a lot of work. I am not sure if I were to have hired someone to install these rails if I would have gotten what I wanted since they were really a pain in the butt to install.
I will be making the trek out to Tierra Del Sol in March and give the rails and the skids a workout. I will try to follow up on this thread to let you know how it worked out.
Measure twice, cut once, have fun, enjoy the process (even if the project is tough)!
~bigrig
Let me start this post by saying this project was very involved and took me much longer than I initially had thought it would. It also required me to dig deep in my tool box and get creative while mounting these rails. I have Hefty Fabworks Skids on my truck and I was really impressed by the fit and finish of those. Everything in that kit fit perfectly and works amazingly. The rails unfortunately didn’t fit right out of the box. As you will see below I had to trim the mount points in order to get the rails to fit correctly. I consulted Chris Hefty about the fit and he said it is to be expected since the trucks have changed a little over the different years and trimming would be expected. This, along with tight spacing made these rails really difficult to install.
Tools I used:
- Mig Welder, Welding Gloves, Welding Mask
- 50ft 220v extension cord
- 220V socket adapter 10-30P to 6-50R
- Angle Grinder with 4.5” flap disc 60 grit
- Die Grinder with 1” flap wheel 60 grit
- Bar Clamp
- Wire Cutters
- Needle Nose Pliers
- Air Compressor
- Floor Jack
- 2 Jack Stands
- 8mm Box End Wrench
- Impact wrench
- 12mm socket
- Reciprocating Saw
- Ear plugs
- Safety Goggles
- Paint Cleaner
- Rustoleum Black Primer Paint
About my experience with Hefty Fabworks:
I waited over 6 months for the delivery of the rails. It took a really long time but it was due to the fact that Hefty Fabworks fired their powder coater and had to find a new one. Chris was good at responding to all my calls requesting updates on the order status during that time.
Once the rails were finally delivered, they arrived in excellent condition. The rails were wrapped securely on a wood pallette that FedEx loaded via forklift in the bed of my truck.
About the Hefty Fabworks Rock Rails:
Before doing anything to the rails I weighed the new rails against the old running boards. The new rails were 50 pounds more per side. So the overall weight increase was 100 pounds.
The powder coating looked clean but isn’t super durable. I have been able to scratch it in some places. I expected the powder coat to be more durable than that. Touchup can be done with some black Rustoleum.
Installation:
I first made a jig that could hold the rails as well as be attached to my floor jack. This enabled me to move the rails around and lift them up against the frame of the truck.


Before welding the rails on, the original step had to be removed. I used an impact wrench with a 12mm socket to make quick work of that.

For the drivers side, I had to detach the electrical harness attached to the frame. I then had to grind the paint off the truck frame as well as the powder coating on the rails where weld points were. I think Hefty Fabworks should have requested from their powder coater, that the rails be masked off at the mounting points since they knew those spots would need to be welded.


When fitting the rails to the frame, two of the mounting points on the rails needed to be trimmed to accommodate the body mounts already on the frame. I checked with Chris at Hefty Fabworks about this modification and he said there are variations in frames and that would be expected. It wasn’t the answer I really expected since my experience with the skids they make fit perfectly.


I wanted to use 220V power for my welder since I was going to have to use an extension cord to reach the truck in the front yard. It was my plan to run a 50ft welding extension cord from my laundry hookup to the welder. That plan came to an abrupt halt when I found that the extension cord didn’t fit my laundry plug. A 10-30P to a 6-50R adapter made it possible though.
Before doing any welding on the truck I unhooked the battery’s positive cable using an 8mm box end wrench and wrapped it in a rag to ensure the terminal wouldn’t touch the cable while I was working on the truck.

I found that my jigs top bars had to be moved sideways to allow the rails to be raised without getting in the way of the truck body. Luckily the rails are well balanced and moving the top bars didn’t affect its stability

I positioned the rails against the frame, centered it, and used some one handed bar clamps to jockey it into position against the frame. I used a piece of plastic and some leftover 3/16 metal bits to enforce space between the rails and the body.


I first tack welded the front and placed jack stands under the rails while I moved my jig with the floor jack to the rear. Once the rear was positioned correctly I tacked it as well. The middle required a little pressure from the floor jack to get the mount to lie flush with the frame. Once in place I tacked that as well.

After verifying that the rails looked straight I started laying the bead for all the seams. Some welds turned out great while others required grinding and rework due to the tight spacing around the mount points. After the welds cooled, I cleaned the seams and painted the bare metal with black primer Rustoleum.


Final Thoughts
To say this was an awkward install would be an understatement. I am pleased with the final result but it took a lot of work. I am not sure if I were to have hired someone to install these rails if I would have gotten what I wanted since they were really a pain in the butt to install.
I will be making the trek out to Tierra Del Sol in March and give the rails and the skids a workout. I will try to follow up on this thread to let you know how it worked out.
Measure twice, cut once, have fun, enjoy the process (even if the project is tough)!
~bigrig


