How To DIY Painted Edges on Taillights

Disclaimer: Links on this page pointing to Amazon, eBay and other sites may include affiliate code. If you click them and make a purchase, we may earn a small commission.
never_summer

Active Member
Joined
Feb 12, 2015
Posts
53
Reaction score
16
Yea it never bothered me either, but the difference is very noticeable. Everyone thought I got them tinted when they saw them. I just cleaned out real well behind the clear lip, there might be some plastic remnants that will need to be cleaned out so the paint gets all the way to the inner edge. Then I just applied a thick layer until it ran into the inner edge, gave up trying to paint it but just apply it haha
 

schmitty

Member
Joined
Apr 22, 2015
Posts
21
Reaction score
32
Just did this mod and used a brush and syringe for the first one. Then found these plastic "pipettes" at a hobby store. What a game changer. The second light came out WAY better and way faster than the first.
fed2e2ae11413175af4281ec7bcd1142.jpg43899952a14f6d0e8c980db442f3af71.jpg


Sent from my iPhone using Tapatalk
 
Last edited:

schmitty

Member
Joined
Apr 22, 2015
Posts
21
Reaction score
32
@TheWolf. It was ridiculously easier with those pipettes. And for $.50 each, a no brainier. Plan on using one pipette per coat.
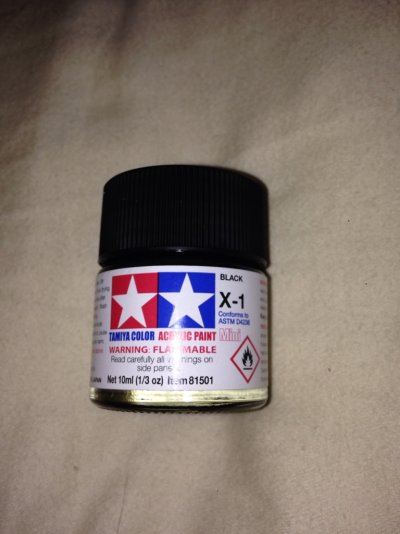
I told the guy at the hobby shop what I was doing and he recommended acrylic. The first coat didn't really cover/stick, the second coat gave it somewhat of a smoked look and I'm hoping the third does the trick. I bought two 1/3 oz. jars and seems to be plenty. a4814c6a3951589f261eeecae4b693e0.jpg


Sent from my iPhone using Tapatalk
 

Nick@Apollo-Optics

Supporting Vendor
Supporting Vendor
Joined
Apr 3, 2011
Posts
7,482
Reaction score
3,128
Location
Houston, TX
I need to do this mod.

So for clarification, are you only filling in the gapped section with the black paint? Or are you filling in the entire section and then also painting the back side of the lens?
 

schmitty

Member
Joined
Apr 22, 2015
Posts
21
Reaction score
32
I need to do this mod.

So for clarification, are you only filling in the gapped section with the black paint? Or are you filling in the entire section and then also painting the back side of the lens?


Only the gap/edge that runs around the perimeter. You know, area that traps soap bubbles when you wash the truck. It also traps dirt. I used and old toothbrush with dish soap and water to clean, rinsed with fresh water and dried with compressed air and sunshine for a couple hours before painting.

The pipettes that I used with the really tiny end fit into the tightest area which is the side that butts against the tailgate.

The internal part of the fixture is left completely untouched.


Sent from my iPhone using Tapatalk
 

Nick@Apollo-Optics

Supporting Vendor
Supporting Vendor
Joined
Apr 3, 2011
Posts
7,482
Reaction score
3,128
Location
Houston, TX
Only the gap/edge that runs around the perimeter. You know, area that traps soap bubbles when you wash the truck. It also traps dirt. I used and old toothbrush with dish soap and water to clean, rinsed with fresh water and dried with compressed air and sunshine for a couple hours before painting.

The pipettes that I used with the really tiny end fit into the tightest area which is the side that butts against the tailgate.

The internal part of the fixture is left completely untouched.


Sent from my iPhone using Tapatalk

Gotcha. I didn't know if you had paint the entire backside of the light as well. Thanks for your help!
 
Top