MrGreen33
FRF Addict
DIY Painted Edges on Taillights
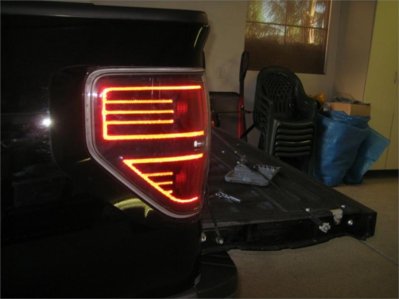
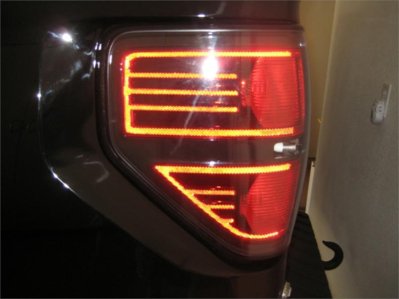
Before DIY:

After DIY:

What is needed:
1.) 8mm or 5/16th socket or wrench
2.) Black paint
3.) Tiny brush
4.) Needle and a syringe
5.) WD-40
6.) Rags
7.) Razorblade
*Overspill or having the paint on a surface not intended on the truck or light, do to operator error, can normally be removed with a small touch up of the almighty, WD-40.
Step 1
Remove Taillights
1. Open Tailgate.
2. Each Taillight has Two 8mm (or 5/16) screws, that needs to be removed.
3. Pull tail light out.
4. Disconnect the taillight.
Step 2
Pre-Paint Prep work
1. Clean tail lights with water and a cloth.
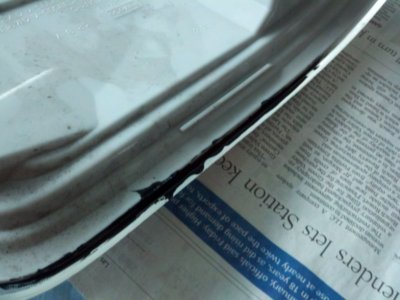
2. Inspect the inside edge of the taillight and look for excess glue that can impede the paint from bonding with the desired location.
With a Razorblade, remove the excess glue from the inside edge of the taillight.
4. If needed, repeat step 1 after completing step 2, if excess glue was removed.
Step 3
Paint
Paint type: I Testors gloss black model enamel paint. Although a good Idea might be to use/try the FORD OEM touch up paint available at the local FORD dealer.
1. Use a tiny brush, with stiff bristles, to paint the inside of the taillights edge.
(Rumor is that a syringe works best…problem is I am not sure how to get one…hehe)
2. Let the paint dry for a few hours, and repeat step one until to apply a second or third coat.
3. Let paint dry after the last coat…I left mine drying overnight.
Before DIY:

After DIY:

What is needed:
1.) 8mm or 5/16th socket or wrench
2.) Black paint
3.) Tiny brush
4.) Needle and a syringe
5.) WD-40
6.) Rags
7.) Razorblade
*Overspill or having the paint on a surface not intended on the truck or light, do to operator error, can normally be removed with a small touch up of the almighty, WD-40.
Step 1
Remove Taillights
1. Open Tailgate.
2. Each Taillight has Two 8mm (or 5/16) screws, that needs to be removed.
3. Pull tail light out.
4. Disconnect the taillight.
Step 2
Pre-Paint Prep work
1. Clean tail lights with water and a cloth.
2. Inspect the inside edge of the taillight and look for excess glue that can impede the paint from bonding with the desired location.
With a Razorblade, remove the excess glue from the inside edge of the taillight.
4. If needed, repeat step 1 after completing step 2, if excess glue was removed.
Step 3
Paint
Paint type: I Testors gloss black model enamel paint. Although a good Idea might be to use/try the FORD OEM touch up paint available at the local FORD dealer.
1. Use a tiny brush, with stiff bristles, to paint the inside of the taillights edge.
(Rumor is that a syringe works best…problem is I am not sure how to get one…hehe)
2. Let the paint dry for a few hours, and repeat step one until to apply a second or third coat.
3. Let paint dry after the last coat…I left mine drying overnight.


