Are you saying there is movement up and down? Would a few washers sandwiched between the grommet and support take care of it? Just ordered the IC and want to have everything on hand for install. ThanksFor anyone who did this install…is the fan suppose to be a bit loose when everything is tightened down? I just did the install and put everything back, and everything is nice and tight, including the intercooler itself, but there is some play with the fan, as in the rubber grommets are not snug against the metal bracket even though everything else is.
See attached photo for the rubber grommet for the fans that is not snug against the metal bracket.
You are using an out of date browser. It may not display this or other websites correctly.
You should upgrade or use an alternative browser.
You should upgrade or use an alternative browser.
CVFab Titan 2 installed
- Thread starter cdiddy4224
- Start date
Disclaimer: Links on this page pointing to Amazon, eBay and other sites may include affiliate code. If you click them and make a purchase, we may earn a small commission.
catinthehat85
Full Access Member
Are you saying there is movement up and down? Would a few washers sandwiched between the grommet and support take care of it? Just ordered the IC and want to have everything on hand for install. Thanks
Yes there was about 1/4” of movement up and down in mine. Really really large washers could work. I was in my garage trying to find something that worked, I ended up using u bolts I had extra laying around from installing a 2” electrical conduit mast. I just locktited the bolt plate down to ensure it never slips out.
Shark
Full Access Member
I received my pipe kit yesterday but still waiting on the IC - seems UPS missed getting it on the trailer in time to deliver with the pipes on Saturday. I mocked up the cold pipe and these are the T-Bolt clamps that came with the kit. I used these on my Factory Five build and I like to take a Dremel cut cut off 3/4 - 1" of the exposed bolt once they are snugged up and prior to install. It will leave enough slack to loosen and move the pipes around, but they take up a lot less space and you can get a reasonable length socket on them. I hope it isn't going to be too much of a PITA to get all the pipes installed.
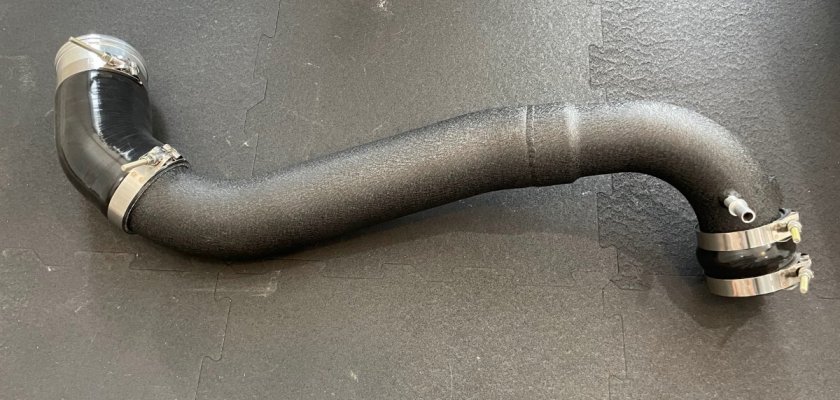
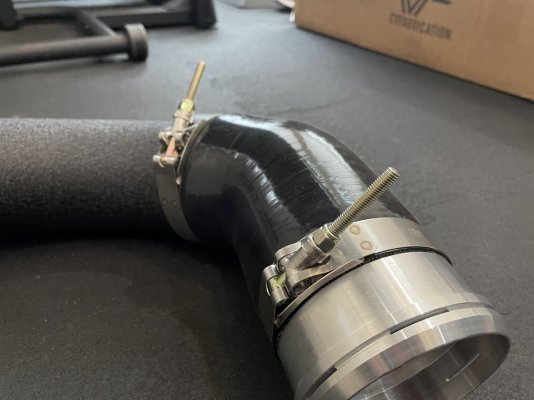


Please give your thoughts on the install after you do it. Waiting on my order and will be doing the same soon.I received my pipe kit yesterday but still waiting on the IC - seems UPS missed getting it on the trailer in time to deliver with the pipes on Saturday. I mocked up the cold pipe and these are the T-Bolt clamps that came with the kit. I used these on my Factory Five build and I like to take a Dremel cut cut off 3/4 - 1" of the exposed bolt once they are snugged up and prior to install. It will leave enough slack to loosen and move the pipes around, but they take up a lot less space and you can get a reasonable length socket on them. I hope it isn't going to be too much of a PITA to get all the pipes installed.
View attachment 382723View attachment 382724
Shark
Full Access Member
I got the IC and pipe kit installed yesterday. It was a pain in the **** and you should plan a whole day to get this job done, and I strongly recommend you have a helper. It took 7 hours to complete this job. I removed the front bumper as well, just to give me a little more room underneath the truck. I did not use any ramps or jack stands, just slid underneath. I used a small step stool to get up over the motor to reach down to the turbos. In order to tighten the bottom clamp for the coupler on the DS turbo, I actually came in from the wheel well with a long extension on my ratchet which was the easiest way to reach it. All the other clamps were accessible from either the top or bottom of the truck. I have a 3/8" power ratchet and a very large socket set with an assortment of extensions and sockets and it was really needed to get this done. The most difficult pipe to run was the DS hot pipe. It took one of us up top and another underneath to twist and adjust the pipes until we could get both ends into the couplers. It also required to disconnect a lot of the hoses on that side of the engine to gain access to pull the old pipe out and to install the new one. On the PS pipe I actually had to cut the stock pipe in half in order to pull it out, but the new pipe went in fairly easily.
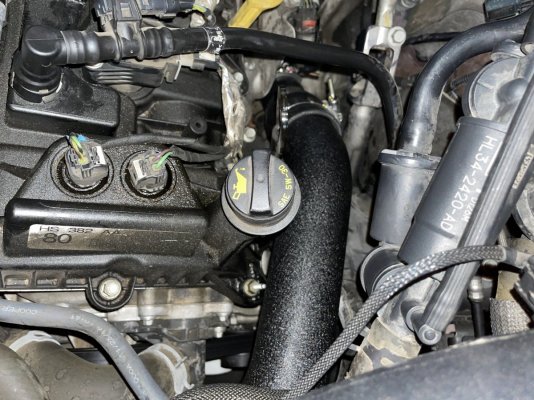
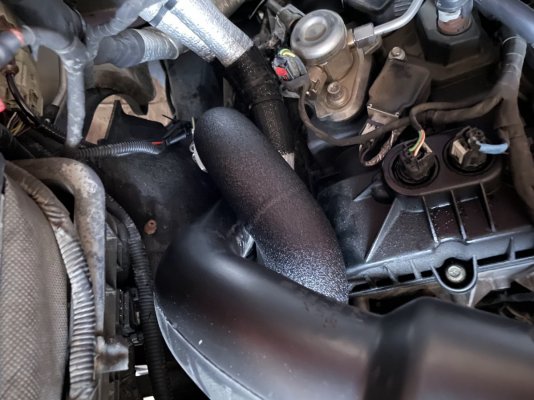
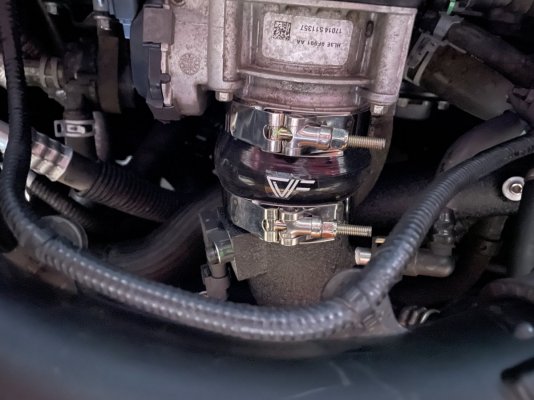


Last edited:
Shark
Full Access Member
Here is the aftermath of the install. After removing the shroud on the shutters, I used my jack to guide the new IC into place but I still didn't have enough clearance to get the grommets on top into the holes of the bracket - it was off by about 1/2". I used my oscillating tool to cut off an additional 1/2" of plastic all around and then it fit just fine. The shutters are still operational but they barely make contact with the front of the IC when fully open.
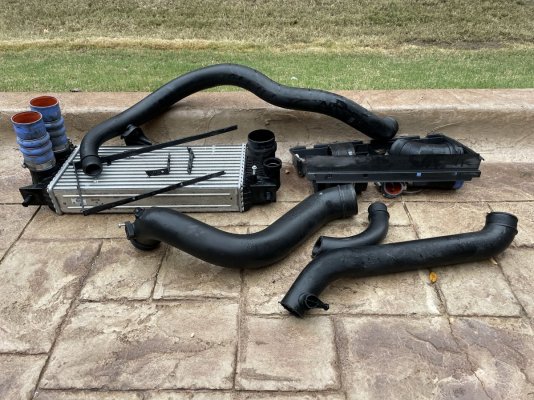
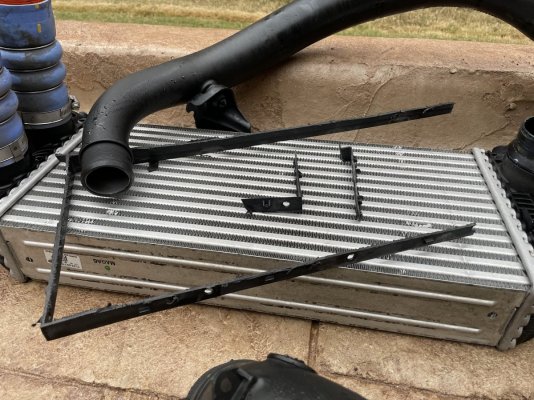


cdiddy4224
Full Access Member
You’re a better man than I am, I gave up on the hot side pipes. Still have them in the garage but as you mentioned, they were a PITA to reach the turbos, etc.
That’s odd you have to cut the shutters. I was really hoping this would be an easy install without having to permanently cut anything on the truck.Here is the aftermath of the install. After removing the shroud on the shutters, I used my jack to guide the new IC into place but I still didn't have enough clearance to get the grommets on top into the holes of the bracket - it was off by about 1/2". I used my oscillating tool to cut off an additional 1/2" of plastic all around and then it fit just fine. The shutters are still operational but they barely make contact with the front of the IC when fully open.
View attachment 383422
View attachment 383423
Shark
Full Access Member
I don't know if there is some adjustment in the top bracket to bring it back, or if there is a variance in the manufacturing of the IC, but I could not slide mine into place without trimming a bit more plastic. I don't plan to go back to stock so not a big deal to me. The oscillating tool took care of the job in just a few minutes.That’s odd you have to cut the shutters. I was really hoping this would be an easy install without having to permanently cut anything on the truck.
khildebr
Full Access Member
Glad I only ordered the IC and passed on the pipes. Looks like too big a PITA for me to deal with. Appreciate the summary of what it took to get them installed and the amount of time it took.I don't know if there is some adjustment in the top bracket to bring it back, or if there is a variance in the manufacturing of the IC, but I could not slide mine into place without trimming a bit more plastic. I don't plan to go back to stock so not a big deal to me. The oscillating tool took care of the job in just a few minutes.
However, the fact that you had to trim additional material from the shutter assembly after removing the shroud has me worried as I’m getting ready to install mine. While you didn’t mention it, I’m assuming that you put the fan assembly in prior to trying to slide the IC in to place. Fingers crossed that this won’t be the case for me.
Similar threads
- Replies
- 7
- Views
- 944
- Replies
- 7
- Views
- 753
- Replies
- 1
- Views
- 797
Members online
- tabvette
- Booth9999
- seilnacht
- Bozz
- Torchy
- pstape23
- IHAVETWO
- mprice1234
- FloonDog
- Daddington
- Siyx
- Zl1Ragtop
- Seadoorider68
- Bonz
- SVT1893
- labradorguy
- 2012SCSVT
- someday
- GordoJay
- HORN HIGH ACES
- HookEm10
- silverf150
- NickyF25
- EZDA45
- designzio
- Rustyseatbelt
- Twofighterplanes
- Big Blue
- scsponger31
- Waterfowler41
- Davesbuzz
- Mattsraptor 2025
- CecilK12
- wyomingraptor
- TEKS
- HOLLYWOOD 1
- Westbayou
- TomDirt
- taquitos
- JohnyPython
- villaraptor
- Braitchell
- Robert Wright
- kredd
- Griffin
- MurderedOutSVT
- nealhoney
- Jred2255
- ToadSmasher2K1
- RaceUV
Total: 6,741 (members: 66, guests: 6,675)

