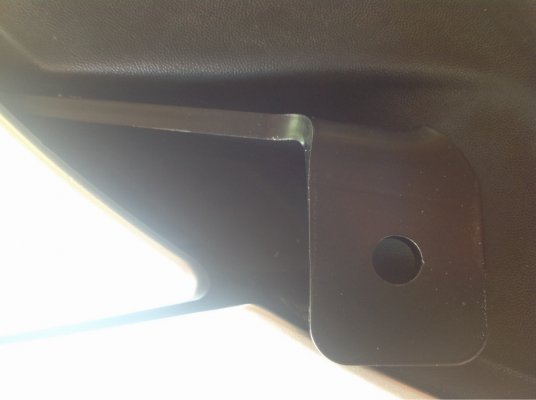
Alternative Offroad No-Cut Hood Mount Light Brackets!!

Disclaimer: Links on this page pointing to Amazon, eBay and other sites may include affiliate code. If you click them and make a purchase, we may earn a small commission.

rkwjunior

Full Access Member
Joined
Oct 20, 2013
Posts
221
Reaction score
53
Location
Massachusettes
Sorry to hear about your install issues! Here's what we recommend if that back bolt is giving you problems.

Have a friend hold the hood up from the front, lifting the base of the hood bracket off the truck. Slide the bracket in place, then carefully tell your friend to lower the hood down so you can get both bolts threaded on. You'll have to make sure your friend is paying attention or else if he/she lets it down to low, it will scratch the hood. Carefully thread both bolts in equally, then using a ratcheting wrench or a small 1/4" ratchet, tighten both bolts down.. The reason it helps to lift the hood, is if there is too much pressure from the hood pushing down on our brackets (or the hood brackets even) the back bolt won't thread on or will start to strip or crossthread. Easing the load on the bolt helps 100000x and I can pretty much guarantee your bolt will go in no problem if you try this :)

Tried..keyword "tried" to install today. Had my father help me out. We are both very mechanical, he's an electrician, I'm a pipefitter. As soon as we pulled the bolts on one side, the hinge moved way out of place, manipulating the bracket through the hood was kinda tricky and lining up the holes to start the bolts while not scratching the edge of the hood was a bitch. My father tried slowly lowering the hood but the hod bracket moved way out of place and pushed way up and made lining up the holes harder. Finally got the bolt in, but rear bolt went in crooked and possibly cross threaded. Then we lost the 1/4 drive and socket down in the fender... bye bye forever. Needless to say we never even finished one side and ran out of sunlight. Have to hit sears in the mornin to get a new socket and drive wrench, I'm more pissed about the rear bolt halfway in and possibly cross threaded, why in God's name would ford use a fine threaded bolt?? I'm so frustrated right now I could n't complete the job, don't know why I do this ********. Will continue in the morning.
 
OP
OP
AlternativeOffroad

AlternativeOffroad

Supporting Vendor
Supporting Vendor
Joined
Aug 25, 2011
Posts
2,576
Reaction score
521
Location
Los Angeles, CA
Tried..keyword "tried" to install today. Had my father help me out. We are both very mechanical, he's an electrician, I'm a pipefitter. As soon as we pulled the bolts on one side, the hinge moved way out of place, manipulating the bracket through the hood was kinda tricky and lining up the holes to start the bolts while not scratching the edge of the hood was a bitch. My father tried slowly lowering the hood but the hod bracket moved way out of place and pushed way up and made lining up the holes harder. Finally got the bolt in, but rear bolt went in crooked and possibly cross threaded. Then we lost the 1/4 drive and socket down in the fender... bye bye forever. Needless to say we never even finished one side and ran out of sunlight. Have to hit sears in the mornin to get a new socket and drive wrench, I'm more pissed about the rear bolt halfway in and possibly cross threaded, why in God's name would ford use a fine threaded bolt?? I'm so frustrated right now I could n't complete the job, don't know why I do this ********. Will continue in the morning.


Did you get this all figured out? Let me know!
 

rkwjunior

Full Access Member
Joined
Oct 20, 2013
Posts
221
Reaction score
53
Location
Massachusettes
Did you get this all figured out? Let me know!

Yup, finally. Went to my uncles and had him also help us out. We ended up taking the hood right off the hood brackets, made it much easier to line up the holes with no weight. The other thing is, if the light brackets had more of a notch cut out so while trying to line up the holes it won't scrape the edge of the hood. Another suggestion is making the bracket sit up an inch higher so the light isn't so low, it made it difficult to thread on the nut. Also, the driverside bracket was extremely close to the top edge of my fender, I'd say less than an 1/8 of an inch, this would be better with the light end and inch higher.. All in all I love the brackets, they are heavy duty and are a great place for some D2 driving lights, but it wasn't easy and wouldn't want to do it again.

I was also able to retrieve my socket drive with a magnet on my tape measure.
 

Sitdown

FRF Supporting Member
Supporting Member
Joined
Oct 28, 2012
Posts
1,617
Reaction score
1,521
Location
Suburbia, IL
since i too had a crossthreaded rear bolt, and battled this for a bit, an optional solution for those looking for a quick n easy install...

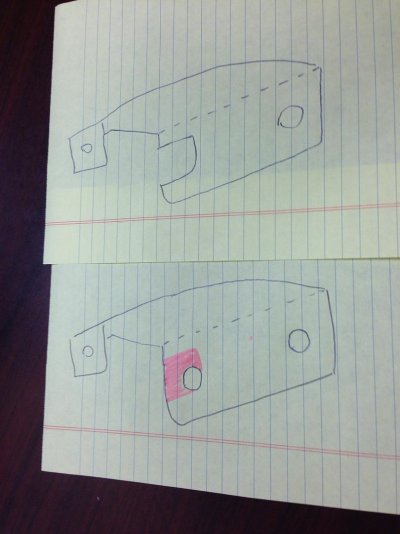
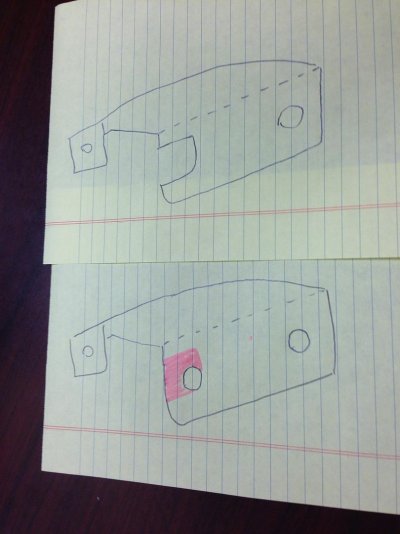
I made a notch in the rear hole, so you dont have to remove the rear bolt. Remove front and Simply loosen the rear enough to slide the mount underneath it. I never took a pic after mod'ing mine, but heres drawing of what i did. 2nd side was done in 5mins. Clearanced a lil extra on the rear to have some more flexibility, just used a bigger washer out back

photo1_zps0acf87de.jpg

not saying the current design is flawed, just another install option.
 

rkwjunior

Full Access Member
Joined
Oct 20, 2013
Posts
221
Reaction score
53
Location
Massachusettes
since i too had a crossthreaded rear bolt, and battled this for a bit, an optional solution for those looking for a quick n easy install...

I made a notch in the rear hole, so you dont have to remove the rear bolt. Remove front and Simply loosen the rear enough to slide the mount underneath it. I never took a pic after mod'ing mine, but heres drawing of what i did. 2nd side was done in 5mins. Clearanced a lil extra on the rear to have some more flexibility, just used a bigger washer out back

photo1_zps0acf87de.jpg

not saying the current design is flawed, just another install option.

Love that idea.... But the bracket with probably hit the edge of the hood while trying to slide it under, but..again..with one bolt still in the hood bracket lowering the hood to help manipulate the light bracket into place will be alot easier since its still bolted down with one bolt... i like it.
 

fogoftw

FRF Supporting Member
Supporting Member
Joined
Apr 15, 2012
Posts
62
Reaction score
37
Well, here you have it guys! Some of you have been hearing about this for a while now, some have been dying to get a set of these, and some may have never heard of it :)

But we have finally released our very own No Cutting, No Modifications Required, Hood Mount Light Brackets!

CNC Laser Cut from 1/4" Steel, Powdercoated Black, and Ready to go!

We've tested a few different mounts, from 3/16" to 1/4" and found the 1/4 to be the sturdiest mount we could find. They will mount up to your Raptor or F150 no problem! Perfect for a set of Light Cannons, or any other light you think would look great up on your new mounts!

We are taking pre orders right now, we will have these bad boys ready in about 2 weeks!


$109.99 plus $10 shipping!

100% MADE IN USA!!

View attachment 27580View attachment 27581

The photos above were with 3/16" steel, the production mounts are 1/4" :)

Do the brackets come with longer bolts?
 

Mluis11

Full Access Member
Joined
Jan 29, 2015
Posts
998
Reaction score
1,476
Successfully installed these last night on my own. These things are sturdy!
I didn't browse through most of the previous pages, so bear with me if I'm repeating things.

What I learned:
1. This was a 2 beer job, but I could've drank 6 in that timeframe if I wasn't working!
2. The second side was much easier after I found the best way to support the hood. I grabbed the corner by the grill and pushed up to maneuver the hinged section. The leverage was very helpful. On the first side, I was maneuvering it down by the hinge with my free hand and it took a lot of extra energy to hold it in place and insert the screws.
3. One screw kept feeling like it was being cross threaded so I backed it out multiple times to inspect the threads, but all were fine. I thought I was going to strip the hole if I continued, but adding the brackets somehow made it much harder to tighten. Powered through and all was well.
4. You have very limited space to get to the back screw. I had to do a lot of wrenching until I had enough clearance to get the ratchet on the bolt.
5. Minimal help from a second person will go a long way when getting things lined up to reinsert the screws.

Now I'm just anxiously awaiting my for KCflexes to arrive!

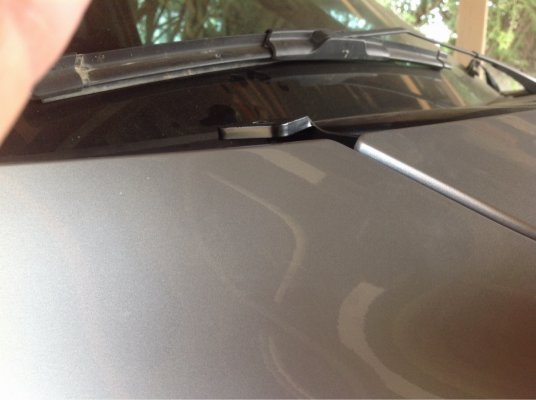
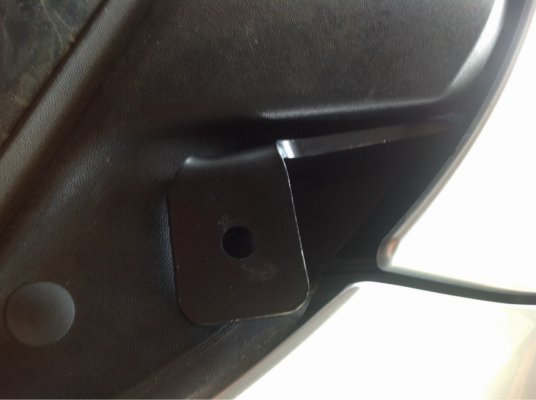
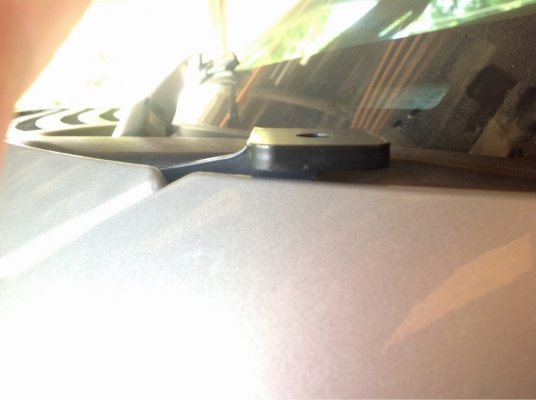
Very snug fit:
875a7e67e171f2fa57b3a96c05eed9b2.jpgb82fd7110c5c584f82e599d0067faf66.jpg398df811f0d1e8c0e21845aed3009570.jpg071034e7d2f1d266dc4691d8017ce770.jpg
 
Top