Bark beetle
Full Access Member
I finally have a chance to update the build thread. I got my transceiver mounted, phone mount installed, mud flaps mounted, and running boards deleted.
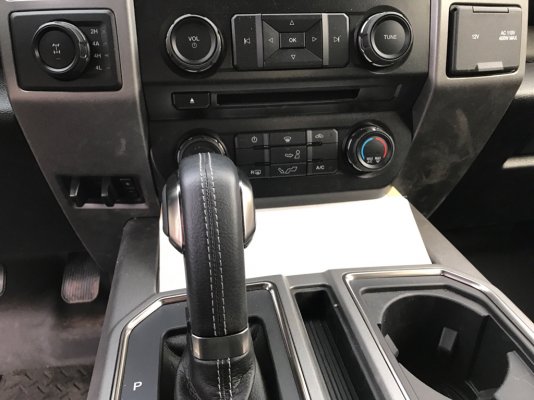
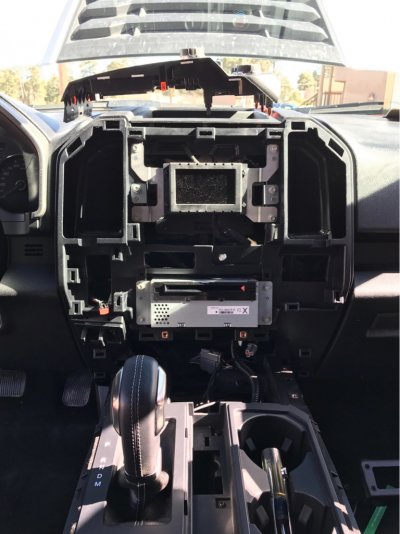
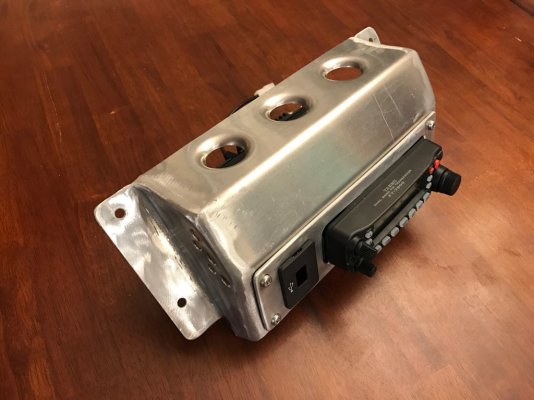
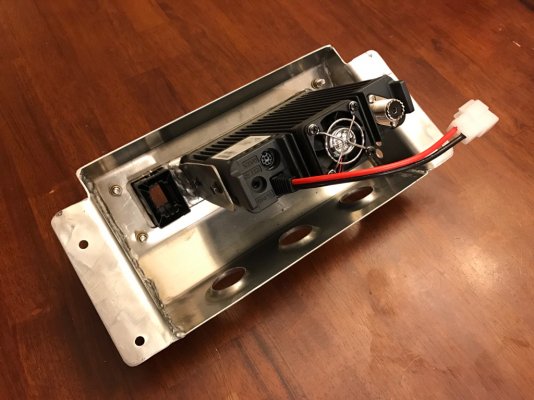
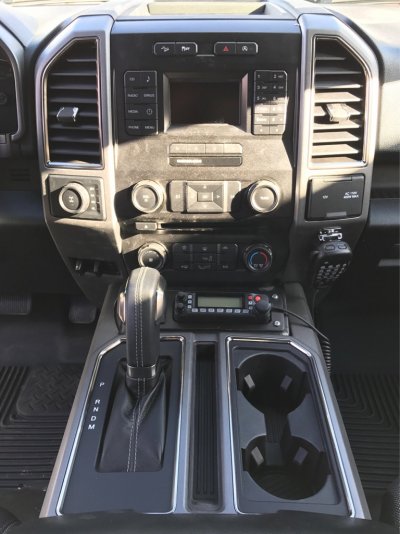
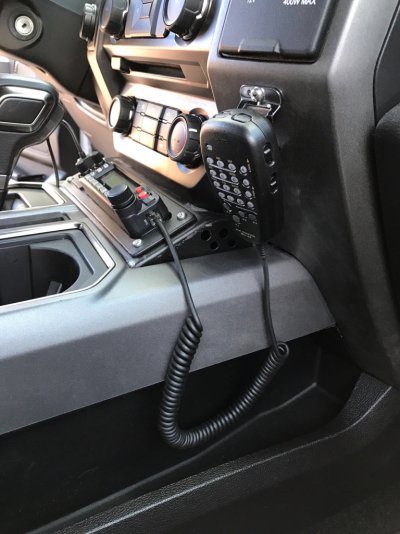
I spent more time on this than I should have on the transceiver mount but it was my first aluminum TIG project. Unfortunately, I have always sucked at painting and the rubberized coating I used on top of etch primer didn't stick worth a crap and some of it pealed off during the fitup into the dash. At some point I may pull the dash back apart to deal with it but right now I want to hurry up and get this truck trip ready. I started with a template, made all the aluminum parts and got it installed in the dash. Sound out of the stock transceiver speaker is good without the need for an external speaker but I did have to use a 90 on the antenna connecter. Thanks to J Bodolay for getting some ideas posted up. Except for the mic mount, that I decided to drill the dash on, everything can be returned to stock. The setup is very similar to the way emergency service vehicles have their center console, such as the ones from Havis, except I only have one mount versus three or more mount plates for accessories.
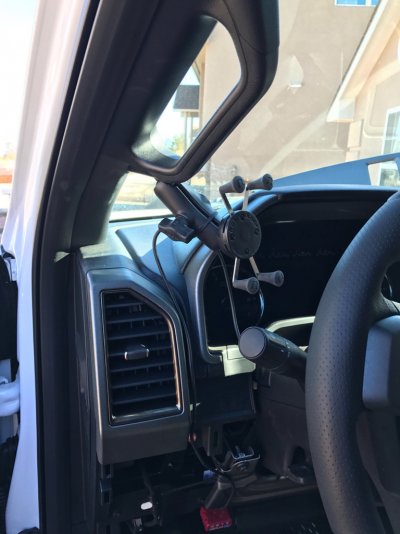
Here is a simple but super solid phone mount off of the grab handle mount. Swapped the bolt for a M6 stud and mounted a RAM ball on it. Routed the charging cable through the dash with the power cables for the transceiver, all in wiring loom to protect them from vibration chafing. Also posted on a phone mount thread but including it here for complete build status.
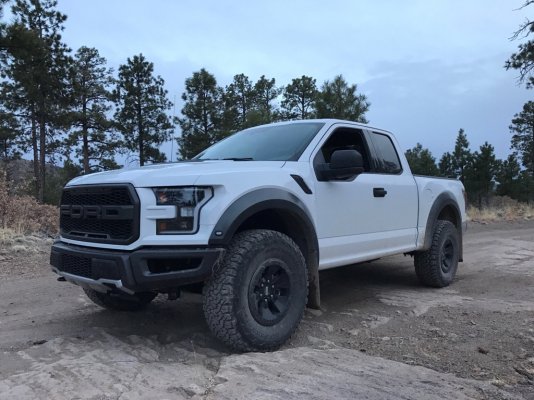
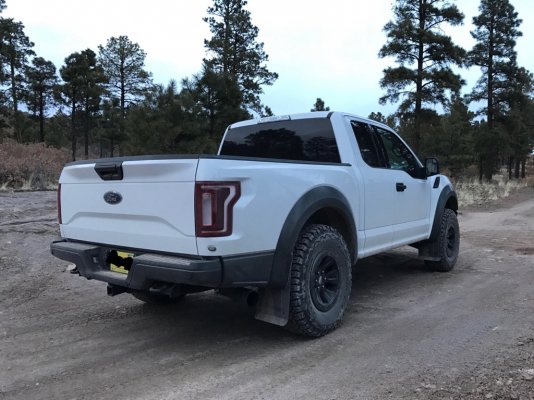
I mounted some PDP mudflaps and I am pretty impressed with them, thanks to all the guys on the mudflap thread. With these I decided to ditch the running boards and I like it a lot better without them. They are actually quite beefy but mount to the cab, not the frame. In addition to a massive improvement in clearance, I noticed that my cab wind noise is now reduced on sweeping corners. Prior to this I noticed some cab flex versus the doors on decent sweeping corners and even felt the motion with my finger between the cab and doors through the corners. This motion resulted in increased wind noise because the gasket seal opens up slightly. With the running boards gone, this motion went down enough that I no longer hear the wind through the seal. If the truck wasn't so quiet already I doubt I would have noticed this. This on asphalt, not dirt.
Sent from my iPad using Tapatalk Pro
---------- Post added at 08:37 AM ---------- Previous post was at 08:11 AM ----------
With all this installed, I did a test load out with all my offroad/camping gear. The ride with all my gear is great and I can't wait for my SVC adjusters to come for the front. I lost about 1" of jounce travel with all the gear, not too bad. Handling improved in the rear with a more planted feel at higher speeds. On lighter chop the rear tended to dance around a bit when the bed is empty.
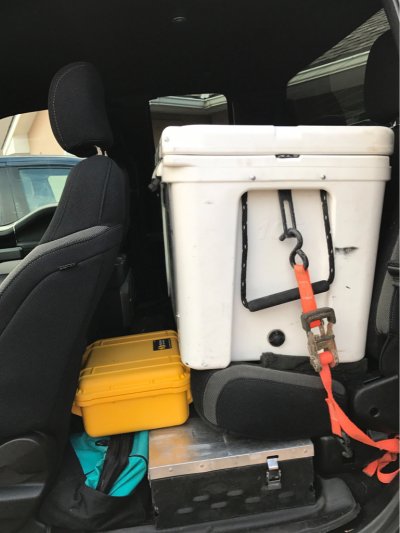
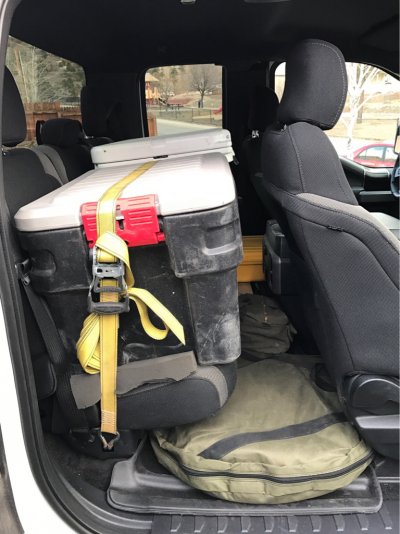
The cooler, stove, first aid kit, bubba rope, tool bag, tire repair bag, air compressor, ARB X-jack, and dry food bin all fit nicely in the SCAB. The seat serves as a nice shelf and shock absorber for all the food. I learned the hard way, a long time ago, that food items in the bed do not survive well. I put a foam wedge under the cooler and dry food bin to level them off better in addition to strapping them down to the seat frame. The square holes in the seat bases were in a near perfect location to secure everything.
In the bed I have the propane, more recovery gear, winch, folding table, camp kitchen (1650 Pelican), camp box, fuel/water. I used two waters for this load out just to add a little more weight and it was quicker than going to get some gas.
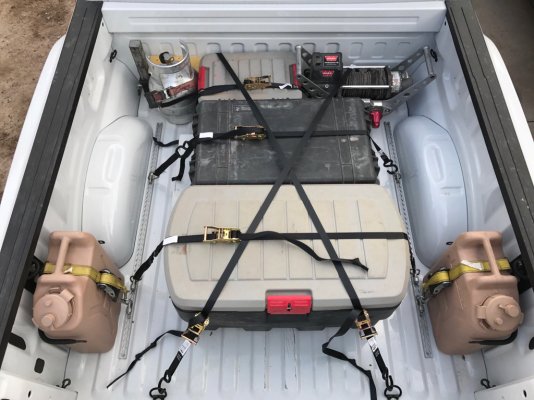
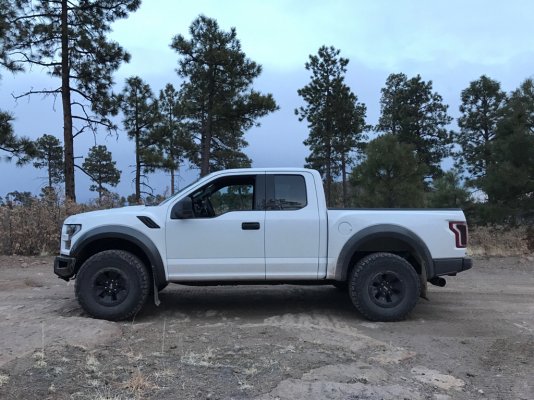
This bed is huge compared to my Taco, I love it. When the bikes come along their will be plenty of room to move stuff around for the road sections and put a bike or two in the bed and stack the gear around them.
Once again, Without even trying, I found another spot I would have torn up the exhaust...
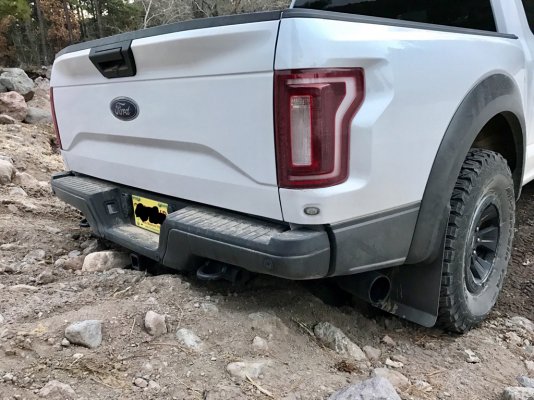
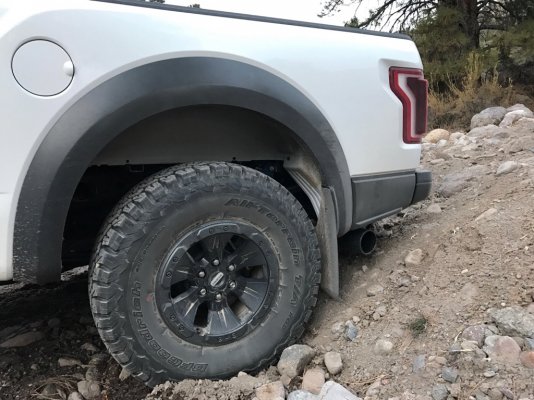
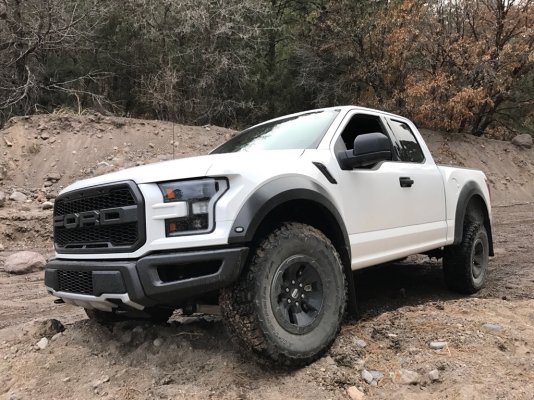
On this little test outing, with the new mud flaps, I aimed for any mud/water I could find and the result is a vast improvement to the running boards. To be fair, the roads have dried out a lot since my initial test runs that made a giant mess. The mud doesn't hit the truck until the front of the rear fenders. It also doesn't add a 100+ lbs of the stuff to the running boards, sides of the truck and door handles. If the mud gets through the running boards, so are the small rocks and sand that will dent and blast the soft aluminum. The mud flaps clearly protect the cab much better from this stuff.
Sent from my iPad using Tapatalk Pro
I spent more time on this than I should have on the transceiver mount but it was my first aluminum TIG project. Unfortunately, I have always sucked at painting and the rubberized coating I used on top of etch primer didn't stick worth a crap and some of it pealed off during the fitup into the dash. At some point I may pull the dash back apart to deal with it but right now I want to hurry up and get this truck trip ready. I started with a template, made all the aluminum parts and got it installed in the dash. Sound out of the stock transceiver speaker is good without the need for an external speaker but I did have to use a 90 on the antenna connecter. Thanks to J Bodolay for getting some ideas posted up. Except for the mic mount, that I decided to drill the dash on, everything can be returned to stock. The setup is very similar to the way emergency service vehicles have their center console, such as the ones from Havis, except I only have one mount versus three or more mount plates for accessories.


Here is a simple but super solid phone mount off of the grab handle mount. Swapped the bolt for a M6 stud and mounted a RAM ball on it. Routed the charging cable through the dash with the power cables for the transceiver, all in wiring loom to protect them from vibration chafing. Also posted on a phone mount thread but including it here for complete build status.

I mounted some PDP mudflaps and I am pretty impressed with them, thanks to all the guys on the mudflap thread. With these I decided to ditch the running boards and I like it a lot better without them. They are actually quite beefy but mount to the cab, not the frame. In addition to a massive improvement in clearance, I noticed that my cab wind noise is now reduced on sweeping corners. Prior to this I noticed some cab flex versus the doors on decent sweeping corners and even felt the motion with my finger between the cab and doors through the corners. This motion resulted in increased wind noise because the gasket seal opens up slightly. With the running boards gone, this motion went down enough that I no longer hear the wind through the seal. If the truck wasn't so quiet already I doubt I would have noticed this. This on asphalt, not dirt.


Sent from my iPad using Tapatalk Pro
---------- Post added at 08:37 AM ---------- Previous post was at 08:11 AM ----------
With all this installed, I did a test load out with all my offroad/camping gear. The ride with all my gear is great and I can't wait for my SVC adjusters to come for the front. I lost about 1" of jounce travel with all the gear, not too bad. Handling improved in the rear with a more planted feel at higher speeds. On lighter chop the rear tended to dance around a bit when the bed is empty.
The cooler, stove, first aid kit, bubba rope, tool bag, tire repair bag, air compressor, ARB X-jack, and dry food bin all fit nicely in the SCAB. The seat serves as a nice shelf and shock absorber for all the food. I learned the hard way, a long time ago, that food items in the bed do not survive well. I put a foam wedge under the cooler and dry food bin to level them off better in addition to strapping them down to the seat frame. The square holes in the seat bases were in a near perfect location to secure everything.


In the bed I have the propane, more recovery gear, winch, folding table, camp kitchen (1650 Pelican), camp box, fuel/water. I used two waters for this load out just to add a little more weight and it was quicker than going to get some gas.


This bed is huge compared to my Taco, I love it. When the bikes come along their will be plenty of room to move stuff around for the road sections and put a bike or two in the bed and stack the gear around them.
Once again, Without even trying, I found another spot I would have torn up the exhaust...


On this little test outing, with the new mud flaps, I aimed for any mud/water I could find and the result is a vast improvement to the running boards. To be fair, the roads have dried out a lot since my initial test runs that made a giant mess. The mud doesn't hit the truck until the front of the rear fenders. It also doesn't add a 100+ lbs of the stuff to the running boards, sides of the truck and door handles. If the mud gets through the running boards, so are the small rocks and sand that will dent and blast the soft aluminum. The mud flaps clearly protect the cab much better from this stuff.

Sent from my iPad using Tapatalk Pro

