Prybar
Full Access Member
OK, everyone loves their DeeZee EZ down (or tail gate assist as it's called now) including me. But, everyone eventually has problems with the nutsert loosening up. I very gently snugged mine every couple of days to keep it tight.....until it wouldn't snug any more. The problem is that the nutsert is being tightened into a hole that is not only too big for it but also not round. This is just a poor design on DeeZees part. Luckily, I figured out a solution that is not only easy, but free as well!
1) Remove the bottom of the gas strut by sliding the clip down and off the ball end and pulling it free. Then put the clip back so you don't loose it.
2) Remove the ball from the nutsert with a 13mm wrench. Clean the threads so that you can re-apply locktite later.
3) Remove the tailgate access panel or the large plastic cover if you have the tailgate step option from the inside of the tailgate with a T27 torx driver.
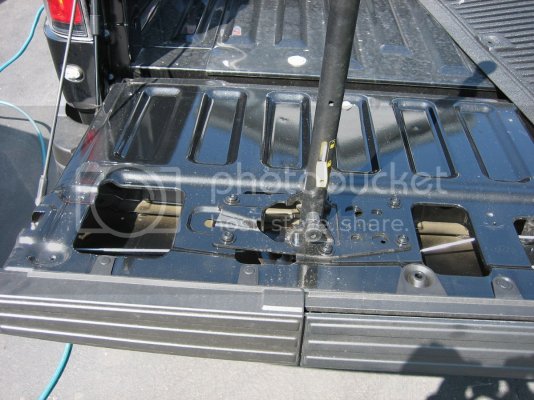
4) You can now see a small round access hole on the left side of the tailgate that allows you to get to the bottom of the tailgate where the nutsert is located
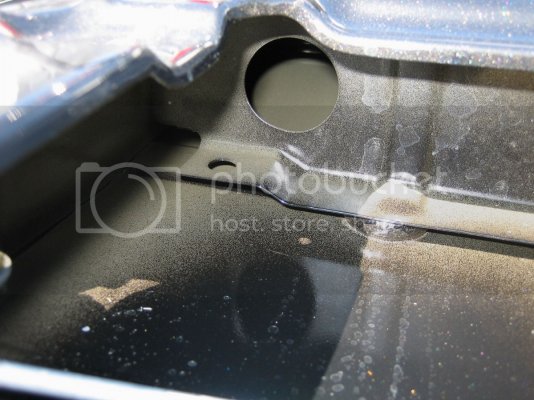
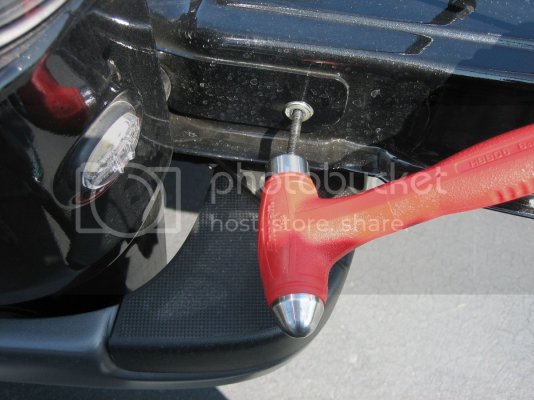
5) Now, thread the screw from your nutsert installation tool that came with the ez down into the nutsert if it is still in your tailgate. Make sure you thread it in enough to catch all of the threads in the nutsert. Then, hit it with a hammer straight in toward the tailgate to stretch the nutsert back out straight so that it can be removed.
6) It should look like this
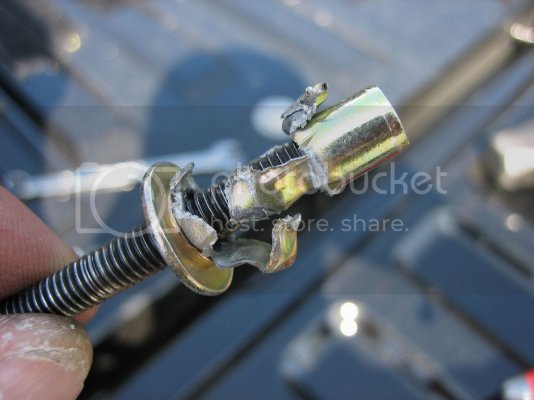
7) Glue your nut that came with the nutsert installation tool to one of the washers that came with the nutsert installation tool to keep them together. I used hot glue because it was fast. Be sure not to get glue inside the nut. (note, I used a different washer on mine but it really doesn't matter)
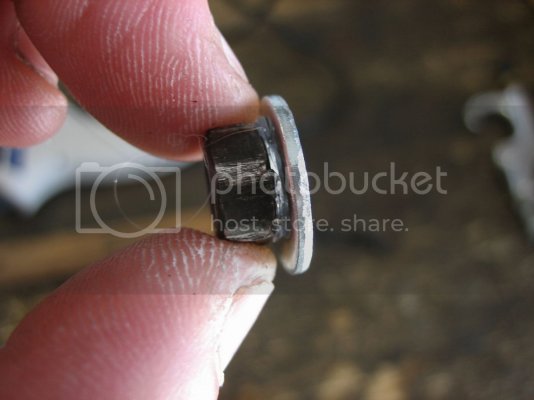
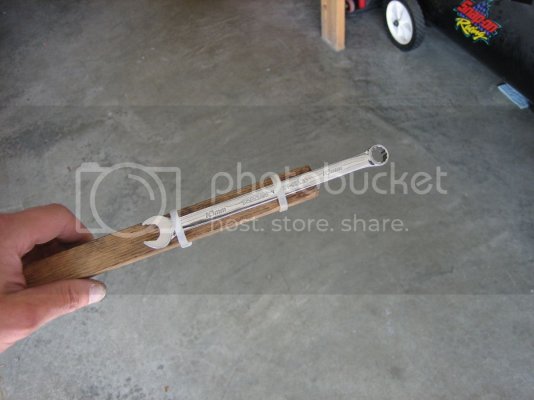
8) Now it's time to make a tool: You will need to zip-tie, tape, or otherwise firmly affix your 10mm wrench to a "confined space wrench extension" (stick). Your extension needs to be short enough to fit into the tailgate but long enough to reach the hole with the end of the wrench. Be sure to set your extension up like the one in the pic. You will need the offset of the wrench to line the nut up properly.
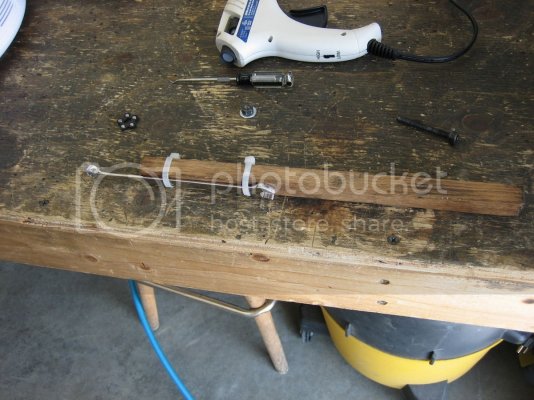
9) Use a small piece of tape to tape the nut/washer combo into the wrench. Don't use much because you will need to break it to get your wrench/ stick back out.
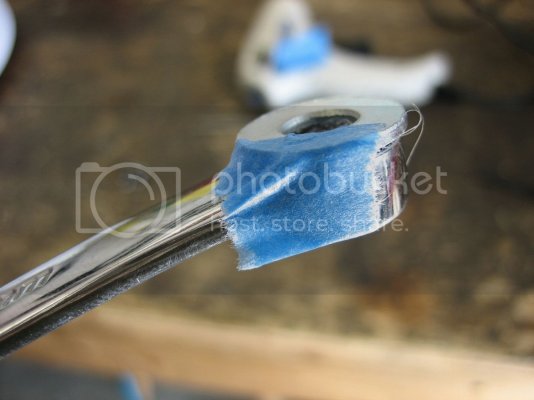
10) Put some locktite on the ball stud again so it doesn't come loose and use the other washer that came with the nutsert installation tool on the ball. Again, I used a different washer but it doesn't matter at all.
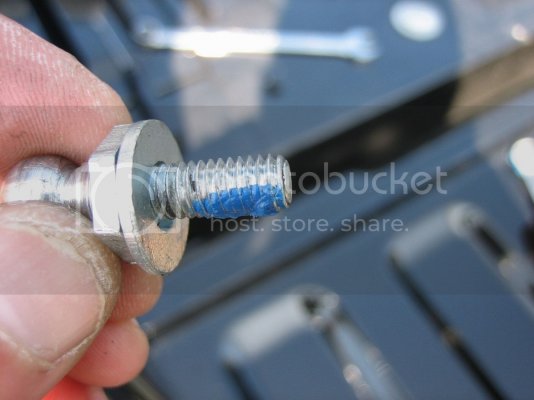
11) Insert the wrench/stick into the hole with the nut in it and line the nut up with the hole from the outside. It's really easy and shouldn't take much jostling around inside the tailgate.
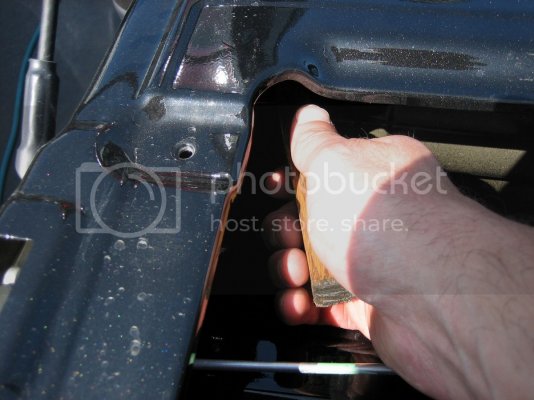
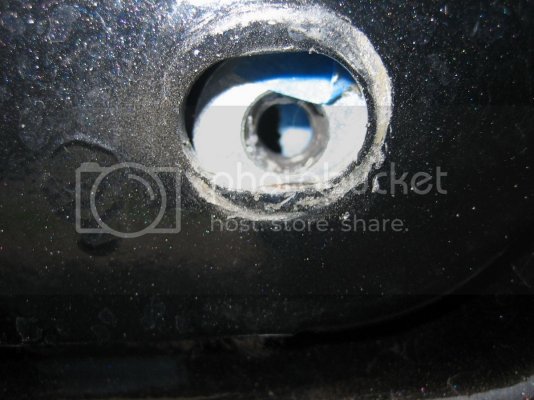
12) Thread the ball stud back through the hole and into the nut
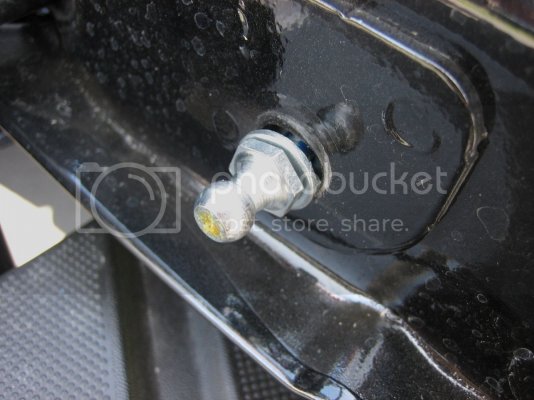
13) Tighten the ball stud up with your 13mm wrench and then break the tape free and pull your wrench/stick out of the hole and out of the tailgate.
14) Snap the gas strut back onto the ball stud.
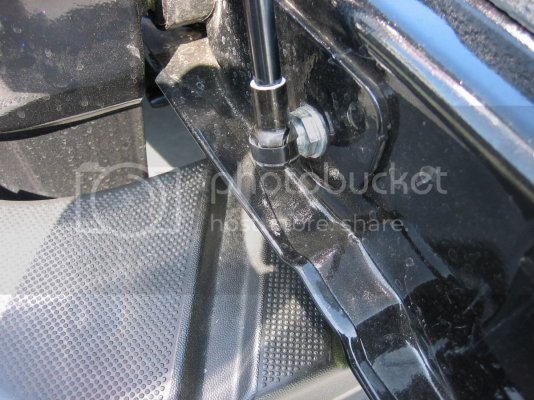
15) Put the tailgate panel back on and be sure to hand tighten only! These holes strip out very easily...as I found out the hard way with the first one.
16) Now, the most important part,
Never, Never, worry about that silly nutsert coming loose again!

1) Remove the bottom of the gas strut by sliding the clip down and off the ball end and pulling it free. Then put the clip back so you don't loose it.
2) Remove the ball from the nutsert with a 13mm wrench. Clean the threads so that you can re-apply locktite later.
3) Remove the tailgate access panel or the large plastic cover if you have the tailgate step option from the inside of the tailgate with a T27 torx driver.

4) You can now see a small round access hole on the left side of the tailgate that allows you to get to the bottom of the tailgate where the nutsert is located

5) Now, thread the screw from your nutsert installation tool that came with the ez down into the nutsert if it is still in your tailgate. Make sure you thread it in enough to catch all of the threads in the nutsert. Then, hit it with a hammer straight in toward the tailgate to stretch the nutsert back out straight so that it can be removed.

6) It should look like this

7) Glue your nut that came with the nutsert installation tool to one of the washers that came with the nutsert installation tool to keep them together. I used hot glue because it was fast. Be sure not to get glue inside the nut. (note, I used a different washer on mine but it really doesn't matter)

8) Now it's time to make a tool: You will need to zip-tie, tape, or otherwise firmly affix your 10mm wrench to a "confined space wrench extension" (stick). Your extension needs to be short enough to fit into the tailgate but long enough to reach the hole with the end of the wrench. Be sure to set your extension up like the one in the pic. You will need the offset of the wrench to line the nut up properly.


9) Use a small piece of tape to tape the nut/washer combo into the wrench. Don't use much because you will need to break it to get your wrench/ stick back out.

10) Put some locktite on the ball stud again so it doesn't come loose and use the other washer that came with the nutsert installation tool on the ball. Again, I used a different washer but it doesn't matter at all.

11) Insert the wrench/stick into the hole with the nut in it and line the nut up with the hole from the outside. It's really easy and shouldn't take much jostling around inside the tailgate.


12) Thread the ball stud back through the hole and into the nut

13) Tighten the ball stud up with your 13mm wrench and then break the tape free and pull your wrench/stick out of the hole and out of the tailgate.
14) Snap the gas strut back onto the ball stud.

15) Put the tailgate panel back on and be sure to hand tighten only! These holes strip out very easily...as I found out the hard way with the first one.

16) Now, the most important part,
Never, Never, worry about that silly nutsert coming loose again!

Last edited:

