BigJ
FRF Addict
- Joined
- Aug 5, 2010
- Posts
- 5,448
- Reaction score
- 1,561
EDITED Feb 29 2012: DO NOT MAKE THIS MOD! HERE'S WHY: http://www.fordraptorforum.com/f5/why-spacers-bad-idea-lots-cv-axle-innards-pics-11645/
I've been considering leveling out my Raptor since I brought it home. I'm not ashamed to admit that I don't like the "stink bug" look, plain and simple. And to be perfectly honest, that's probably the main reason this mod keeps coming back up in my mind.
However there are other functional reasons as well. I do want to replace my stock bumper and skid, but finances don't allow for that (at least in the short term), so getting the nose up in the air helps with the approach angle I've been struggling with (by adding my Bull Bar I gave up a little bit). It will also help me avoid mangling that skid plate.
I waffled back and forth between the Truxxx kit and adjusting the spring perch. MarkT pretty much wrote the definitive word regarding these two mods in terms of their ramifications, and in the end thanks mostly to Mark, I decided the Truxxx kit was a better option for me. I scored a brand new kit off eBay for $100 shipped, which made the decision even easier for me.
On to the install. I assembled these notes and many of these pics from various sources over the internet. Those with the SVTO watermark are pics I took and those left unmarked are those I pulled from elsewhere. I totally lost my notes on what came from where, so if these are yours thanks for taking them!
Go ahead and read the Truxxx install instructions then basically throw them away. They're almost worthless. Then call Truxxx up @ 888-660-5892 ext8, tell them you're going to do this install and ask them for any tips. I talked to Dave twice and both times he was really helpful in offering tips and pitfalls to avoid. Then read these notes. Between those three sources, you should be in good shape, even if you're not the most experienced modder out there.
Start by making some room. Unbolt the retainer holding the brake line in place
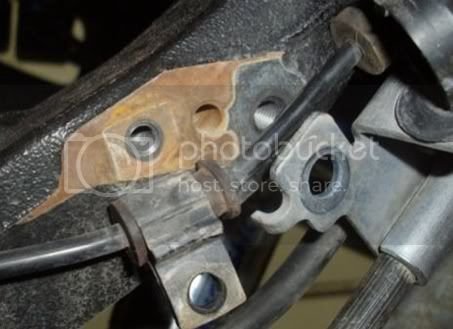
You can use a small flathead to push the locking tooth up on the tiestraps releasing them and allowing for reuse
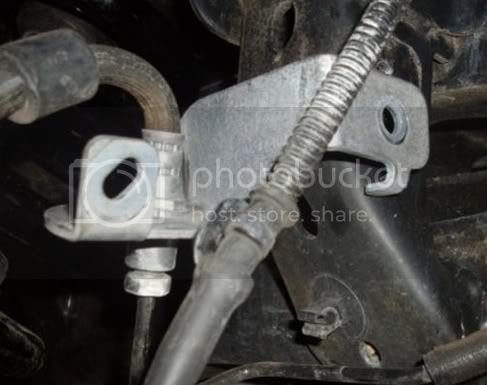
I then unbolted the tie rods.
I've read one guy used standard tie down straps at this point, wrapped thru the tie rod holes and around the back of the upper control arm pivot bolts, with the other end hooked to the top of the caliper mounting post. I don't have standard straps, but I do have ratcheting straps and a bottle jack so I used those. I would suggest you probably go buy standard tie downs and use those instead.
Once tight and fully supported, I knocked the top ball joints loose.
I then knocked off the chrome spindle dust cap off, and removed the spindle nut. FYI this is a nut that looks like it deforms when torqued. You may consider replacing these with new nuts, or do what I did which is reuse them but also applied couple drops of blue loctite to each first. (According to Ford, there is no special note about either replacing them or reusing them, nor is there anything indicating these are special 'crush' or 'deformation' style nuts. The part number is N802827-S440, and run around $1.70ea retail.)
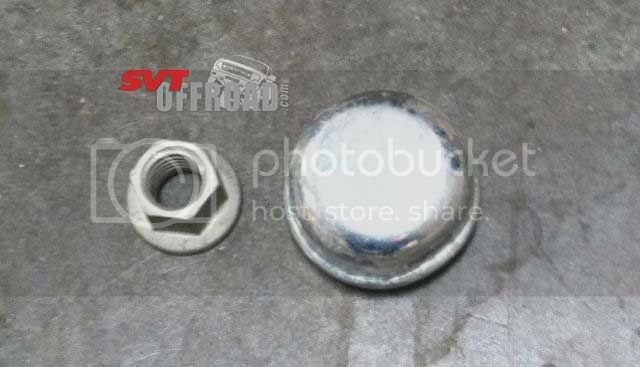
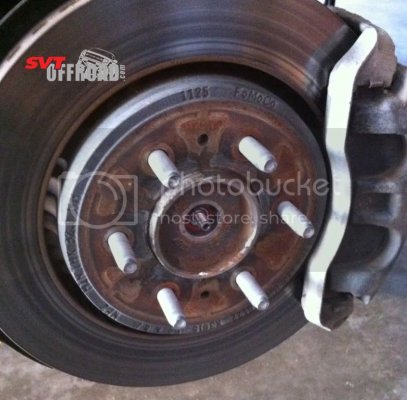
You don't actually pull the hub, brake caliper or shaft. Removing this nut allows the shaft to float and give you that extra bit of room needed to remove the strut.
I then pulled the bottom strut bolt (its TIIIGGGGHT) and then loosened (not removed) the three top strut nuts. I worked the bottle jack down slowly as the tension in the strut released until finally I was able to remove the three top strut nuts. A little 'gentle persuasion' with the pry bar and out came the strut.
Here's everything apart
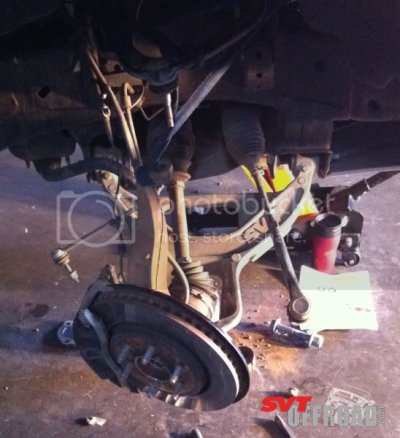
Here's one of the gotchas; from the factory our struts have wedge spacers top and bottom. Apparently lots of guys neglect to remove the top spacers from the strut FIRST. They then go to put the Truxxx spacer on and it no workie. You want to pull those spacers off before putting the Truxxx on, then put the wedge on top of the installed Truxxx spacer (those wedges are the same side to side, top to bottom)
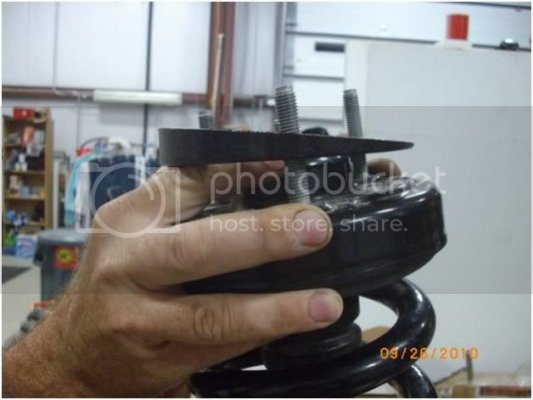
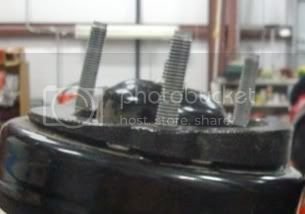
Here's where you can see why the stock studs need to be cut down. There's no clearance for 'em.
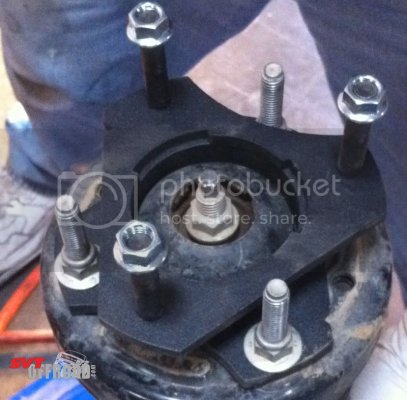
Here's a little trick I read from another guy who did this install; The Truxxx instructions tell you you have to flip the strut 180deg to reinstall it, but the bummer there is that pretty engraved SVT logo and Fox labeling is now facing the rear of the truck! Given that everything is identical side to side, why not swap the struts side to side to keep everything pointing forward as before? So that's what I did; the driver strut is now on the passenger side, and the passenger side strut is on the drivers side. Everything is facing forward as before.
After that it was a matter of reinstalling everything in the reverse order. I did have to pry down on the lower control arm to gain that extra bit of clearance required, which is where having that spindle nut removed and slack in all the cabling really helped.
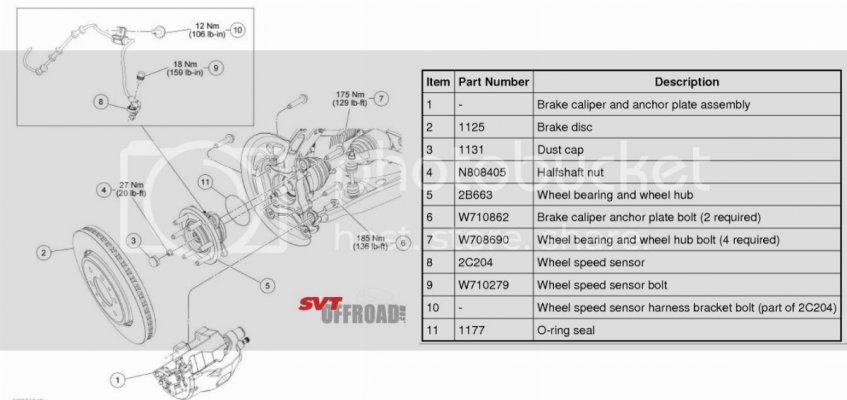
Here's the torque specs I used to reassemble everything. This is from the 2009 F150 4x4 w/ 5.4 FFV Service Manual. The 2010 isn't available yet, but even so I'm fairly positive the numbers I'm interested didn't change between 2009 and 2010, and nothing here is Raptor specific. Use this, or not, with all that in mind
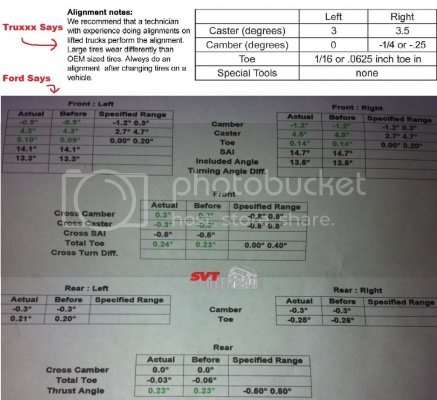
Here's the measurement before the mod:
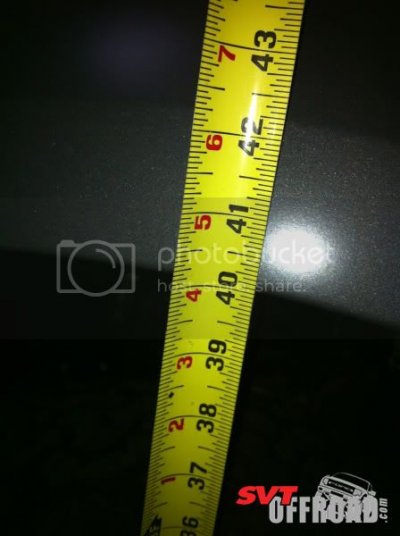
And after:
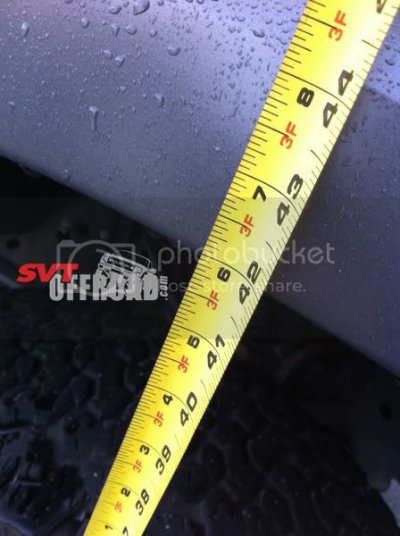
And for comparison, here's the rear:
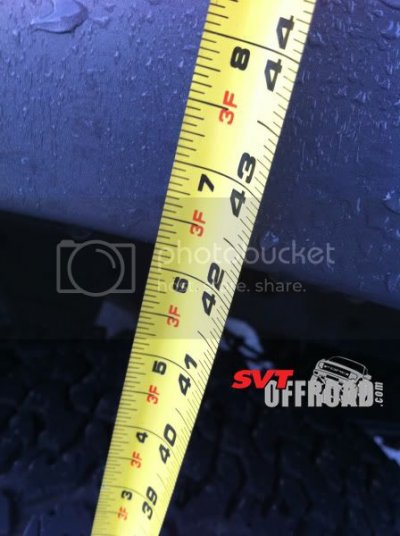
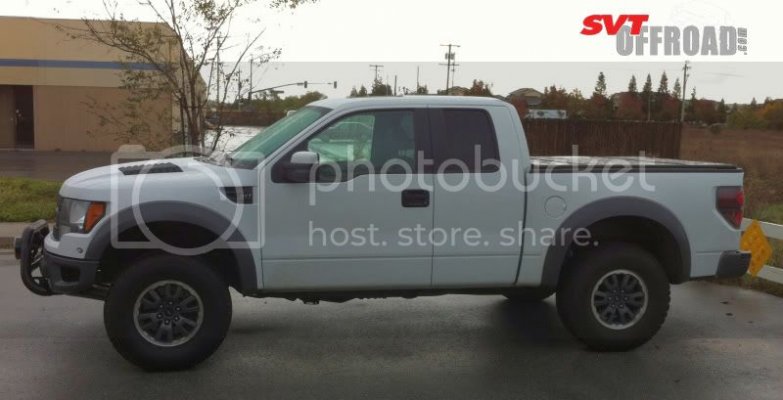
Here's an older 'before' pic:
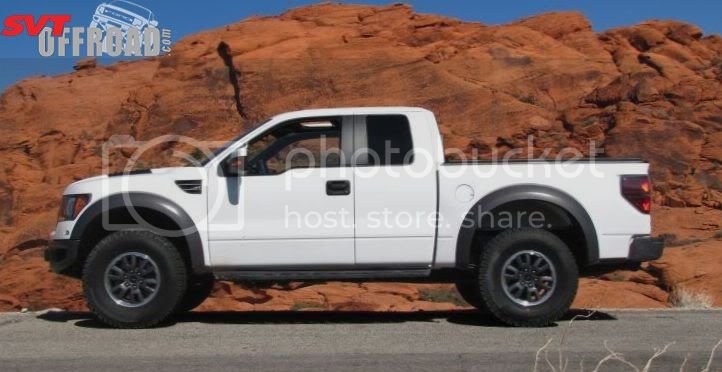
And here's a better 'before' example pic (not my truck obviously)
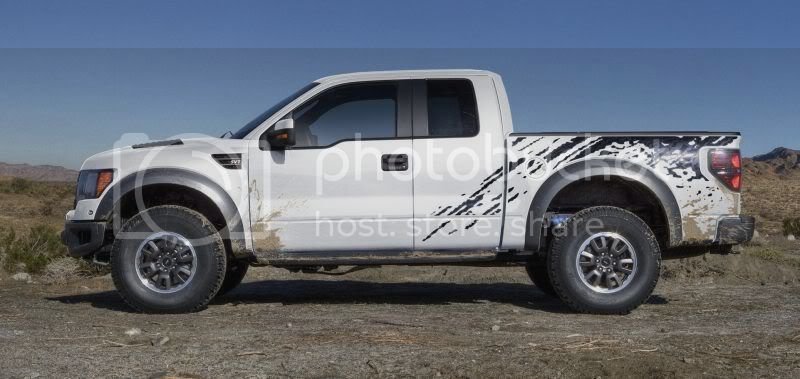
And a couple of 'done' pics:
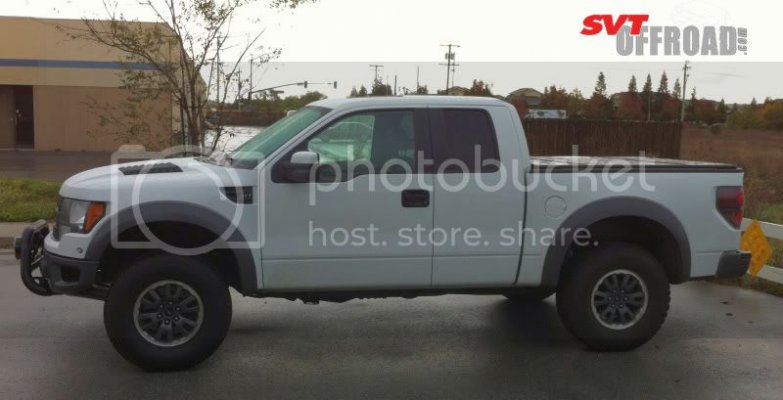
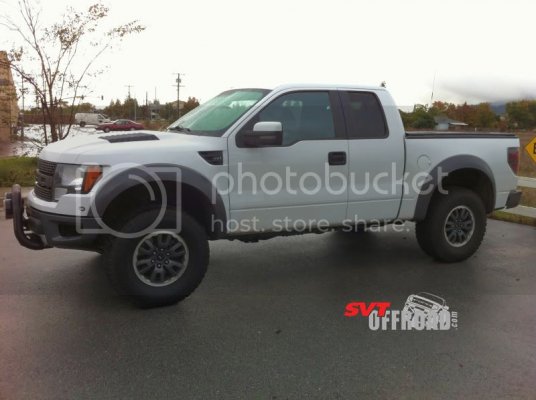
The drive is damn near identical as before. I haven't had 'er off road yet with this mod, but on road characteristics haven't changed at all, in my opinion.
I've been considering leveling out my Raptor since I brought it home. I'm not ashamed to admit that I don't like the "stink bug" look, plain and simple. And to be perfectly honest, that's probably the main reason this mod keeps coming back up in my mind.
However there are other functional reasons as well. I do want to replace my stock bumper and skid, but finances don't allow for that (at least in the short term), so getting the nose up in the air helps with the approach angle I've been struggling with (by adding my Bull Bar I gave up a little bit). It will also help me avoid mangling that skid plate.
I waffled back and forth between the Truxxx kit and adjusting the spring perch. MarkT pretty much wrote the definitive word regarding these two mods in terms of their ramifications, and in the end thanks mostly to Mark, I decided the Truxxx kit was a better option for me. I scored a brand new kit off eBay for $100 shipped, which made the decision even easier for me.
On to the install. I assembled these notes and many of these pics from various sources over the internet. Those with the SVTO watermark are pics I took and those left unmarked are those I pulled from elsewhere. I totally lost my notes on what came from where, so if these are yours thanks for taking them!
Go ahead and read the Truxxx install instructions then basically throw them away. They're almost worthless. Then call Truxxx up @ 888-660-5892 ext8, tell them you're going to do this install and ask them for any tips. I talked to Dave twice and both times he was really helpful in offering tips and pitfalls to avoid. Then read these notes. Between those three sources, you should be in good shape, even if you're not the most experienced modder out there.
Start by making some room. Unbolt the retainer holding the brake line in place

You can use a small flathead to push the locking tooth up on the tiestraps releasing them and allowing for reuse

I then unbolted the tie rods.
I've read one guy used standard tie down straps at this point, wrapped thru the tie rod holes and around the back of the upper control arm pivot bolts, with the other end hooked to the top of the caliper mounting post. I don't have standard straps, but I do have ratcheting straps and a bottle jack so I used those. I would suggest you probably go buy standard tie downs and use those instead.
Once tight and fully supported, I knocked the top ball joints loose.
I then knocked off the chrome spindle dust cap off, and removed the spindle nut. FYI this is a nut that looks like it deforms when torqued. You may consider replacing these with new nuts, or do what I did which is reuse them but also applied couple drops of blue loctite to each first. (According to Ford, there is no special note about either replacing them or reusing them, nor is there anything indicating these are special 'crush' or 'deformation' style nuts. The part number is N802827-S440, and run around $1.70ea retail.)


You don't actually pull the hub, brake caliper or shaft. Removing this nut allows the shaft to float and give you that extra bit of room needed to remove the strut.
I then pulled the bottom strut bolt (its TIIIGGGGHT) and then loosened (not removed) the three top strut nuts. I worked the bottle jack down slowly as the tension in the strut released until finally I was able to remove the three top strut nuts. A little 'gentle persuasion' with the pry bar and out came the strut.
Here's everything apart

Here's one of the gotchas; from the factory our struts have wedge spacers top and bottom. Apparently lots of guys neglect to remove the top spacers from the strut FIRST. They then go to put the Truxxx spacer on and it no workie. You want to pull those spacers off before putting the Truxxx on, then put the wedge on top of the installed Truxxx spacer (those wedges are the same side to side, top to bottom)


Here's where you can see why the stock studs need to be cut down. There's no clearance for 'em.

Here's a little trick I read from another guy who did this install; The Truxxx instructions tell you you have to flip the strut 180deg to reinstall it, but the bummer there is that pretty engraved SVT logo and Fox labeling is now facing the rear of the truck! Given that everything is identical side to side, why not swap the struts side to side to keep everything pointing forward as before? So that's what I did; the driver strut is now on the passenger side, and the passenger side strut is on the drivers side. Everything is facing forward as before.
After that it was a matter of reinstalling everything in the reverse order. I did have to pry down on the lower control arm to gain that extra bit of clearance required, which is where having that spindle nut removed and slack in all the cabling really helped.
Here's the torque specs I used to reassemble everything. This is from the 2009 F150 4x4 w/ 5.4 FFV Service Manual. The 2010 isn't available yet, but even so I'm fairly positive the numbers I'm interested didn't change between 2009 and 2010, and nothing here is Raptor specific. Use this, or not, with all that in mind

Here's the measurement before the mod:

And after:

And for comparison, here's the rear:

Here's an older 'before' pic:

And here's a better 'before' example pic (not my truck obviously)

And a couple of 'done' pics:


The drive is damn near identical as before. I haven't had 'er off road yet with this mod, but on road characteristics haven't changed at all, in my opinion.
Last edited:


