MOAR light!
Prior to this install I "only" had a 40" M&R LED bar installed the traditional way in the lower part of the Ford grille, and a 20" M&R LED bar installed in my RPG Pre-runner bumper.
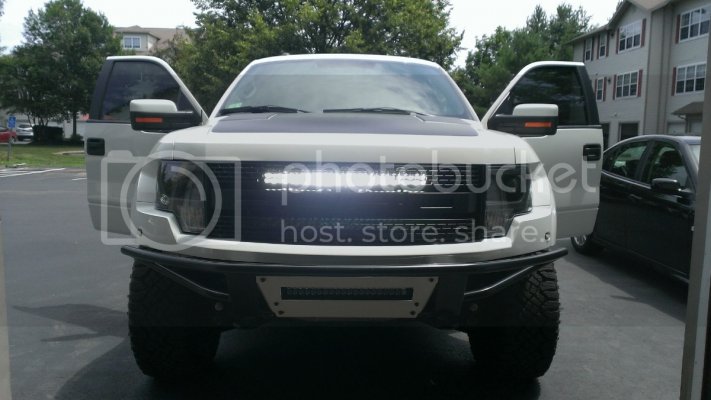
The last logical spot to install more LED lighting was the top section of the Ford grille. I had the opportunity to get a good deal on a 30" KC HiLiTES LZR series Spot/Flood combo bar and jumped on it.
There are some brackets out there to facilitate the install of a 30" LED bar in the upper grille, but I decided to go about it my own way without the need for the brackets.
I think I have accomplished a reliable method for securely installing a 30" bar in the upper section of the Ford grille without the use of any additional brackets.
I will also do some comparisons between the M&R and KC light bars.
What you will need:
(2) Flange head M8-1.25 - 30 bolts
(6) 5/8" exposed tooth lock washers
(6) 5/8" washers
1/8" + 5/16" drill bits
Socket set
Wiring accessories - ring terminal, butt connectors, zip ties, etc. (the supplied KC wiring is long enough, no need for wire)
Time: 2 hours
Difficulty: 1 2 3 4 5 6 7 8 9 10
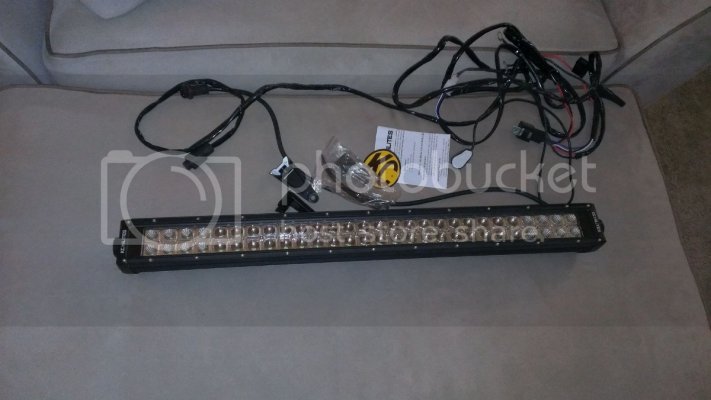
This is what's supplied in the box:
The light, the wiring pigtail (with some relays and switches we don't need), bolts, zip ties, brackets, etc.
1. Open your hood and observe the 2 grille support brackets. At the bottom of the grille, you will see where the brackets attach. Use a 10mm socket and loosen the 2 bolts holding each bracket to the grille. Don't remove the bolts, just loosen them. There are slotted holes in the support brackets that will allow you move the brackets for adjustment during installation.
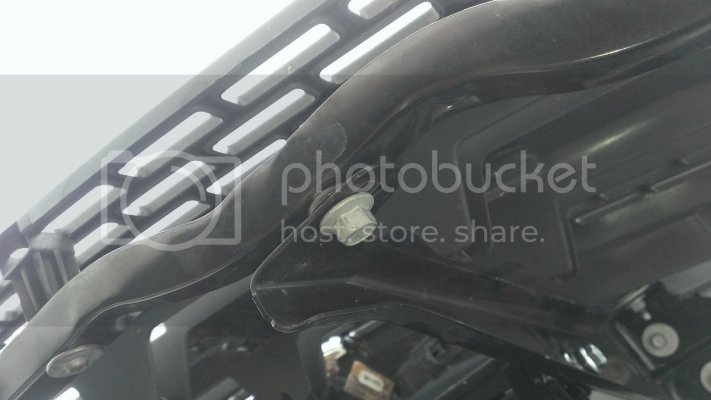
2. On the inside of each grille support bracket, approximately 6" down from the hood, you will see some part numbers. To make this step even easier, I discovered that the "B" in the part number is exactly 6" down from the hood and where you will need to drill your holes for mounting the light. Note that I drilled directly through the "B" which is centered in the support bracket, but I would recommend drilling as close to the front of the bracket as possible, I'll get to that later.
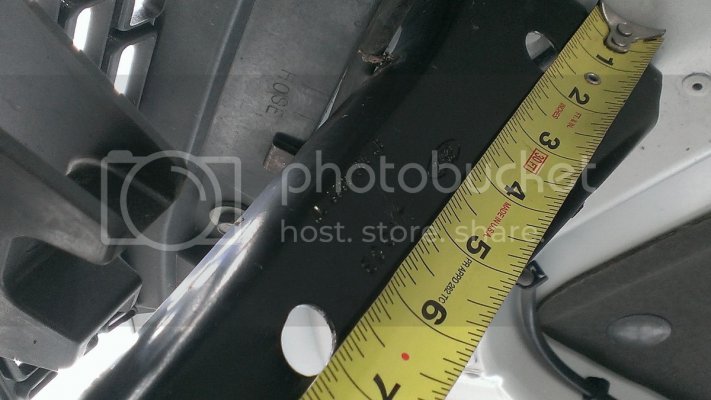
- Use a 1/8" drill bit to give yourself a pilot hole.
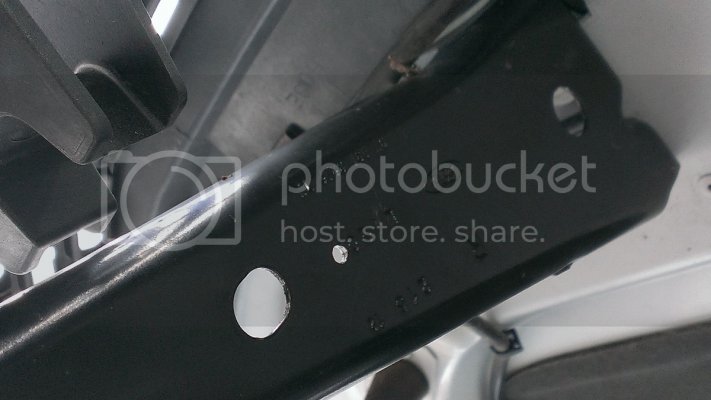
- Then bore that baby out with your 5/16" bit. Repeat on the other side.
3. Now to mount the light using the additional hardware I outlined in the parts list. You are NOT going to use the supplied M-8 x 1.25 Alan head bolts that come with the KC light. For this method I needed a little more length and a larger head than what the supplied bolts allowed.
- The reason for loosening the grille support brackets was to allow a small amount of play and adjustment of the distance between the brackets to better match the width of the 30" LED. It also allows you to crank the bolts in to place buy pulling the brackets in toward the light.
- Assemble the and secure the light using the flange head M-8 x 1.25-30 bolts, (2) 5/8" washers and (3) exposed tooth locking washers on each side as shown:
Place (1) locking washer under the flange head bolt and pass it through the holes you drilled.
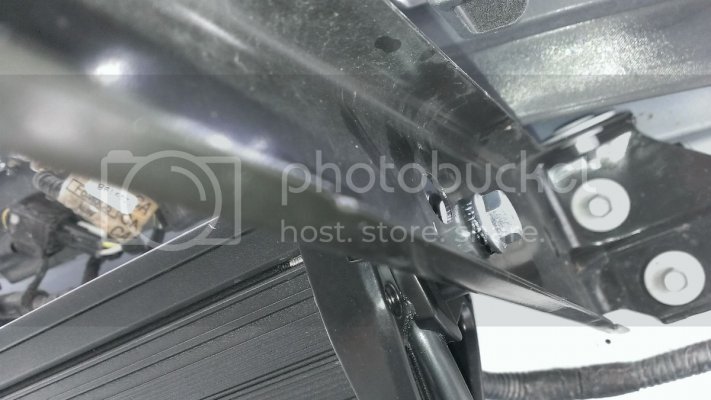
On the inside place a locking washer against the bracket, 2 washers, and then another locking washer which will sit against the mounting surface of the light bar. Like this:
**BLUE LOCKTITE the bolt!
Do both sides, snug them down.
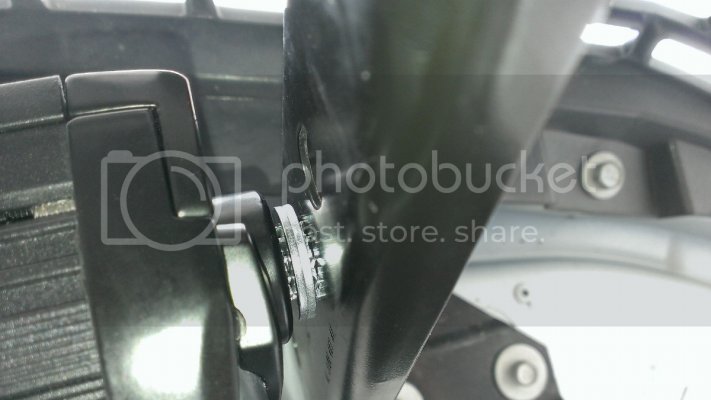
4. Aim the light slightly down (you can always re-adjust later) and firmly secure the bolts. Don't Hercules the crap out of the bolts, but tighten until they stop turning. I used a fair amount of force, one handed, with a 1/4" drive socket. The light should not rotate if you apply force to it. Keep tightening the bolts evenly until the light won't rotate or move.
- Once you're satisfied, snug down the factory grille support bracket bolts that you loosened earlier.
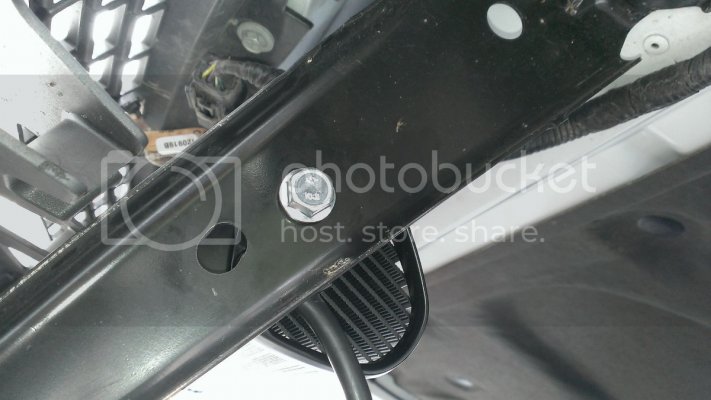
5. Wiring. As I mentioned, you won't need any additional wiring than what is supplied with the KC light. I simply cut the wire to length which is conveniently about 12" short of where all the relays and switches are on the KC harness. Just cut all that stuff off and retain the red/black wires.
- I installed the light with the pigtail off the light oriented toward the driver side and retained the water-tight connector which leads to about the other end of the light. I zip tied it all along the wiring for the amber marker lights.
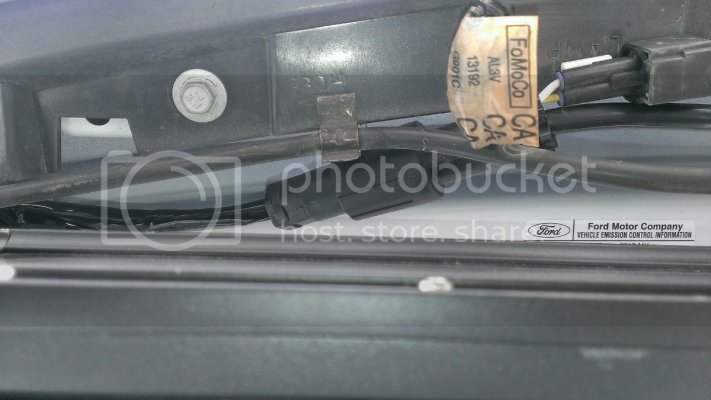
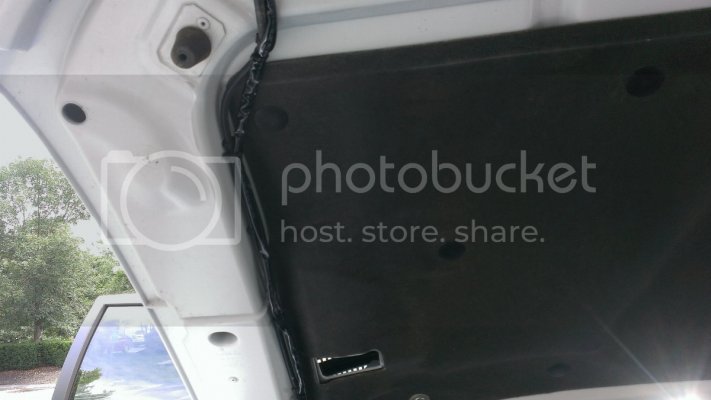
Then I ran the wire down my hood, and zip tied it to the front camera washer fluid line. If you don't have a front camera, you're going to need another method. I followed the washer fluid line all the way down to near the pass-through wires using zip ties every 12" or so.
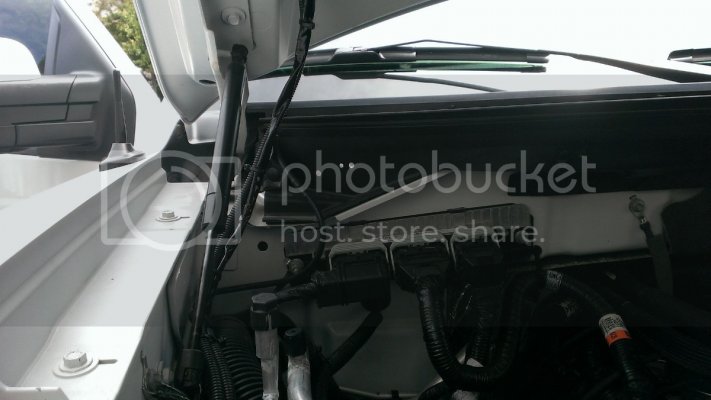
I hooked in to a pass-through wire, and attached a ring terminal to the ground lead to secure at the factory ground location closest to the pass-thru wires.
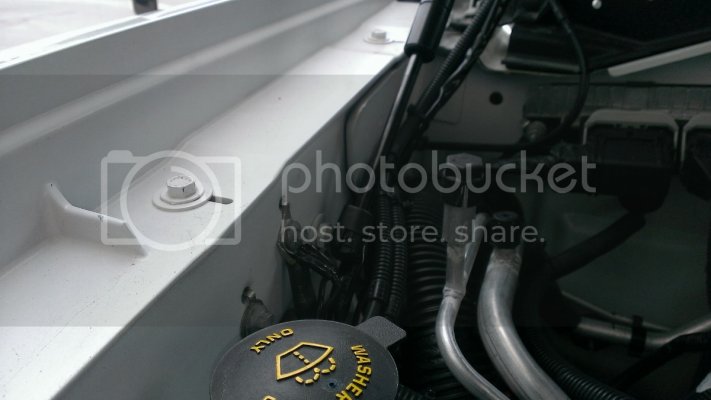
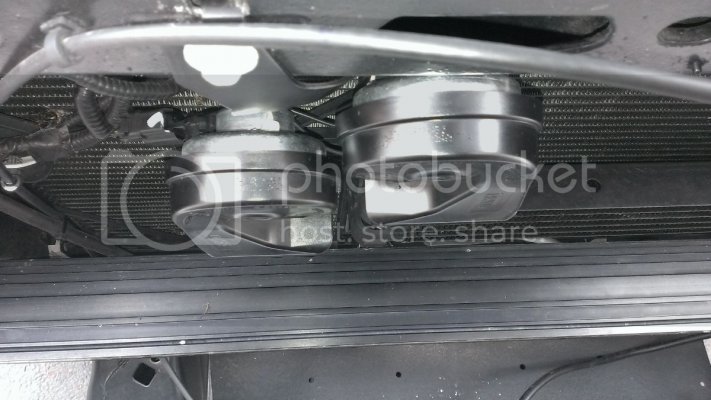
6. Given the location of the light, it may contact the horns when you lower the hood. Not by much, but I just bent the horn support brackets back about 1/2" to make sure they wouldn't contact the light. I mentioned that you will want to drill your holes a little more toward the front of the grille support bracket and the reason is my light is very close to hitting the hood latch on the way down. If someone was to slam my hood it would hit but being careful it doesn't.
7. Hook your pass through wire in to an AUX switch with 15A or greater protection. I used switch #2 I did a write up on the AUX switch wiring here: http://www.fordraptorforum.com/f170/wire-raptor-aux-upfitter-switches-20335/.
Done, check it out, align as needed...enjoy.
An additional consideration I had to make was the location of my SDHQ Under Hood light. It will not fit in the intended location if you install a 30" LED in your upper grille like I have. What I decided to do was relocate the light to one of the lower grille bracket support screws and ran the wiring up the channel in the back of the grille contour. The supplied wiring from SDHQ was long enough and this method allows proper orientation of the light to point toward the engine bay with the hood open. The only problem is that the Vision X flood light will partially block the 40" lower LED if you have one.
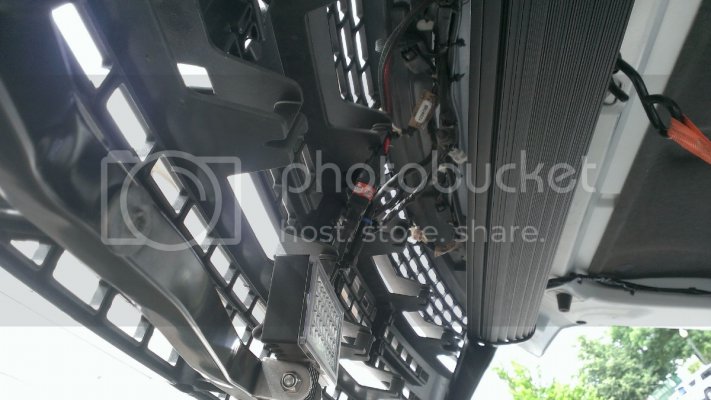
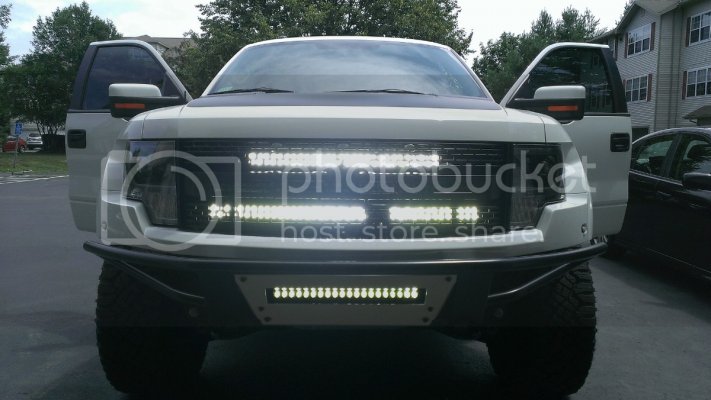
You can see how the flood light blocks a small square of my 40"....but I think I have enough light to go around .
.
General comparison of the KC LZR series LED and M&R LED lighting products:
These are my general observations about the two products besides how bright the lights actually are (we'll get to that).
- First and foremost, I have been very happy with my M&R LED lights and have been very vocal about their lumens per dollar value. I maintain that stance and the first point of comparison is price.
Retail pricing:
KC: (30" LZR) $774.70
M&R: (30"): $500.00
Lumen output per manufacturer specs:
KC: 12,000
M&R: 11,250
As for the look and feel of the two lights, there are many differences.
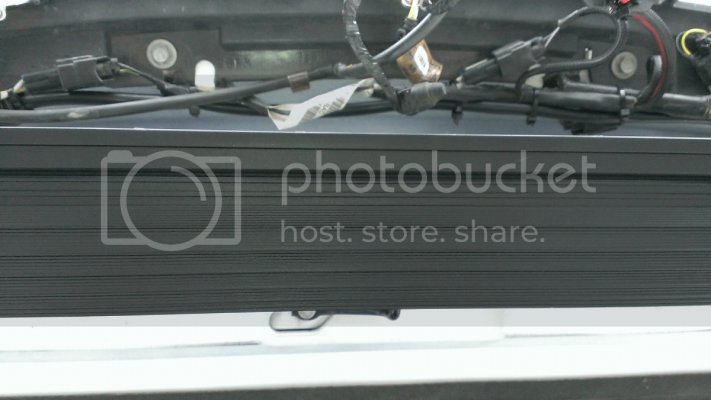
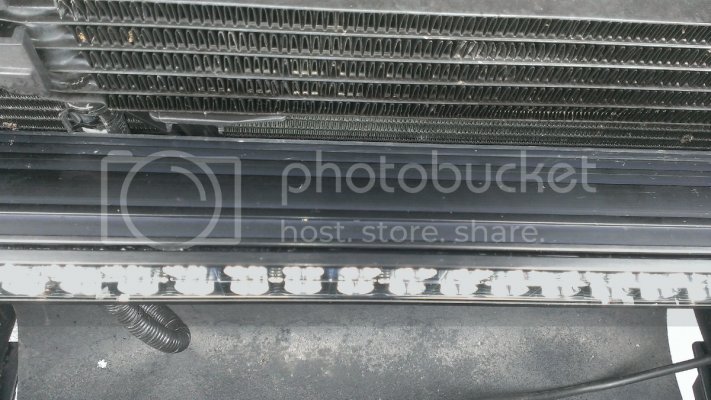
The aluminum housing/fins on the KC light are a bit larger and more robust than the M&R. Not saying the M&R housing isn't sufficient, but just a point to note.
KC:
M&R:
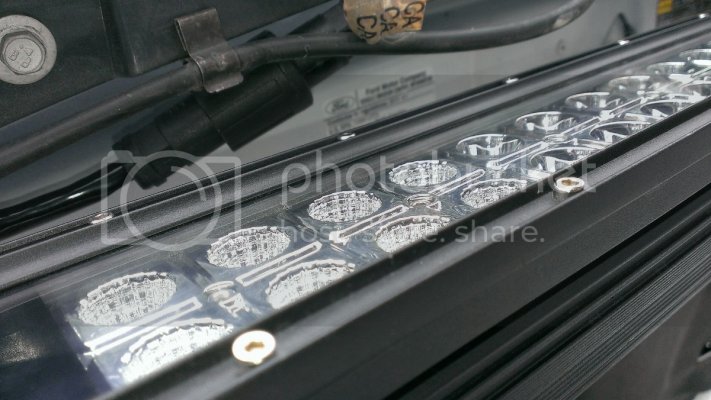
The lens and optics of the two look very different. Offered without comment:
KC:
M&R:
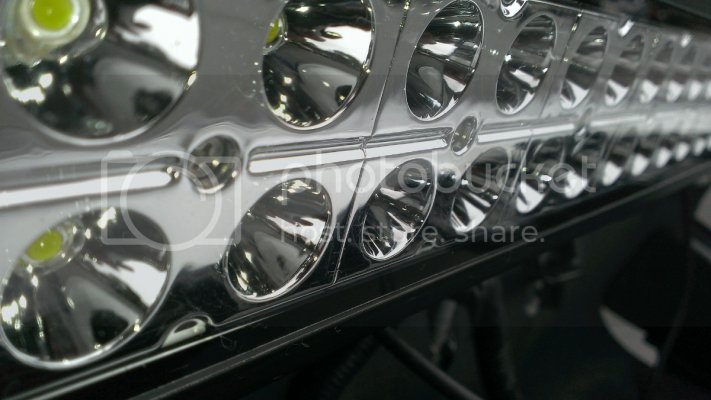
Other differences of minimal consequence are:
The rated Lifespan of the LEDs. M&R claims a life of 30,000 hours while KC claims a lifespan of 50,000 hours. Either way, I don't think this is a game changing difference because being these are off-road lights it would take many many years to actually run the lights for even 10,000 hours, let alone 30,000 or 50,000.
The mounting hardware provided with the KC light is also a bit more heavy duty than the M&R. Again, not saying it's of any consequence because maybe the M6 M&R bolts are sufficient, but it's worth noting that the KC supplies an M8 bolt for attaching to the light its self.
One thing I did like about the KC is the very thorough installation harware, including but not limited to the wiring harness and supplied zip ties. The M&R does not come with any additional wiring, but again there is a price difference here.
The KC is a bit more of a blueish-white light while the M&R is yellowish-white.
The KC LZR series LED lights are built in the USA.
Night time shots and actual light output comparison coming soon!
Prior to this install I "only" had a 40" M&R LED bar installed the traditional way in the lower part of the Ford grille, and a 20" M&R LED bar installed in my RPG Pre-runner bumper.
The last logical spot to install more LED lighting was the top section of the Ford grille. I had the opportunity to get a good deal on a 30" KC HiLiTES LZR series Spot/Flood combo bar and jumped on it.
There are some brackets out there to facilitate the install of a 30" LED bar in the upper grille, but I decided to go about it my own way without the need for the brackets.
I think I have accomplished a reliable method for securely installing a 30" bar in the upper section of the Ford grille without the use of any additional brackets.
I will also do some comparisons between the M&R and KC light bars.
What you will need:
(2) Flange head M8-1.25 - 30 bolts
(6) 5/8" exposed tooth lock washers
(6) 5/8" washers
1/8" + 5/16" drill bits
Socket set
Wiring accessories - ring terminal, butt connectors, zip ties, etc. (the supplied KC wiring is long enough, no need for wire)
Time: 2 hours
Difficulty: 1 2 3 4 5 6 7 8 9 10
This is what's supplied in the box:
The light, the wiring pigtail (with some relays and switches we don't need), bolts, zip ties, brackets, etc.

1. Open your hood and observe the 2 grille support brackets. At the bottom of the grille, you will see where the brackets attach. Use a 10mm socket and loosen the 2 bolts holding each bracket to the grille. Don't remove the bolts, just loosen them. There are slotted holes in the support brackets that will allow you move the brackets for adjustment during installation.

2. On the inside of each grille support bracket, approximately 6" down from the hood, you will see some part numbers. To make this step even easier, I discovered that the "B" in the part number is exactly 6" down from the hood and where you will need to drill your holes for mounting the light. Note that I drilled directly through the "B" which is centered in the support bracket, but I would recommend drilling as close to the front of the bracket as possible, I'll get to that later.

- Use a 1/8" drill bit to give yourself a pilot hole.

- Then bore that baby out with your 5/16" bit. Repeat on the other side.
3. Now to mount the light using the additional hardware I outlined in the parts list. You are NOT going to use the supplied M-8 x 1.25 Alan head bolts that come with the KC light. For this method I needed a little more length and a larger head than what the supplied bolts allowed.
- The reason for loosening the grille support brackets was to allow a small amount of play and adjustment of the distance between the brackets to better match the width of the 30" LED. It also allows you to crank the bolts in to place buy pulling the brackets in toward the light.
- Assemble the and secure the light using the flange head M-8 x 1.25-30 bolts, (2) 5/8" washers and (3) exposed tooth locking washers on each side as shown:
Place (1) locking washer under the flange head bolt and pass it through the holes you drilled.

On the inside place a locking washer against the bracket, 2 washers, and then another locking washer which will sit against the mounting surface of the light bar. Like this:
**BLUE LOCKTITE the bolt!
Do both sides, snug them down.

4. Aim the light slightly down (you can always re-adjust later) and firmly secure the bolts. Don't Hercules the crap out of the bolts, but tighten until they stop turning. I used a fair amount of force, one handed, with a 1/4" drive socket. The light should not rotate if you apply force to it. Keep tightening the bolts evenly until the light won't rotate or move.
- Once you're satisfied, snug down the factory grille support bracket bolts that you loosened earlier.

5. Wiring. As I mentioned, you won't need any additional wiring than what is supplied with the KC light. I simply cut the wire to length which is conveniently about 12" short of where all the relays and switches are on the KC harness. Just cut all that stuff off and retain the red/black wires.
- I installed the light with the pigtail off the light oriented toward the driver side and retained the water-tight connector which leads to about the other end of the light. I zip tied it all along the wiring for the amber marker lights.

Then I ran the wire down my hood, and zip tied it to the front camera washer fluid line. If you don't have a front camera, you're going to need another method. I followed the washer fluid line all the way down to near the pass-through wires using zip ties every 12" or so.


I hooked in to a pass-through wire, and attached a ring terminal to the ground lead to secure at the factory ground location closest to the pass-thru wires.

6. Given the location of the light, it may contact the horns when you lower the hood. Not by much, but I just bent the horn support brackets back about 1/2" to make sure they wouldn't contact the light. I mentioned that you will want to drill your holes a little more toward the front of the grille support bracket and the reason is my light is very close to hitting the hood latch on the way down. If someone was to slam my hood it would hit but being careful it doesn't.

7. Hook your pass through wire in to an AUX switch with 15A or greater protection. I used switch #2 I did a write up on the AUX switch wiring here: http://www.fordraptorforum.com/f170/wire-raptor-aux-upfitter-switches-20335/.
Done, check it out, align as needed...enjoy.

An additional consideration I had to make was the location of my SDHQ Under Hood light. It will not fit in the intended location if you install a 30" LED in your upper grille like I have. What I decided to do was relocate the light to one of the lower grille bracket support screws and ran the wiring up the channel in the back of the grille contour. The supplied wiring from SDHQ was long enough and this method allows proper orientation of the light to point toward the engine bay with the hood open. The only problem is that the Vision X flood light will partially block the 40" lower LED if you have one.

You can see how the flood light blocks a small square of my 40"....but I think I have enough light to go around
 .
.
General comparison of the KC LZR series LED and M&R LED lighting products:
These are my general observations about the two products besides how bright the lights actually are (we'll get to that).
- First and foremost, I have been very happy with my M&R LED lights and have been very vocal about their lumens per dollar value. I maintain that stance and the first point of comparison is price.
Retail pricing:
KC: (30" LZR) $774.70
M&R: (30"): $500.00
Lumen output per manufacturer specs:
KC: 12,000
M&R: 11,250
As for the look and feel of the two lights, there are many differences.
The aluminum housing/fins on the KC light are a bit larger and more robust than the M&R. Not saying the M&R housing isn't sufficient, but just a point to note.
KC:

M&R:

The lens and optics of the two look very different. Offered without comment:
KC:

M&R:

Other differences of minimal consequence are:
The rated Lifespan of the LEDs. M&R claims a life of 30,000 hours while KC claims a lifespan of 50,000 hours. Either way, I don't think this is a game changing difference because being these are off-road lights it would take many many years to actually run the lights for even 10,000 hours, let alone 30,000 or 50,000.
The mounting hardware provided with the KC light is also a bit more heavy duty than the M&R. Again, not saying it's of any consequence because maybe the M6 M&R bolts are sufficient, but it's worth noting that the KC supplies an M8 bolt for attaching to the light its self.
One thing I did like about the KC is the very thorough installation harware, including but not limited to the wiring harness and supplied zip ties. The M&R does not come with any additional wiring, but again there is a price difference here.
The KC is a bit more of a blueish-white light while the M&R is yellowish-white.
The KC LZR series LED lights are built in the USA.
Night time shots and actual light output comparison coming soon!


