Raptor Embroidery
aka <b><font color='darkorange'>Raptor_Al_41</font
!!!!PLEASE READ!!!!
The lights need to be wired up on an led power draw style relay on both sides. I ran power from the battery, ground to the frame under the passenger foot well, and the switched wires on the back of the mirror connectors(purple wire). Sorry if this wiring issue caused an inconvenience! I wired mine off the purple wires and it shorted my BCM and my puddles and cargos wouldnt come on. Ford fixed it under warranty.
^^^^^^^^^^^REEEEAAAADDD THAAAATTT!!!!!^^^^^^^^^^^^^^^^^^^^^^^^^^^
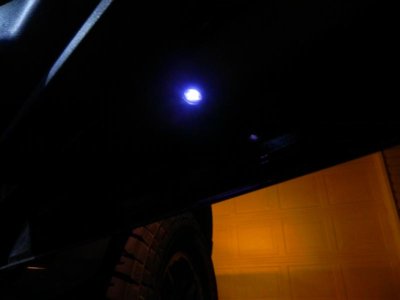
I found these under the names of "ghost shadow lights" and "logo projectors." I call them "Frickin sweet as hell lights." (Fsahl for short). Here is my sorta detailed instructions on how to install them.
As for value and quality, these are top of the line! The shipping to Alabama (35768) was fast and cheap! GTR lighting is a high quality low priced lighting resource! Awesome customer service too!
I AM NOT RESPONSIBLE FOR ANY DAMAGE TO YOUR TRUCK! I AM SIMPLY SHOWING YOU HOW I INSTALLED MY LOGO PROJECTORS INTO MY TRUCK!
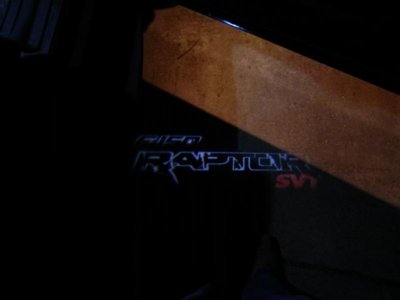
Here is a link to the product.
Ford Raptor SVT LED Logo Projectors Door Puddle Lights | eBay
Here is a link to a detailed review. (with some funky music)
GTR Lighting Logo Projectors Review and Demo - YouTube
In the kit, there are two LED logo projectors and a 24mm hole saw. The one I was using broke so I picked up a 25mm one from home depot.
I reccomend using some rtv silicone on the back of the housing where the wires run into the projector and the threaded part that holds the back housing to the front housing. Be sure not to let any silicone get on the led or lenses.
If you have the lux package with the fancy mirrors with puddle lights, this write up is for you. Otherwise, youll need to find another wire to tap into.
Ok here is the write up along with a few pics.
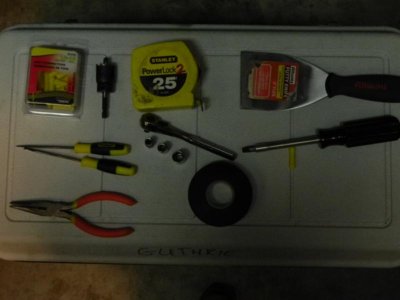
First off, you are gonna need some tools yo! You'll need a 6mm socket, 8mm socket, 11mm socket, flat head screw driver, cotter pin remover, a thin putty knife, wire strippers, wire cutters, needle nose plyers, electrical tape, connectors, lighting, a good drill, Rtv silicone adhesive, 9v battery, a round battery style connector for the ground, and lots of luck. The pic has most of the tools needed. Lol.
The first problem I ran into was the use of a quick connect to tap into the wire for the puddle lights in the mirror. Everytime the door closed it would mess up the connection. I had to go lower profile with it! First, get the door panel off of there! It doesnt belong! Below is Busa's video of the removal!
Ford door panel removal - YouTube
Once you have the door panel off, peel off the black cover that is over the electrical wires going to the mirror. (I used silicone to restick it). Once thats done, peel the bottom larger cover up halfway from the bottom of the door to access the inside of the door. Or, until you can access the area you want to install the light. Tape it back, out of the way.
Once thats done, you need to make a mark for your hole. Center it in the middle of the bottom of the door. (Or where ever you wish for the logo to go!)
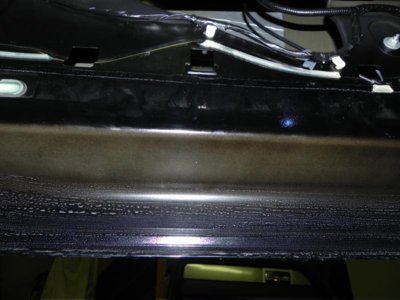
Now, put on some safety glasses, check the inside of the door above your drilling location for anything you could damage, set up some lighting, and insert the hole saw into your drill. Drill slowly and precisely until the hole is cut. Make sure to catch the round bit of door before it slides down into the dark abyss inside of the door! (Fortunately it didnt happen to me.) File the edges to make it a cleaner install, if you wish. (I didnt)
Take the wires from the Projector and run them through the hole and out the door panel. Slide the nut down the wires and pull the projector up into the door. Use a 9v battery to power the light so you can line up the logo. I hand tightened them down and that was that!
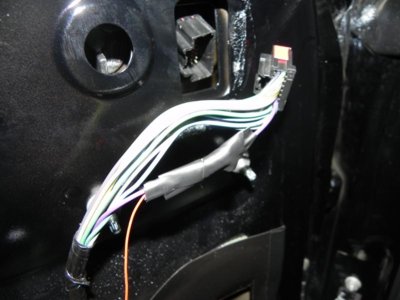
Now for the wiring. You can run the wire up to the top of the door near the mirror any way you would like as long as it doesnt get in the way of the clips or holes used for putting the door panel back on. The wires for these things are VERY THIN. Remove about 6 to 10 inches of the black covering(or however much you wish.) I stripped the very thin wires with my fingernails (yeah they are that thin.) Now, remove the plug from the back of the mirror. The wire you want is the purple one on the flat side of the plug. Here, I cut it about 4 inches down. Then I twisted the switch wire for the relay onto the cut purple wire. Solder them together real nice(or quick inline connect if you want to go that route). After that you need to get your led relay ready. I mounted mine in the door near where the projector is. The power goes to the battery from the power pin on the relay. I then ran the grounds to the chassis under the passenger footwell. It is very difficult to get the wires through the door. That is the hardest part... But, the wiring is out of the way. After that, I used silicone adhesive to restick the black covers onto the doors! Wala (or however you say it) you are done with one door! Use the video to reinstall the door panel! The door lock knob is a pain in the ass! Get a friend or use blind luck to line it up! Heres a pic of my shit wiring job. (THAT PICTURE IS OUT OF DATE IT LOOKS MUCH BETTER AND DIFFERENT WITH THE WIRING FIXED)
Do this on both doors and you will have a fully functioning set of logo projectors!


Im sorry if any of you had problems before I corrected the wiring. All is good now though and that is how I have mine wired. (look at the disclaimer)
The lights need to be wired up on an led power draw style relay on both sides. I ran power from the battery, ground to the frame under the passenger foot well, and the switched wires on the back of the mirror connectors(purple wire). Sorry if this wiring issue caused an inconvenience! I wired mine off the purple wires and it shorted my BCM and my puddles and cargos wouldnt come on. Ford fixed it under warranty.
^^^^^^^^^^^REEEEAAAADDD THAAAATTT!!!!!^^^^^^^^^^^^^^^^^^^^^^^^^^^
I found these under the names of "ghost shadow lights" and "logo projectors." I call them "Frickin sweet as hell lights." (Fsahl for short). Here is my sorta detailed instructions on how to install them.
As for value and quality, these are top of the line! The shipping to Alabama (35768) was fast and cheap! GTR lighting is a high quality low priced lighting resource! Awesome customer service too!
I AM NOT RESPONSIBLE FOR ANY DAMAGE TO YOUR TRUCK! I AM SIMPLY SHOWING YOU HOW I INSTALLED MY LOGO PROJECTORS INTO MY TRUCK!

Here is a link to the product.
Ford Raptor SVT LED Logo Projectors Door Puddle Lights | eBay
Here is a link to a detailed review. (with some funky music)
GTR Lighting Logo Projectors Review and Demo - YouTube
In the kit, there are two LED logo projectors and a 24mm hole saw. The one I was using broke so I picked up a 25mm one from home depot.
I reccomend using some rtv silicone on the back of the housing where the wires run into the projector and the threaded part that holds the back housing to the front housing. Be sure not to let any silicone get on the led or lenses.
If you have the lux package with the fancy mirrors with puddle lights, this write up is for you. Otherwise, youll need to find another wire to tap into.
Ok here is the write up along with a few pics.
First off, you are gonna need some tools yo! You'll need a 6mm socket, 8mm socket, 11mm socket, flat head screw driver, cotter pin remover, a thin putty knife, wire strippers, wire cutters, needle nose plyers, electrical tape, connectors, lighting, a good drill, Rtv silicone adhesive, 9v battery, a round battery style connector for the ground, and lots of luck. The pic has most of the tools needed. Lol.

The first problem I ran into was the use of a quick connect to tap into the wire for the puddle lights in the mirror. Everytime the door closed it would mess up the connection. I had to go lower profile with it! First, get the door panel off of there! It doesnt belong! Below is Busa's video of the removal!
Ford door panel removal - YouTube
Once you have the door panel off, peel off the black cover that is over the electrical wires going to the mirror. (I used silicone to restick it). Once thats done, peel the bottom larger cover up halfway from the bottom of the door to access the inside of the door. Or, until you can access the area you want to install the light. Tape it back, out of the way.
Once thats done, you need to make a mark for your hole. Center it in the middle of the bottom of the door. (Or where ever you wish for the logo to go!)

Now, put on some safety glasses, check the inside of the door above your drilling location for anything you could damage, set up some lighting, and insert the hole saw into your drill. Drill slowly and precisely until the hole is cut. Make sure to catch the round bit of door before it slides down into the dark abyss inside of the door! (Fortunately it didnt happen to me.) File the edges to make it a cleaner install, if you wish. (I didnt)
Take the wires from the Projector and run them through the hole and out the door panel. Slide the nut down the wires and pull the projector up into the door. Use a 9v battery to power the light so you can line up the logo. I hand tightened them down and that was that!
Now for the wiring. You can run the wire up to the top of the door near the mirror any way you would like as long as it doesnt get in the way of the clips or holes used for putting the door panel back on. The wires for these things are VERY THIN. Remove about 6 to 10 inches of the black covering(or however much you wish.) I stripped the very thin wires with my fingernails (yeah they are that thin.) Now, remove the plug from the back of the mirror. The wire you want is the purple one on the flat side of the plug. Here, I cut it about 4 inches down. Then I twisted the switch wire for the relay onto the cut purple wire. Solder them together real nice(or quick inline connect if you want to go that route). After that you need to get your led relay ready. I mounted mine in the door near where the projector is. The power goes to the battery from the power pin on the relay. I then ran the grounds to the chassis under the passenger footwell. It is very difficult to get the wires through the door. That is the hardest part... But, the wiring is out of the way. After that, I used silicone adhesive to restick the black covers onto the doors! Wala (or however you say it) you are done with one door! Use the video to reinstall the door panel! The door lock knob is a pain in the ass! Get a friend or use blind luck to line it up! Heres a pic of my shit wiring job. (THAT PICTURE IS OUT OF DATE IT LOOKS MUCH BETTER AND DIFFERENT WITH THE WIRING FIXED)

Do this on both doors and you will have a fully functioning set of logo projectors!


Im sorry if any of you had problems before I corrected the wiring. All is good now though and that is how I have mine wired. (look at the disclaimer)

Last edited:


