Steve-O
FRF Addict
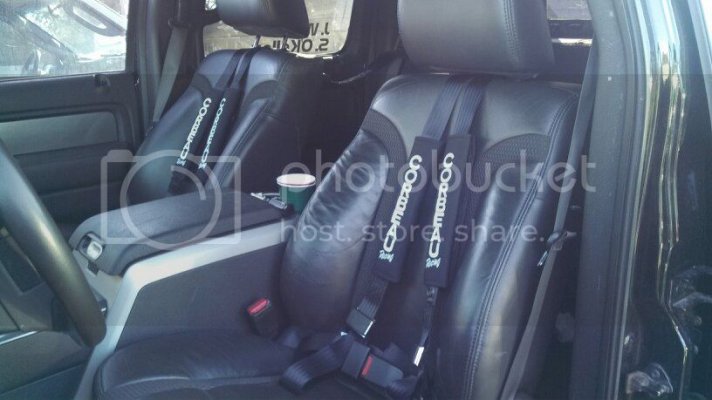
Santa brought me a set of Corbeau 3 point harnesses for Christmas. I looked around and couldnt find any Raptor or F150 specific install instructions so I figured I'd do a write up in case any one else is on the edge. I know some people are against harnesses without a roll cage so lets keep that discussion somewhere else. The factory belts are still in place so I can use either one.
Tools Required
3/8" Ratchet
3" Extension
15mm socket
18mm socket
7mm socket
3/8" to 1/4" adapter (for 7mm socket)
TT50 Torx bit
Flathead screwdriver
Total Install Time:
2-3 hrs (This is estimated. It took me a little longer since I was experimenting to figure out the best way to do certain things.)
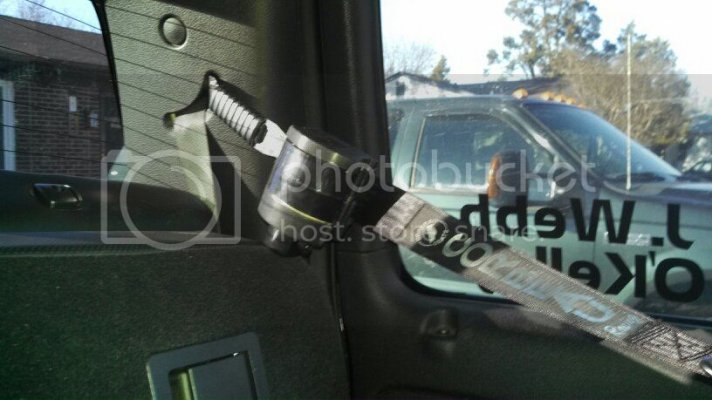
I decided to start in the back. The spool attaches on the "C" pillar where the rear seat belts are attached. First remove the plastic trim. Pop the little circle cover off and remove the 6mm bolt. Everything else is just clips. Pull straight back on the plastic trim and it'll pop right off. This will expose where the rear seat belt is bolted in.
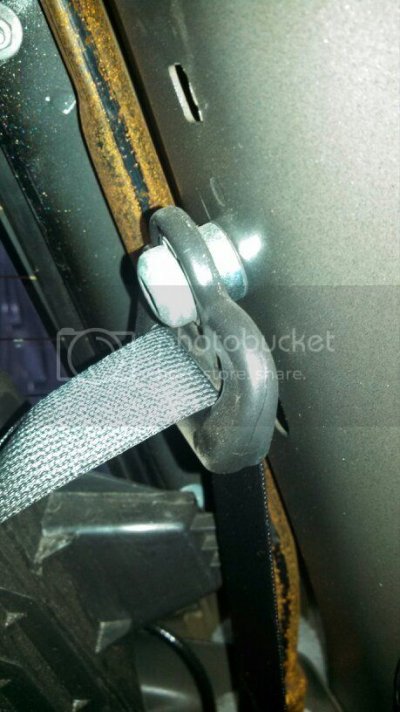
Use the torx bit to remove the seat belt. I mounted the little extension piece to the outside of the factory mount. I had to bend it a little bit to make everything fit right. Once that's done, feed the extension piece through the hole in the trim and put the trim back together.
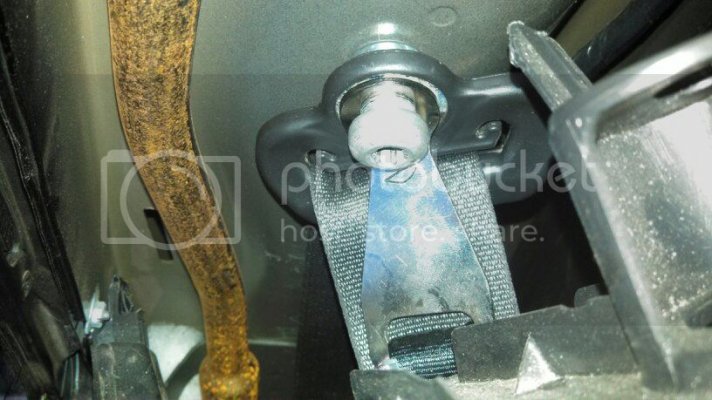
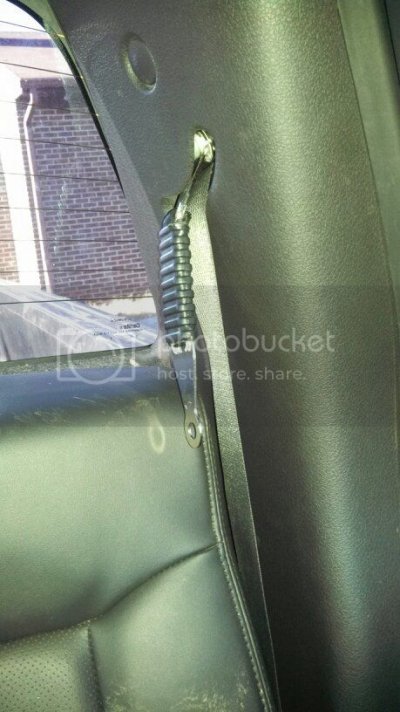
Next, you can bolt the inertia reel to the extension thing with one of the supplied nuts. This part is pretty self explanatory once you look at it.
The next part is a little trickier. After taking apart my interior, I realized to easiest way to attach the lap belt is to just remove the seat. Its only 4 bolts and it out. Remove those and slide the seat to the back. This gives easy access to everything. (While its out, this is a GREAT time to vacuum under your seat and get all the dirt you can never reach.)
On the outside of the seat is another torx bolt holding the factory seat belt down. Pop the plastic cover off to expose the bolt. Remove it, mount the harness lap belt to the inside and reassemble.
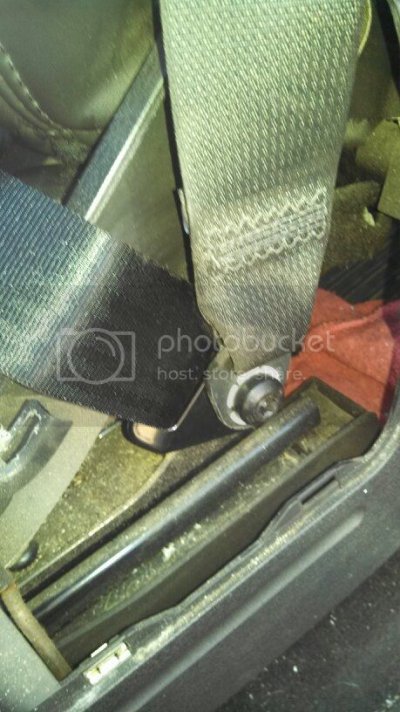
Once thats done, move to the other side (inside) of the seat where the factory buckle is located. Under the fabric is a bolt that looks like this:
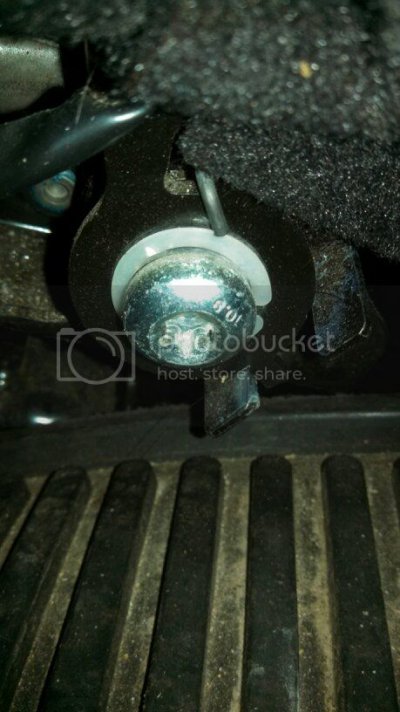
Remove that bolt. Be careful with the buckle as it has a spring on it that seems like it would be a major pain in the @$$ if it flew apart. Again, mount the harness belt to the inside of the factory buckle and reassemble. This one has an alignment tab so be sure that its lined up with the hole and it should slide right in.
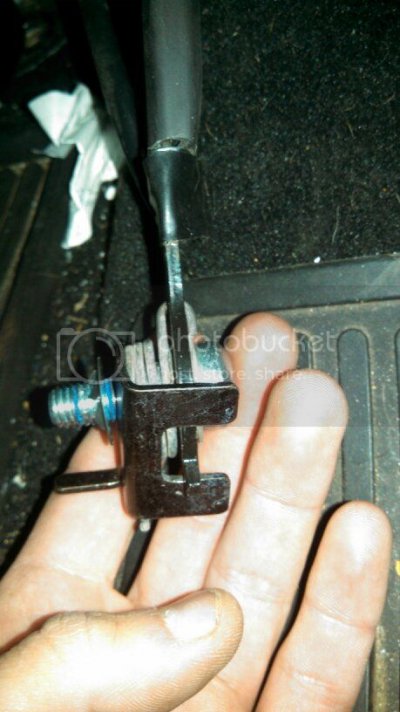
Now connect the inertia reel to the shoulder straps and adjust it to your comfort. There is a dial on the inertia reel that takes some playing around with to get it to unspool easily. Just turn the dial a little and pull, turn dial and pull, keep repeating until the strap unspools. Once thats complete, your DONE! Enjoy
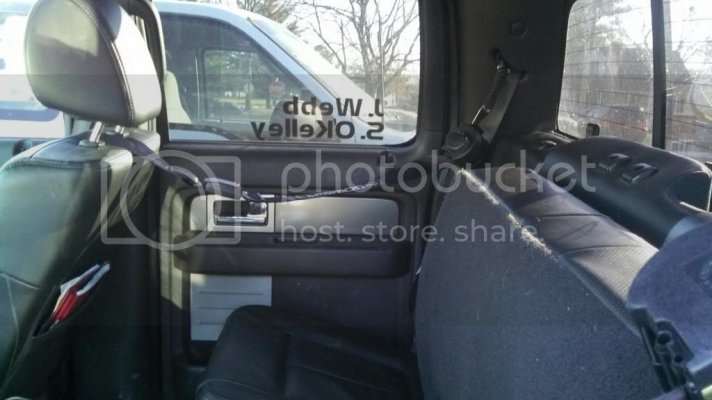
A few tips that I learned the hard way:
-Clean out your truck before you start. It makes life much easier.
-Buy harness pads with the harnesses. They're much more comfortable.
-If you have access to a heated/air conditioned garage, do it in there. Or wear warm socks. I had to take a few breaks to thaw my feet out.
Tools Required
3/8" Ratchet
3" Extension
15mm socket
18mm socket
7mm socket
3/8" to 1/4" adapter (for 7mm socket)
TT50 Torx bit
Flathead screwdriver
Total Install Time:
2-3 hrs (This is estimated. It took me a little longer since I was experimenting to figure out the best way to do certain things.)
I decided to start in the back. The spool attaches on the "C" pillar where the rear seat belts are attached. First remove the plastic trim. Pop the little circle cover off and remove the 6mm bolt. Everything else is just clips. Pull straight back on the plastic trim and it'll pop right off. This will expose where the rear seat belt is bolted in.

Use the torx bit to remove the seat belt. I mounted the little extension piece to the outside of the factory mount. I had to bend it a little bit to make everything fit right. Once that's done, feed the extension piece through the hole in the trim and put the trim back together.


Next, you can bolt the inertia reel to the extension thing with one of the supplied nuts. This part is pretty self explanatory once you look at it.
The next part is a little trickier. After taking apart my interior, I realized to easiest way to attach the lap belt is to just remove the seat. Its only 4 bolts and it out. Remove those and slide the seat to the back. This gives easy access to everything. (While its out, this is a GREAT time to vacuum under your seat and get all the dirt you can never reach.)
On the outside of the seat is another torx bolt holding the factory seat belt down. Pop the plastic cover off to expose the bolt. Remove it, mount the harness lap belt to the inside and reassemble.

Once thats done, move to the other side (inside) of the seat where the factory buckle is located. Under the fabric is a bolt that looks like this:

Remove that bolt. Be careful with the buckle as it has a spring on it that seems like it would be a major pain in the @$$ if it flew apart. Again, mount the harness belt to the inside of the factory buckle and reassemble. This one has an alignment tab so be sure that its lined up with the hole and it should slide right in.

Now connect the inertia reel to the shoulder straps and adjust it to your comfort. There is a dial on the inertia reel that takes some playing around with to get it to unspool easily. Just turn the dial a little and pull, turn dial and pull, keep repeating until the strap unspools. Once thats complete, your DONE! Enjoy


A few tips that I learned the hard way:
-Clean out your truck before you start. It makes life much easier.
-Buy harness pads with the harnesses. They're much more comfortable.
-If you have access to a heated/air conditioned garage, do it in there. Or wear warm socks. I had to take a few breaks to thaw my feet out.
Last edited:

