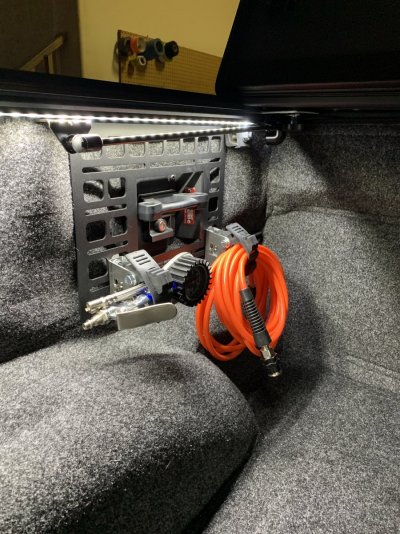
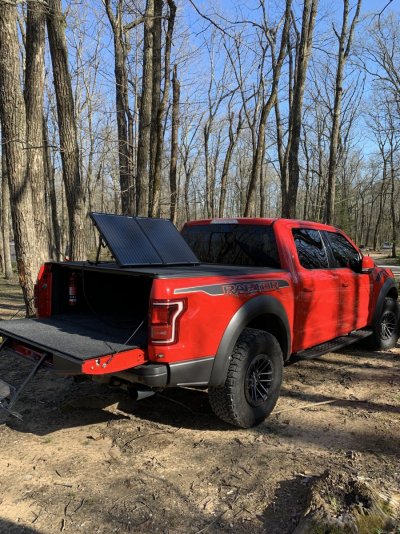
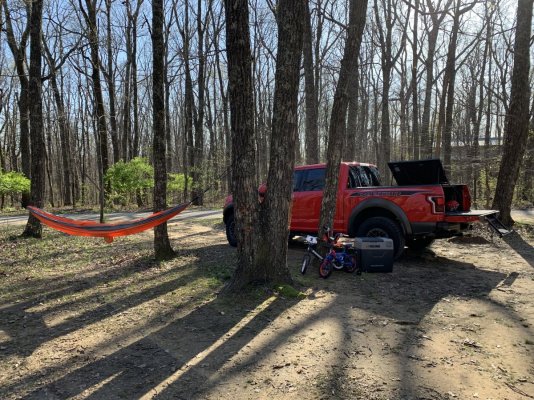
Here's a couple videos of the project in its current state:
This is all the fault of @ShadowRaptor. His bed build was the inspiration for my build. I saw his build soon after getting my Raptor in the summer of 2020, and I couldn't believe how a truck bed could at the same time be so functional and useful and simultaneously be so orderly and even...clean. So thanks, @ShadowRaptor. I know you no longer own your Raptor, but its legacy lives on.
This build is roughly two parts:
1. Bed buildout
2. Dual battery system
First, let's tackle the bed buildout. The goals I had in mind were
1. I'm tired of my shit sliding everywhere on the spray-in bedliner. I can't put my gym bag in the bed in the morning because it will easily end up at the front of the bed by the time I get to the gym. That's just one example. Anything I put in there was gonna be a strewn asunder in about 1.2 miles.
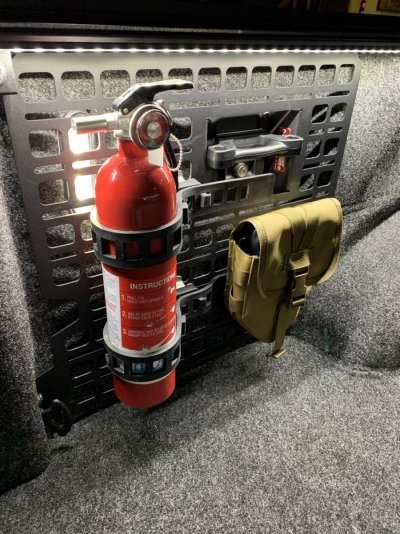
2. I wanted a way to cleanly store some camping and general preparedness items.
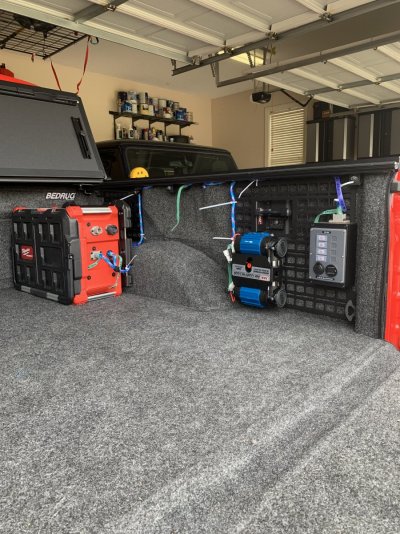
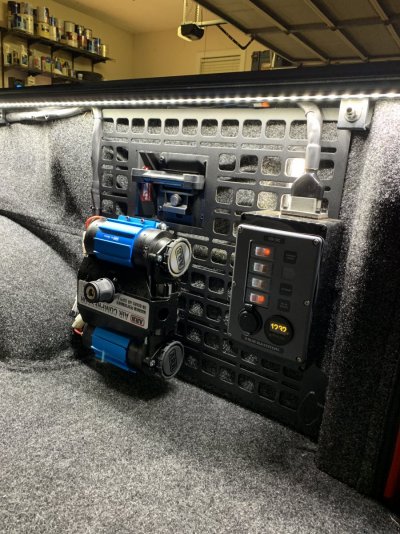
3. I like having an onboard air compressor on my vehicles. I am fully aware of the new high pressure CO2 solutions. A standard air compressor is my preferred solution.
4. Protect bed contents from rain. I don't require 100% waterproof, but I'd like it to be close.
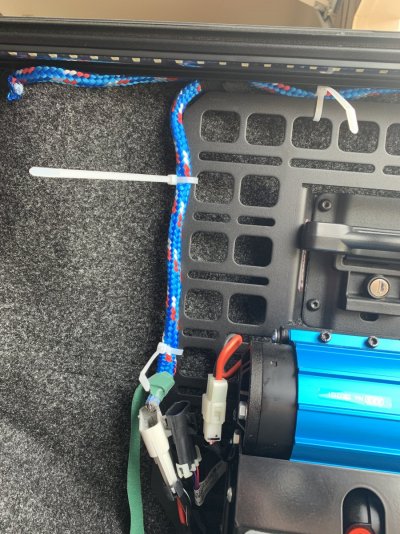
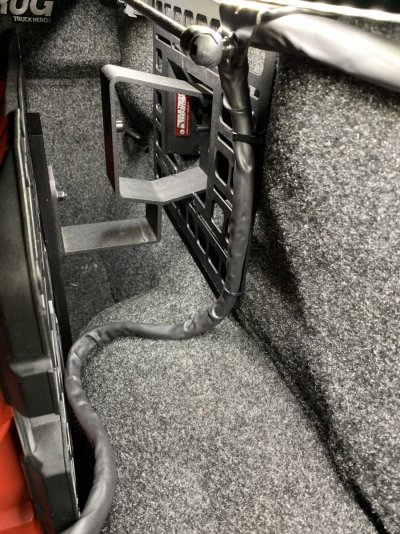
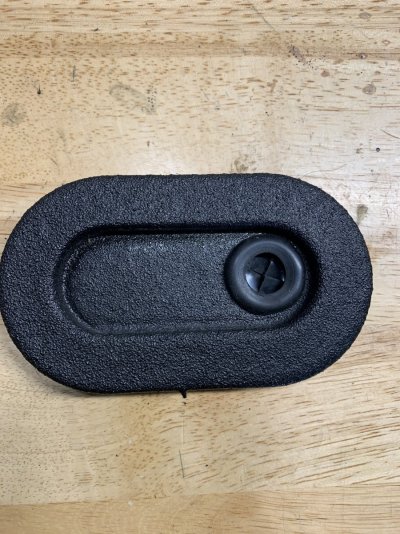
First, I removed the passenger side plug from the front of the bed and installed a grommet. This would allow cables to pass through when I implemented the dual battery setup.
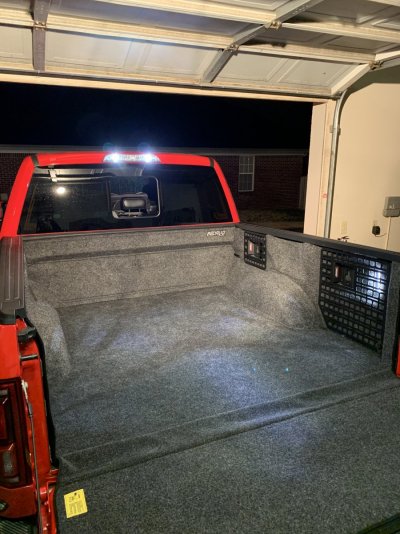
Next, I swept and washed the bed as thoroughly as I could with dish soap. I used a pick tool to get all the little pebbles and artifacts out of the drain holes at the front. Anything left in there is gonna get covered by the BedRug forever.
Then I installed the Bedrug. I bought two of the heavy duty adhesion kits that BedRug recommends for when you install over spray-in bedliners. I'm glad I did. I needed the extra velcro strips and adhesion promoter. I scuffed the bedliner with sandpaper in the areas the velcro would attach, cleaned with an IPA wipe, applied adhesion promoter, and then applied the velcro. With this method, the Velcro is STUCK. Very solid adhesion.
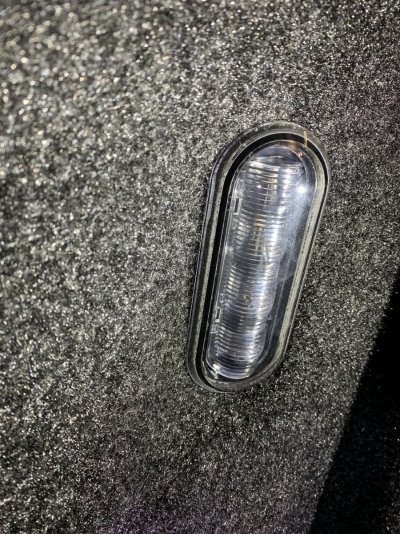
I really took my time on the cutouts for the bed lights. This is where the install will either look completely factory or completely Bubba'd. I started small and iterated until it was a super tight fit, and I'm very happy with the result. Be careful not to break any of the plastic restraints on the light housing. I actually chipped one, but the light still holds fine. If you fully break one, it looks like you need to replace the entire LED light assembly. After working with the bed lights, I decided not to attempt to get the switch on the outside of the bedrug. It is such a small item that I felt like I was very likely to break it getting it out of the bed, and then I would be unlikely to get a professional looking fit. So I left it under the BedRug. Luckily, a cutout in the BuiltRight panel points my finger right to it. So practically, this isn't a problem. In a perfect world, I'd prefer the switch on top of the BedRug.
Then I tackled the BuiltRight panels. Why them before the bed cover? Well, the clamps that hold the bedcover rails need to be placed around the BuiltRight panels, and it's a tight fit. So if you have the time and cover from the weather, I think this was the best order.
Everyone tells you, quite truthfully, that BuiltRight Panels can be installed over a BedRug. What they don't tell you is that it is extremely time consuming to get it right. Everywhere you had 0.5" of clearance before the BedRug? You now have .25" of clearance. It matters. Ready to install the BoxLink brackets? You better line that shit up like Martha Stewart, because you're about to drill through your $400 BedRug. So be damn sure of what you're doing.
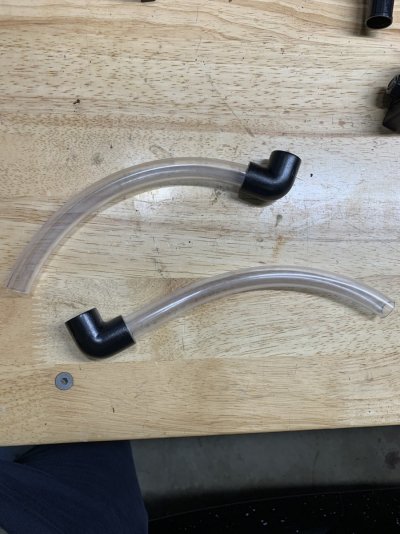
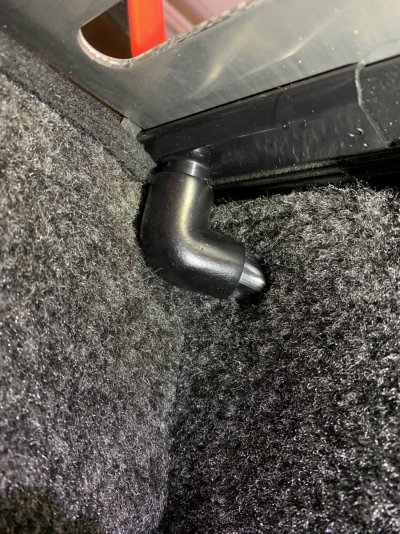
Next came the bed cover. I went with a BakFlip MX4. I traded this option back and forth with Retrax, and I eventually settled on BakFlip because I needed the extra space at the front of the bed for my dual battery setup. The retrax would have occupied this space with its cannister. I would have preferred an automatically retractable solution, but in practice the BakFlip has been great and I've put the extra bed space to good use. The stock drain tubes that come with bed covers are just flat out goofy, especially when our trucks have a perfectly places drain hole at the top/front of each side of the bed. I used a 1/2" PVC elbow and 5/8" OD plastic tube from Home Depot (SKU 702361 and SKU 187674) to make a better drain tube. Snake the tube behind the body panel and then push the PVC elbow onto the drain port for the bed cover. Very easy. I sanded and painted the PVC elbow black to give it a nice look.
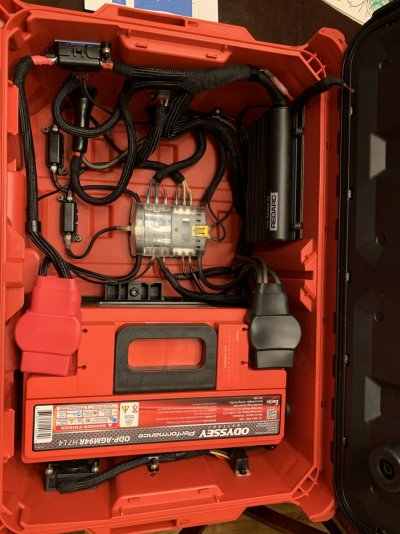
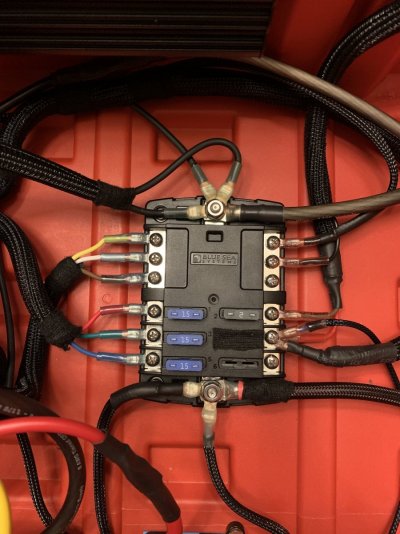
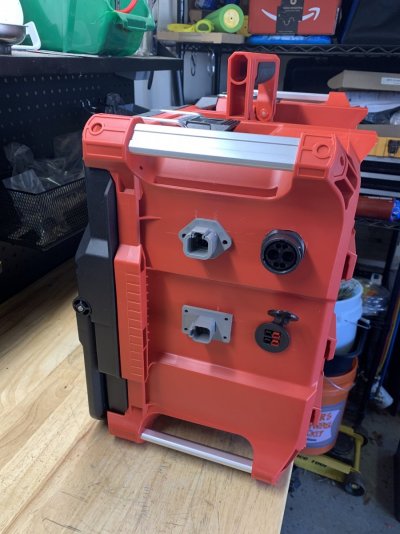
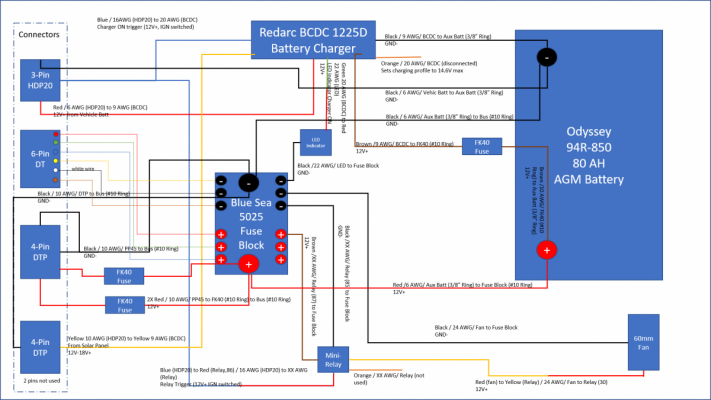
So with that, the bed was built out and ready for accessories. Now let's talk about the dual battery setup.
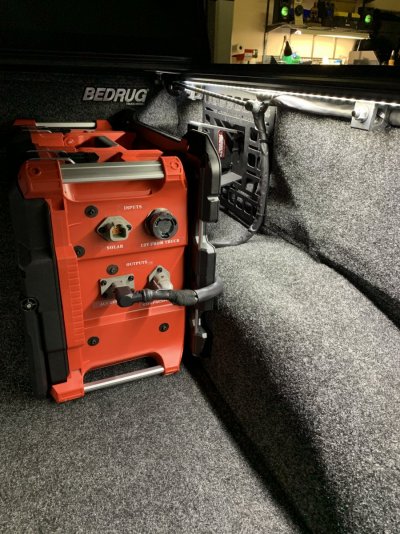
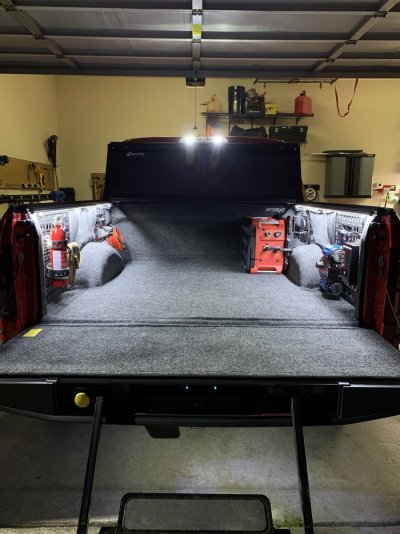
Late in the game I finally installed extra bed lights in the form of LED strips along the bottom side of each rail of the Bakflip MX4. I used the same 3M adhesion promoter that I learned to love when installing the Bedrug velcro. Clean with IPA. Apply adhesion promoter. Apply adhesive strip/LED strip. So far it is holding super tight. No delamination.
This is all the fault of @ShadowRaptor. His bed build was the inspiration for my build. I saw his build soon after getting my Raptor in the summer of 2020, and I couldn't believe how a truck bed could at the same time be so functional and useful and simultaneously be so orderly and even...clean. So thanks, @ShadowRaptor. I know you no longer own your Raptor, but its legacy lives on.
This build is roughly two parts:
1. Bed buildout
2. Dual battery system
First, let's tackle the bed buildout. The goals I had in mind were
1. I'm tired of my shit sliding everywhere on the spray-in bedliner. I can't put my gym bag in the bed in the morning because it will easily end up at the front of the bed by the time I get to the gym. That's just one example. Anything I put in there was gonna be a strewn asunder in about 1.2 miles.
2. I wanted a way to cleanly store some camping and general preparedness items.
3. I like having an onboard air compressor on my vehicles. I am fully aware of the new high pressure CO2 solutions. A standard air compressor is my preferred solution.
4. Protect bed contents from rain. I don't require 100% waterproof, but I'd like it to be close.
First, I removed the passenger side plug from the front of the bed and installed a grommet. This would allow cables to pass through when I implemented the dual battery setup.
Next, I swept and washed the bed as thoroughly as I could with dish soap. I used a pick tool to get all the little pebbles and artifacts out of the drain holes at the front. Anything left in there is gonna get covered by the BedRug forever.
Then I installed the Bedrug. I bought two of the heavy duty adhesion kits that BedRug recommends for when you install over spray-in bedliners. I'm glad I did. I needed the extra velcro strips and adhesion promoter. I scuffed the bedliner with sandpaper in the areas the velcro would attach, cleaned with an IPA wipe, applied adhesion promoter, and then applied the velcro. With this method, the Velcro is STUCK. Very solid adhesion.
I really took my time on the cutouts for the bed lights. This is where the install will either look completely factory or completely Bubba'd. I started small and iterated until it was a super tight fit, and I'm very happy with the result. Be careful not to break any of the plastic restraints on the light housing. I actually chipped one, but the light still holds fine. If you fully break one, it looks like you need to replace the entire LED light assembly. After working with the bed lights, I decided not to attempt to get the switch on the outside of the bedrug. It is such a small item that I felt like I was very likely to break it getting it out of the bed, and then I would be unlikely to get a professional looking fit. So I left it under the BedRug. Luckily, a cutout in the BuiltRight panel points my finger right to it. So practically, this isn't a problem. In a perfect world, I'd prefer the switch on top of the BedRug.
Then I tackled the BuiltRight panels. Why them before the bed cover? Well, the clamps that hold the bedcover rails need to be placed around the BuiltRight panels, and it's a tight fit. So if you have the time and cover from the weather, I think this was the best order.
Everyone tells you, quite truthfully, that BuiltRight Panels can be installed over a BedRug. What they don't tell you is that it is extremely time consuming to get it right. Everywhere you had 0.5" of clearance before the BedRug? You now have .25" of clearance. It matters. Ready to install the BoxLink brackets? You better line that shit up like Martha Stewart, because you're about to drill through your $400 BedRug. So be damn sure of what you're doing.
Next came the bed cover. I went with a BakFlip MX4. I traded this option back and forth with Retrax, and I eventually settled on BakFlip because I needed the extra space at the front of the bed for my dual battery setup. The retrax would have occupied this space with its cannister. I would have preferred an automatically retractable solution, but in practice the BakFlip has been great and I've put the extra bed space to good use. The stock drain tubes that come with bed covers are just flat out goofy, especially when our trucks have a perfectly places drain hole at the top/front of each side of the bed. I used a 1/2" PVC elbow and 5/8" OD plastic tube from Home Depot (SKU 702361 and SKU 187674) to make a better drain tube. Snake the tube behind the body panel and then push the PVC elbow onto the drain port for the bed cover. Very easy. I sanded and painted the PVC elbow black to give it a nice look.
So with that, the bed was built out and ready for accessories. Now let's talk about the dual battery setup.


Late in the game I finally installed extra bed lights in the form of LED strips along the bottom side of each rail of the Bakflip MX4. I used the same 3M adhesion promoter that I learned to love when installing the Bedrug velcro. Clean with IPA. Apply adhesion promoter. Apply adhesive strip/LED strip. So far it is holding super tight. No delamination.
Last edited:


