Whats up guys!
First of all big shout out to Bruce @Hush Car Audio and Noah @The Car Stereo Company
Boy has this been a project! So it all started with @Oldfart and his "basic upgrade" to the factory B&O. I thought to myself, I'd like to have a little better sound and bass in my 802A screw. Got with oldfart and figured out his set up.
Welllllll I continued to do more and more research into this rabbit hole and it kept morphing larger and larger. Mind you I've never really done a sound system build but have done many other things in the car/truck building game.
The whole premise for this was for all parts/components to fit behind the rear bench seat. I did not want to lose any floor space at all. Also the other requirement was for it all to work with the rear seats folded up at all times. That is a big hill to climb evidently.
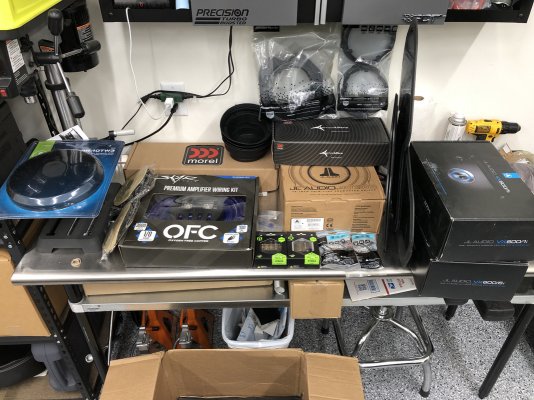
So below is what all I settled on:
Front Doors and Tweeters: Morel Virtus component set
Rear Doors: Morel Tempo Ultra Integra
Sub: 10" JL TW3 with custom box behind pass side
AMP: JL VX600/1i and VX600/6i
Nav-TV Zen A2B
LMI rear seat 2" forward relocation
Hush Car Audio Front & Rear Door Panel covers
Hush Car Audio silicone speaker baffles
Seems like the bulk of this project was sound treatment.
Second Skin for most inner and outer panels
Sound skin with foam for rear wall and parts of the doors
Black Hole Acoustic tiles for doors for dampening
Doors mostly got second skin. Did all inner and outer portions of all 4 doors from top to bottom. Didn't get many pics of SS pre tiles.
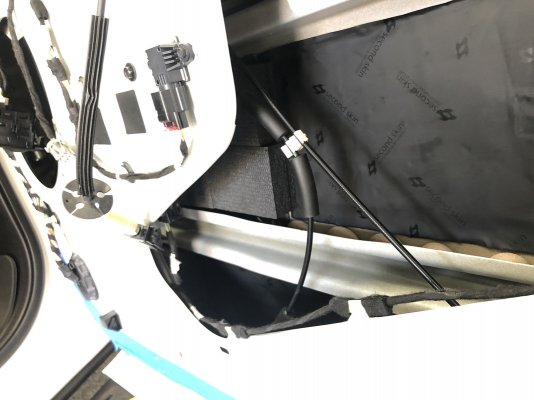
Now these tiles from The Car Stereo Company were fun! Was able to stuff 56 of these thangs in each front door! Oh and if your wondering... their not cheap
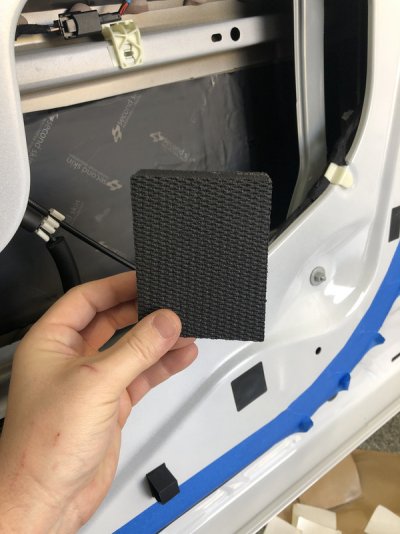
Don't make fun of my blue tape! It was my gauge to know where to stop the second skin.
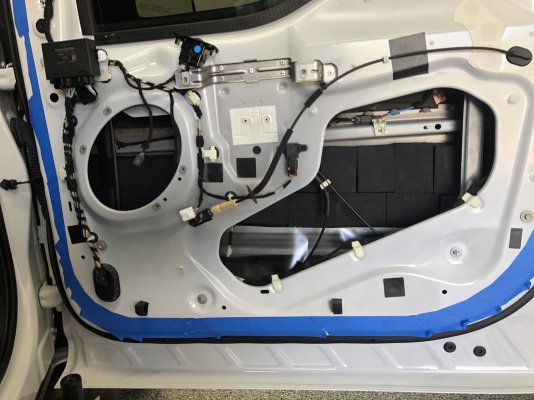
Was able to stuff 1 and 2 rows up top. 2 full rows in the middle
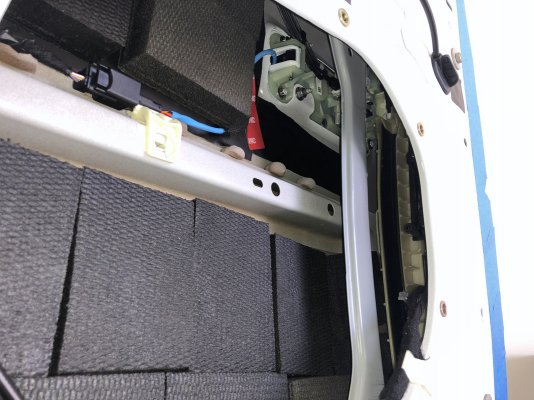
Yes they come super close to the window but don't actually touch. Like 1-2MM close.
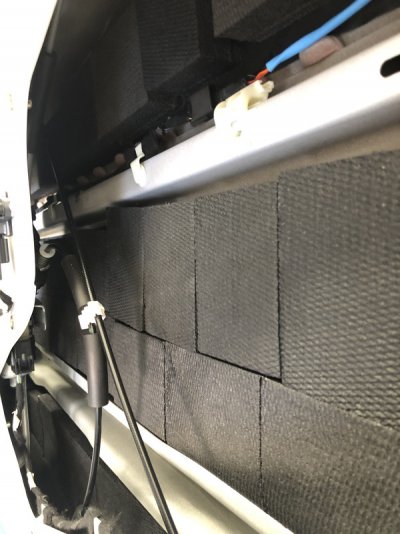
3 full rows in the bottom. Kind of tedious and time consuming to install but oddly satisfying
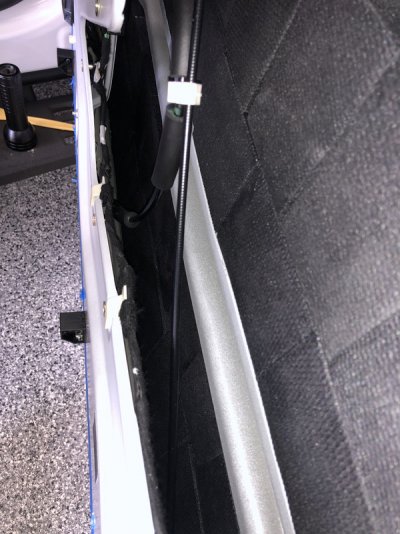
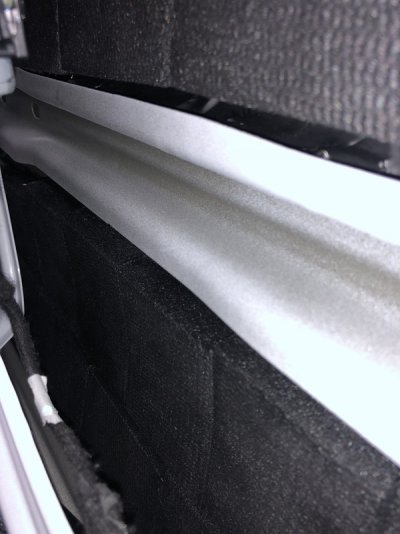
Next up was the door plates from Hush. These had a really good fitment and are well thought out. Like another poster mentioned a few weeks ago. Tape it up and get it perfect, then do only 2 holes first. Get your holes drilled, nut-riveted and bolt the plate completely with 2 only. Once you verify that it is perfect with those 2 holes, then use your punch and place your punch indentations in the middle of the rest of the holes.
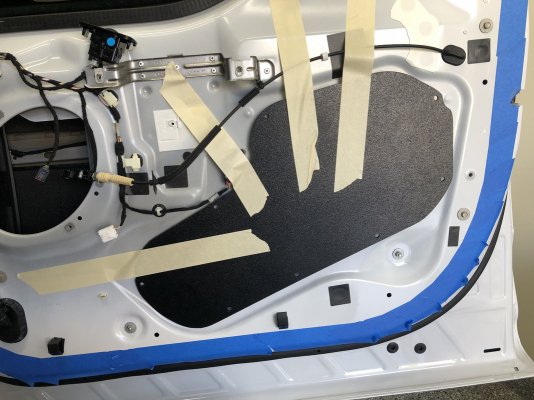
Once all your threads are there is should look like this
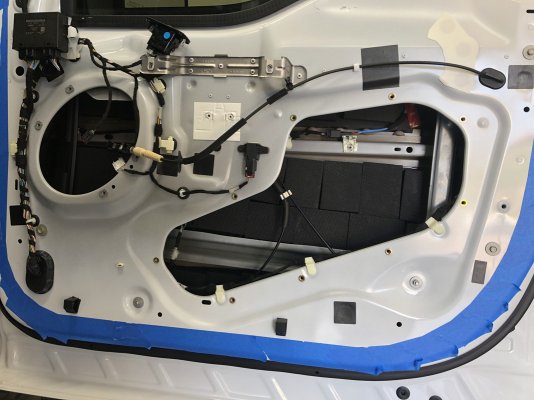
Also, because I'm crazy, I second skinned the front of these and sound skinned the back. Also that is sound skin butyl rope. Super cool stuff and easy to work with. That seals the plates to the doors to keep water out, and might help turn your hollow door into a sealed box for your door speaker. Have no idea if that helps but figure it doesn't hurt.
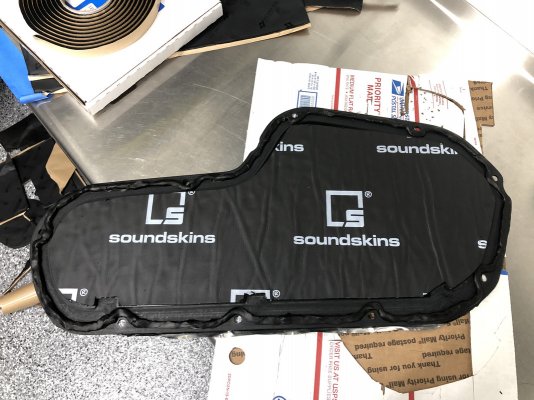
Sealed!
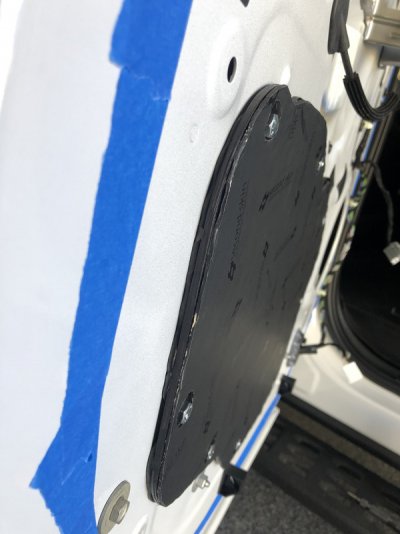
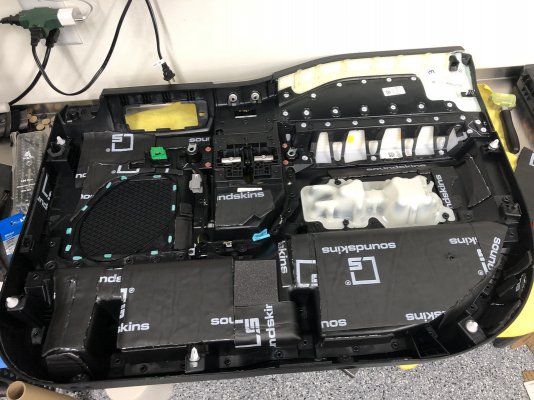
Next up was the back's of the door panels. Didn't go too crazy here but they all mostly look like this. Sound skin in the areas that could handle the thicker material and second skin in the areas that needed thinner.
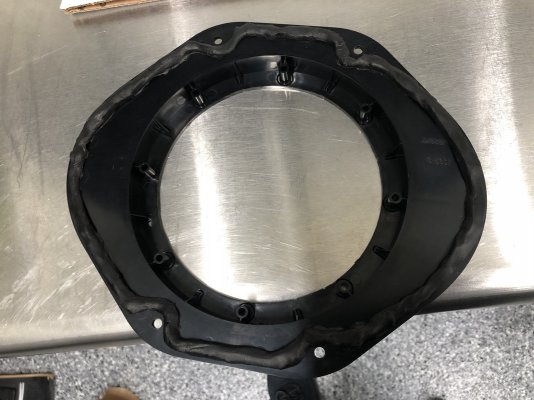
After that it was the speaker adapters. A lot of cutting and grinding on them. I did use the butyl rope on them as well. Does it help? Heck IDK
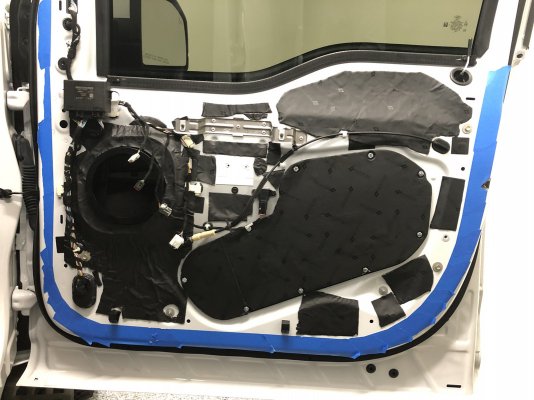
Next up for the doors was more second skin on the speaker adapters and rest of the door. Really wanted to make sure I'd be drama free when I put the door panels back on so I didn't go crazy coverage here. Needed to ensure I would not have any bulge of the door panel off the door on re-installation.
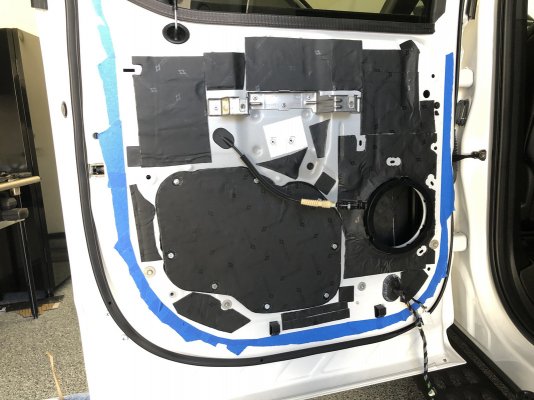
Last and best part of the doors was putting the speakers in. Don't they look sexy? Really like the silicone baffles. They expand wider as the speaker grill from the door panel touches them so they'll never fold over into the speaker path. Pretty cool.
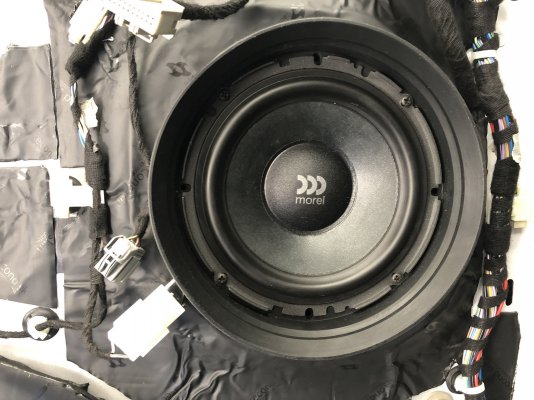
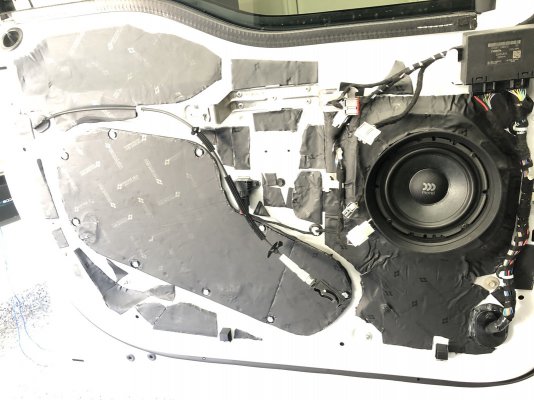
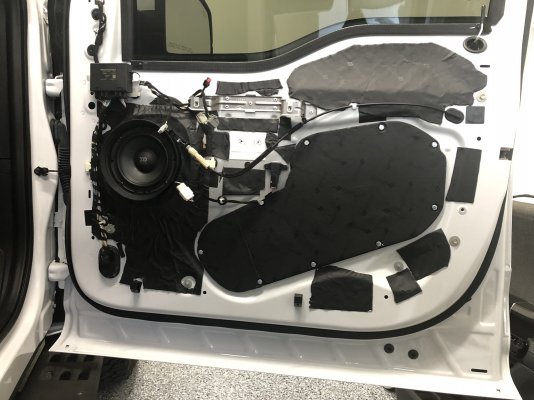
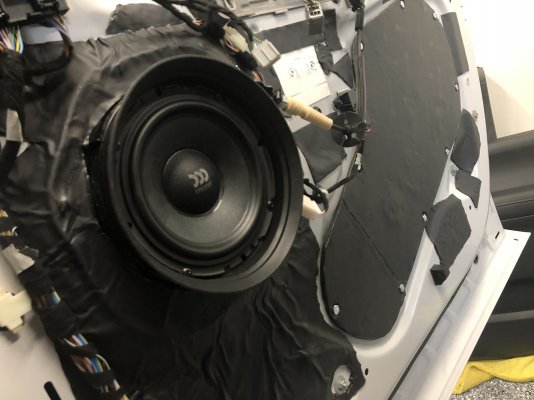
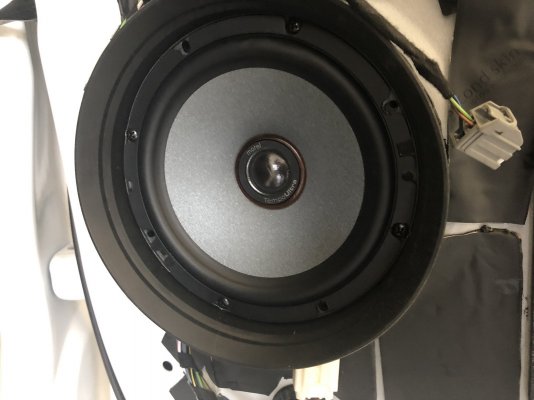
This was my very last door and last thing to hit with the SS. Didn't have a full sheet left for speaker adapter. Doh!
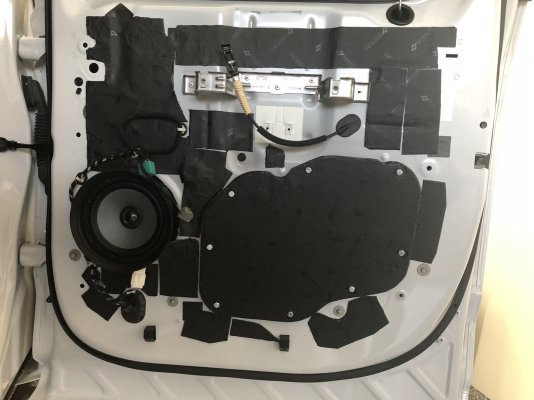
Making the inline fuse mount under the hood took me unnecessarily too long but whatever. It's ugly but here it is. Used a torch to heat and bend the 1/4" ABS. Mounted to battery holder with some lock washers underneath. It's at least sturdy.
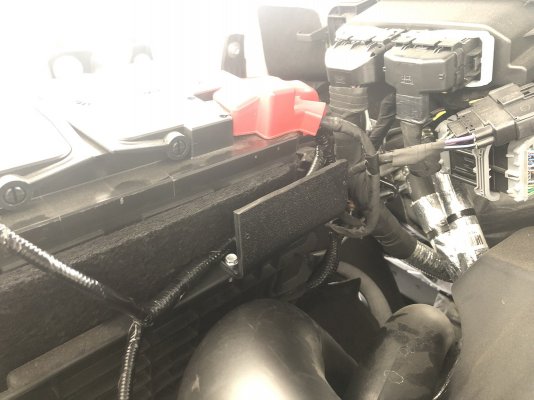
Now onto the amp board. I made the mistake of thinking cutting out my own will be a piece of cake. Yeahhh welllll it wasn't, was super time consuming and no, I don't have a router. This was all done with a Dremel, by hand and took forever to make it look halfway decent... And yes I know it still kinda looks like crap but it is what it is. So far this is as far as I have gotten. I think this will be the layout.
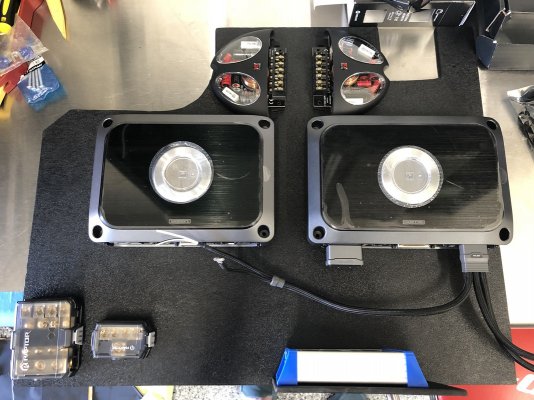
After all this the door panels are back on and I am driving the truck but it's still not finished. Let me tell you.... the ride in the truck now is absolutely amazing. NVH is ridiculously low. Since I have no speakers/sound/bluetooth right now, I make calls on speaker phone in my truck, people on the other end think I'm at my house. No background noise at all. It's really really nice.
To be continued....
First of all big shout out to Bruce @Hush Car Audio and Noah @The Car Stereo Company
Boy has this been a project! So it all started with @Oldfart and his "basic upgrade" to the factory B&O. I thought to myself, I'd like to have a little better sound and bass in my 802A screw. Got with oldfart and figured out his set up.
Welllllll I continued to do more and more research into this rabbit hole and it kept morphing larger and larger. Mind you I've never really done a sound system build but have done many other things in the car/truck building game.
The whole premise for this was for all parts/components to fit behind the rear bench seat. I did not want to lose any floor space at all. Also the other requirement was for it all to work with the rear seats folded up at all times. That is a big hill to climb evidently.
So below is what all I settled on:
Front Doors and Tweeters: Morel Virtus component set
Rear Doors: Morel Tempo Ultra Integra
Sub: 10" JL TW3 with custom box behind pass side
AMP: JL VX600/1i and VX600/6i
Nav-TV Zen A2B
LMI rear seat 2" forward relocation
Hush Car Audio Front & Rear Door Panel covers
Hush Car Audio silicone speaker baffles

Seems like the bulk of this project was sound treatment.
Second Skin for most inner and outer panels
Sound skin with foam for rear wall and parts of the doors
Black Hole Acoustic tiles for doors for dampening
Doors mostly got second skin. Did all inner and outer portions of all 4 doors from top to bottom. Didn't get many pics of SS pre tiles.

Now these tiles from The Car Stereo Company were fun! Was able to stuff 56 of these thangs in each front door! Oh and if your wondering... their not cheap

Don't make fun of my blue tape! It was my gauge to know where to stop the second skin.

Was able to stuff 1 and 2 rows up top. 2 full rows in the middle

Yes they come super close to the window but don't actually touch. Like 1-2MM close.

3 full rows in the bottom. Kind of tedious and time consuming to install but oddly satisfying


Next up was the door plates from Hush. These had a really good fitment and are well thought out. Like another poster mentioned a few weeks ago. Tape it up and get it perfect, then do only 2 holes first. Get your holes drilled, nut-riveted and bolt the plate completely with 2 only. Once you verify that it is perfect with those 2 holes, then use your punch and place your punch indentations in the middle of the rest of the holes.

Once all your threads are there is should look like this

Also, because I'm crazy, I second skinned the front of these and sound skinned the back. Also that is sound skin butyl rope. Super cool stuff and easy to work with. That seals the plates to the doors to keep water out, and might help turn your hollow door into a sealed box for your door speaker. Have no idea if that helps but figure it doesn't hurt.

Sealed!

Next up was the back's of the door panels. Didn't go too crazy here but they all mostly look like this. Sound skin in the areas that could handle the thicker material and second skin in the areas that needed thinner.

After that it was the speaker adapters. A lot of cutting and grinding on them. I did use the butyl rope on them as well. Does it help? Heck IDK

Next up for the doors was more second skin on the speaker adapters and rest of the door. Really wanted to make sure I'd be drama free when I put the door panels back on so I didn't go crazy coverage here. Needed to ensure I would not have any bulge of the door panel off the door on re-installation.


Last and best part of the doors was putting the speakers in. Don't they look sexy? Really like the silicone baffles. They expand wider as the speaker grill from the door panel touches them so they'll never fold over into the speaker path. Pretty cool.


This was my very last door and last thing to hit with the SS. Didn't have a full sheet left for speaker adapter. Doh!

Making the inline fuse mount under the hood took me unnecessarily too long but whatever. It's ugly but here it is. Used a torch to heat and bend the 1/4" ABS. Mounted to battery holder with some lock washers underneath. It's at least sturdy.

Now onto the amp board. I made the mistake of thinking cutting out my own will be a piece of cake. Yeahhh welllll it wasn't, was super time consuming and no, I don't have a router. This was all done with a Dremel, by hand and took forever to make it look halfway decent... And yes I know it still kinda looks like crap but it is what it is. So far this is as far as I have gotten. I think this will be the layout.

After all this the door panels are back on and I am driving the truck but it's still not finished. Let me tell you.... the ride in the truck now is absolutely amazing. NVH is ridiculously low. Since I have no speakers/sound/bluetooth right now, I make calls on speaker phone in my truck, people on the other end think I'm at my house. No background noise at all. It's really really nice.
To be continued....
Last edited:

