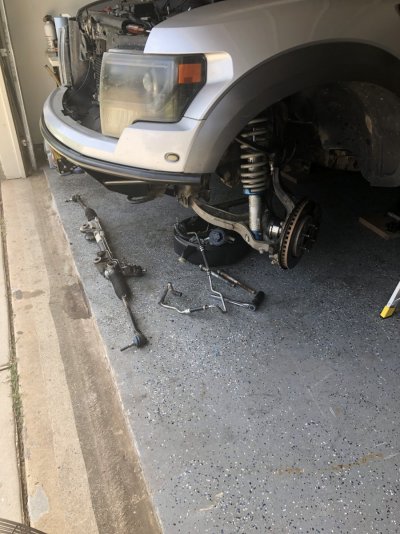
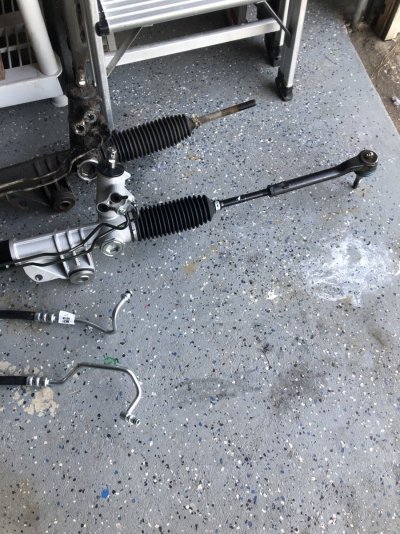
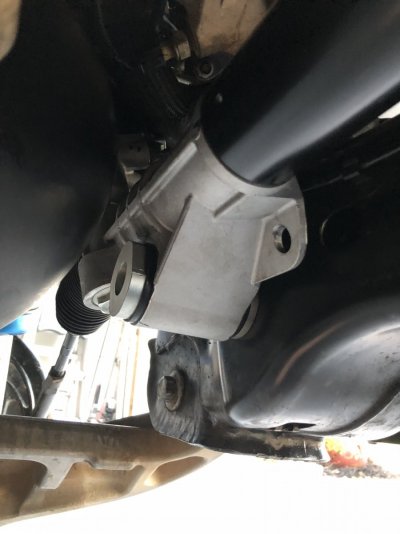
Thought I would write up a quick DIY for replacing the steering rack on a Gen 1, recently did mine and couldn't find another thread on here so hope it helps someone. Parental advisory I'm not a certified or otherwise endorsed mechanic! This is as much a "what not to do" as it is just entertainment. Procedure is probably pretty similar for Gen 2/3 but instead of hydraulic lines you have electrical connectors (and possibly dealer programming? HellifIknow).
First find said steering rack appropriate to your truck, unless of course you can have yours rebuilt. There's a different part number for SCAB and SCREW (slightly fewer turns lock to lock for the SCAB or 133" wheelbase version versus the SCREW or 145" wheelbase); as of this writing new ones aren't readily available online anymore but you might happen upon NOS (New Old Stock) squirreled away at a dealership somewhere (and yes capitalist swine you could probably snap it up and double your money on ebay if you did). And I couldn't find any seal kits available or any information on rebuilding your own so that leaves rebuilt. Motorcraft offers a reman with a 24 month/unlimited mileage warranty, and other sources are available like Cardone reman from rockauto.com with a 36 month/36,000 mile warranty. I went with the Cardone instead of the Motorcraft from rockauto or Tasca along with all new power steering lines (note the aftermarket pressure line I got for the rack to the pump was crap and I returned it for a Motorcraft part, YMMV but I generally recommend going with Motorcraft where possible, depending on availability and price).
Next you'll need some Power Steering fluid (Mercon LV, a couple quarts is more than enough), two new o-rings for where the pressure lines enter the rack (these should come with your rack if you bought new/reman) and a few tools:
10mm Socket and ratchet/wrench, or even better a Gearwrench type ratchet wrench and skinny hands due to clearance (if you use the hamfist socket approach you might need a 10" or so extension and a universal joint)
21mm Deep socket for outer tie rod end nuts and lug nuts (an impact is helpful too)
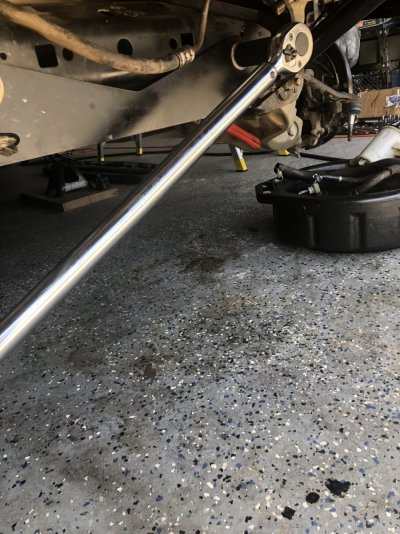
1" Socket and big-ass torque wrench capable of 325 ft-lbs (big-ass isn't a requirement but it helps with leverage if you're not a powerlifter when you get into torque values well beyond your own body weight, as is my case. I use a 600 ft-lb that's about 4' long from Summit for about $200, well worth it especially if you ever remove your front shocks)
Regular-ass torque wrench (0-250 ft-lb) for tie rod nuts, etc.
Large-ish pipe wrench; I used a 24", this is to hold the nuts on the back of the rack that aren't really nuts as much as about 2" diameter round things with two flats machined in 'em
Hammer of some kind
Large flat blade screwdriver
Large crescent wrench
Couple ratchet straps or something to keep the steering wheel from moving once the column is disconnected (like maybe a Club? Are those still a thing?) or else the clockspring will have to be recentered.
Lastly, if you follow Ford's official instructions, you'll need 2 new mounting bolts for the rack, a new pinch bolt for the column where it attaches to the rack, and a new bolt for the mounting flange for the pressure lines. I didn't. I had those huge steering bolts off and reused them with blue Loctite about 5 years and 50,000 miles ago when I put on a frame-cut front bumper so...I use blue Loctite for most things I don't want coming out and Anti-seize for things (like the taper on the outer tie rods) I do, but that's just me.
Here's the service manual overview:
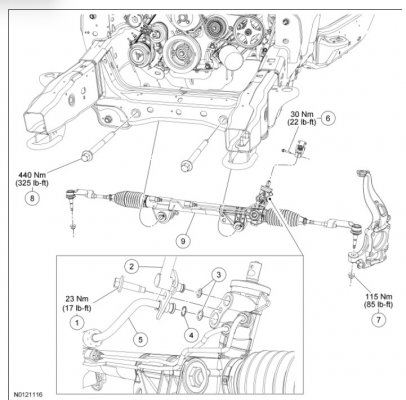
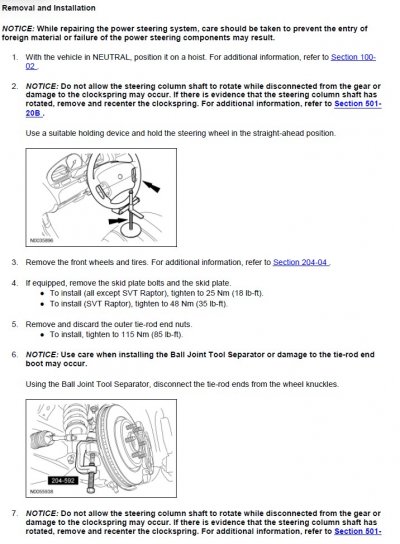
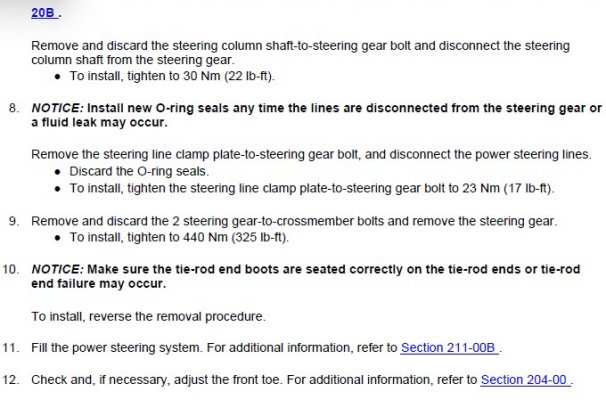
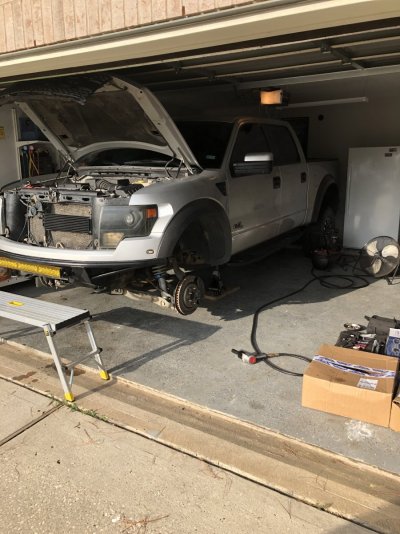
And the actual process is pretty much just as straightforward, although in practice they omit a few subtle details. Anyway, first lift the front end and support it on jackstands, remove the front wheels, center the steering wheel and strap it so it can't turn, pull the front and engine skidplates:
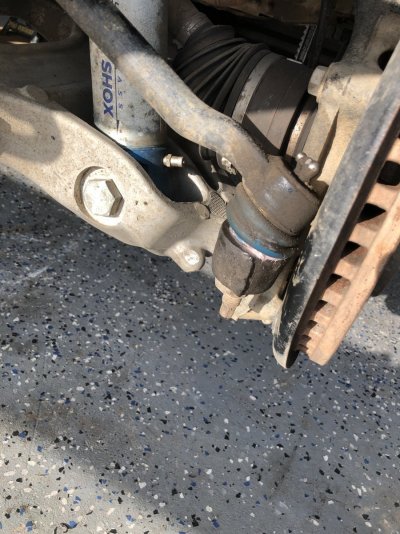
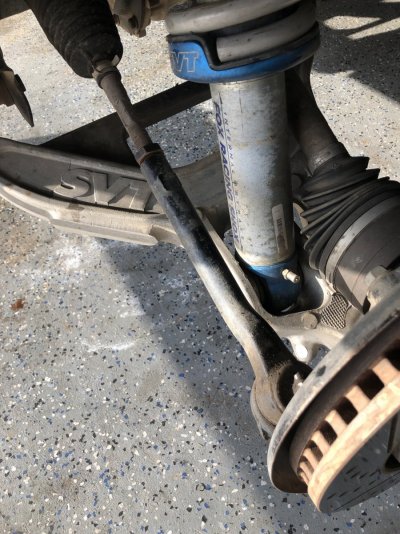
Break loose the outer tie rod end backup nuts (this is just way easier now than after the rack is out):
First find said steering rack appropriate to your truck, unless of course you can have yours rebuilt. There's a different part number for SCAB and SCREW (slightly fewer turns lock to lock for the SCAB or 133" wheelbase version versus the SCREW or 145" wheelbase); as of this writing new ones aren't readily available online anymore but you might happen upon NOS (New Old Stock) squirreled away at a dealership somewhere (and yes capitalist swine you could probably snap it up and double your money on ebay if you did). And I couldn't find any seal kits available or any information on rebuilding your own so that leaves rebuilt. Motorcraft offers a reman with a 24 month/unlimited mileage warranty, and other sources are available like Cardone reman from rockauto.com with a 36 month/36,000 mile warranty. I went with the Cardone instead of the Motorcraft from rockauto or Tasca along with all new power steering lines (note the aftermarket pressure line I got for the rack to the pump was crap and I returned it for a Motorcraft part, YMMV but I generally recommend going with Motorcraft where possible, depending on availability and price).
Next you'll need some Power Steering fluid (Mercon LV, a couple quarts is more than enough), two new o-rings for where the pressure lines enter the rack (these should come with your rack if you bought new/reman) and a few tools:
10mm Socket and ratchet/wrench, or even better a Gearwrench type ratchet wrench and skinny hands due to clearance (if you use the hamfist socket approach you might need a 10" or so extension and a universal joint)
21mm Deep socket for outer tie rod end nuts and lug nuts (an impact is helpful too)
1" Socket and big-ass torque wrench capable of 325 ft-lbs (big-ass isn't a requirement but it helps with leverage if you're not a powerlifter when you get into torque values well beyond your own body weight, as is my case. I use a 600 ft-lb that's about 4' long from Summit for about $200, well worth it especially if you ever remove your front shocks)
Regular-ass torque wrench (0-250 ft-lb) for tie rod nuts, etc.
Large-ish pipe wrench; I used a 24", this is to hold the nuts on the back of the rack that aren't really nuts as much as about 2" diameter round things with two flats machined in 'em
Hammer of some kind
Large flat blade screwdriver
Large crescent wrench
Couple ratchet straps or something to keep the steering wheel from moving once the column is disconnected (like maybe a Club? Are those still a thing?) or else the clockspring will have to be recentered.
Lastly, if you follow Ford's official instructions, you'll need 2 new mounting bolts for the rack, a new pinch bolt for the column where it attaches to the rack, and a new bolt for the mounting flange for the pressure lines. I didn't. I had those huge steering bolts off and reused them with blue Loctite about 5 years and 50,000 miles ago when I put on a frame-cut front bumper so...I use blue Loctite for most things I don't want coming out and Anti-seize for things (like the taper on the outer tie rods) I do, but that's just me.
Here's the service manual overview:


And the actual process is pretty much just as straightforward, although in practice they omit a few subtle details. Anyway, first lift the front end and support it on jackstands, remove the front wheels, center the steering wheel and strap it so it can't turn, pull the front and engine skidplates:

Break loose the outer tie rod end backup nuts (this is just way easier now than after the rack is out):


