You are using an out of date browser. It may not display this or other websites correctly.
You should upgrade or use an alternative browser.
You should upgrade or use an alternative browser.
Review: Camburg MIG Rear Shackles
- Thread starter ToucanLife
- Start date
Disclaimer: Links on this page pointing to Amazon, eBay and other sites may include affiliate code. If you click them and make a purchase, we may earn a small commission.
ToucanLife
Full Access Member
- Joined
- Oct 15, 2013
- Posts
- 82
- Reaction score
- 81
I didn't measure - but I can tell you side by side they looked almost identical in length to stock
stewwalker
Full Access Member
Sup Crew!
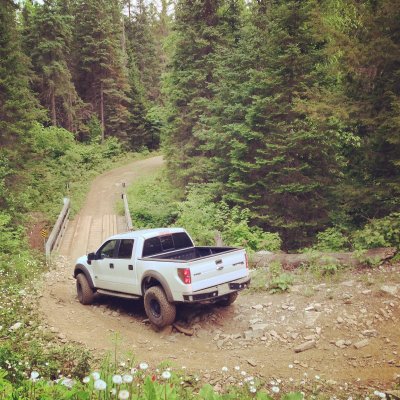
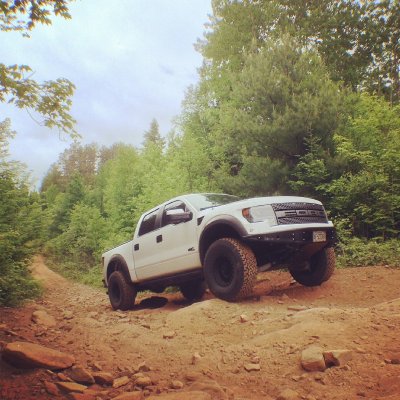
I have a 13 SCREW - Mid Perch - 37 BFG on Methods - other than that the suspension is stock.
I decided to try out the Camburg MIG rear shackles in hopes they would somehow give the rear a bit more compliance - as I do not really want to buy new leaf packs at the moment for the type of offroading I do (slow speed crawling jeep trails and highspeed gravel roads)
http://camburg.com/store/09-11-f-150/camburg-ford-raptor-10-14-rear-mig-shackles/
These are stock height shackles, they do not lower or raise the rear.
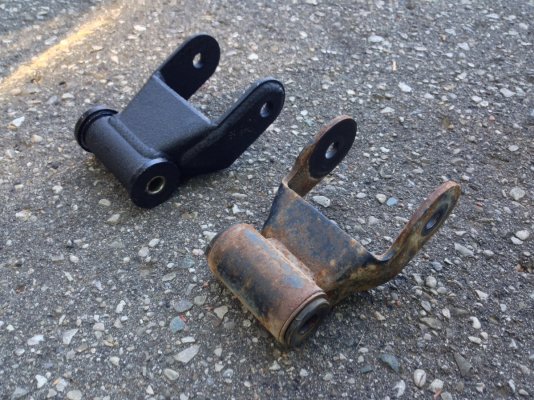
Build quality: They are beefy as hell, great hammer coating, and the bushings seem to be good quality.
Install: Drivers side is a bitch, you have to cut the bolt out on the top shackle to leaf mount similar to the gas tank bolt when doing leafs, or drop the shocks and do some magic to wrangle it out - I cut the bolt. Pass side takes 15 min.
Impressions:
To be honest I was expecting no difference. I am also not super sensitive to mods - some people seem to be able to pick out the smallest differences and get into detail on them - I am not one of those people - there needs to be a big change for me to notice it.
I installed the passenger side first - went out and hit some soft curbs, gravel road potholes, washboards, and rain water channels with the left and right side independently to test it (truth be told I had to go to the dealer to get a new bolt before I could install the drivers side - or I would of done both at once.
I DID notice a difference and quite a big one which surprised me. Small bump compliance was better, mid bump was much better also. The imediate difference was there was less of a 'bang' as the rear hit bumps or obstacles.
IE hitting a rounded 5" curb at about 45-50 mph - before the front would feel softer than the back - now I feel the front hit softly, then the back hit a bit more harshly than the front - now it is hard to even feel the back hit the bump - it seems to soak into travel much smoother.
Big bumps where you really get into travel - I have not tested this, nearest desert is 1500 miles away so the best I could do was jumping a whoop section on my dirt road. Felt similar just a touch smoother in the back - less of a harsh transition. I would say I only used 65% of the travel doing this.
Small bumps - IE washboard, potholes, rain channels - much smoother maybe 15% smoother - the rear would bang or shutter before - it seems to not do that as much now.
I noticed the stock shackles with the fused bushings had some serious windup and reluctance to move - the Camburg setup moves freely when bolted down - IE no windup.
Worth the $160 bucks? Definitly - will they help you if you trash your truck in the desert on big hits? Probably not a ton like leafs - but if you enjoy a softer ride, blasting backroads and socking up smaller stuff they definitely help.
Here's some pics of the truck;

Did you have to remove the leaf springs to install the shackles? Trying to figure out how long this will take me.
mpk1996
Full Access Member
- Joined
- Mar 5, 2013
- Posts
- 262
- Reaction score
- 159
Ok. So having done this let me tell you the trick to getting the drivers side shackle too bolt out without having to cut it.
Yes. You have to remove the shock (two bolts and still way less of an issue than cutting it)
And really you need to do this anyway, cause if you look at the bolt, you NEED to have the bolt head on the inside by the frame. The other way you can get interference from the threaded end as it sticks in further.
On the pass side you can just jack the leaf up and pull the bold through over the frame. On the drivers side (stock) we have that damn shake weight thing.
So. Drop the shock. Remove the lower shackle bolt (the one attached to the truck). Have the nut off the top bolt. Lift the axle up (I used a jack on the third member while the frame was on jack stands) to the point you start lifting the truck off the stands. Put a jack stand under the pass side of the axle as high as it will go. You want to create as much articulation as possible.
Start lowering the jack until it clears low enough to pull the bolt out. Keep everything there. Put the new shackle on. Slide the bolt back in and start jacking the axle back up. Obviously you’ll have to have the shackle pointed “up” to start. Once you get it high enough to put it in its normal “down” position move it. Line it all back up and slide the other bolt in. Put the nuts back on.
Put the shock on. Wheels back on. Get it on the ground and torque it all to spec.
Really once you figure this out (I beat my head for an hour or so till I figured out the single jack part) it’s only about 5 min more to do the drivers side than the pass.
I had to swap them out a second time. And did it very quickly since I knew how to do it.
Hope that helps.
stewwalker
Full Access Member
Ok. So having done this let me tell you the trick to getting the drivers side shackle too bolt out without having to cut it.
Yes. You have to remove the shock (two bolts and still way less of an issue than cutting it)
And really you need to do this anyway, cause if you look at the bolt, you NEED to have the bolt head on the inside by the frame. The other way you can get interference from the threaded end as it sticks in further.
On the pass side you can just jack the leaf up and pull the bold through over the frame. On the drivers side (stock) we have that damn shake weight thing.
So. Drop the shock. Remove the lower shackle bolt (the one attached to the truck). Have the nut off the top bolt. Lift the axle up (I used a jack on the third member while the frame was on jack stands) to the point you start lifting the truck off the stands. Put a jack stand under the pass side of the axle as high as it will go. You want to create as much articulation as possible.
Start lowering the jack until it clears low enough to pull the bolt out. Keep everything there. Put the new shackle on. Slide the bolt back in and start jacking the axle back up. Obviously you’ll have to have the shackle pointed “up” to start. Once you get it high enough to put it in its normal “down” position move it. Line it all back up and slide the other bolt in. Put the nuts back on.
Put the shock on. Wheels back on. Get it on the ground and torque it all to spec.
Really once you figure this out (I beat my head for an hour or so till I figured out the single jack part) it’s only about 5 min more to do the drivers side than the pass.
I had to swap them out a second time. And did it very quickly since I knew how to do it.
Hope that helps.
I've removed the shake weight vibration damper a couple of times before. If I remember correctly, a 15mm ratcheting and articulating wrench will let you pull the damper bolts without loosening the bed. Hopefully this would give me clearance to pull the bolt over the frame...
MTF
FRF Addict
I've removed the shake weight vibration damper a couple of times before. If I remember correctly, a 15mm ratcheting and articulating wrench will let you pull the damper bolts without loosening the bed. Hopefully this would give me clearance to pull the bolt over the frame...
I like this, I need to replace that weight, Thanks stewwalker
stewwalker
Full Access Member
I like this, I need to replace that weight, Thanks stewwalker
I don't think you can get that part any more. I just took mine out and put a bunch of silicone in the bushing so doesn't flop around anymore. I think the stock bolts have lock tight, so you may need to lift the bed a bit to get a real ratchet in there. Loosen the passenger bed bolts, remove the drivers bed bolts, lift the bed up via the wheel well and stick a 2x2 or whatever scrap you have in-between the bed and frame.
Most people just remove the damper, but I could actually tell a difference with it removed when driving down the highway.
Similar threads
- Replies
- 17
- Views
- 8K
- Replies
- 2
- Views
- 756
- Replies
- 1
- Views
- 261


