Projects through 1st week of ownership

Disclaimer: Links on this page pointing to Amazon, eBay and other sites may include affiliate code. If you click them and make a purchase, we may earn a small commission.

LSURaptor

Full Access Member
Joined
Aug 24, 2011
Posts
387
Reaction score
33
Location
Houston
Total cost for everything was $70...

Next up will be a bed liner of some sort (leaning towards Bedrug or Bedtred) and tonneau cover of some sort. Still on the fence about the Bakflip. It's a lot of money...

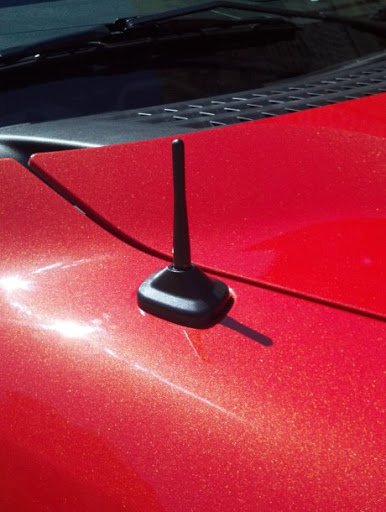
Stubby antennae $25 shipped.
2011-10-04_13-23-21_876.jpg

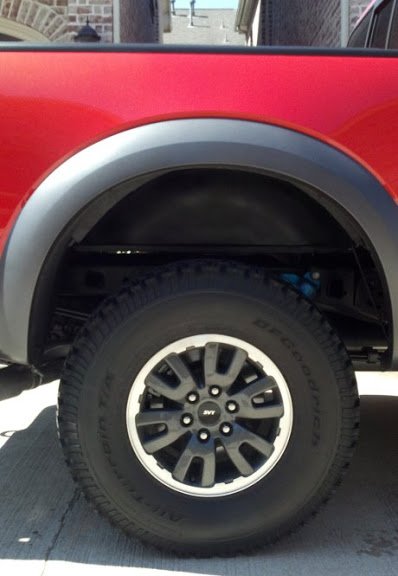
Fender well sprayed with Rust-o-leum Rubberized undercoating. 2 cans @ $7.50each.
2011-10-04_13-23-44_161.jpg

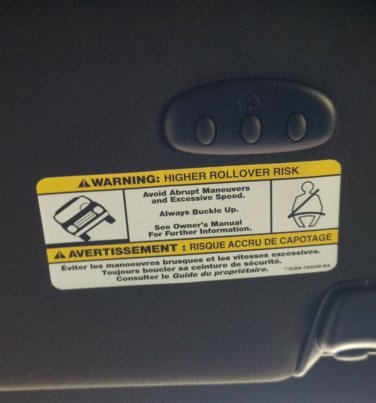
Homelink visor install. $30 shipped off of ebay.
2011-10-04_13-24-07_93.jpg
 

Humvee21

FRF Addict
Joined
Aug 17, 2011
Posts
4,848
Reaction score
538
Thanks for sharing. Truck looks awesome. What kind of prep did you do for the wheel wells?
 
OP
OP
L

LSURaptor

Full Access Member
Joined
Aug 24, 2011
Posts
387
Reaction score
33
Location
Houston
I just washed them with dish soap and used the 2" wide blue painters tape to mask off the flares and a few other pieces I didn't want to spray. Then I took a sheet and threw it over the tire, shock, etc. I didn't take the wheels off but I've seen people that do.

Total time to wash, dry, mask, spray, and cleanup was about an hour. I saw someone post that Linex will do it for $100. That's a hell of a deal if you can work it out with them but that seems really cheap...

This was under $20 and I was bored. I'll spend the other $80 on some Gentleman Jack.
 

linexsa

Full Access Member
Joined
Apr 20, 2011
Posts
449
Reaction score
57
Location
San Antonio TX
not bad! i would have gotten some scotch-brite and some sand paper though and given that stuff some mechanical bonding advantage. we usually will spray wheel wells for $100 a side or less sometimes, the only catch is it has to be done with the bedliner. yours looks good, im just curious as to how long it will last.
 
OP
OP
L

LSURaptor

Full Access Member
Joined
Aug 24, 2011
Posts
387
Reaction score
33
Location
Houston
I should have taken a picture before I started but the "paint" that was under there was basically primer. It wasn't smooth at all, it was very textured and there was definitely no clear coat on anything. Shit, it wasn't even Orange, it was white-ish.

Kinda pissed that they didn't bother to complete the paint job. My 2005 Chevy is painted just as nice under there as the rest of the truck. At least it saved me the prep time...

I got after it with a key and it didn't do anything so I think it will hold up OK. It's not nearly as thick as an application of LineX so there's no way it's as durable but it seems like it will be fine and touch ups are easy enough.

If I were putting in a spray in liner and they offered to do both wells for $100, I'd be all over that but since I'm not going the spray in route this time I didn't even bother calling around for quotes.
 
OP
OP
L

LSURaptor

Full Access Member
Joined
Aug 24, 2011
Posts
387
Reaction score
33
Location
Houston
Bought the module off eBay. Took about an hour to install. Only cut myself once with the razor blade! You can buy the visor with it already installed but it's about 350. I'm a cheap bastard...

The install isn't that bad. I could do it quicker if I had to do another one.
 

RobertM

Member
Joined
Jul 31, 2011
Posts
14
Reaction score
2
Location
Northern Michigan
Bought the module off eBay. Took about an hour to install. Only cut myself once with the razor blade! You can buy the visor with it already installed but it's about 350. I'm a cheap bastard...

The install isn't that bad. I could do it quicker if I had to do another one.


You're welcome to come up here and do mine...grin.gif
 

Cublime

Member
Joined
Jul 11, 2011
Posts
6
Reaction score
0
Can you give me a little more detail on how you installed the home link. All the ones I see include a large box behind the actual buttons and I am not sure how you install this?

Thanks in advance
 
Top