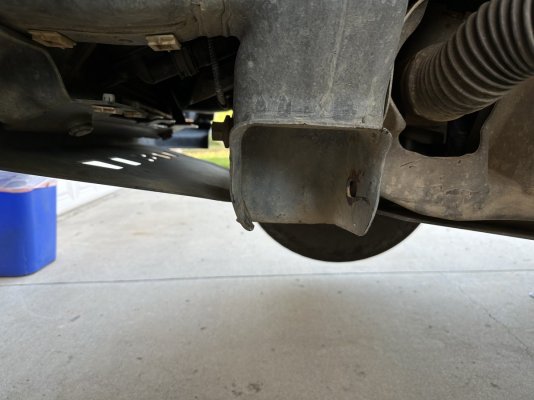
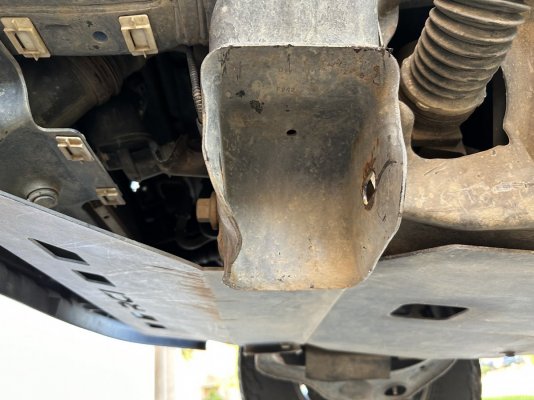
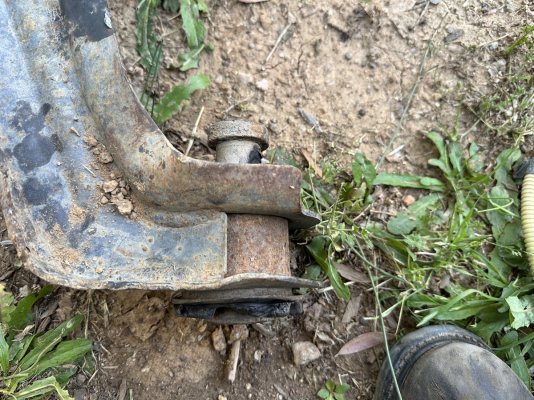
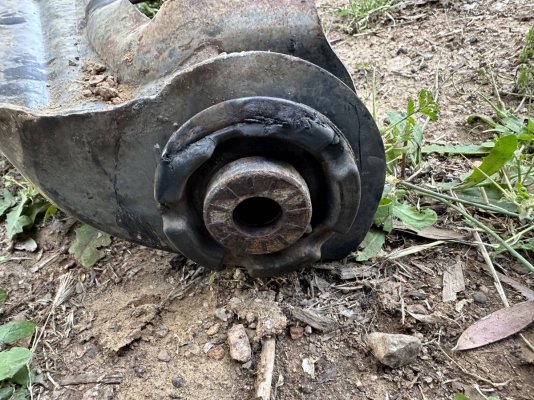
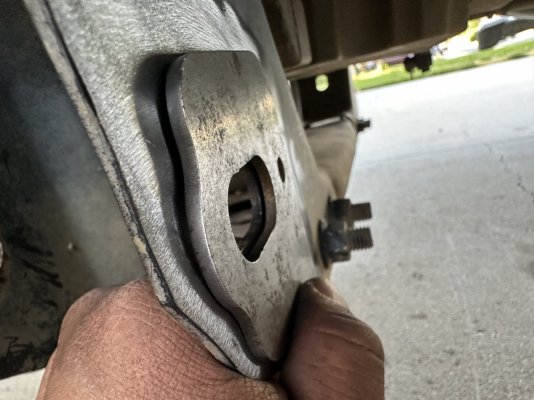
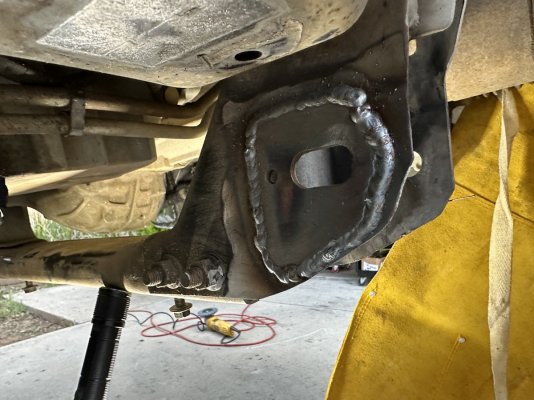
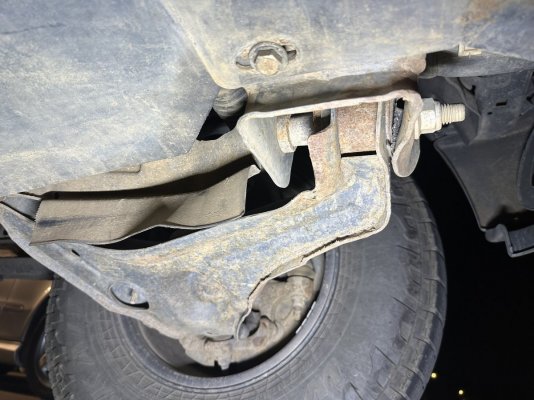
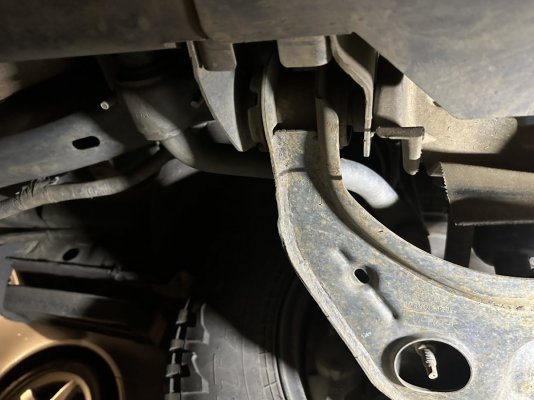
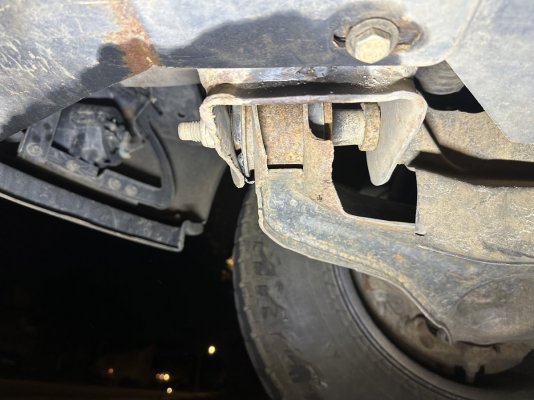
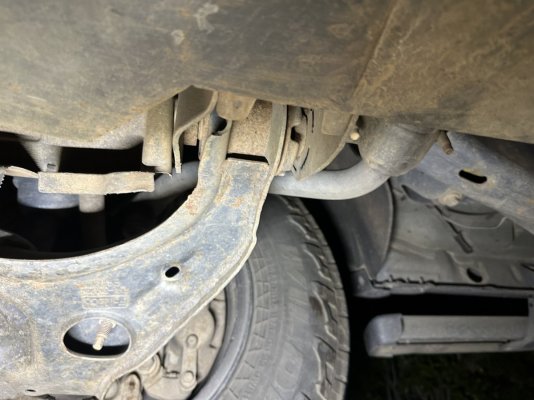
A couple years back I took a dip too fast and smashed my front end - 2013 F150 (not a Raptor, I know). Only front LCA mounts damaged, rears are fine.
About 25k into some new Wildpeaks, and my inner shoulder is cording... better fix this now before I throw on new tires.
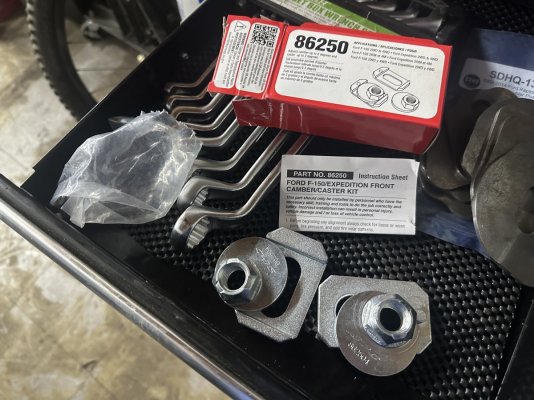
I have the SPC cam kit and SDHQ Lower A-Arm doubler plates.
I know there are a little more intricate kits out there, but being a F150 SuperCrew, 6.5ft bed, my 'jumping' days are over and now I'm just looking to bend these tabs back and not ruin them again.
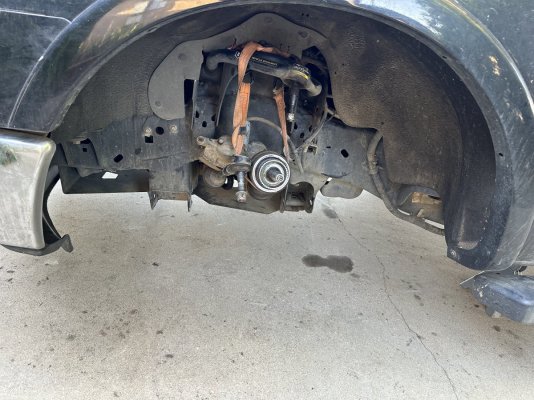
I'll be replacing the lower control arms (may as well, since the rubber bushing is likely shot now) so I'll have full access to the inside mounts.
How are people bending this metal back, just a crescent wrench and heat?
Any 'gotchas' to be looking for? Tried googling DIY threads but couldn't find much.
Mostly nervous I will goof any not line the plates up correctly and cause alignment issues, but it seems very straightforward..
Drop LCA, smash metal back into alignment, put bolt through with the doubler plates, tack weld with bolts still in place, remove bolts and finish weld.
Anything else I'm missing here?
Driver Front... Driver Rear
Passenger Front... Passenger Rear
About 25k into some new Wildpeaks, and my inner shoulder is cording... better fix this now before I throw on new tires.
I have the SPC cam kit and SDHQ Lower A-Arm doubler plates.
I know there are a little more intricate kits out there, but being a F150 SuperCrew, 6.5ft bed, my 'jumping' days are over and now I'm just looking to bend these tabs back and not ruin them again.
I'll be replacing the lower control arms (may as well, since the rubber bushing is likely shot now) so I'll have full access to the inside mounts.
How are people bending this metal back, just a crescent wrench and heat?
Any 'gotchas' to be looking for? Tried googling DIY threads but couldn't find much.
Mostly nervous I will goof any not line the plates up correctly and cause alignment issues, but it seems very straightforward..
Drop LCA, smash metal back into alignment, put bolt through with the doubler plates, tack weld with bolts still in place, remove bolts and finish weld.
Anything else I'm missing here?
Driver Front... Driver Rear


Passenger Front... Passenger Rear


