JLT Oil Catch Can for Dummies

Disclaimer: Links on this page pointing to Amazon, eBay and other sites may include affiliate code. If you click them and make a purchase, we may earn a small commission.

Raptized

Full Access Member
Joined
Dec 30, 2016
Posts
566
Reaction score
128
Location
Raptorida
OK. For future information seekers. To you can not cut the factory hose as it is a tube. You must use 1/2" inside diameter tubing and retro fit and oil catch can as long as it is not baffled as this cause an erratic idle much like if one had a huge cam installed (not good if you don't.) Use a razor blade to make a small slice down the tube to remove the factory connectors from the tube for use with new hoses. [emoji106]

Sent from my SAMSUNG-SM-N900A using Tapatalk
 
Last edited:

Ricoman

Full Access Member
Joined
Feb 23, 2019
Posts
986
Reaction score
982
Location
WASHINGTON STATE
JTL says that this setup will not work on a supercharged raptor. is there another brand that will? What do I need to do?

What brand did you finally go with...I also have a Whippled Raptor and wonder if the JTL is now made to fit a SCed Raptor..? Anyone know?
 

Ricoman

Full Access Member
Joined
Feb 23, 2019
Posts
986
Reaction score
982
Location
WASHINGTON STATE
Just got my JLT oil catch can in and it is sah-wheeet!!!!
View attachment 18933

Since this is such a difficult and time consuming part to put on the vehicle, I thought I would do a write up......

1) Check garage fridge for beer (if none you will need to purchase 10 at your local store since JLT did not include any in the kit)
2) Take beer from fridge and open beer
3) Place beer on work bench and open hood of truck
4) Finish beer and open another beer

5) Remove hose
View attachment 18935
View attachment 18937

6) Finish beer and open another beer


7) Place old hose on cowl
View attachment 18938

8) Finish beer and open another beer


9) Route new hose and catch can
View attachment 18941

10) Finish beer and open another beer


11) Connect new hose and catch can
View attachment 18952

12) Finish beer and open another beer
13) Remove old hose from cowl
14) Finish beer and open another beer
15) Start truck to ensure no warning lights
16) Finish beer and open another beer
17) Turn off truck
18) Finish beer and open another beer
19) Close hood
20) Finish beer and open another beer
21) Finish off that last beer with a feeling of pride that you were able to accomplish such a technical installation. Additionally, now that you have that beer mentality going on and are in such a celebratory mood, it is a perfect time to chase momma around the house nekkid......

Russ Out

View attachment 18933

View attachment 18935

View attachment 18937

View attachment 18938

View attachment 18941

View attachment 18952

Is that a baffle/filter on the underside of the top...easy to take apart and clean? Thanks
 

Ricoman

Full Access Member
Joined
Feb 23, 2019
Posts
986
Reaction score
982
Location
WASHINGTON STATE
Just got my JLT oil catch can in and it is sah-wheeet!!!!
View attachment 18933

Since this is such a difficult and time consuming part to put on the vehicle, I thought I would do a write up......

1) Check garage fridge for beer (if none you will need to purchase 10 at your local store since JLT did not include any in the kit)
2) Take beer from fridge and open beer
3) Place beer on work bench and open hood of truck
4) Finish beer and open another beer

5) Remove hose
View attachment 18935
View attachment 18937

6) Finish beer and open another beer


7) Place old hose on cowl
View attachment 18938

8) Finish beer and open another beer


9) Route new hose and catch can
View attachment 18941

10) Finish beer and open another beer


11) Connect new hose and catch can
View attachment 18952

12) Finish beer and open another beer
13) Remove old hose from cowl
14) Finish beer and open another beer
15) Start truck to ensure no warning lights
16) Finish beer and open another beer
17) Turn off truck
18) Finish beer and open another beer
19) Close hood
20) Finish beer and open another beer
21) Finish off that last beer with a feeling of pride that you were able to accomplish such a technical installation. Additionally, now that you have that beer mentality going on and are in such a celebratory mood, it is a perfect time to chase momma around the house nekkid......

Russ Out

View attachment 18933

View attachment 18935

View attachment 18937

View attachment 18938

View attachment 18941

View attachment 18952

EXCELLENT JOB..!! Can you do one on hooking up fogs to up-fitter switches next...I figure if the little JLT job took you a 12 pack,might want to put a case in fridge for that one...:Caffeine:
 

HAZMAT221

Member
Joined
Feb 15, 2020
Posts
17
Reaction score
20
Location
NJ
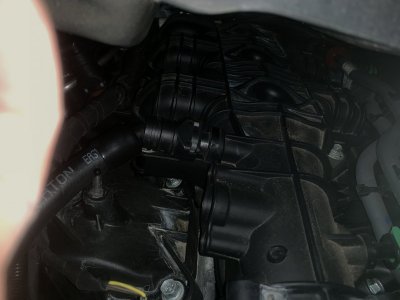
Anyone have experience in changing the orientation of the hose connections? The way mine came really likes to sit a certain way, but it sits up against one of the mounts for the engine cover. I think it would be less intrusive reversed, but the hose does not fit well that way unless the connector is flipped.

002FDD4E-6F30-4A8A-9CDD-CAAE1C5A5ECA.jpeg
 

scmsltn

Active Member
Joined
Apr 5, 2018
Posts
65
Reaction score
32
Location
Denver CO
I have my JLT sitting in the garage and will post pics after I install it. Thanks for the write up.
 
Top